Nails Polish Pen: The Complete Guide to Easy, Precise Nail Art at Home
Have you ever tried doing your nails with a regular polish brush, only to end up with polish around your cuticles, uneven lines, or a design that looked nothing like what you imagined?
You’re definitely not alone.
A traditional nail polish bottle can be great for covering the whole nail, but detailed nail art is a different story. This is where a nails polish pen can make things much easier.
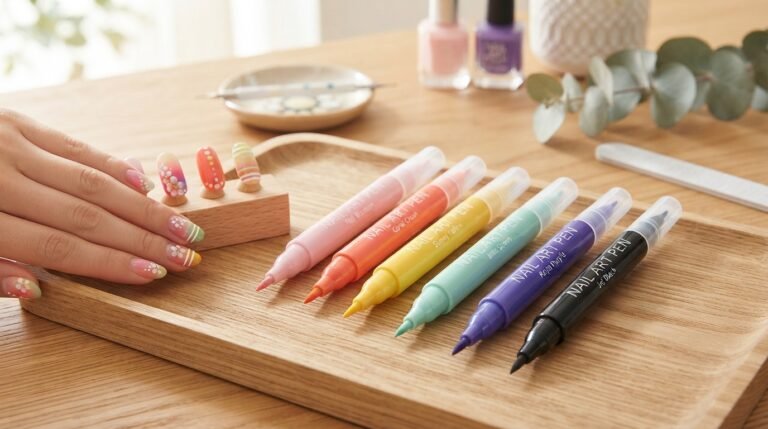
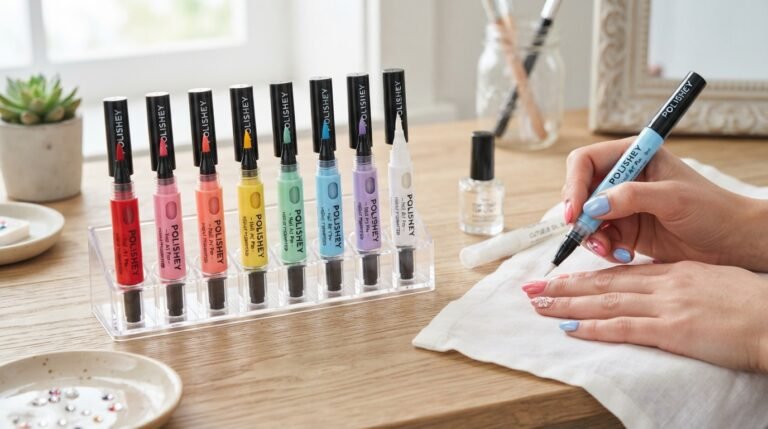
A nails polish pen—also commonly called a nail polish pen, nail art pen, or nail polish marker—is designed to give you more control when applying color or creating designs. Depending on the product, it can be used for everything from simple dots and lines to French tips, flowers, hearts, and geometric patterns.
Some pens are designed to apply polish across the nail, while others are made mainly for decorative details. Products also differ in their formulas and application methods, so checking the manufacturer’s instructions is important. (Sweenly)
The best part? You don’t need to be a professional nail artist to start.
With a little practice, a nail polish pen can turn your manicure into a fun DIY project—and it can be much easier to control than a traditional brush when you’re working on small details.


What Is a Nails Polish Pen?
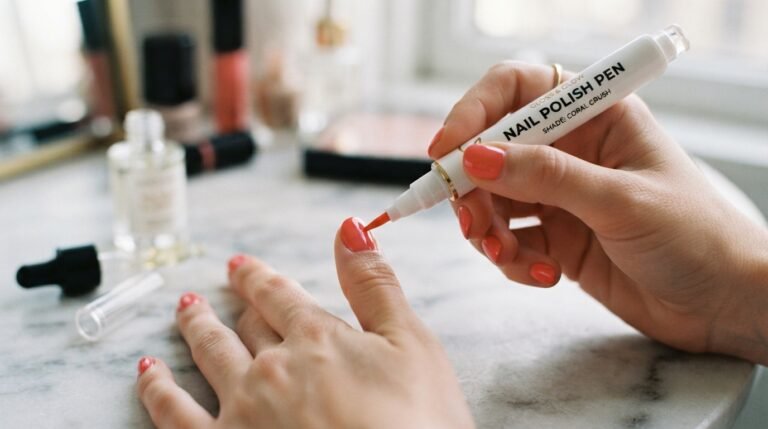
A nails polish pen is a pen-shaped beauty product that allows you to apply nail color or nail-art decoration directly onto the nail.
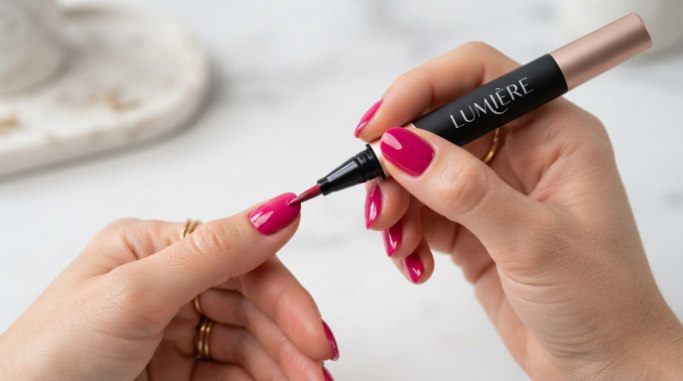
Instead of dipping a brush into a bottle, you hold the product much like a normal pen or marker. Depending on the design, the tip may be felt, brush-like, or another precision applicator.
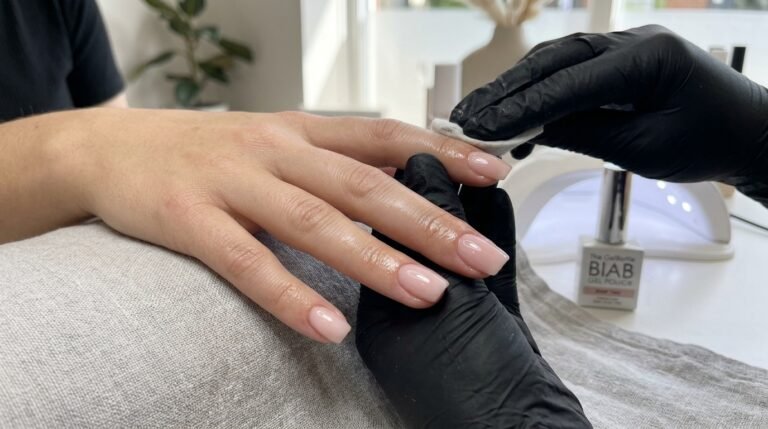
Some products contain a polish-like formula, while others use nail-art ink or a water-based formula. Some are intended for natural nails, while others may be compatible with gel, acrylic, or press-on nails. Always check the product instructions before applying it to a particular nail surface. (BIAB NAIL)
The basic idea is wonderfully simple:
Shake → activate → draw → let it dry → finish.
For someone who struggles with traditional nail-art brushes, that familiar pen-like grip can make detailed work feel less intimidating.
Nails Polish Pen vs. Regular Nail Polish
So, why would you use a nail polish pen when you already have nail polish?
The answer is control.
With a traditional polish bottle, you load a brush with liquid polish and then try to control that wet brush across a small nail.
With a pen, you can often approach the nail more like you’re drawing.
That can be particularly helpful for:
- French tips
- Thin lines
- Polka dots
- Flowers
- Hearts
- Stars
- Swirls
- Geometric nail art
- Small details
- Accent nails
- Nail-art touch-ups
Some current nail pens are specifically designed around precision application, with fine tips intended for controlled lines and details. (anticbeauty.com)


Why Are Nails Polish Pens Becoming So Popular?
There is a simple reason people enjoy them: they make nail art feel more approachable.
Imagine sitting at your desk on a Friday evening. You want pretty nails before going out, but you don’t have time for a salon appointment.
You open your nail polish collection and think, “Maybe I’ll just do something simple.”
Then you remember your nail polish pen.
Instead of trying to control a tiny brush, you can create a few dots, draw a small heart, or make a simple French tip.
Suddenly, your manicure doesn’t feel like a difficult beauty project.
1. Better Control
One of the biggest advantages of a nail polish pen is the pen-style grip.
Because you’re holding it like a writing instrument, the movement can feel more familiar.
This is especially useful for people who find tiny nail-art brushes difficult to control.
2. Beginner-Friendly
You don’t need years of nail-art experience.
Start with basic designs and gradually build your confidence.
Try a single dot.
Then try three dots.
Next, turn those dots into a flower.
Before long, you may find yourself experimenting with more detailed designs.
3. Great for Nail Art
A nail art pen is particularly useful for small decorative details.
A fine tip can help you create lines and shapes that would be difficult with a large polish brush. (anticbeauty.com)
4. Easy to Carry
The pen format can be convenient for travel, work, holidays, or simply keeping inside your everyday beauty bag.
You don’t need to carry a whole nail-art setup when you only want to create a small design.
5. Less Mess for Small Designs
When you’re drawing a tiny line, you don’t need a large amount of polish.
A controlled pen can help you apply product only where you need it.
How to Use a Nails Polish Pen Step by Step
This is the part many beginners want to know.
The exact process depends on the product, because nail polish pens don’t all work in exactly the same way. Some require shaking, some need their tips primed, and some are designed to air-dry while others require curing. Always follow the directions supplied with your specific product. (Sweenly)
However, this general routine is a great place to start.


Step 1: Prepare Your Nails
Start with clean, dry nails.
Remove old polish and wash your hands. Then dry your nails completely.
If you have recently used hand cream or cuticle oil, make sure there isn’t excess oil sitting on the nail surface.
You can also:
- Shape your nails with a nail file
- Gently tidy loose skin around the nail
- Remove old polish
- Clean the nail surface
- Make sure your nails are completely dry
Starting with a clean surface can help the product apply more evenly. Some nail-pen manufacturers specifically recommend beginning with clean, dry nails. (Sweenly)
Step 2: Choose Your Base Color
You can use your nail polish pen directly on a clean nail if your product is designed for that.
Alternatively, you can create a base manicure with regular nail polish first.
For example:
Nude base + white pen = classic French-inspired look
Pink base + red pen = cute heart design
Black base + silver pen = evening nail art
White base + colorful pens = playful summer nails
If you apply regular polish underneath, let it dry properly before drawing your design.
Step 3: Shake the Pen
Many nail polish pens need to be shaken before use.
This helps distribute the product inside the pen.
Keep the cap on while shaking so you don’t accidentally flick polish around your workspace.
However, always follow your product’s instructions because application systems vary.
Step 4: Activate the Tip
This step depends heavily on the design of your pen.
Some products require you to press or pump the tip several times until the polish begins to flow.
Others may simply require shaking and application.
For example, some current pen-style products instruct users to rotate or activate the pen before applying the product.
Don’t force the tip.
If nothing comes out, read the instructions rather than repeatedly pressing as hard as possible.
Step 5: Test the Pen
Before putting it directly onto your nail, test it on a piece of paper or another suitable surface.
Draw a few lines.
Try:
— — — —
• • • •
~~~~
This lets you see how quickly the product flows.
If it comes out too quickly, use less pressure.
If it barely comes out, check whether the pen needs additional activation.
Step 6: Start With Simple Nail Art
Don’t begin with an intricate flower on your first attempt.
Start small.
Try a:
- Dot
- Line
- Heart
- Wave
- Simple French tip
- Tiny star
Once you understand how the pen behaves, you can move on to more complicated designs.
10 Easy Nail Art Ideas Using a Nail Polish Pen
Now for the fun part.
A nail polish pen can be used for many different designs, depending on the formula and tip.
1. Polka Dots
This is probably one of the easiest designs for beginners.
Apply a base color and allow it to dry.
Then use your nail art pen to place small dots across the nail.
You can use one color or several.
2. Simple French Tips
French tips can be difficult with a normal brush because the line needs to look even.
A French manicure pen can make the process more controlled because you’re drawing the tip rather than trying to manipulate a large brush.
Some dedicated French manicure pens are specifically designed to create a white line along the nail tip. (Kiko Milano Store)


3. Tiny Hearts
Apply a nude or pink base.
Then make two small dots close together.
Connect the dots downward into a point.
That’s it—you have a tiny heart.
This design looks particularly cute on an accent nail.
4. Flowers
Create a small dot in the center.
Then add five smaller dots around it.
You can use contrasting colors for a cheerful look.
5. Abstract Lines
Don’t worry about making everything perfect.
Draw curved lines, waves, or uneven shapes across the nail.
Abstract nail art is great because small imperfections can actually become part of the design.
6. Checkerboard Nails
Use a fine-tip nail polish marker to create small squares.
You can use classic black and white or experiment with pink, blue, purple, and pastel shades.
7. Stars
Draw a small cross and add diagonal lines through it.
Keep the design tiny for a more delicate appearance.
8. Geometric Nails
Try:
- Triangles
- Squares
- Diagonal lines
- Half moons
- Curved blocks
A fine-tip pen can be particularly useful for this kind of detailed design.
9. Animal Prints
Leopard print is another fun option.
You can create irregular dots or patches and then outline parts of them with a darker nail art pen.
A current nail-art tutorial demonstrates using a fine pen to outline leopard-print details.
10. Accent Nails
You don’t have to decorate every nail.
Paint nine nails normally and decorate one accent nail.
This is a great approach if you’re new to nail art because you can spend more time getting one design right.
How to Choose the Right Nails Polish Pen
Buying the first pen you see isn’t always the best approach.
Different products are designed for different purposes.
Here are the main things to consider.
Tip Type
If you’re buying a nail polish pen for nail art, look for a tip designed for precision.
Fine tips are useful for:
- Lines
- Dots
- Lettering
- Small flowers
- Outlining
- Geometric patterns
Broader tips may be more useful for covering larger areas.
Formula
Pay attention to whether the product is:
- Water-based
- Traditional polish-based
- Gel
- UV/LED-curable
- Designed for natural nails
- Designed for artificial nails
- Designed for nail-art details
These aren’t interchangeable.
For example, a gel product may require curing under a lamp, while some traditional or water-based products can air-dry. (Sweenly)
Color Selection
You don’t necessarily need a 20-color collection.
If you’re starting out, choose colors you’ll actually use.
A basic collection could include:
- White
- Black
- Pink
- Red
- Nude
- Gold
- Silver
Once you’ve learned the basics, you can add more unusual colors.
Should You Buy a Nail Polish Pen Set?
If you enjoy experimenting with nail art, a nail polish pen set can be a practical purchase.
Instead of buying one color at a time, a set can give you several shades for different designs.
For example, one set could allow you to create:
Pink flowers + white details
Black lines + gold accents
White French tips + pink details
Rainbow dots
Pastel abstract designs
The important thing is not simply how many colors are included.
Look at:
- Tip quality
- Formula
- Instructions
- Compatibility
- Ease of application
- Packaging
- Storage
- Ingredient information
A cheap set with poor tips may be frustrating, while a smaller set with good control may be much more enjoyable to use.
What Makes a Good Nails Polish Pen Worth Buying?
If you’re deciding whether to spend money on one, think about convenience and control, not just the color.
A good product should fit naturally into your manicure routine.
Look for:
✔ A comfortable pen shape
You want to be able to hold it steadily.
✔ A controlled tip
The product shouldn’t flood the nail when you’re trying to draw a tiny line.
✔ Clear instructions
Especially if the pen needs to be activated or cured.
✔ Suitable formula
Make sure it is appropriate for the nails you’re working on.
✔ Secure cap
This is particularly important with pen-style products because you don’t want the tip drying out between uses.
✔ Useful colors
Choose shades that match the designs you actually want to create.
How to Make Your Nail Art Last Longer
A beautiful design is great.
A beautiful design that stays looking good is even better.
The exact wear time depends on the formula, nail preparation, application technique, and finishing product.
Some nail-pen systems are designed to be used alone, while others recommend a top coat or UV-cured finishing system. (Sweenly)
Here are some simple habits that can help.
Start With Clean Nails
Oil and moisture can interfere with some nail products.
Make sure your nails are clean and dry before application.
Use Thin Layers
If your particular product requires multiple coats, thin layers are generally easier to control than one thick layer. Some current nail-pen instructions recommend two thin coats for fuller coverage. (Sweenly)
Allow Each Layer to Dry
Don’t rush.
If the first layer is still wet and you immediately add another, you can drag your design.
Use the Correct Top Coat
If the manufacturer’s instructions recommend a top coat, use a compatible one.
Don’t automatically put a random gel top coat over a non-gel product.
Common Mistakes When Using a Nail Polish Pen
Even though nail polish pens are beginner-friendly, there are a few mistakes worth avoiding.
Mistake 1: Pressing Too Hard
Too much pressure can release too much product.
Start gently.
Mistake 2: Drawing on Wet Polish
If your base color hasn’t dried, your design can become muddy.
Wait until the surface is ready.
Mistake 3: Skipping Nail Preparation
Dirty or oily nails can make application less predictable.
Mistake 4: Trying a Complicated Design Immediately
Give yourself time to learn the pen.
Start with dots and lines.
Mistake 5: Leaving the Cap Off
The tip can dry out depending on the product.
Keep the pen properly closed when you’re finished.
Mistake 6: Assuming Every Pen Works the Same Way
This is a big one.
Some nail art pens air-dry.
Some need curing.
Some need priming.
Some are water-based.
Always read the manufacturer’s instructions.
Nail Polish Pen Safety Tips
A nail polish pen is still a cosmetic product, so it’s worth treating it like one.
The FDA advises consumers to read nail-product labels carefully, follow warnings and directions, keep products properly closed, and use nail products in a well-ventilated area. It also notes that some nail products can cause irritation or allergic reactions. (U.S. Food and Drug Administration)
Remember:
- Don’t use a product in a way that contradicts its instructions.
- Avoid unnecessary contact with surrounding skin.
- Don’t use products that have noticeably changed in smell or appearance.
- Keep nail products away from children.
- Keep products away from flames and heat sources where applicable.
- Use adequate ventilation.
- Stop using a product if you develop an unexpected reaction.
If you experience a rash, burning, swelling, or another concerning reaction, stop using the product and seek appropriate medical advice. (U.S. Food and Drug Administration)
Can You Use a Nails Polish Pen on Gel or Acrylic Nails?
Sometimes—but not every pen is compatible with every nail system.
Some nail-art pens are designed to work on gel nails, acrylic nails, or press-ons. Others are made specifically for natural nails.
Therefore, don’t assume compatibility simply because the product looks like a marker.
Check the manufacturer’s instructions before use.
If you’re using gel products, also remember that gel systems may require an appropriate UV/LED curing process. Dermatologists note that artificial and gel nail systems can contribute to nail brittleness, peeling, or cracking, particularly with repeated use or improper application and removal. (AAD)
Nails Polish Pen vs. Nail Art Brush
Both have their place.
| Feature | Nails Polish Pen | Nail Art Brush |
|---|---|---|
| Beginner-friendly | Usually easy to learn | Can take more practice |
| Grip | Similar to a pen | Different brush styles |
| Precision | Good for many small details | Excellent with practice |
| Portability | Very convenient | Requires more supplies |
| Setup | Usually simple | May require polish palette |
| Fine lines | Good with precision tips | Excellent with suitable brush |
| Design flexibility | Depends on pen | Very high |
| Cleaning | Depends on formula | Brushes need cleaning |
If you’re new to nail art, a nail polish pen can be an easier starting point.
If you’re an experienced nail artist, you may prefer having both pens and brushes available.
A Simple 10-Minute Nail Polish Pen Routine
If you’re short on time, try this:
Minute 1–2: Prepare
Clean and dry your nails.
Minute 3–4: Base
Apply your base polish if you’re using one.
Minute 5: Prepare the Pen
Shake and activate it according to its instructions.
Minute 6: Test
Draw a few lines on paper.
Minute 7–9: Design
Create dots, lines, flowers, hearts, or another simple design.
Minute 10: Finish
Allow the design to dry and apply a compatible top coat if recommended.
That’s all.
You don’t need an entire afternoon to create attractive nail art.
Why a Nails Polish Pen Can Be a Smart Beauty Purchase
Let’s be honest: not every beauty product needs to be in your collection.
But a nails polish pen can earn its place if you actually enjoy doing your nails.
It combines several useful qualities:
Convenience + control + creativity + portability.
Instead of buying several specialist nail-art tools immediately, you can start with one simple pen and learn the basics.
And because you’re able to create designs yourself, you don’t have to wait for a salon appointment every time you want something different.
A dedicated nail polish pen can be particularly appealing if:
- You enjoy DIY manicures.
- You struggle with tiny nail-art brushes.
- You like experimenting with designs.
- You travel frequently.
- You want quick nail-art touch-ups.
- You enjoy changing your manicure regularly.
- You want an easy gift for someone who loves nail art.
The key is to choose a product that matches your needs rather than buying purely because it has the largest number of colors.
Frequently Asked Questions About Nails Polish Pens
What is a nails polish pen?
A nails polish pen is a pen-shaped nail product designed to apply nail color or create nail-art designs directly on the nail.
Is a nail polish pen easy to use?
Yes, many are designed to be beginner-friendly because the pen shape provides a familiar grip and can make detailed application easier. However, the exact application method varies between products. (anticbeauty.com)
Can beginners use nail art pens?
Absolutely. Start with simple dots, lines, hearts, and French tips before moving toward complicated designs.
Do nail polish pens need a UV lamp?
Not necessarily.
Some products are designed to air-dry, while certain gel systems require UV/LED curing. Always check the instructions for your specific product. (Sweenly)
Can you use a nail polish pen on natural nails?
Many products are designed for natural nails, but compatibility depends on the formula. Check the product label before use.
Can you use a nail polish pen over regular nail polish?
Some can be used over a completely dry polish base, while others may have different requirements. Always follow the manufacturer’s directions.
How do you stop a nail polish pen from drying out?
Keep the cap securely closed whenever you’re not using it. Follow the manufacturer’s storage and cleaning instructions.
Are nail polish pens better than regular polish?
They’re not automatically better for every purpose. Traditional polish is excellent for covering the entire nail, while a nail polish pen can be particularly convenient for precision work and nail art.
Final Thoughts
A nails polish pen can make DIY nail art feel much less complicated.
You don’t need to have a perfectly steady hand or professional training to start. With the right pen, a little patience, and some practice, you can create simple designs that make your manicure feel much more personal.
Start with dots.
Then try lines.
Then hearts.
Then flowers.
Before you know it, you’ll probably be looking at your nails and thinking, “I can’t believe I actually did that myself.”
When shopping, focus on tip quality, formula, compatibility, instructions, useful colors, and ease of application rather than simply choosing the biggest set.
Most importantly, choose a product you will genuinely enjoy using. A well-designed nail polish pen can be a small addition to your beauty collection, but it can open up a surprisingly large world of DIY nail art.
For safe use, always read the product label and follow its instructions; the FDA recommends paying attention to directions, warnings, ingredient information, and ventilation when using nail products. (U.S. Food and Drug Administration)
And that’s what makes a good nail polish pen worth considering: it doesn’t promise to turn you into a professional overnight. It simply gives you a more convenient way to practice, experiment, and enjoy creating beautiful nails at home.