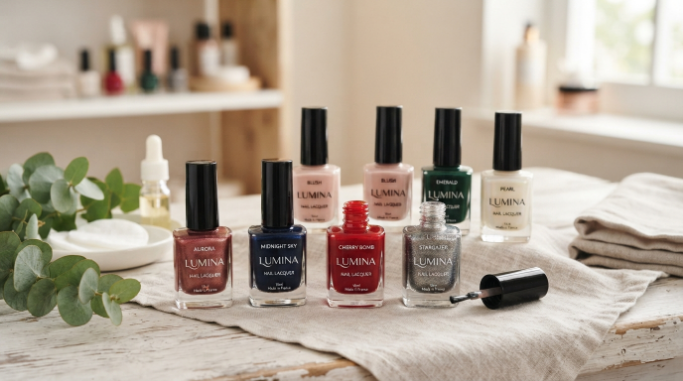
Nail Lacquer: The Complete Guide to Choosing, Applying, and Enjoying Beautiful Nails
Nail lacquer is one of the simplest ways to give your nails a polished, stylish look without needing a salon appointment. Whether you prefer soft nude shades, classic red, pretty pink, deep burgundy, glitter, shimmer, or bold seasonal colors, the right nail lacquer can instantly change the way your hands look.
For many people, painting their nails is more than just adding color. It can be a relaxing part of a beauty routine. You choose a shade, prepare your nails, carefully apply the polish, and then enjoy that fresh, glossy finish.
However, buying nail polish is not always as simple as picking the prettiest bottle on the shelf. Different formulas offer different finishes, coverage, drying times, and application experiences. There are also terms such as base coat, top coat, gel polish, 3-free, 5-free, and 10-free that can make shopping confusing.
So, if you are looking for a complete guide to nail lacquer, you are in the right place.
This guide explains what nail lacquer is, how it works, how to choose the right shade and formula, how to apply it step by step, how to make your manicure last longer, and what to consider before buying.


What Is Nail Lacquer?
Nail lacquer is a cosmetic product applied to fingernails or toenails to add color and create a finished appearance. It is commonly called nail polish, nail enamel, or nail varnish.
A typical nail lacquer formula contains a combination of solvents, film-forming ingredients, resins, plasticizers, pigments, and other ingredients that help the product spread across the nail and form a coating as it dries.
The U.S. Food and Drug Administration’s information on nail-care products explains that nail products used at home and in salons are generally regulated as cosmetics in the United States. (U.S. Food and Drug Administration)
In everyday language, you can simply think of nail lacquer as a colored cosmetic coating that you brush onto your nails.
And that simple little bottle can do a lot.
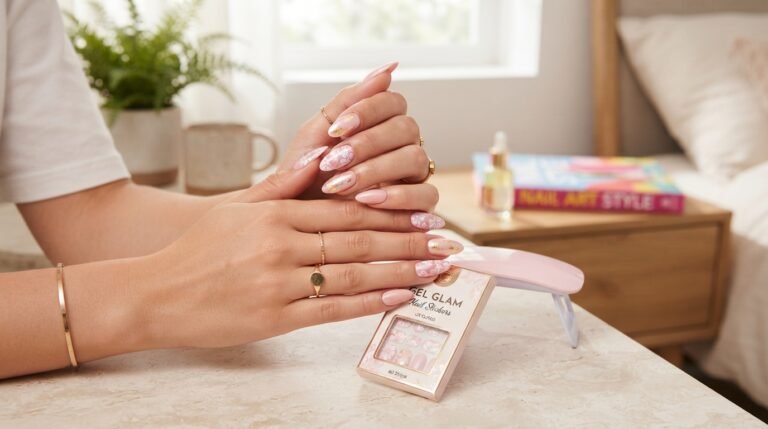
A soft pink can create a clean everyday look. A bright red can make your manicure stand out. A dark chocolate shade can feel sophisticated, while glitter polish can instantly turn an ordinary manicure into something party-ready.
Why Is Nail Lacquer So Popular?
One of the biggest reasons people love nail lacquer is its flexibility.
You can completely change your manicure whenever you feel like it.
Imagine that you painted your nails a soft beige on Monday because you wanted something simple for work. By Friday, you have dinner plans and want something more noticeable. Instead of booking a salon appointment, you can simply remove the old polish and apply a rich red or sparkling shade.
That convenience makes nail polish a practical beauty product.
It is also a fun way to experiment with personal style.
You can match your nails with:
- Your favorite outfit
- The current season
- A special occasion
- Your mood
- A holiday
- A wedding or party
- Your everyday makeup
- Your favorite jewelry
In addition, traditional lacquer does not normally require a curing lamp, making it convenient for people who want to do their manicure at home.
Types of Nail Lacquer You Can Try
There is no single type of nail lacquer that works for everyone. Different finishes create completely different results.
1. Cream Nail Lacquer
Cream nail lacquer is one of the most classic options.
It normally provides a smooth, solid color without visible glitter or shimmer.
Popular cream shades include:
- Nude
- Pink
- Red
- White
- Black
- Brown
- Burgundy
- Coral
If you are buying your first bottle, a cream finish is an easy option because it works for both casual and more formal looks.
2. Sheer Nail Polish
Sheer nail polish gives your nails a softer wash of color rather than completely covering the natural nail.
Milky white, pale pink, beige, and translucent peach are common choices.
This type of polish is particularly attractive if you prefer a natural-looking manicure.
It can also be useful when you want your nails to look neat and polished without drawing too much attention.
3. Glitter Nail Lacquer
Want something more playful?
Try glitter nail lacquer.
Glitter polish contains reflective particles that create sparkle. You can wear it over your entire nail or use it as an accent.
For example, you could apply a nude base color and then add gold glitter to one or two nails.
That small change can make the manicure look much more interesting.
4. Shimmer Nail Polish
Shimmer nail polish is different from chunky glitter because the reflective particles are generally much finer.
The result is a soft glow that catches the light as you move your hands.
If you like shiny nails but do not want an extremely dramatic manicure, shimmer can be a beautiful middle ground.
5. Metallic Nail Lacquer
Metallic nail lacquer creates a finish inspired by polished metal.
Gold, silver, bronze, copper, and metallic rose shades are popular choices.
These colors can be especially attractive for evening events, celebrations, parties, and festive manicures.
6. Matte Nail Polish
Unlike glossy polish, matte nail polish dries to a flatter finish with little or no shine.
Matte black, matte burgundy, matte nude, and matte brown can create a modern look.
If you already have several glossy colors, adding a matte top coat can also give some of them a completely different appearance.
Nail Lacquer vs. Gel Polish
A common question is: Is nail lacquer the same as gel polish?
No.
Traditional nail lacquer and gel polish are different types of nail products.
Traditional lacquer generally dries as its volatile ingredients evaporate. Gel systems are designed to cure under a specific light according to the manufacturer’s instructions.
Traditional Nail Lacquer
- Easy to apply at home
- Does not normally require a curing lamp
- Easy to change
- Available in many finishes
- Can generally be removed with nail-polish remover
Gel Polish
- Uses a curing system
- Requires additional equipment
- Has a different removal process
- Is designed specifically for gel application
If you enjoy changing your nail color regularly, traditional nail lacquer can be particularly convenient.
How to Choose the Best Nail Lacquer
Buying polish should be fun, but it is worth looking beyond the color.
Choose the Right Color
Start with colors you genuinely enjoy wearing.
If you prefer simple, versatile nails, consider:
Nude, beige, soft pink, rose, cream, or classic red.
If you enjoy making a statement, you might prefer:
Berry, burgundy, purple, emerald-inspired shades, black, metallics, or glitter.
There is no rule saying you need to choose only one type.
Your nail collection can include both everyday shades and special-occasion colors.
Consider the Finish
Ask yourself what kind of manicure you want.
Do you want:
- Glossy?
- Matte?
- Shimmer?
- Glitter?
- Metallic?
- Sheer?
- Cream?
Knowing the answer can make shopping much easier.
Look at the Formula
The formula affects how easily the product applies.
A polish that is extremely thick can be difficult to spread evenly. On the other hand, a very thin formula may require several coats to achieve full coverage.
Look for a product with clear instructions and information from a reputable manufacturer.
Check the Ingredients
Before purchasing any cosmetic product, reading the ingredient list is a sensible habit.
The FDA’s cosmetic ingredient guidance explains that cosmetic manufacturers are responsible for ensuring their products are safe under labeled or customary conditions of use. (U.S. Food and Drug Administration)
If you already know that you are sensitive or allergic to a particular ingredient, checking the label becomes even more important.
What Is Inside Nail Lacquer?
Have you ever looked at the back of a nail-polish bottle and wondered why the ingredient list seems so complicated?
You are not alone.
A nail lacquer formula can contain several different types of ingredients, each serving a particular purpose.
Film-forming Ingredients
These help create the solid coating that remains on the nail after the product dries.
Solvents
Solvents help keep the formula in a workable liquid form while you apply it. As the product dries, some of these volatile ingredients evaporate.
Plasticizers
These can help provide flexibility to the dried film.
Resins
Certain resins can help with adhesion, gloss, and durability.
Pigments
Pigments provide the actual color you see.
The FDA specifically discusses ingredients that have been used in nail products, including formaldehyde, toluene, and certain phthalates. (U.S. Food and Drug Administration)
Importantly, formulas vary between products, so you should check the actual ingredient list rather than assuming every nail lacquer contains the same ingredients.


Step-by-Step Guide: How to Apply Nail Lacquer at Home
A beautiful manicure does not necessarily require professional skills.
The secret is preparation.
Here is a simple step-by-step method.
Step 1: Remove Old Polish
If you already have nail polish on your nails, remove it carefully using an appropriate polish remover.
Make sure the old color is completely removed before applying your new manicure.
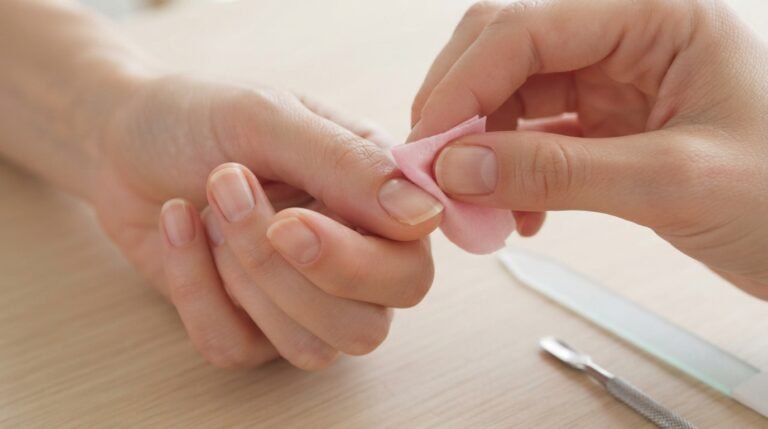
Step 2: Clean Your Nails
Wash your hands and make sure your nails are clean.
If you have recently used hand cream or cuticle oil, allow the nails to become clean and dry before polishing.
A clean nail surface makes application easier.
Step 3: Shape Your Nails
Use a quality nail file to shape the free edge.
Popular nail shapes include:
- Round
- Oval
- Square
- Squoval
- Almond
Choose the shape that feels comfortable and suits your personal style.
Step 4: Prepare the Cuticle Area
Gently tidy the area around your nails.
Do not aggressively cut or damage the surrounding skin.
The goal is simply to create a neat surface for your manicure.
Step 5: Apply a Base Coat
Now apply a thin layer of base coat.
A base coat can provide a smooth foundation for your color and may help reduce staining with some highly pigmented polishes.
Allow it to dry according to the product instructions.
Step 6: Apply the First Coat of Nail Lacquer
Now it is time for the color.
Open your nail lacquer and wipe excess polish from one side of the brush against the bottle neck.
Place the brush near the base of the nail without flooding the cuticle.
Then:
- Pull the brush toward the tip.
- Paint one side.
- Paint the other side.
- Finish with a controlled stroke through the center.
Do not worry if the first coat looks slightly transparent.
That is completely normal.
Step 7: Let the First Coat Dry
This step is easy to skip, but it matters.
Give the first layer enough time to set according to the product instructions.
Applying another coat too quickly can cause dragging or unevenness.
Step 8: Apply the Second Coat
Apply another thin coat of nail polish.
The second layer usually helps create stronger color and more even coverage.
Remember:
Thin, controlled layers are usually easier to manage than one thick layer.
Step 9: Apply a Top Coat
Once the color has been applied, use a top coat if appropriate for your chosen system.
A glossy top coat can give the manicure a smooth, shiny appearance and can help protect the finished surface.
Step 10: Let Your Nails Dry
Now comes the hardest part for many people:
waiting.
Do not immediately start opening bags, washing dishes, searching through your handbag, or typing furiously on your keyboard.
Give your manicure enough time to dry.
A Quick Nail-Lacquer Story
A friend once spent almost half an hour creating a beautiful red manicure.
The color was perfectly even. The edges looked clean. The glossy finish was gorgeous.
Then, five minutes later, she decided to change her bedsheets.
One nail was dented.
Then another.
By the time she finished, the manicure looked completely different.
The problem wasn’t the polish.
It was impatience.
That is why drying time is an important part of applying nail lacquer. Sometimes the best thing you can do after a manicure is simply sit back and leave your hands alone for a little while.
How to Make Nail Lacquer Last Longer
You have invested time in your manicure, so naturally you want it to stay beautiful.
Here are some simple habits that can help.
Apply Thin Coats
Thick coats can take longer to dry and may be more likely to dent.
Thin layers are generally easier to control.
Use a Top Coat
A suitable top coat can provide a smooth finishing layer.
Some formulas are specifically designed to improve the wear of traditional polish.
Protect Your Hands
Frequent exposure to water, cleaning products, and physical activity can affect your manicure.
When doing household cleaning, appropriate gloves can help protect your hands and nails.
Do Not Peel Your Polish
When one corner starts lifting, it can be incredibly tempting to pull it off.
Try not to.
Picking and peeling can disturb the nail surface.
Instead, remove the polish properly when you are ready for a new manicure.
Common Nail Lacquer Mistakes
Even a beautiful polish can look disappointing if it is applied incorrectly.
Here are some common mistakes to avoid.
Mistake 1: Applying Too Much Polish
More product does not automatically mean better coverage.
Very thick layers can take longer to dry.
Mistake 2: Painting Over Oily Nails
Creams and oils can interfere with the application.
Prepare the nail surface before polishing.
Mistake 3: Skipping Preparation
Rushing straight into color without shaping and cleaning your nails can make the final manicure look less neat.
Mistake 4: Touching Wet Polish
This is probably the biggest enemy of a fresh manicure.
Mistake 5: Using Very Old Polish
Over time, polish can become thick or change in appearance.
If a cosmetic has changed significantly in color or smell, the FDA advises consumers to discard it. (U.S. Food and Drug Administration)


Best Nail Lacquer Colors for Different Occasions
One of the most enjoyable parts of choosing nail lacquer is matching your manicure to the occasion.
Everyday Nail Colors
For everyday wear, consider:
- Nude
- Beige
- Soft pink
- Rose
- Milky white
- Light brown
These colors are easy to match with different outfits.
Work-Friendly Nail Colors
If you prefer understated nails for work, soft neutrals and muted shades can create a clean appearance.
Party Nail Colors
This is your opportunity to experiment.
Try:
- Glitter
- Metallic gold
- Silver
- Deep red
- Berry
- Plum
- Bright pink
Wedding Nail Colors
For an elegant wedding manicure, consider:
Milky pink, nude, soft white, champagne, blush, or delicate shimmer.
Holiday Nail Colors
Seasonal colors can make your manicure feel more festive.
For example:
- Deep red
- Berry
- Chocolate brown
- Metallic gold
- Silver
- Emerald-inspired shades
- Sparkling glitter
How to Buy Nail Lacquer Online With Confidence
Shopping for nail lacquer online can be convenient, but there are a few things you should check before placing an order.
Read the Product Description
Look for information about:
- Finish
- Shade
- Size
- Application
- Ingredients
- Drying instructions
- Removal instructions
Check Customer Reviews
Reviews can give you useful information about application, pigmentation, brush quality, and the overall experience.
However, remember that one person’s experience may not be exactly the same as yours.
Look at Multiple Photos
Nail-polish colors can appear different depending on lighting, camera settings, and screen displays.
If possible, look at several product photos before buying.
Buy From a Reputable Seller
Choose a trustworthy retailer or the manufacturer’s official store where possible.
This can give you greater confidence that you are receiving the product described.
What Does “3-Free,” “5-Free,” and “10-Free” Nail Polish Mean?
You may see terms such as 3-free nail polish, 5-free nail polish, or 10-free nail lacquer while shopping.
These terms generally refer to formulas marketed as being made without certain listed ingredients.
However, there is an important detail:
The exact ingredients excluded can vary between brands.
Therefore, do not assume that every “10-free” formula excludes exactly the same ingredients.
If you want to avoid a specific ingredient, check the manufacturer’s ingredient list.
This is much more useful than relying only on the number printed on the front of the bottle.
Nail Lacquer Safety Tips
Although nail lacquer is a common cosmetic product, it should still be used carefully.
The FDA recommends reading product labels, following warnings and directions, and using nail products in a well-ventilated area. (U.S. Food and Drug Administration)
Keep nail products away from flames and other ignition sources because some nail products can catch fire. (U.S. Food and Drug Administration)
You should also:
- Keep nail lacquer away from young children.
- Avoid getting polish in your eyes.
- Do not intentionally inhale product fumes.
- Follow the manufacturer’s directions.
- Keep bottles closed when not in use.
- Stop using a product if you develop an unexpected reaction.
Some nail products can cause irritation or allergic reactions in certain people. The FDA specifically discusses potential reactions associated with some nail-product ingredients. (U.S. Food and Drug Administration)
If you experience a concerning reaction, stop using the product and seek appropriate medical advice.
How to Store Nail Lacquer
Proper storage can help you get more use from your favorite nail polish.
Always close the bottle tightly after use.
Before replacing the cap, wipe excess polish from around the bottle opening if needed. This helps prevent dried polish from building up around the neck.
Also, follow the manufacturer’s storage instructions.
If your favorite bottle becomes unusually thick, changes smell, or looks significantly different from when you bought it, it may be time to replace it.
Can Good Nail Lacquer Really Make a Difference?
Absolutely—but the important thing is to define “good.”
A good nail lacquer is not necessarily the most expensive bottle on the shelf.
Instead, look for a product that matches your needs.
For example, you may want:
Easy application if you are a beginner.
Strong pigmentation if you want rich color with fewer coats.
A glossy finish if you love shiny nails.
A sheer formula if you prefer natural-looking nails.
A glitter finish if you enjoy statement manicures.
A particular ingredient profile if you have personal preferences about formulation.
The best purchase is therefore the one that fits your routine.
Why Buying Quality Nail Lacquer Can Be Worth It
Sometimes people assume that all nail polishes are essentially the same.
But if you have ever struggled with a streaky, thick, difficult-to-control formula, you already know that the application experience can vary.
A well-designed nail lacquer can make the manicure process much more enjoyable.
A good brush can provide better control.
A well-balanced formula can spread more evenly.
A beautiful finish can make your manicure look more polished.
And when you genuinely enjoy using the product, you are more likely to use it regularly.
That is why it makes sense to consider the formula, finish, brush, ingredients, shade, and reputation instead of choosing a product only because it is cheap.
Nail Lacquer Ideas for Your Next Manicure
Once you have your favorite polish, you can experiment with different styles.
Classic Red
A glossy red manicure is timeless and works for almost any season.
Nude and Gold
Apply a nude base and add delicate gold accents.
Pink and White
Soft pink with white details creates a clean, feminine look.
French Manicure
Use a neutral base with contrasting tips.
Glitter Accent
Keep most nails simple and add glitter to one or two nails.
Dark and Glossy
Deep burgundy, chocolate, navy-inspired, or black shades can create a dramatic evening look.
Pastel Nails
Soft lavender, baby pink, mint, butter yellow, or powder blue can create a fresh seasonal manicure


Frequently Asked Questions About Nail Lacquer
Is nail lacquer the same as nail polish?
Yes. Nail lacquer and nail polish are commonly used terms for traditional cosmetic nail-color products.
How many coats of nail lacquer should I use?
It depends on the formula and the desired coverage. A common approach is one base coat, one or two thin color coats, and a top coat.
Always follow the instructions for your particular product.
Can I use nail lacquer without a base coat?
You can, but a base coat can provide a smoother foundation and may help reduce staining with certain highly pigmented colors.
Why does my nail polish chip quickly?
Chipping can be influenced by application technique, nail flexibility, exposure to water and cleaning products, the formula itself, and everyday wear.
Using thin coats, allowing adequate drying time, and applying an appropriate top coat may help.
Why does my nail lacquer become thick?
Polish can become thicker over time, especially when the bottle is repeatedly opened and exposed to air.
Keeping the bottle tightly closed can help reduce unnecessary exposure.
Can I use glitter nail lacquer every day?
Of course. Nail style is personal.
If you love glitter, there is no reason you need to save it only for special occasions.
Is 10-free nail polish automatically better?
Not necessarily.
“10-free” describes a manufacturer’s claim about excluding certain ingredients. The exact list can vary between products.
If a specific ingredient matters to you, read the actual ingredient list.
How should I remove nail lacquer?
Use a suitable nail-polish remover and gently remove the product rather than picking or peeling it away.
Final Thoughts: Is Nail Lacquer Worth Buying?
Nail lacquer remains one of the easiest and most versatile ways to change your nail look at home.
You do not need an enormous collection to enjoy it, either.
Start with a few shades that fit your lifestyle. A good nude, a soft pink, a classic red, and one fun statement shade can give you plenty of options.
Then, as you become more comfortable, experiment with glitter nail polish, shimmer nail lacquer, metallics, pastels, French manicures, and seasonal colors.
Most importantly, choose your products thoughtfully.
Look at the formula, finish, ingredients, brush, and application instructions. Buy from reputable sources, follow safety directions, and give yourself enough time to apply and dry your manicure properly.
The result is worth it.
A fresh coat of nail lacquer can make your hands look polished, complement an outfit, and give you that satisfying feeling of having done something nice for yourself.
And perhaps that is the real appeal of nail polish: it is a small beauty purchase that can provide a lot of creativity.
So, whether you are searching for an everyday nude, a bold red, a sparkling party shade, or your next favorite nail lacquer, choose a product that fits your style and enjoy the process.
Beautiful nails do not have to be complicated. Sometimes, all you need is the right bottle of nail lacquer, a steady hand, and a little patience.
Helpful Resources
- FDA: Nail Care Products — information about nail-product ingredients, labeling, and safe use. (U.S. Food and Drug Administration)
- FDA: Cosmetic Ingredients — general information about cosmetic ingredients and safety. (U.S. Food and Drug Administration)
- FDA: Phthalates in Cosmetics — information about phthalates and their historical use in cosmetics. (U.S. Food and Drug Administration)