21 Halloween Nail Design Ideas 2026 That Are Easy, Cute and Stylish
Halloween nail design ideas 2026 are a fun way to add a spooky touch to your autumn look. From cute ghost nails and tiny pumpkins to spooky French tips and black-and-orange designs, there are plenty of styles to try. Whether you prefer simple nail art at home or detailed designs from a nail technician, you can find a Halloween manicure that suits your style and nail length.
Some designs are simple enough to paint at home with a few basic nail polishes, while others are better suited to a salon appointment. The best choice depends on your nail length, the time you have available and how bold you want your Halloween look to be.
This guide covers 21 Halloween nail designs, from simple ideas for beginners to more detailed looks inspired by current nail trends. You will also find practical steps for recreating popular designs, advice on choosing nail colours, and product suggestions to help you achieve a neat finish at home.
Halloween Nail Design Ideas 2026 for Every Style
1. Classic Black Halloween Nails
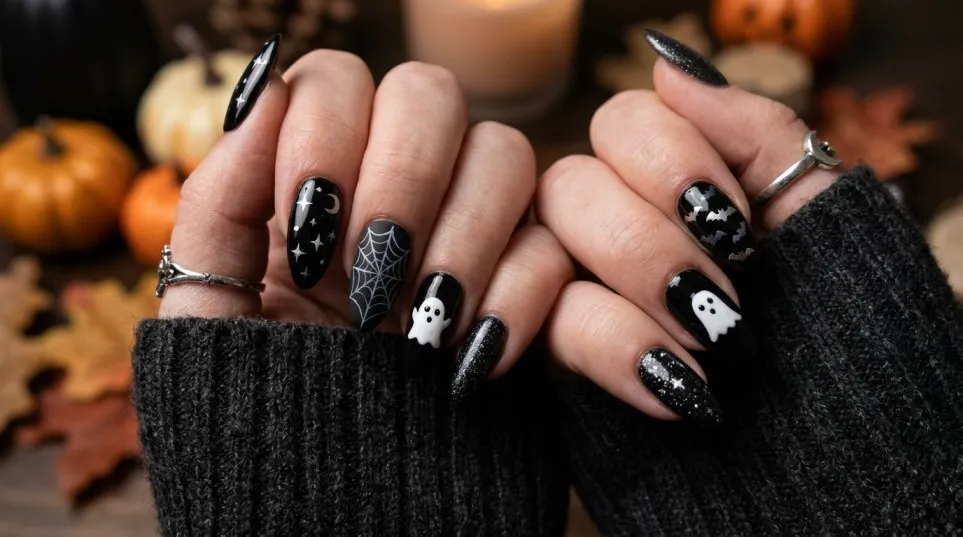
Black nails are one of the easiest ways to create a Halloween-inspired manicure. They look bold, work with almost any outfit and can be worn long after the celebrations are over.
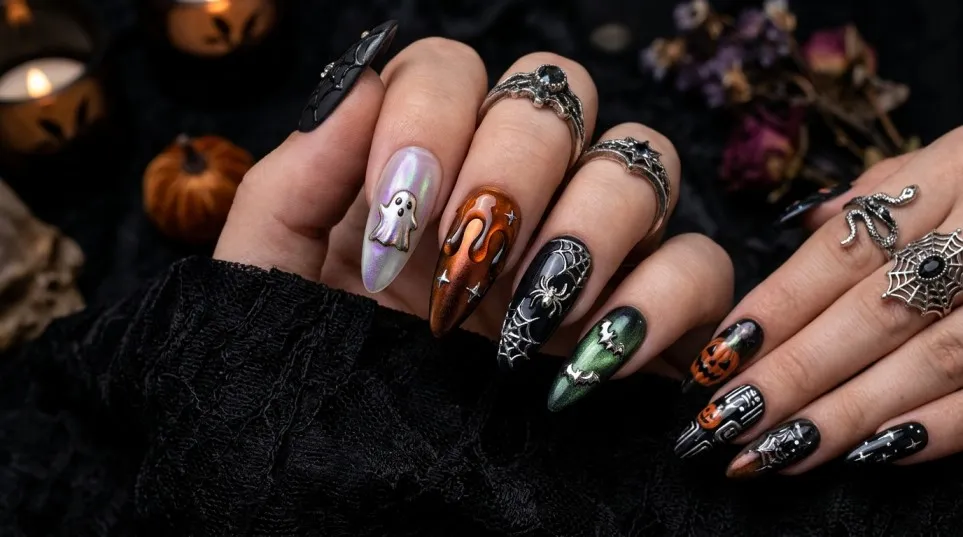
For a simple look, apply glossy black nail polish to every nail. If you prefer something a little different, use a matte top coat to create a softer finish. You can also add a single silver star, tiny bat or spiderweb to one accent nail.
This design works particularly well on short square nails, almond-shaped nails and long coffin nails. It is also a useful option if you want Halloween nails without spending too much time on detailed artwork.
How to create the look:
- Shape your nails and gently clean the nail surface.
- Apply a suitable base coat and let it dry.
- Paint two thin coats of black polish, allowing each coat to dry.
- Finish with a glossy or matte top coat.
For more ideas, explore these black nail designs for inspiration.
2. Cute Ghost Halloween Nails
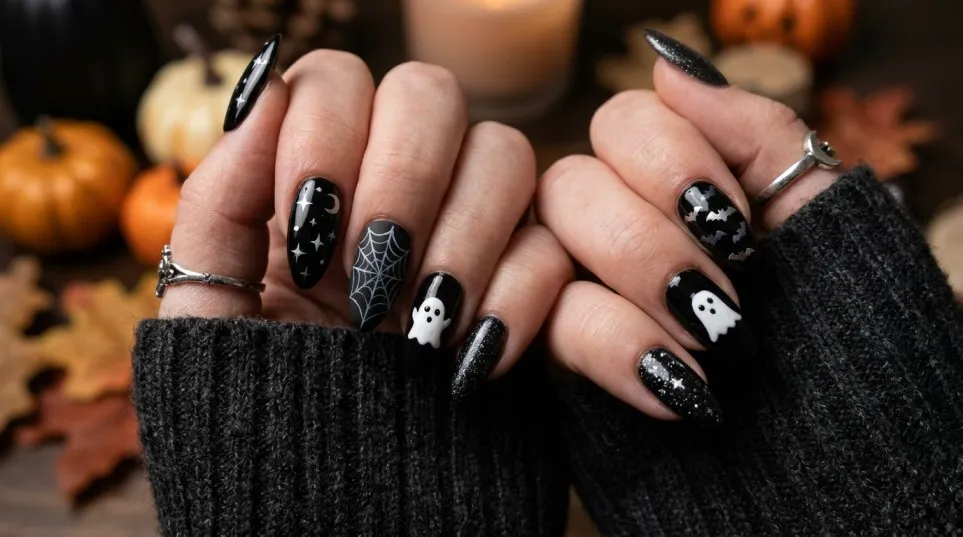
Ghost nails are a great choice if you want something playful rather than frightening. Small white ghosts on a nude, pale pink or milky base create a cute manicure that works for everyday wear as well as Halloween parties.
You do not need to paint a ghost on every nail. Instead, keep most nails plain and add one or two little ghosts as a feature. This creates a balanced design without making the manicure look too busy.
How to create ghost nails at home:
- Apply a nude or pale pink base colour.
- Use white polish to paint a small rounded shape with a slightly wavy bottom.
- Allow the white polish to dry.
- Add two tiny black dots for the eyes.
- Apply a clear top coat once the design is dry.
A dotting tool makes the eyes easier to create, but the end of a small nail art tool can also work.
If you enjoy cute designs, take a look at these Halloween nail art ideas from Boots.
3. Pumpkin Orange Nail Designs
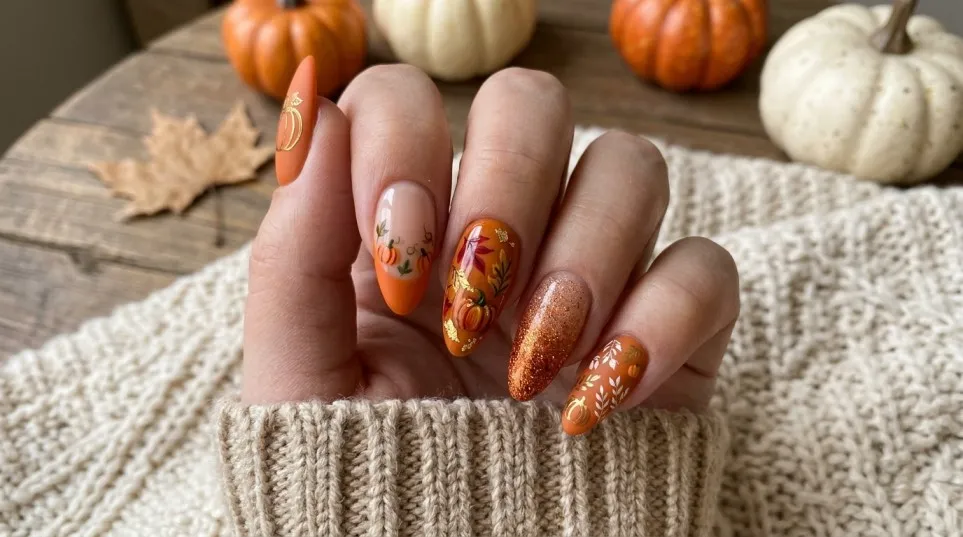
Orange nails are a natural choice for autumn and Halloween. The shade brings to mind pumpkins, fallen leaves and cosy seasonal outfits.
You can keep the manicure simple with a solid pumpkin-orange colour, or add small black pumpkin faces to one or two nails. Burnt orange, terracotta and deeper rust shades are good alternatives if bright orange feels too bold.
For a more polished appearance, combine orange nails with cream or nude accents. This gives you a seasonal manicure without relying on a different design on every finger.
Styling tip: Choose a glossy orange polish for a bright finish or a matte top coat for a softer autumn look.
Orange nails also pair well with brown knitwear, black clothing and neutral outfits, making them a practical option throughout October.
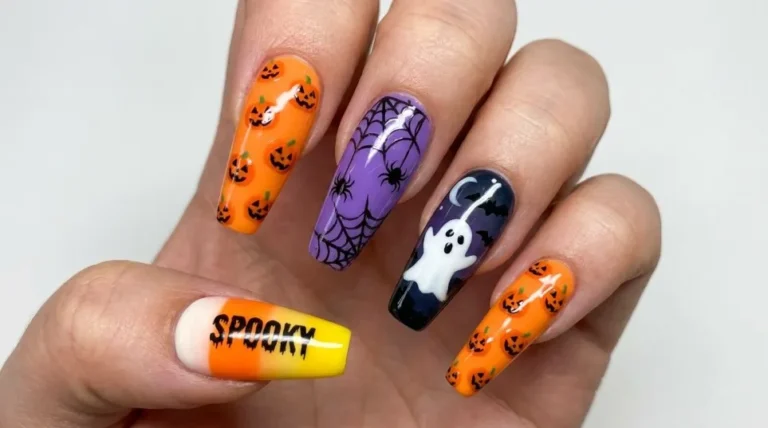
4. Spiderweb Halloween Nails
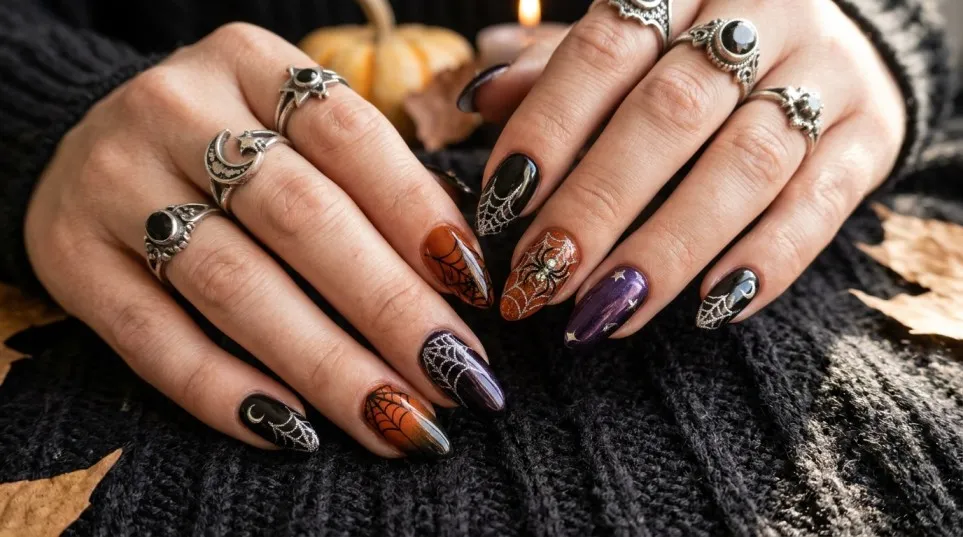
Spiderweb nails offer a classic spooky look without requiring a complicated design across every finger. The contrast between a dark base and fine white lines makes the artwork stand out.
A popular approach is to paint most nails black and use a nude or white base on one accent nail. Draw a small web on the accent nail to keep the manicure clean and easy to wear.
Step-by-step guide:
- Apply your chosen base colour.
- Use a fine nail art brush to draw three or four thin lines spreading out from one corner.
- Connect the lines with small curved strokes.
- Let the design dry before applying top coat.
The most important part is keeping the lines thin. Thick lines can make the web look crowded, especially on short nails.
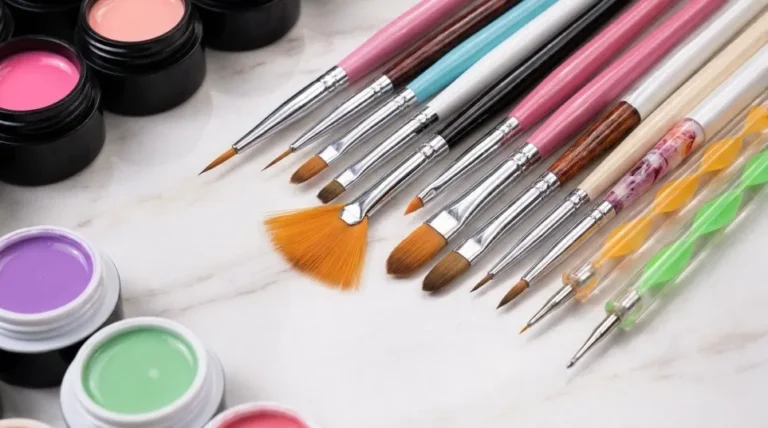
If you are new to nail art, browse fine nail art brushes on Amazon UK to find tools for detailed designs.
5. Blood-Red Halloween Nails
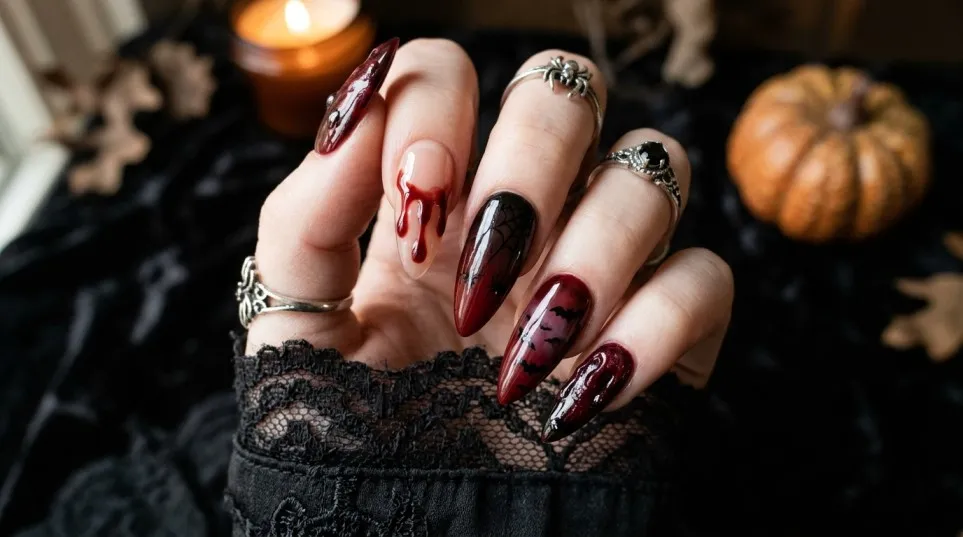
If you prefer a darker manicure, deep red nails are an excellent alternative to traditional black. Shades such as burgundy, oxblood and dark cherry create a dramatic look that feels sophisticated rather than costume-like.
For a simple version, paint every nail in a rich red shade and finish with a glossy top coat. To make the design more recognisably Halloween-inspired, add a few red drips over a pale nude base.
How to create a red-drip effect:
- Apply a nude or pale pink base.
- Paint a thin red line near the tip of the nail.
- Add a few small red dots beneath the line.
- Carefully pull each dot towards the nail tip to create a dripping effect.
- Let the polish dry before sealing the design.
Keep the drips different lengths for a more natural pattern. You can find more seasonal inspiration in this Halloween nail trend guide from Glamour UK.
6. Black and Orange Halloween Nails
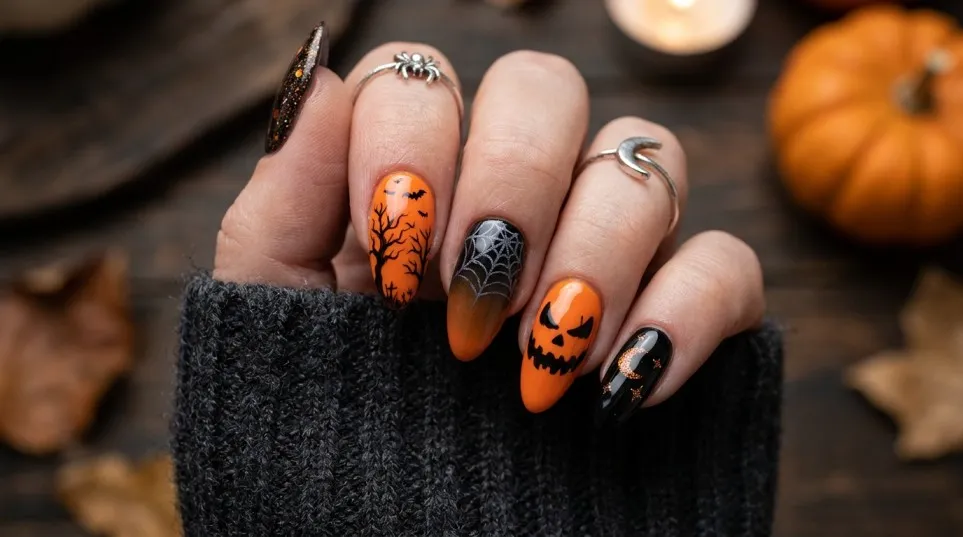
Black and orange are classic Halloween colours, and they work well together in simple nail designs. You can alternate the colours across your fingers, create French tips or use one colour as the base and the other for small decorative details.
For example, paint your thumb, middle finger and little finger black, then use orange on the remaining nails. Another option is to add orange tips to a black manicure.
This design is ideal if you want a recognisable Halloween look without painting detailed characters or patterns.
For a coordinated finish, use the same shade of orange throughout the manicure and avoid adding too many extra colours.
7. Halloween French Tip Nails
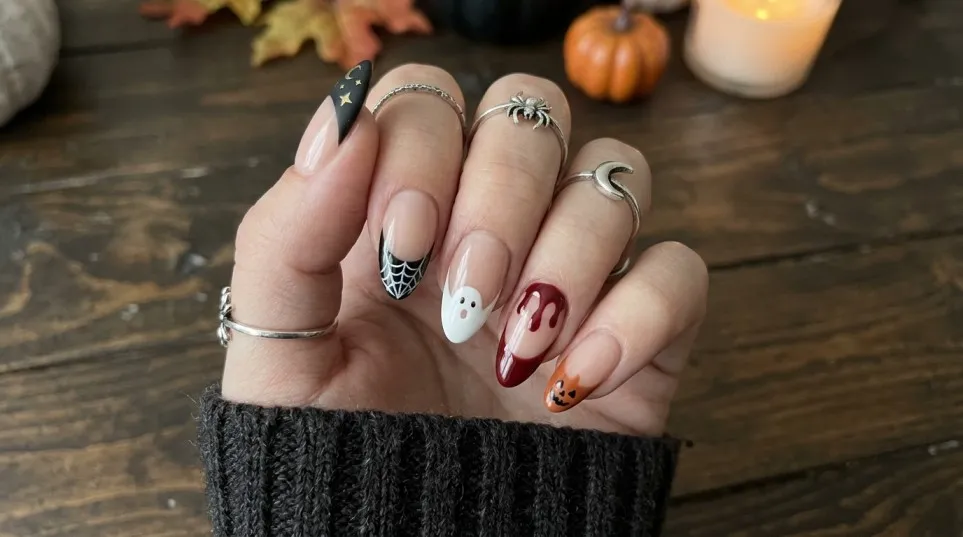
French tip nails are usually associated with a clean, classic manicure, but changing the tip colour gives them a seasonal twist.
Instead of traditional white tips, try black, burgundy, orange or deep purple. You can also create a ghost French tip by shaping a small white ghost-like outline at the end of the nail.
For a more understated result, keep the base sheer pink or nude and use a dark colour only at the tips. This is particularly attractive on almond-shaped nails, although square and oval shapes work just as well.
To create Halloween French tips:
- Apply a sheer nude or pink base.
- Allow it to dry completely.
- Use a fine brush to paint your chosen colour across the tips.
- Tidy the edges with a small brush if necessary.
- Finish with a suitable top coat.
The beauty of this design is its versatility. You can make it subtle enough for work or choose bold, contrasting colours for a Halloween party.
8. Spider Nail Art
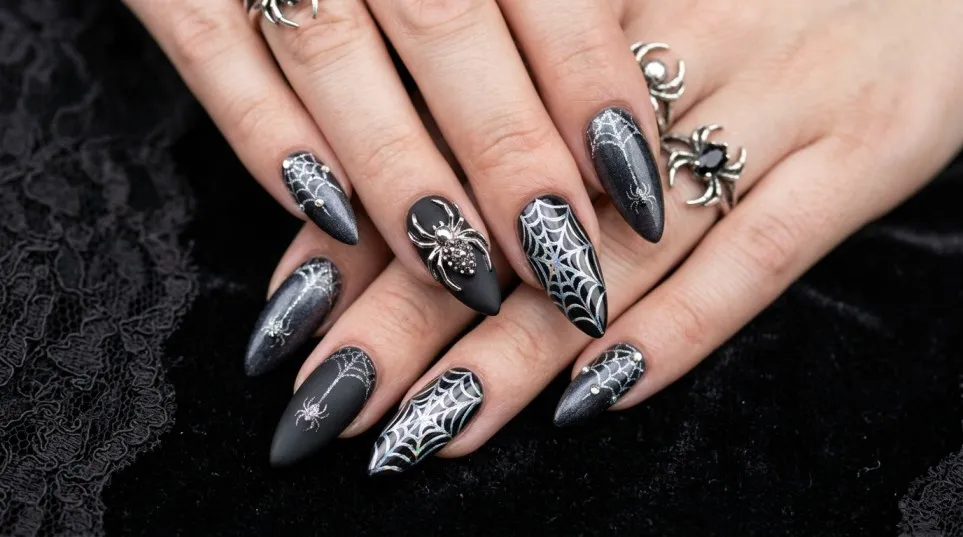
A tiny spider can turn a simple manicure into something unmistakably spooky. The design works particularly well on a nude, white or black background.
For a beginner-friendly version, paint a small black dot for the spider’s body and add thin legs using a fine brush. You can also draw a short thread connecting the spider to the top of the nail.
One accent nail is often enough. Adding spiders to every finger can make the design feel crowded, especially if your nails are short.
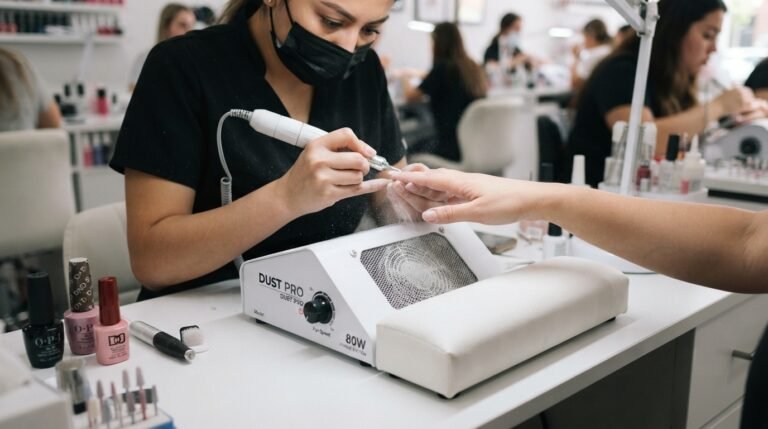
If you want a more detailed result, a professional nail technician can create textured spiders or combine them with magnetic polish and other decorative finishes.
For further inspiration, see Vogue’s coverage of spider nail designs.
9. Purple Halloween Nails
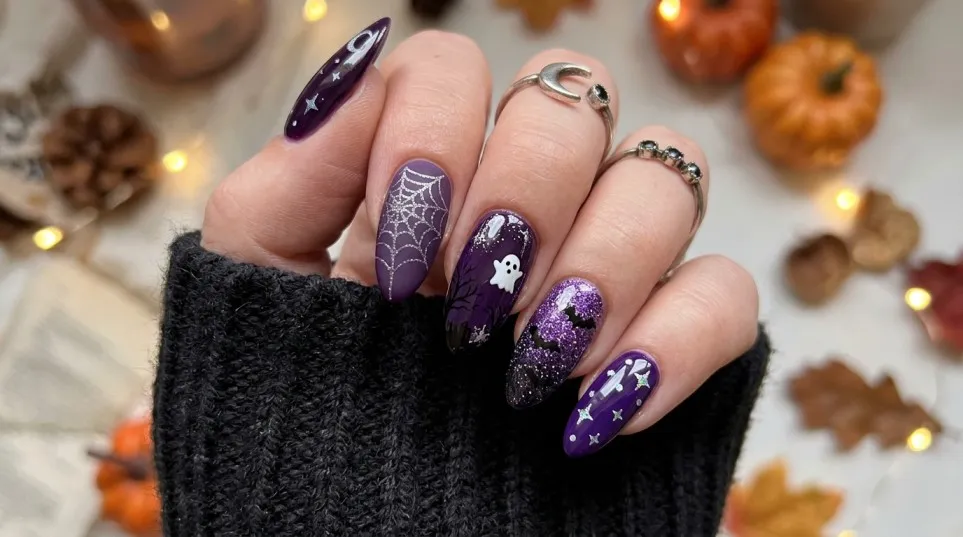
Purple is a useful choice if you want something different from the usual black and orange palette. Deep plum, violet and smoky lavender can all create a Halloween-inspired look.
Dark purple works well with silver stars, black bats and fine spiderwebs. Lighter lavender is better suited to cute ghosts, small moons and delicate designs.
You can also combine purple with black for a dramatic finish or use a sheer purple base for a softer effect.
For a simple manicure, paint every nail the same shade and decorate just one finger. This keeps the look coordinated while still giving it a seasonal theme.
10. Glow-in-the-Dark Halloween Nails
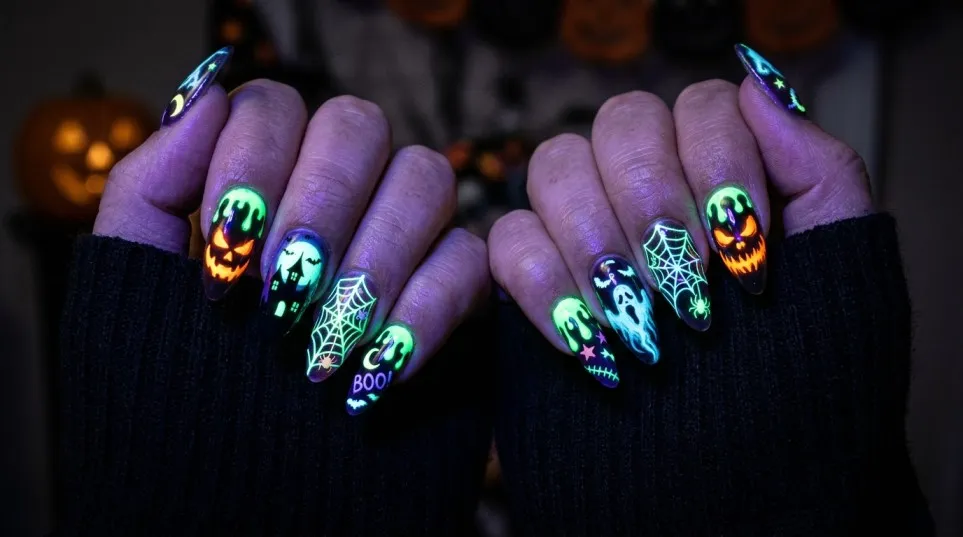
Glow-in-the-dark nails are especially fun for evening events and Halloween parties. The effect can be created with suitable glow-in-the-dark nail products or specially designed nail stickers.
A common look is to use a pale base with glowing ghost shapes, green details or small stars. You can also keep the daytime design fairly simple and let the glow effect become the main feature in low light.
Before purchasing a product, check whether it is designed for natural nails, press-on nails or gel systems. These products are not necessarily interchangeable.
For an easy option, explore glow-in-the-dark nail polish on Amazon UK.
Always follow the product’s directions, including any instructions about exposure to light, application and removal.
11. Cute Pumpkin Nail Art
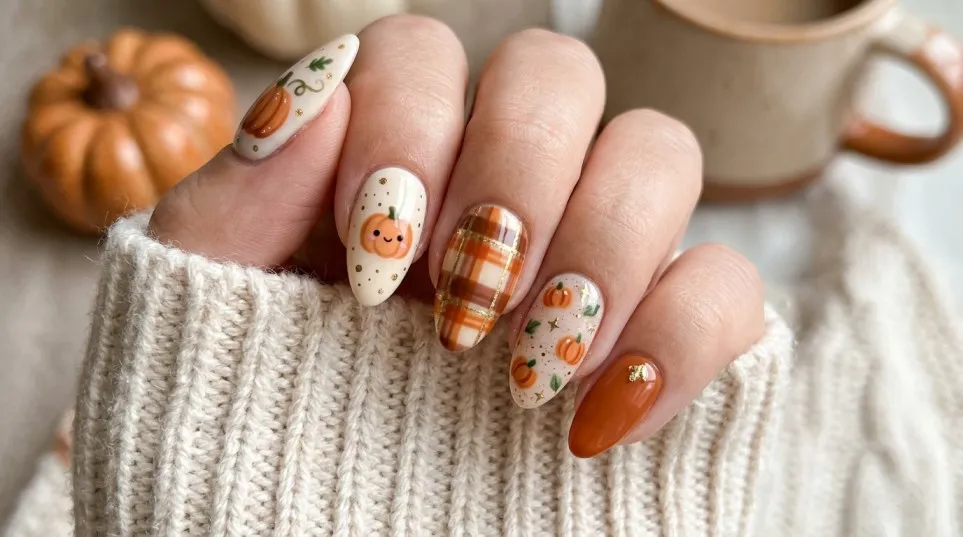
Pumpkin nail art is perfect if you enjoy playful seasonal designs. Small pumpkin faces can be painted on a nude or cream base, or you can create tiny orange pumpkins with green stems.
This design works on both short and long nails because the artwork can be adjusted to the available space.
For short nails, use a simple orange oval with a small green line at the top. Add two black triangles and a small curved line if you want to create a jack-o’-lantern face.
For longer nails, you have more room to add leaves, vines and extra details.
A useful trick is to practise the pumpkin shape on paper before painting your nails. It helps you find the right size and makes the finished design look more consistent.
12. Minimalist Halloween Nails
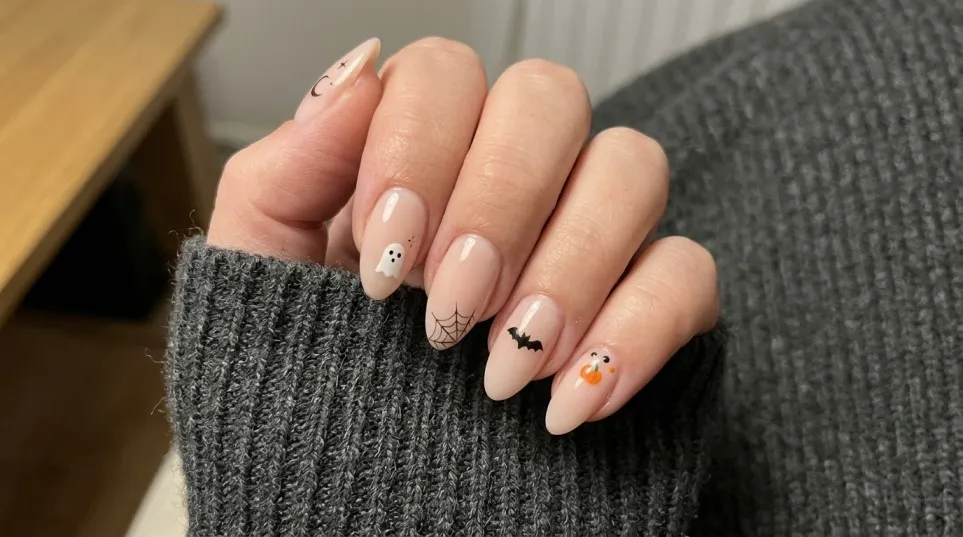
Not everyone wants a full set of spooky designs. If you prefer a neat, understated manicure, minimalist Halloween nails are worth considering.
Start with a sheer pink, beige or milky white base. Then add one tiny black bat, a small ghost or a delicate spiderweb to just one or two nails.
Another option is to use a single dark shade across the entire manicure and leave the artwork out altogether.
Minimalist designs are particularly useful if you want your nails to look suitable for everyday activities as well as seasonal events.
They are also easier to maintain because there are fewer detailed areas where chips or small imperfections can become noticeable.
13. Witch-Inspired Halloween Nails
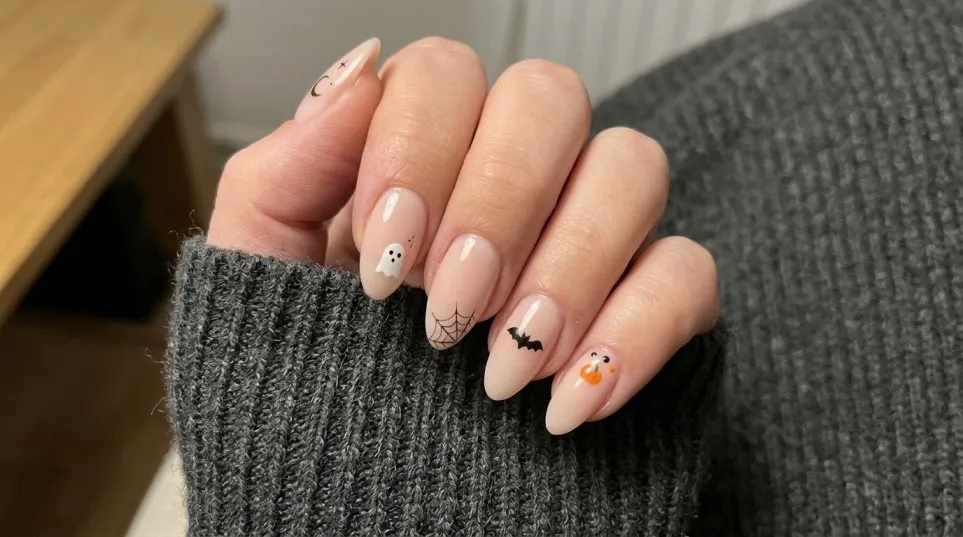
Witch-inspired nail art can be as simple or as elaborate as you like. Dark green, black and purple create a classic colour combination, while tiny stars, moons and pointed hat shapes add a magical touch.
For a simple version, paint your nails deep purple and add small silver stars to one or two fingers. You could also use black polish with a crescent moon design on a nude accent nail.
If you want something more dramatic, ask a nail technician about combining a dark base with shimmer or a cat-eye effect.
The key is to choose one main theme. Too many unrelated symbols can make the design look less polished.
14. Candy Corn Nail Designs
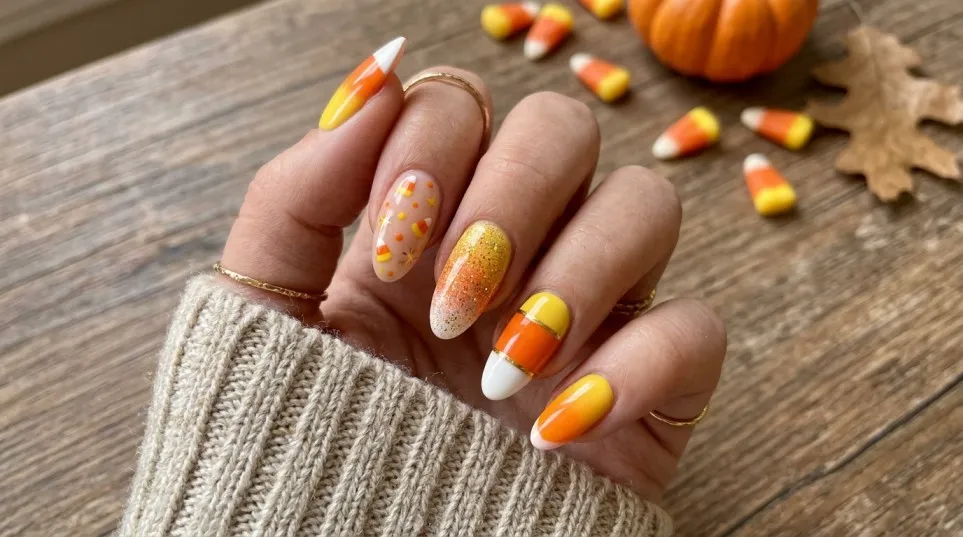
Candy corn-inspired nails use white, orange and yellow to create a striped design inspired by the familiar Halloween sweet.
The traditional look places white at the tip, orange in the middle and yellow near the base. You can recreate this pattern on every nail or use it on just one accent finger.
For beginners, a simpler alternative is to paint each nail a different colour from the candy corn palette. This gives you the same seasonal feel without needing perfectly straight stripes.
Use thin coats of polish and allow each section to dry before adding the next colour. This helps reduce smudging and keeps the lines more defined.
Although candy corn is especially popular in American Halloween styling, the bright colour combination works well for anyone who enjoys playful seasonal nail art.
15. Matte Black and Burgundy Nails
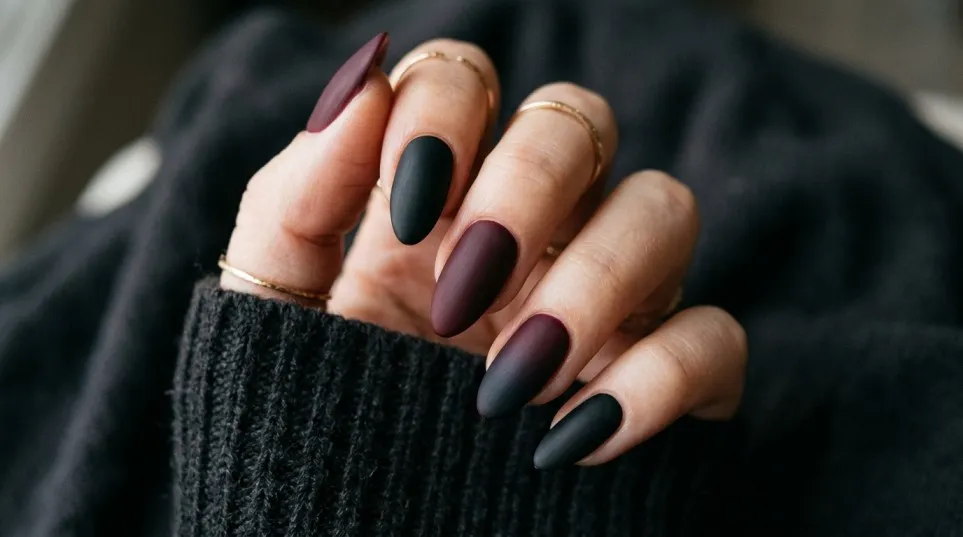
Matte black and burgundy make a sophisticated combination for anyone who prefers darker colours. Rather than using obvious Halloween characters, this design relies on colour and finish to create a moody look.
You could paint half your nails matte black and the rest deep burgundy. Alternatively, use burgundy as the main shade and add a single black accent nail.
A matte top coat can change the appearance of an ordinary glossy polish, provided the product is compatible with the polish underneath.
If you want a manicure that can last beyond 31 October, this is one of the most versatile Halloween nail design ideas to try.
16. Bat Nail Art
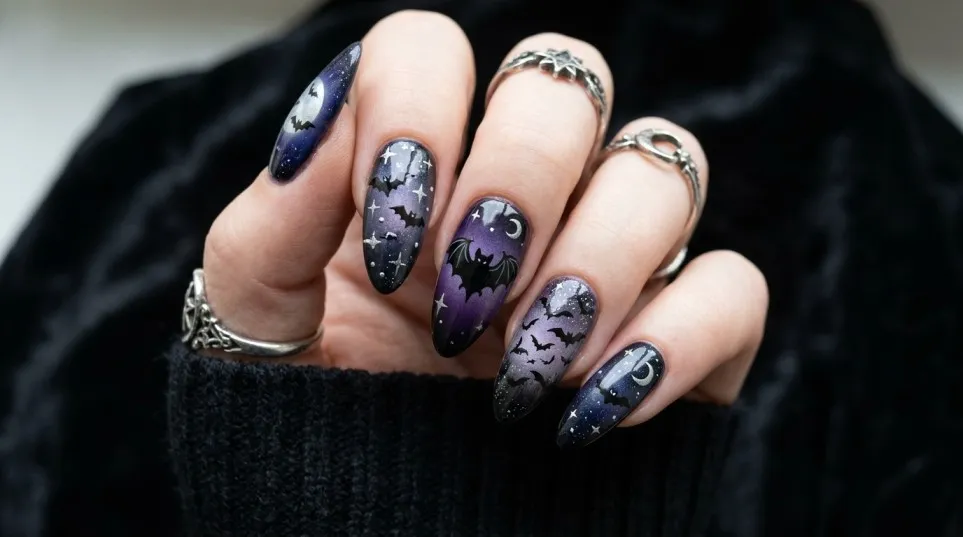
Bats are a classic Halloween motif, but they do not have to look complicated. Small black silhouettes against a pale pink or nude base create a clean, easy-to-wear design.
To draw a simple bat, begin with a small central body. Add two angled wings and finish with a few short points along the bottom edge of each wing.
If drawing by hand feels difficult, nail stickers are a convenient alternative. They are especially useful when you want several similar shapes across different nails.
Explore Halloween nail stickers on Amazon UK to compare designs and application styles.
Choose stickers made for nail use and follow the manufacturer’s instructions. Some products need a top coat, while others have different application requirements.
17. Halloween Aura Nails
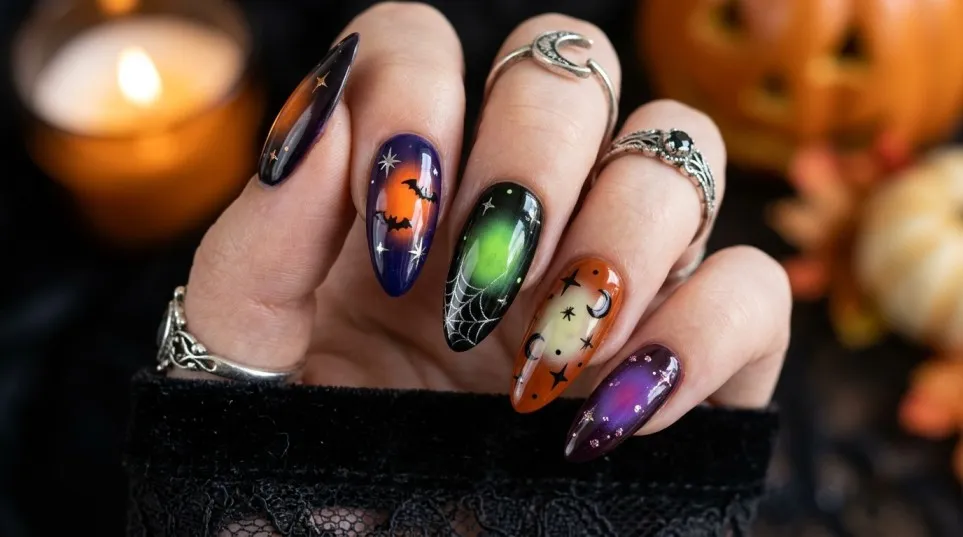
Aura nails feature a soft, rounded blend of colour in the centre of the nail. For Halloween, this effect can be created using shades such as burgundy, black, smoky purple or deep green.
The result is more subtle than a full character design but still feels dramatic.
A salon professional can create a smooth aura effect using suitable nail products and application techniques. If you prefer a DIY manicure, a small makeup sponge may help blend compatible regular nail polishes, although the result may be less precise.
Keep the colours within a similar tonal range if you want a smooth-looking finish. For example, deep red fading into black creates a vampy appearance, while purple blending into charcoal feels more mysterious.
Aura designs are particularly attractive when paired with a glossy top coat and simple nail shapes.
18. Vampire-Inspired Nails
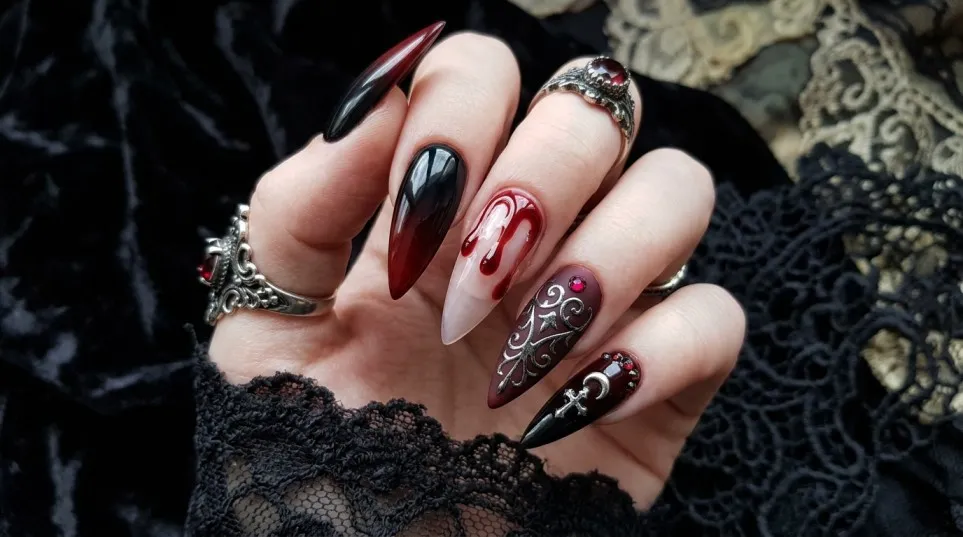
Vampire nails are a good option if you like dramatic, gothic styling. Deep red, black cherry and glossy black are the main colours to consider.
A simple manicure in dark red can be enough to create the look. For something more detailed, try red tips over a nude base or a gradual transition from burgundy to black.
You can also add a tiny drop-shaped detail to one nail for a subtle reference to vampire-inspired styling.
The advantage of this design is that it does not need elaborate artwork. A well-chosen colour and a smooth finish can make the manicure feel intentional and polished.
19. Halloween Mix-and-Match Nails
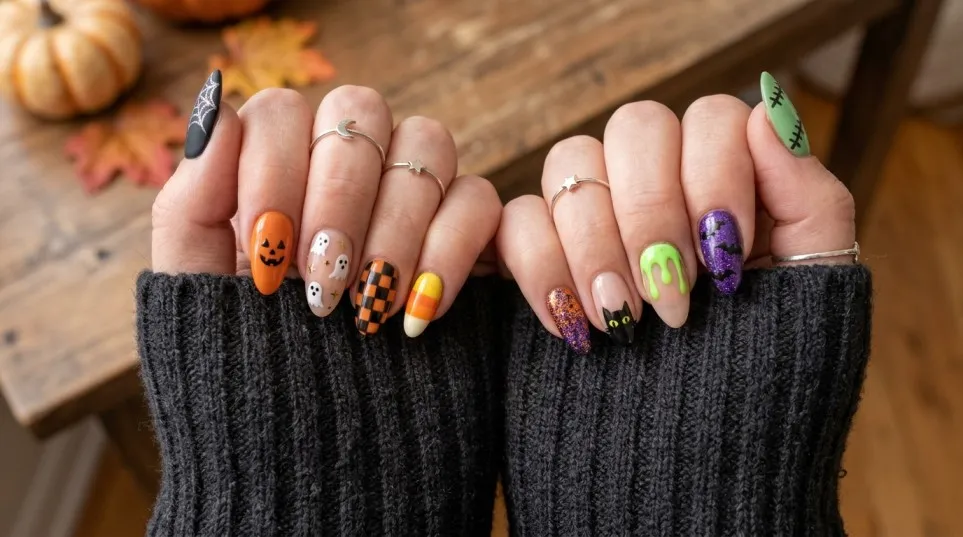
If you cannot decide on a single design, mix-and-match nails allow you to combine several related ideas.
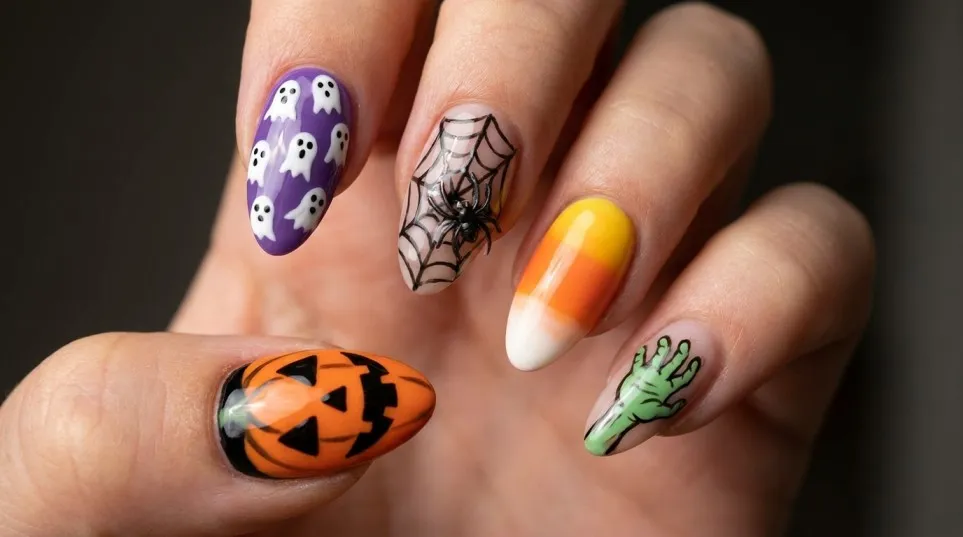
For example, you could use black polish on two fingers, a ghost on one, a spiderweb on another and a pumpkin on the final nail. The result feels playful without requiring every finger to carry the same pattern.
To keep the manicure coordinated, choose a limited colour palette before you begin. Black, white and orange are an easy combination, while burgundy, nude and silver create a more understated result.
This approach is also useful when saving inspiration for a salon appointment. Choose a few designs that work together rather than combining several unrelated pictures.
20. Chrome Ghost Halloween Nails
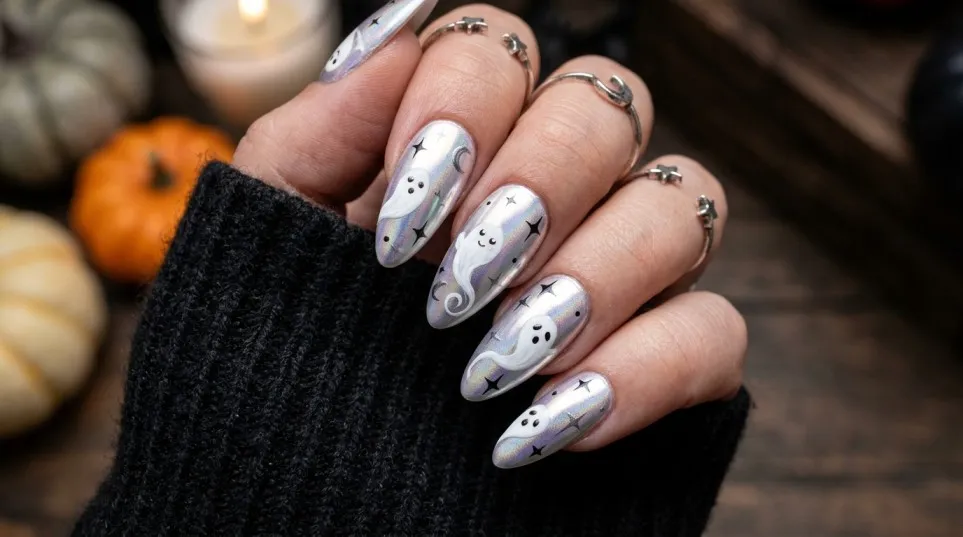
Chrome ghost nails combine a cute Halloween motif with a reflective finish. A pale or milky base helps the ghost stand out, while suitable chrome products can add a glossy, metallic-looking effect.
For a simpler version, use white ghosts on a nude base and add a small amount of shimmer to the background. You do not need a complicated design on every finger.
Chrome effects can depend on the product system being used, so check whether the powder or polish is intended for regular polish, gel polish or another specific application method.
If you want a highly reflective finish or detailed chrome artwork, a professional nail technician may be the better choice.
21. Short Halloween Nail Designs
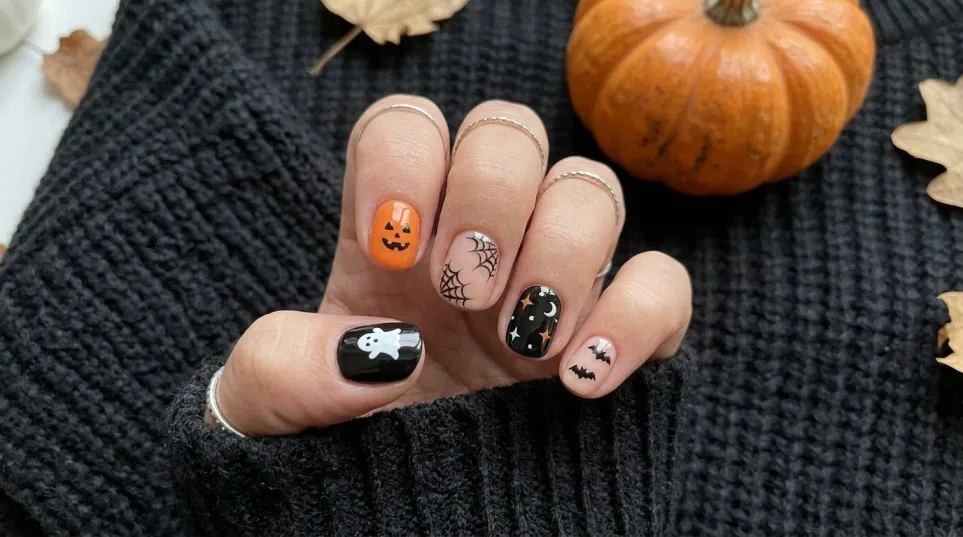
Short nails can look just as festive as long extensions. In fact, small designs often look particularly neat on shorter nails because the artwork remains simple and well proportioned.
Good options include tiny ghosts, miniature pumpkins, black French tips, single bats and small spiderwebs. You can also choose a solid autumn shade and add a single decorative detail.
If you have short natural nails, avoid trying to fit several large designs onto each finger. One small motif usually looks cleaner and is easier to paint.
For anyone who wants extra length, press-on nails are another option. Choose a suitable size for each nail and follow the manufacturer’s fitting and removal instructions.
The best design is one that suits your everyday routine, feels comfortable and does not require more maintenance than you are prepared to manage.
How to Create Halloween Nail Designs at Home
Creating a neat Halloween manicure is easier when you prepare your nails and tools before applying any colour. You do not need an expensive professional kit to begin, but a few reliable products can make the process more manageable.
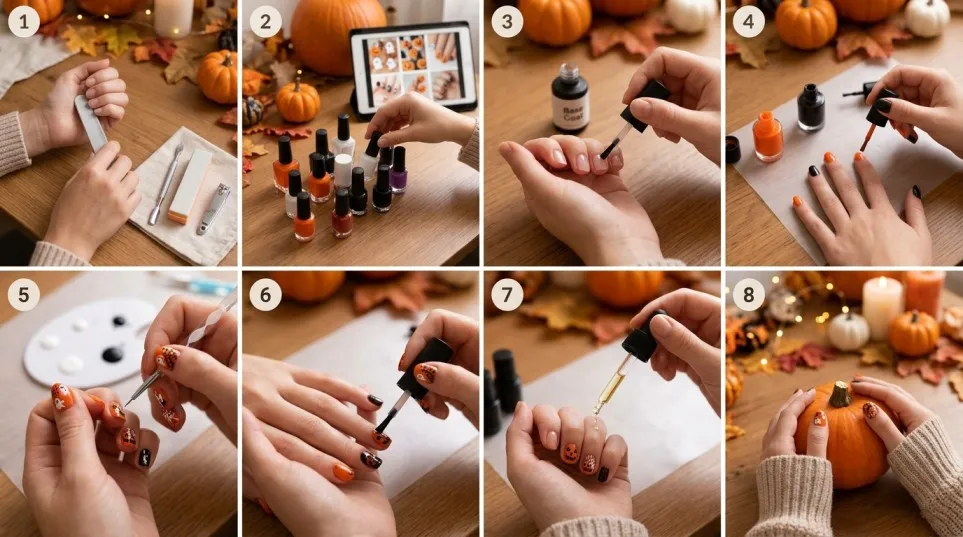
Step 1: Prepare Your Nails
Remove any old polish and wash your hands. Shape your nails with a file, then gently tidy the cuticles without cutting or damaging the surrounding skin.
Avoid applying polish over oily or damp nails, as this can affect how well the product adheres.
Step 2: Choose Your Design and Colours
Decide on your design before opening your nail polish. Beginners may find ghosts, pumpkins, dots and simple French tips easier than detailed spiderwebs or character art.
Choose two or three colours that complement one another. This makes it easier to create a coordinated manicure.
Step 3: Apply a Base Coat
A suitable base coat provides a smooth foundation for many regular nail polish manicures. Follow the instructions on your chosen product and allow it to dry before adding colour.
Step 4: Apply Thin Coats of Colour
Apply your main colour in thin, even layers rather than one thick coat. Allow each layer to dry according to the product instructions.
Thin coats generally give you better control and can help reduce smudging.
Step 5: Add Your Halloween Artwork
Use a fine brush for lines and a dotting tool for small shapes. For ghosts, start with a white body and add the face after the white polish has dried. For spiderwebs, work slowly with thin lines.
If your first attempt is not perfect, do not worry. Small designs often look more natural when they are not overly complicated.
Step 6: Seal the Design
Once your artwork is dry, apply a compatible top coat to help protect the manicure and add your preferred finish.
Avoid touching or pressing the nail surface until the polish has dried fully.
Step 7: Look After Your Manicure
Apply hand cream regularly and use cuticle oil around the nails if suitable for your manicure. Wear gloves when doing household tasks that involve prolonged contact with water or cleaning products.
Remember that regular nail polish and gel polish have different curing and removal requirements. Do not treat them as interchangeable systems.
What Products Do You Need for Halloween Nail Art?
You can create many easy Halloween nail designs with a small collection of basic products. Before buying a large kit, consider which designs you are most likely to wear.
Here are some useful starting points:
- Nail art brushes on Amazon UK: Helpful for drawing thin spiderwebs, bat wings and small details.
- Halloween nail stickers on Amazon UK: A convenient option if you prefer not to paint every design by hand.
- Nail dotting tools on Amazon UK: Useful for ghost eyes, pumpkin faces, stars and other small details.
- Black nail polish on Amazon UK: A versatile colour for Halloween artwork and everyday manicures.
- Orange nail polish on Amazon UK: Useful for pumpkins, candy corn-inspired designs and autumn manicures.
- Nail top coats on Amazon UK: Worth considering if you want a glossy or matte finish.
These links lead to Amazon UK’s search results rather than a specific tested product. Compare the brand, ingredients, size, reviews and suitability for your manicure before purchasing. Availability and prices may change.
A small, well-chosen collection is often more useful than a large kit full of tools you rarely use. If you enjoy doing your nails regularly, investing in a good fine brush and a reliable top coat can make it easier to experiment with different designs throughout the year.
Affiliate note: Some links on this page may be affiliate links. If you purchase through an eligible affiliate link, the publisher may earn a commission at no additional cost to you. Confirm that any affiliate links used on your website comply with your affiliate programme’s disclosure requirements.
How to Choose the Best Halloween Nail Design for You
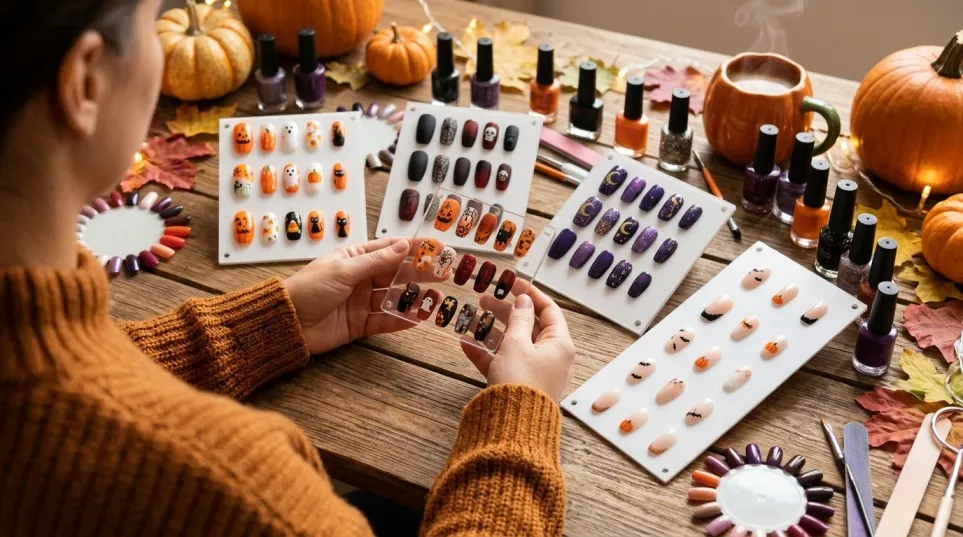
With so many options available, it helps to think about your lifestyle before choosing a design.
If you want something suitable for work, minimalist ghosts, dark French tips or a single accent nail are sensible choices. They provide a seasonal touch without making the manicure too bold.
For a Halloween party, you may prefer black-and-orange nails, vampire-inspired red, glow-in-the-dark details or a mix-and-match set.
If you are new to nail art, start with a solid colour and one simple motif. You can experiment with more detailed artwork once you are comfortable using a fine brush.
Your nail length also matters. Short nails suit small motifs and simple patterns, while longer nails provide more room for detailed illustrations and colour combinations.
Finally, consider how long you want to wear the manicure. A dark red or black manicure can remain suitable throughout autumn, while character designs and bright Halloween patterns may feel more seasonal.
Frequently Asked Questions About Halloween Nail Design Ideas
Related BIAB Guides
- Halloween Nail Design: 25 Spooky, Cute and Stylish Ideas to Try
- Halloween Nail Stickers: Easy Spooky Nail Art Ideas for Halloween
- Halloween Nails: 25 Spooky, Cute and Easy Nail Ideas to Try
Some of the most versatile options are black nails, cute ghost designs, pumpkin orange nails, spiderwebs, blood-red French tips and minimalist Halloween nail art. The best design depends on whether you prefer a subtle manicure or a bold, spooky look.
Solid black nails, orange nails, simple French tips and ghost designs are good starting points. They require relatively few colours and can be created with basic nail polish and a small nail art tool.
Choose a limited colour palette, use a sheer nude or dark base and add one or two small details. Black French tips, burgundy nails, delicate spiderwebs and tiny silver accents can create an elegant Halloween manicure.
Short nails suit tiny ghosts, small pumpkins, black tips, miniature bats and simple dots. Keeping the artwork small helps prevent the design from looking crowded.
Black, orange, white, burgundy, purple and deep green are popular choices. Nude and pale pink bases are useful when you want a softer look, while silver accents can add contrast.
Apply a base colour, then paint a small rounded ghost shape with white polish. Once it dries, add two black dots for the eyes and seal the design with a compatible top coat.
Yes. You can use the tip of a suitable small tool to make dots and a fine brush for basic lines. Nail stickers are another option if you want detailed designs without painting them yourself.
Press-on nails can be a convenient option if you want extra length or detailed artwork without creating the design yourself. Check the sizing, adhesive instructions and removal guidance before purchasing. Avoid forcing the nails off, as this can damage your natural nails.
Prepare your nails properly, apply thin coats, use a compatible base and top coat, and avoid prolonged exposure to water where possible. Follow the drying instructions for your chosen polish and touch up only as recommended by the product manufacturer.
If you are booking a salon appointment, arrange it early enough to secure your preferred time before Halloween. For regular nail polish at home, you may prefer to apply the design closer to your event so it looks fresh.
Final Thoughts
The best Halloween nail design ideas are the ones that suit your personal style, whether that means tiny ghosts on a nude base, glossy black nails or a full set of pumpkins and spiderwebs.
You do not need to be a professional nail artist to create a manicure that looks neat and festive. Start with a design you can comfortably manage, choose colours that work together and take your time with each layer.
If you are buying nail art products for the first time, focus on versatile essentials such as a fine brush, a few useful polish colours and a suitable top coat. These products can help you create Halloween designs now and experiment with other seasonal manicures later.
Most importantly, enjoy the process. Halloween is an opportunity to try something creative, so choose a design that makes you feel good and have fun with it.