Halloween Nail Design: 25 Spooky, Cute and Stylish Ideas to Try
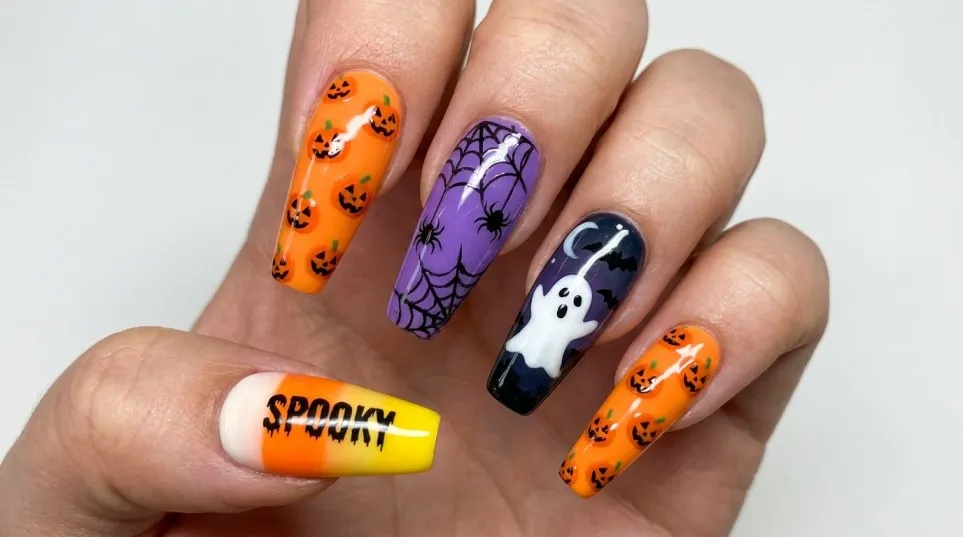
Halloween is the perfect time to try something different with your manicure. Whether you love tiny ghosts, black spiderwebs, blood-red French tips or cute pumpkin art, the right Halloween nail design can make your whole look feel ready for spooky season.
The best part is that you do not need long acrylic nails or expensive salon appointments to enjoy Halloween nail art. Many designs look beautiful on short natural nails, too. With a few nail polishes, a fine brush and a little patience, you can create a manicure that matches your costume, party outfit or everyday autumn style.
This guide covers Halloween nail designs, easy DIY tutorials, colour combinations, short nail ideas, salon inspiration and useful products to help you get the look you want. You will also find practical answers to common questions so you can choose a design with confidence.
What Is Halloween Nail Design?
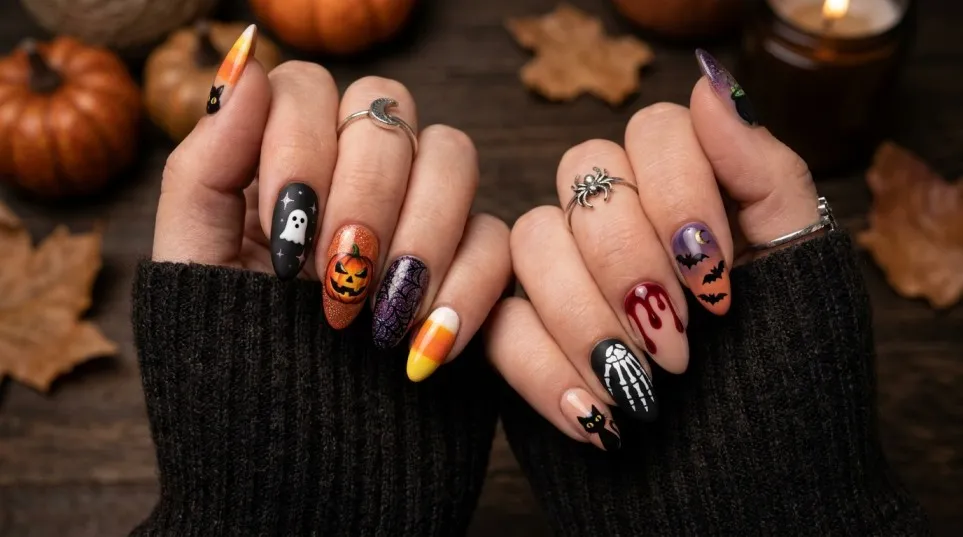
A Halloween nail design is a manicure inspired by the colours, characters and atmosphere of Halloween. It can be playful, spooky, elegant or dramatic, depending on your personal style.
Traditional designs often feature pumpkins, ghosts, bats, witches, skulls and spiderwebs. However, Halloween nail art does not have to include obvious spooky pictures. A glossy black manicure, deep burgundy polish or smoky purple finish can create the same seasonal feeling without looking like a costume.
For example, someone attending a Halloween party might choose black nails with red dripping details. Someone who prefers a simple manicure could choose nude nails with tiny white ghosts on two fingers.
Both options work because Halloween nail art is about choosing details that suit you.
For more seasonal inspiration, explore Halloween nail art ideas from Boots and the latest Halloween nail inspiration from British Vogue.
25 Halloween Nail Design Ideas to Inspire Your Next Manicure
1. Classic Black Halloween Nails
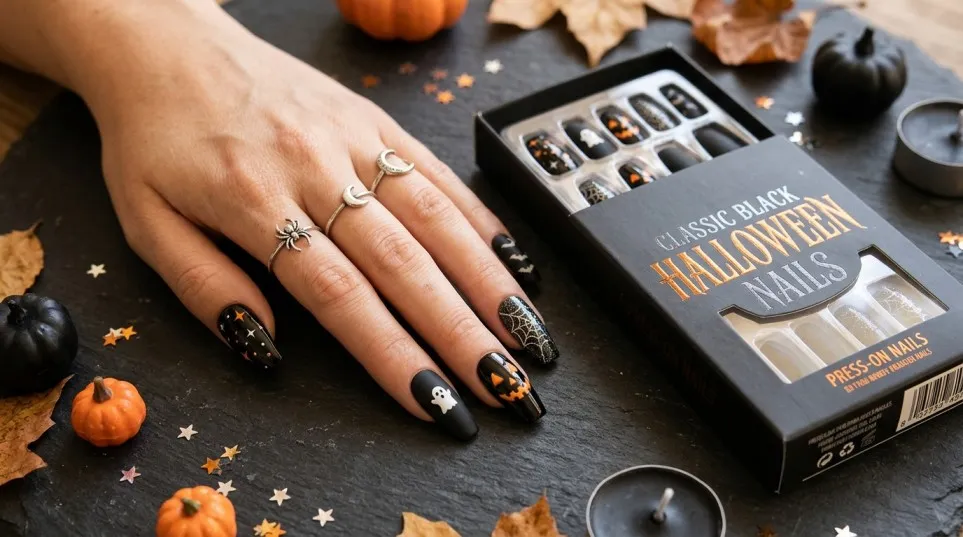
You cannot go wrong with black nail polish. It is simple, easy to match with different outfits and suitable for almost any nail length.
For a classic black Halloween nail design, paint all your nails glossy black. If you want a more modern finish, use a matte top coat instead. You can also add a small silver star or spiderweb to one accent nail.
This design is ideal if you want something spooky without spending too much time on detailed nail art.
Best for: Short nails, long nails, beginners and minimalist styles.
2. Cute Ghost Nail Design
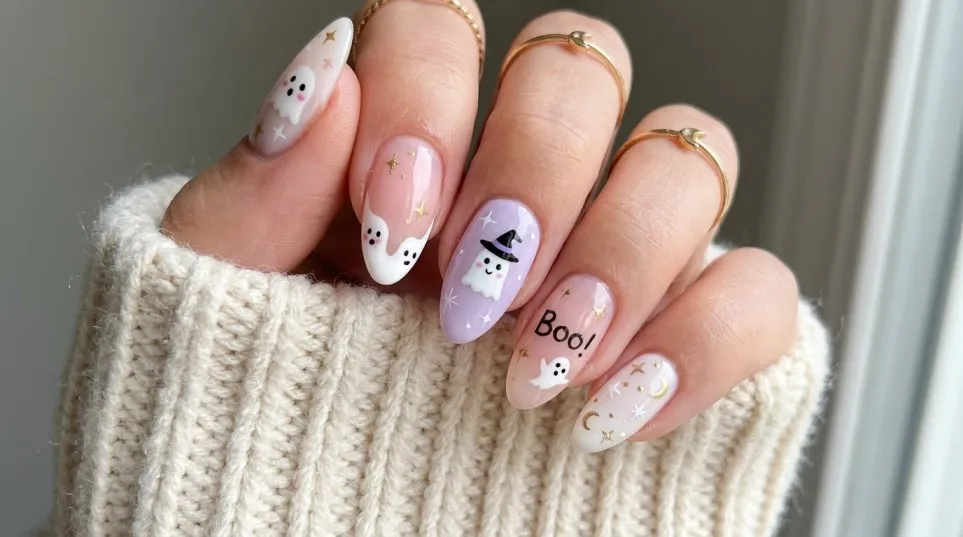
Ghost nails are a fun choice for anyone who likes Halloween designs that look sweet rather than frightening.
Start with a sheer pink, nude or milky-white base. Paint a small white ghost on one or two nails, then add two tiny black eyes and a little mouth.
You do not need to make every ghost identical. Slight differences can make the manicure look more playful.
A simple ghost design works particularly well on short nails because the artwork can remain small and neat.
Best for: Cute Halloween nails, short manicures and beginners.
3. Pumpkin Halloween Nails
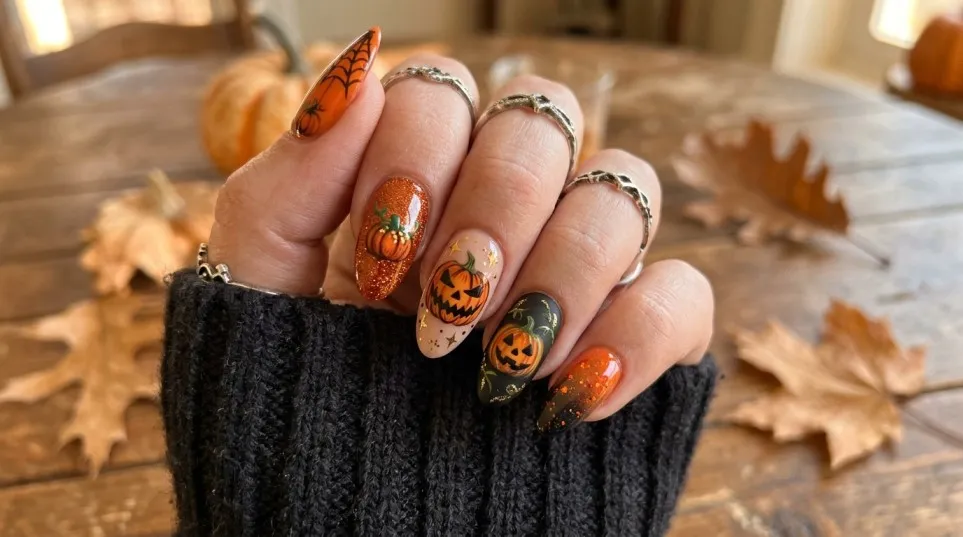
Pumpkin nails bring a warm autumn feel to your manicure. They are especially suitable if you enjoy orange, terracotta and brown shades.
Paint your nails in a soft nude or orange colour. On one accent nail, create a small orange oval, add a few curved lines for the pumpkin sections and finish with a tiny green or brown stem.
For a more understated result, keep the other nails plain.
You can also pair pumpkin art with cosy autumn shades such as caramel, cream and burnt orange.
Best for: Autumn nail designs, pumpkin lovers and daytime Halloween events.
4. Black and Orange Halloween Nails
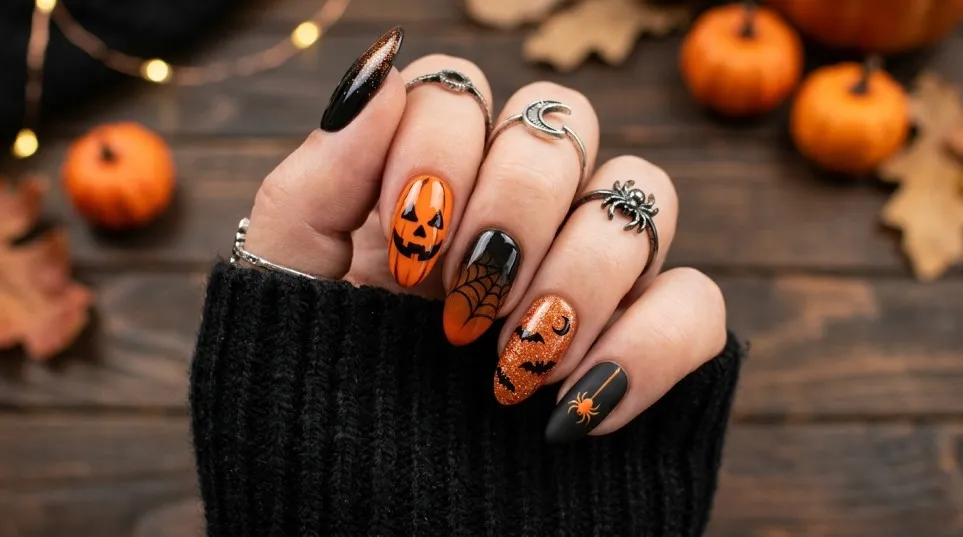
Black and orange are classic Halloween colours. Together, they create a bold look that is instantly recognisable.
Paint some nails black and others orange, or combine both shades in French tips, stripes or small geometric patterns.
If you prefer something more detailed, add tiny bats or stars over an orange base.
The trick is to keep the colours balanced. For example, three black nails, two orange nails and one small decorative accent can look more polished than putting several patterns on every finger.
Best for: Traditional Halloween looks, parties and themed outfits.
5. Spiderweb Nail Art
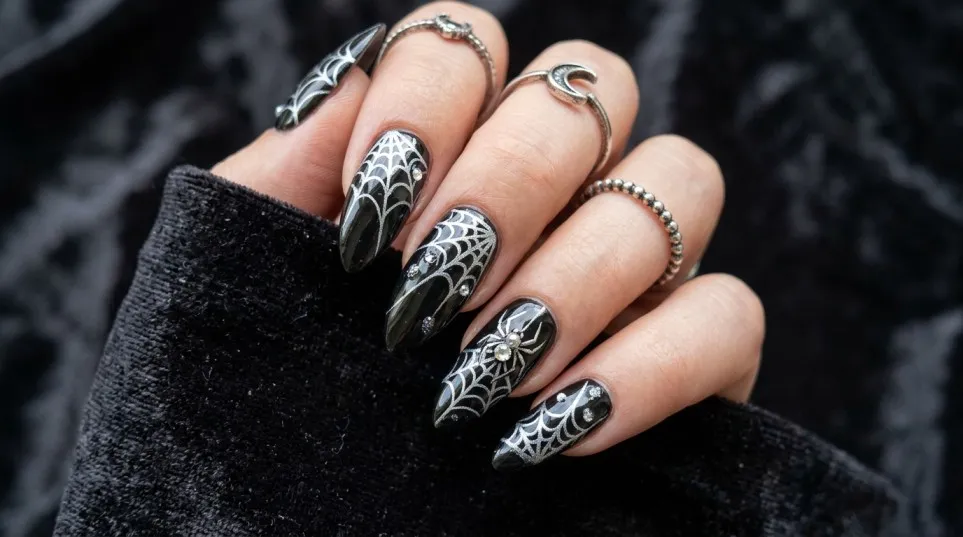
Spiderwebs are a good option if you want a design that feels spooky but still stylish.
Begin with a black, nude, burgundy or transparent base. Once it is dry, use a thin nail-art brush to draw several curved lines from one corner of the nail. Connect them with smaller curved lines to create the web.
You can place the web on just one nail or use it as a detail across two fingers.
For a cleaner finish, keep the lines thin and leave enough space between them.
Best for: Elegant Halloween nails, dark manicures and people who enjoy fine details.
6. Blood-Drip Halloween Nails
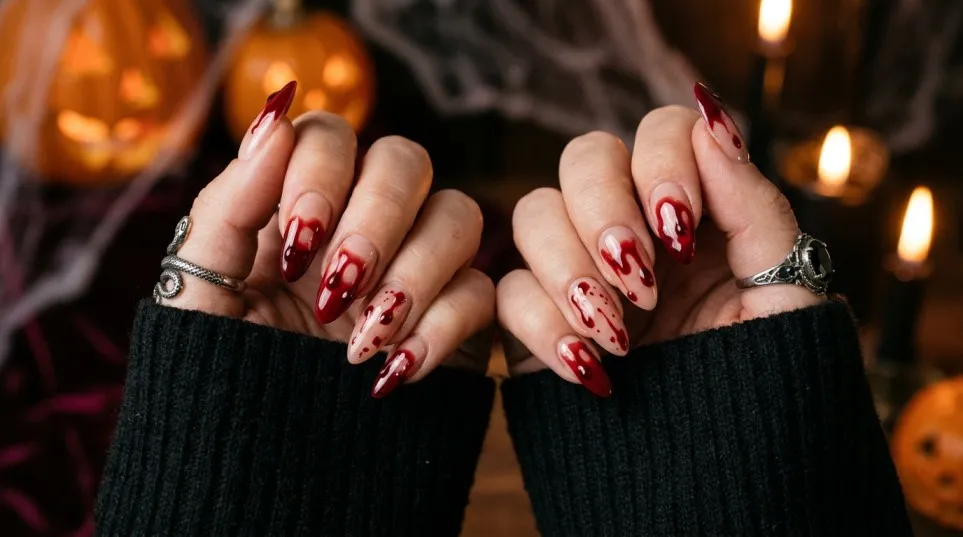
Blood-drip nails are ideal if you want a dramatic manicure for a Halloween party.
Apply a black, nude or pale pink base. Use a dark red polish to create small rounded drops near the top of the nail, then pull the colour down into uneven lines.
Finish with a glossy top coat once the artwork is dry.
You can also try a burgundy French manicure with red drip details for a less graphic look.
Best for: Gothic outfits, vampire costumes and bold Halloween nail art.
7. Halloween French Tip Nails
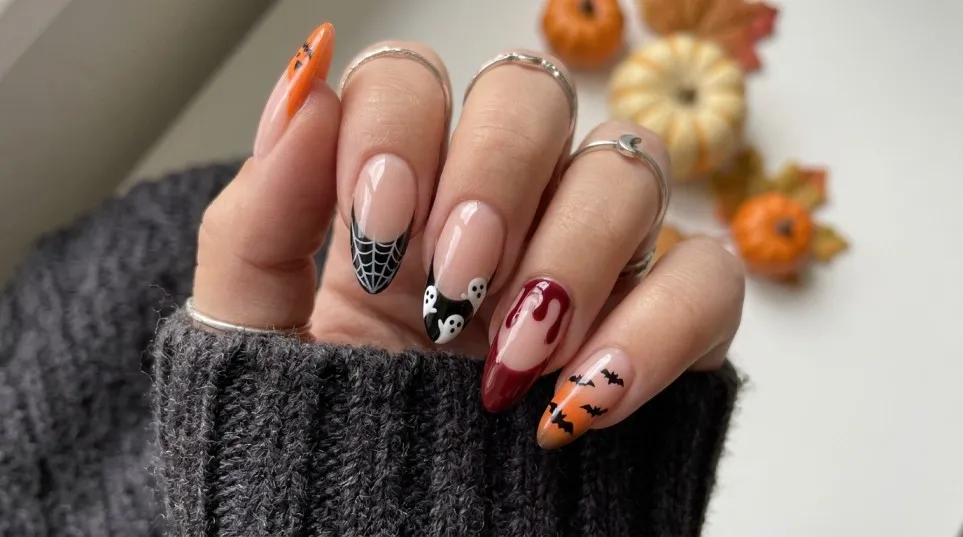
French tips do not always need to be white. For Halloween, replace the traditional white tips with black, orange, deep red or dark purple.
A black French manicure over a sheer pink base creates a neat, wearable look. If you want something more playful, add a tiny ghost or bat to one nail.
This style is useful if you want a seasonal manicure that still looks appropriate for work or everyday activities.
Best for: Elegant Halloween nails, almond shapes and people who prefer simple designs.
8. Cute Black Cat Nails
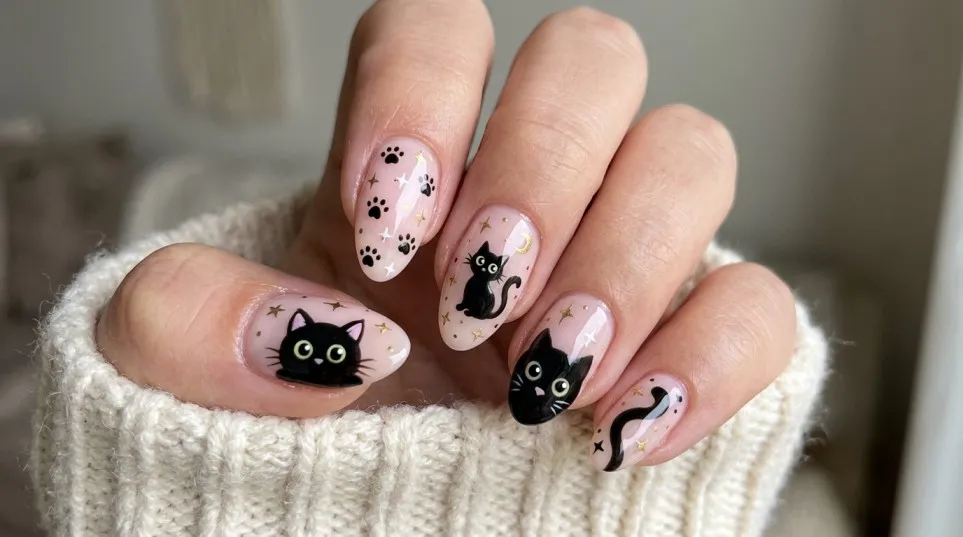
Black cats are a natural fit for Halloween nail art.
Choose a pale pink or nude base, then paint a small black cat face on one nail. Add pointed ears, two tiny eyes and a simple nose. Alternatively, paint a black cat silhouette against an orange background.
If freehand drawing feels difficult, look for Halloween nail stickers on Amazon UK.
Stickers can make detailed designs easier, especially when you are working with your non-dominant hand.
Best for: Cute nail designs, cat lovers and beginner-friendly manicures.
9. Witchy Purple Nails
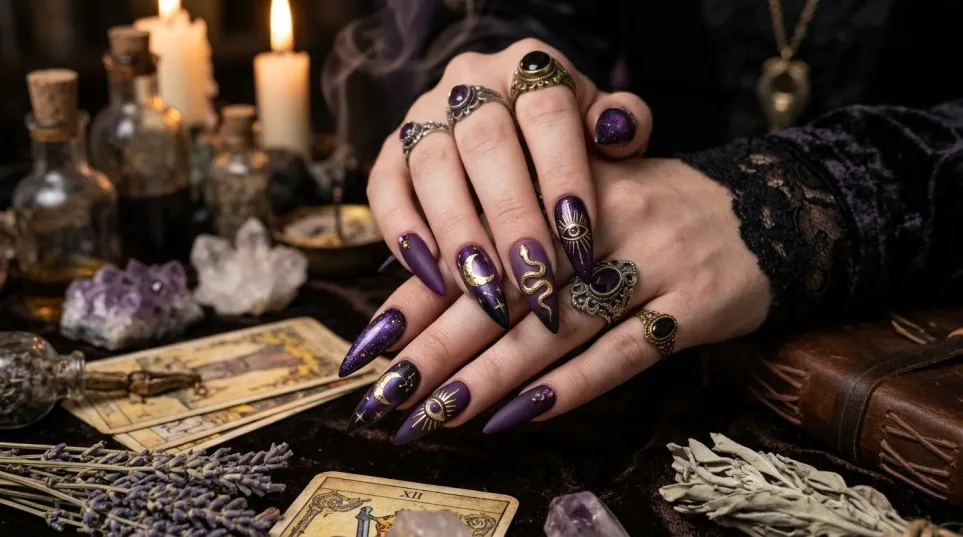
Deep purple is a great alternative to black if you want something dark but slightly different.
Try plum, aubergine or smoky violet polish. Add tiny moons, stars or silver dots to create a magical theme.
You can keep the design simple with a single purple shade or combine it with black accents for a more dramatic result.
This manicure also works beyond Halloween, making it a practical choice if you do not want to change your nails immediately after the celebration.
Best for: Witch-inspired looks, autumn manicures and elegant nail designs.
10. Vampire Red Nails
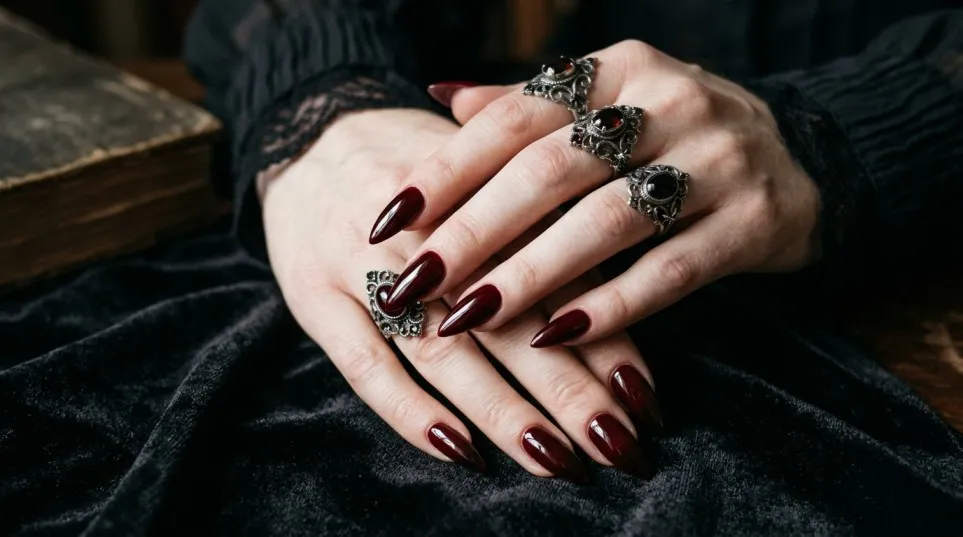
Deep red, burgundy and black cherry shades create a rich vampire-inspired look.
Apply a dark red polish and finish with a glossy top coat. For a more detailed manicure, add black French tips or a subtle red-to-black effect.
Long almond and coffin-shaped nails can make the look feel dramatic, but short nails also look beautiful in deep red.
If you want to wear your manicure throughout autumn, choose a classic burgundy shade rather than adding obvious Halloween pictures.
Best for: Gothic nail designs, evening events and sophisticated seasonal styles.
11. Glow-in-the-Dark Halloween Nails
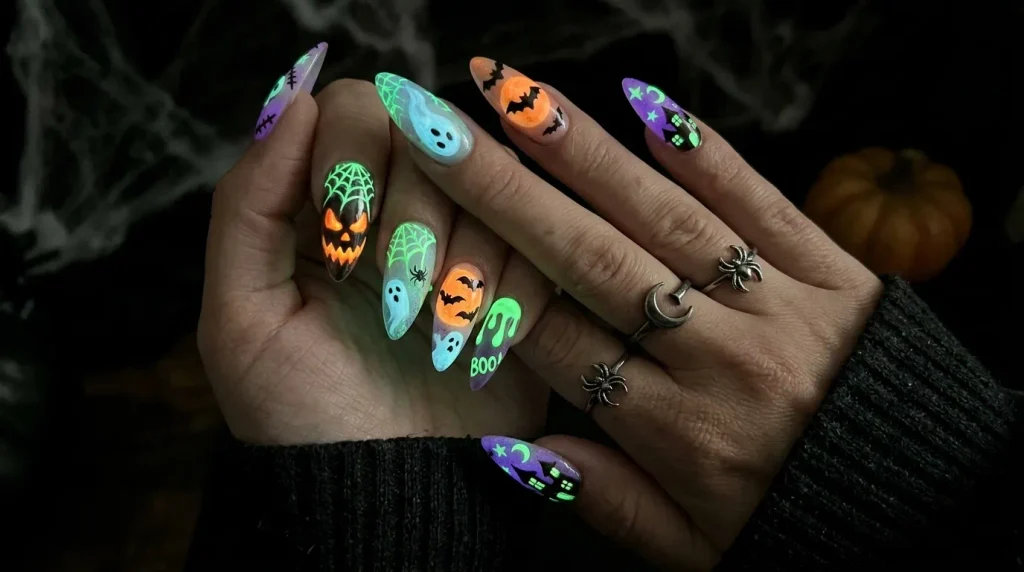
Glow-in-the-dark nail polish adds a fun surprise to your manicure.
Choose a suitable glow polish or nail-art product and follow its specific application instructions. You can use it over a dark base or add small glowing ghosts, stars and spiderwebs.
Remember that glow products vary. Some need exposure to light before they glow, and the effect may fade over time.
If you are using gel products, follow the manufacturer’s curing instructions and avoid getting uncured product on your skin.
Best for: Halloween parties, costumes and playful nail art.
12. Halloween Nails with Bats
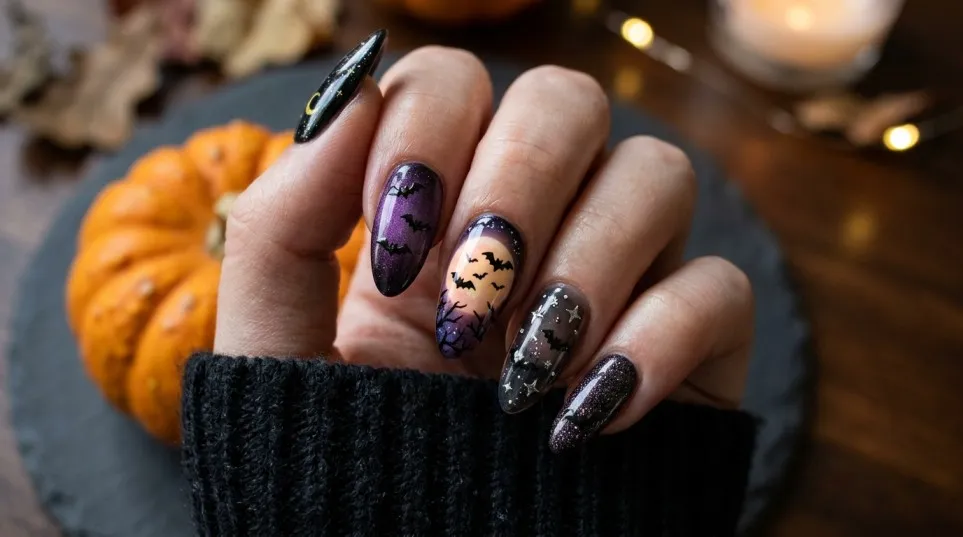
Bat nail art can be subtle or dramatic depending on the size and colour of the design.
Paint your nails nude, pale pink or deep purple. Then use a fine brush to draw tiny black bat silhouettes. Place them on one or two nails to avoid overcrowding the manicure.
For a night-sky effect, add a small moon or a few silver stars.
This design is particularly attractive on short oval and almond-shaped nails.
Best for: Minimalist Halloween nail designs and spooky seasonal details.
13. Skeleton and Skull Nails
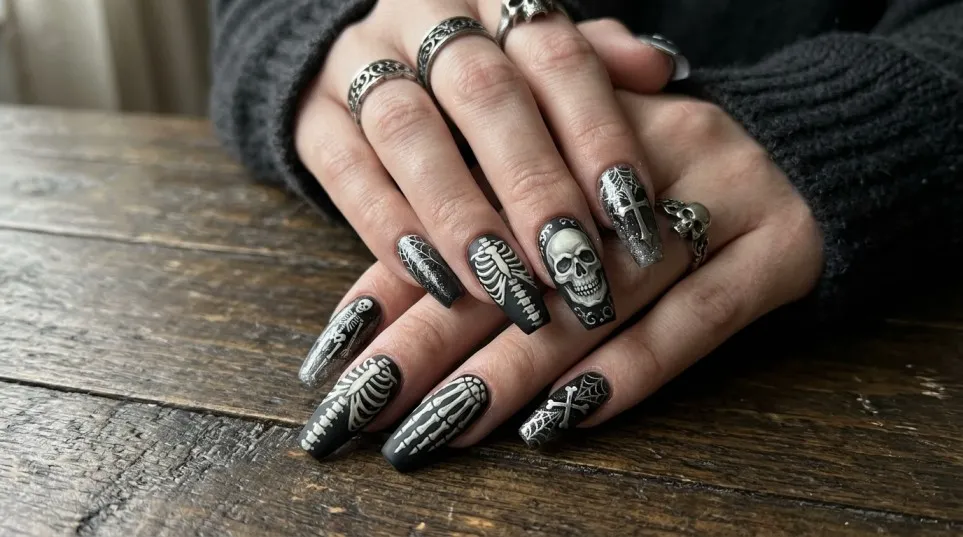
Skeleton nails are a good choice for people who enjoy traditional Halloween themes.
A black base with white bone details creates a strong contrast. Alternatively, use a nude base with small skulls for a softer look.
You can paint a skull on a single accent nail or create simple bone patterns across several fingers.
Because skull designs need a little more detail, beginners may find nail stickers easier than painting each feature by hand.
Best for: Gothic manicures, horror-inspired costumes and bold nail art.
14. Minimalist Halloween Nails
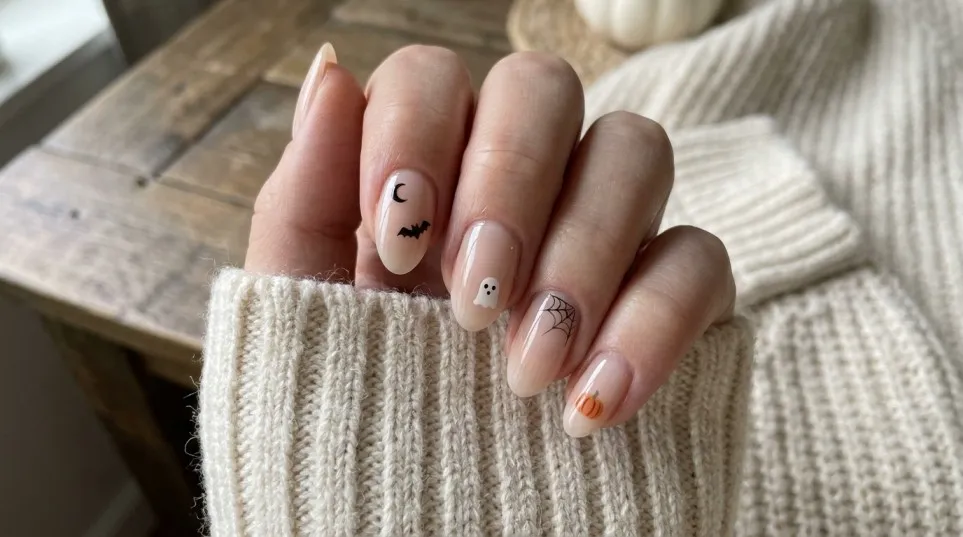
Not everyone wants pumpkins, ghosts and bright orange nails. Minimalist Halloween nail designs offer a more understated alternative.
Start with a clear, nude or milky pink base. Add a tiny black star, a single bat, a small ghost or a delicate spiderweb.
Leave most of the nail uncovered to create negative space. This helps the design look clean rather than busy.
Minimalist nail art is also a practical choice if you want a manicure that can remain attractive after Halloween has passed.
Best for: Everyday wear, office-friendly manicures and understated styles.
15. Halloween Ombre Nails
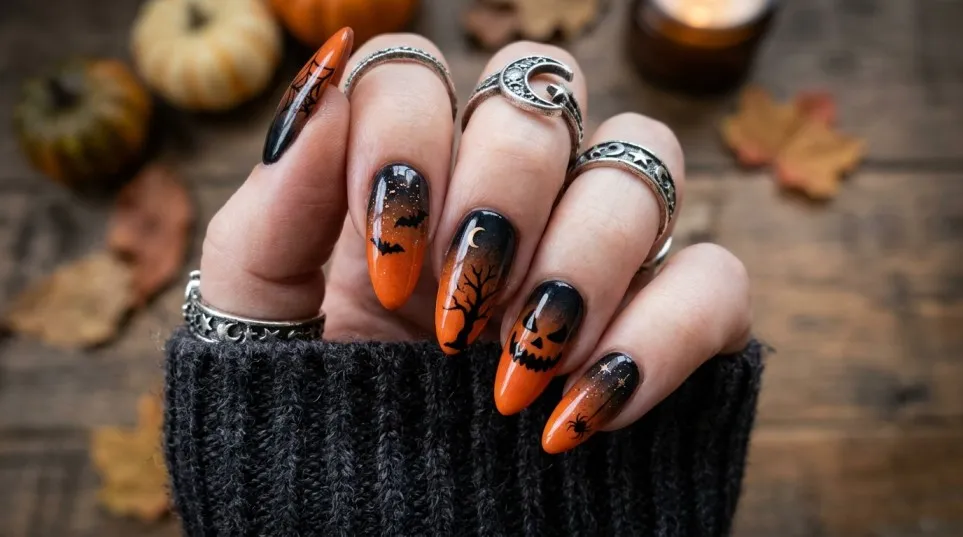
Ombre nails blend two or more colours to create a soft transition.
For Halloween, try black fading into red, purple blending into black or orange merging into a darker burnt-orange shade.
You can create a simple polish ombre with a small makeup sponge, although the result may need a few layers to become smooth. Protect the skin around your nails and apply thin coats.
If you prefer a more polished finish, a nail technician can create a smoother blend.
Best for: Long nails, dramatic manicures and people who enjoy colour effects.
16. Green Slime Nails
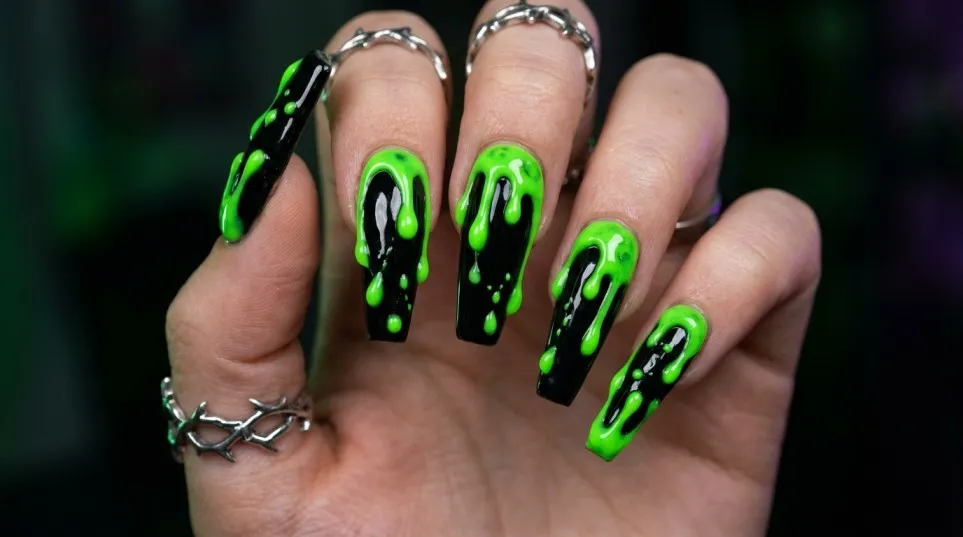
Bright green slime nails are perfect if you want a playful, slightly creepy manicure.
Use a lime-green shade over black, white or nude polish. Create uneven dripping shapes along the tips, then finish with a glossy top coat.
You can also add green slime details to only one or two nails while keeping the others black.
This look pairs well with monster costumes and colourful Halloween outfits.
Best for: Fun Halloween parties, bold colours and creative nail art.
17. Haunted House Nail Art
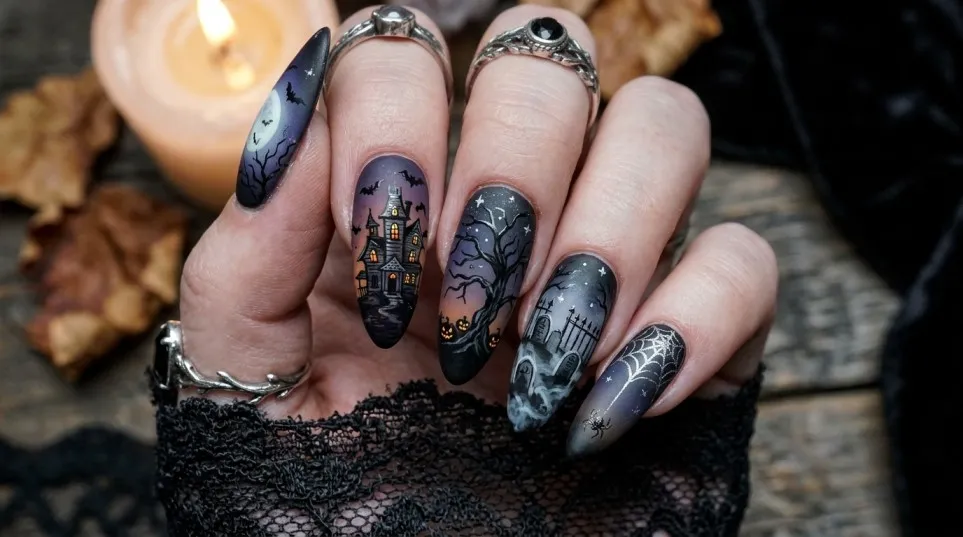
A tiny haunted house can turn a simple manicure into a miniature Halloween scene.
Start with a dark blue, grey or black background. Add a small house silhouette, a few yellow windows and tiny black tree shapes.
This design works best when the artwork is kept simple. You do not need to paint every brick or window to make the scene recognisable.
For more detailed designs, consider booking a nail artist who specialises in hand-painted nail art.
Best for: Creative manicures, Halloween events and experienced nail-art enthusiasts.
18. Glitter Halloween Nails
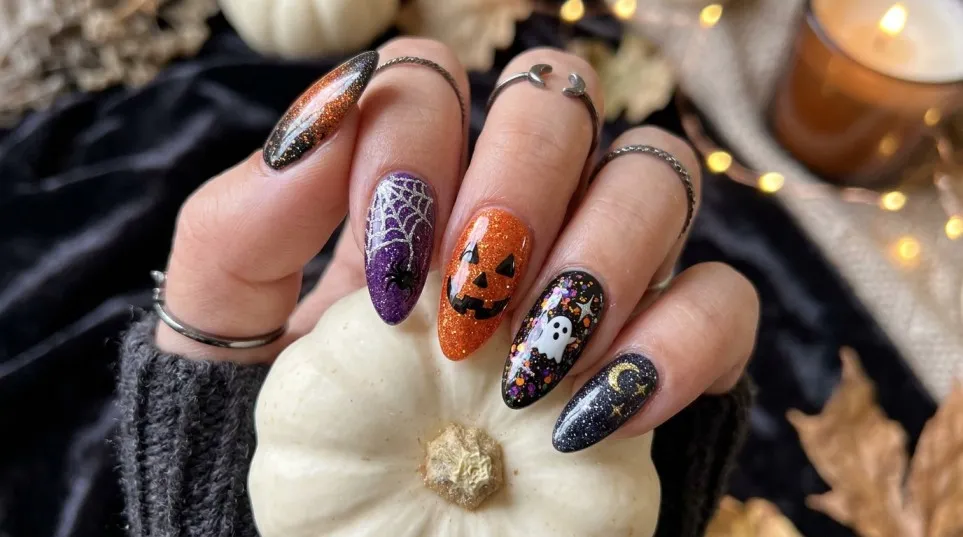
Glitter is an easy way to add sparkle without learning complicated nail-art techniques.
Apply black, purple, orange or burgundy polish, then add a suitable glitter top coat. You can also place glitter on just the tips for a French-style effect.
Silver glitter looks striking against black, while copper and gold-toned glitter complement orange and brown shades.
For easier removal, consider using a suitable peel-off base coat with regular polish, following the product instructions.
Best for: Party nails, glamorous Halloween looks and quick DIY manicures.
19. Halloween Aura Nails
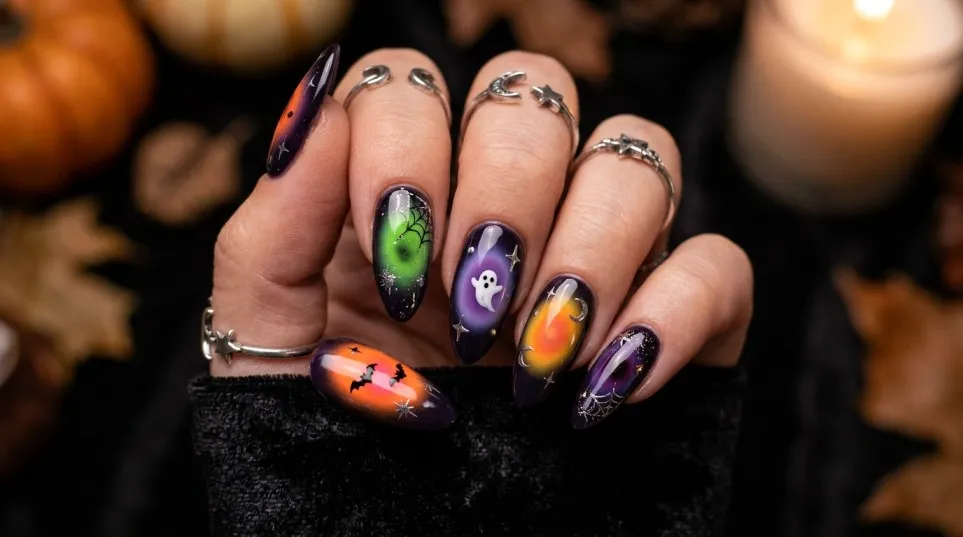
Aura nails feature a soft, rounded blend of colour that creates a glowing effect in the centre of the nail.
For a Halloween-inspired version, combine dark red with black, purple with charcoal or orange with brown.
This style is more about colour and atmosphere than recognisable Halloween pictures. That makes it a good choice for people who want something fashionable but not overly themed.
Depending on the finish you want, a nail technician may use an airbrush or other specialist techniques to create a smooth effect.
Best for: Trend-led manicures, autumn colours and modern nail art.
20. Chrome Halloween Nails
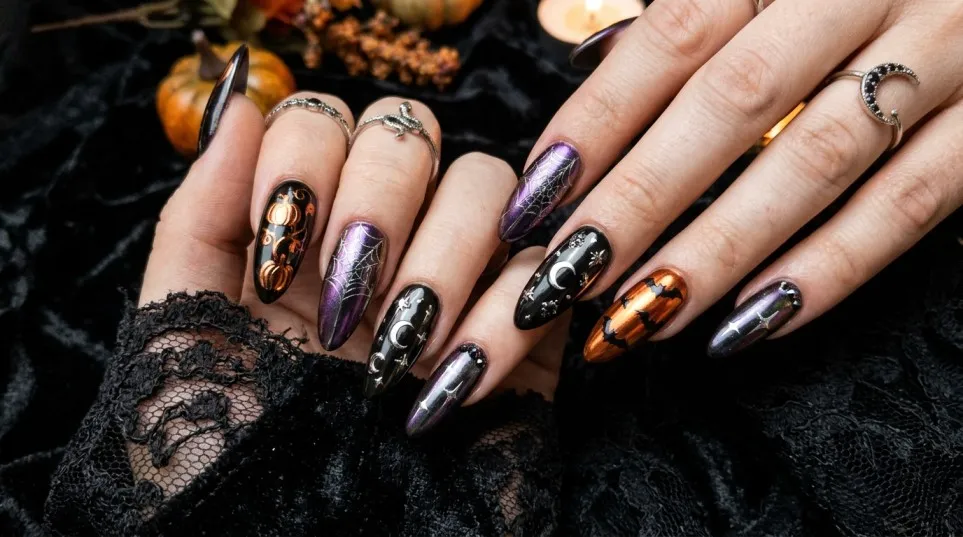
Chrome finishes give nails a reflective appearance and can make a simple design look more striking.
Try silver chrome over black, smoky purple with a reflective finish or a dark red manicure with a subtle metallic effect.
For a more recognisable Halloween theme, add tiny bat silhouettes or spiderweb details.
Chrome products differ, so check whether the powder or polish you choose is compatible with your base and top coat.
Best for: Glamorous Halloween nails, evening events and modern salon manicures.
21. Halloween Nails with Rhinestones
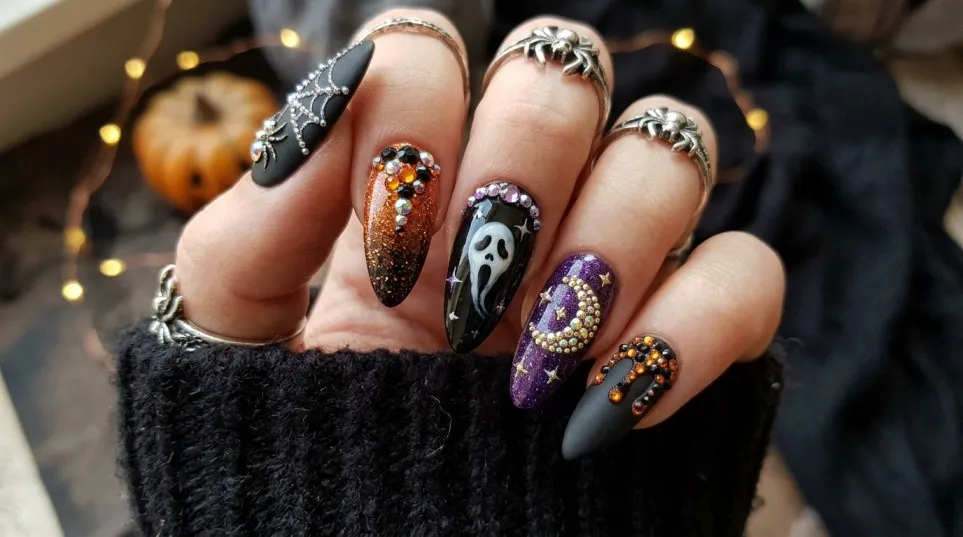
Rhinestones add sparkle and texture to Halloween nail art.
You can place a few small stones around a spiderweb, create a sparkling moon or add tiny gems to a black manicure.
Use products intended for nail decoration and follow the manufacturer’s instructions. Avoid placing embellishments where they are likely to catch on clothing or hair.
If you prefer a practical manicure, use small decorations on just one or two nails.
Best for: Party manicures, glamorous costumes and statement nail designs.
22. Short Halloween Nail Designs
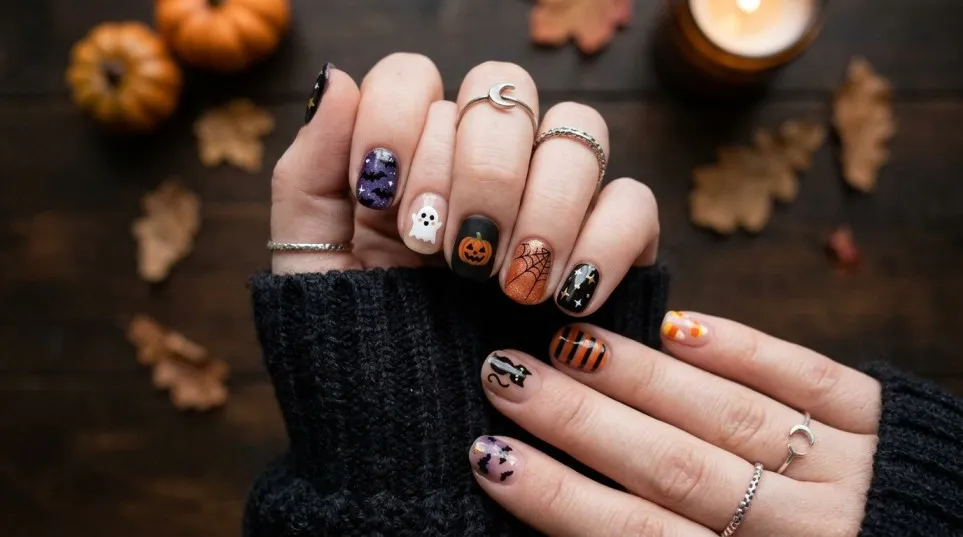
Short nails can look just as creative as long extensions.
The key is choosing patterns that fit the available space. Tiny ghosts, simple pumpkins, black French tips, small stars and minimalist spiderwebs are all good options.
Avoid trying to squeeze too many details onto each nail. A single clear motif usually looks better than several tiny drawings competing for attention.
If your nails are naturally short, file them into a consistent round or soft-square shape before applying polish.
Best for: Natural nails, practical lifestyles and beginners.
23. Almond Halloween Nails
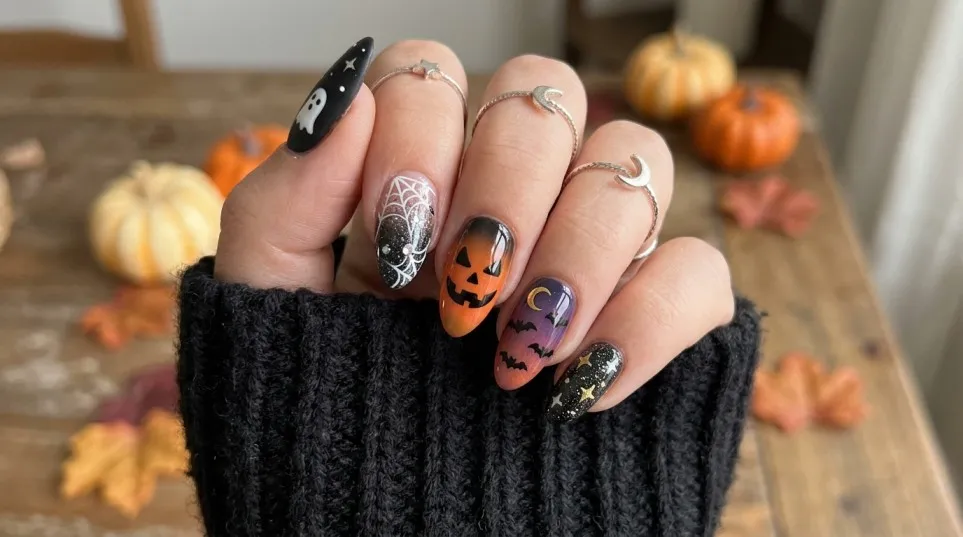
Almond nails have tapered sides and a rounded point. Their shape provides a useful canvas for longer designs.
Try black French tips, red ombre, tiny bats or a mix of plain dark nails and detailed accent nails.
Because almond nails can already look elegant, you do not need complicated artwork to make them feel seasonal.
Choose a design that complements your usual style rather than selecting a pattern simply because it is popular.
Best for: Elegant Halloween manicures and medium-to-long nails.
24. Halloween Press-On Nails
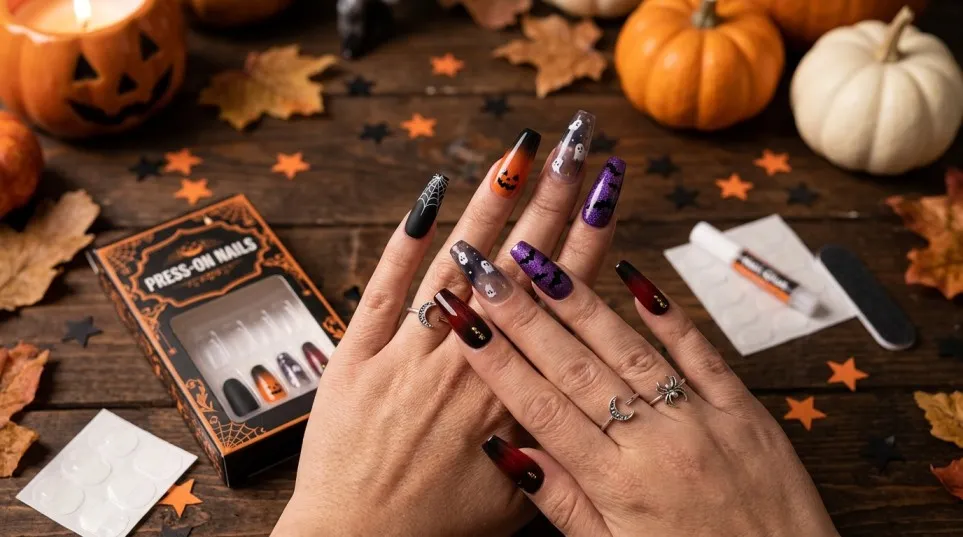
Press-on nails are a convenient option if you want detailed nail art without painting every design yourself.
You can find sets featuring ghosts, pumpkins, spiderwebs, black French tips and gothic patterns. Choose a size and shape that fit your natural nails comfortably.
Before purchasing, check the set’s measurements, included adhesive, application instructions and removal guidance.
For shopping inspiration, browse Halloween press-on nails on Amazon UK.
Press-ons can be useful for a single event, but they still need correct application and removal. Never force a nail off if it does not release easily.
Best for: Quick manicures, beginners and people who want ready-made designs.
25. Mix-and-Match Halloween Nails
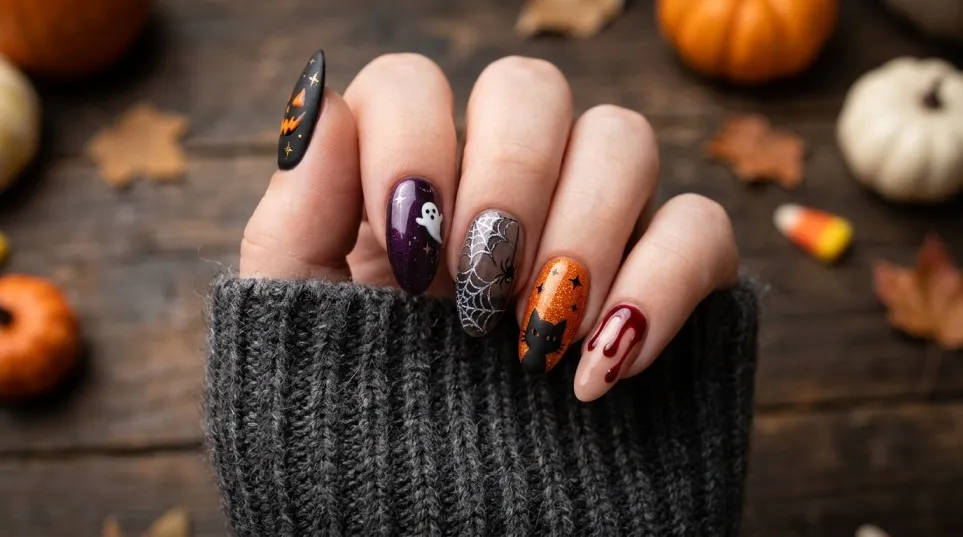
If you cannot choose just one design, combine several related ideas into a single manicure.
For example, use glossy black on three nails, a ghost on one accent nail and a spiderweb on another. Alternatively, combine pumpkin art, orange French tips and small stars.
The secret is to keep the colours consistent. Black, orange, white and nude work well together, while burgundy, black and silver create a more dramatic palette.
A mix-and-match manicure lets you express your personality without committing to the same pattern on every finger.
Best for: Creative nail lovers, Halloween parties and personalised manicures.
How to Create an Easy Halloween Nail Design at Home
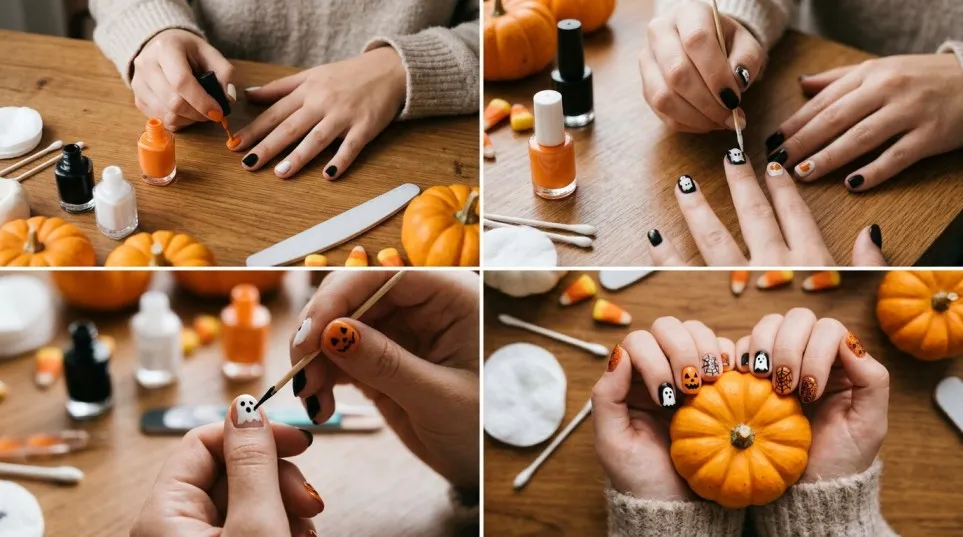
You do not need professional training to create a simple Halloween manicure. Start with a small design and build your skills gradually.
For this tutorial, we will create a cute ghost nail design using regular nail polish.
Step 1: Gather Your Nail Art Supplies
You will need:
- Nail polish remover.
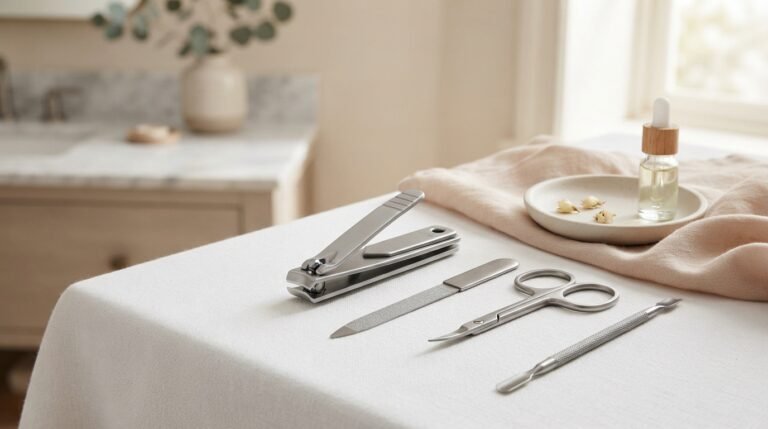
- A nail file and a gentle cuticle pusher.
- A base coat.
- A nude, pale pink or clear polish.
- White nail polish.
- Black nail polish.
- A fine nail-art brush or dotting tool.
- A top coat.
You can find nail-art brush sets on Amazon UK, nail dotting tools on Amazon UK and nail-art top coats on Amazon UK.
You do not need to buy every tool at once. A basic brush set and a few suitable polishes are enough to get started.
Step 2: Prepare Your Nails
Remove old polish and wash your hands. File your nails into your preferred shape and gently tidy the surrounding skin without cutting or damaging it.
Avoid applying polish over broken, irritated or infected skin.
Next, apply a thin layer of base coat. Allow it to dry according to the product instructions.
A good base helps create a more even finish and can make the manicure easier to remove.
Step 3: Apply Your Base Colour
Apply one thin coat of nude, pale pink or clear polish.
Allow it to dry before adding another coat if the colour needs more coverage.
Thin layers are generally easier to control than one thick coat. They are also less likely to smudge while you work on the design.
Step 4: Paint the Ghost Shapes
Use white polish to create a small rounded shape on your chosen accent nails.
Make the top rounded and the bottom slightly wider. Add two or three small curves at the bottom to suggest the ghost’s flowing shape.
If you are new to nail art, practise the shape on paper first. You can also use a small dotting tool to make the body easier to form.
Let the white polish dry before adding the facial details.
Step 5: Add the Eyes and Mouth
Dip a fine brush or dotting tool into black polish.
Add two small dots for the eyes and a tiny dot or short line for the mouth. Keep the details simple so the ghost remains easy to recognise.
If you make a mistake, wait until the polish is dry before carefully correcting it with a small brush and suitable polish remover.
Step 6: Finish with a Top Coat
Once the artwork has dried completely, apply a suitable top coat.
This adds shine and helps protect the design from everyday wear. It cannot prevent every chip, so avoid using your nails as tools.
Allow the manicure to dry fully before handling objects that might mark the surface.
Congratulations! You now have a simple DIY Halloween nail design that works for a party, a seasonal outing or everyday wear.
What Nail Art Products Are Worth Buying?
Choosing the right supplies can make home manicures easier and more enjoyable. However, you do not need an expensive professional kit to create attractive Halloween nails.
Here are four useful product categories to consider.
1. Nail-Art Brushes
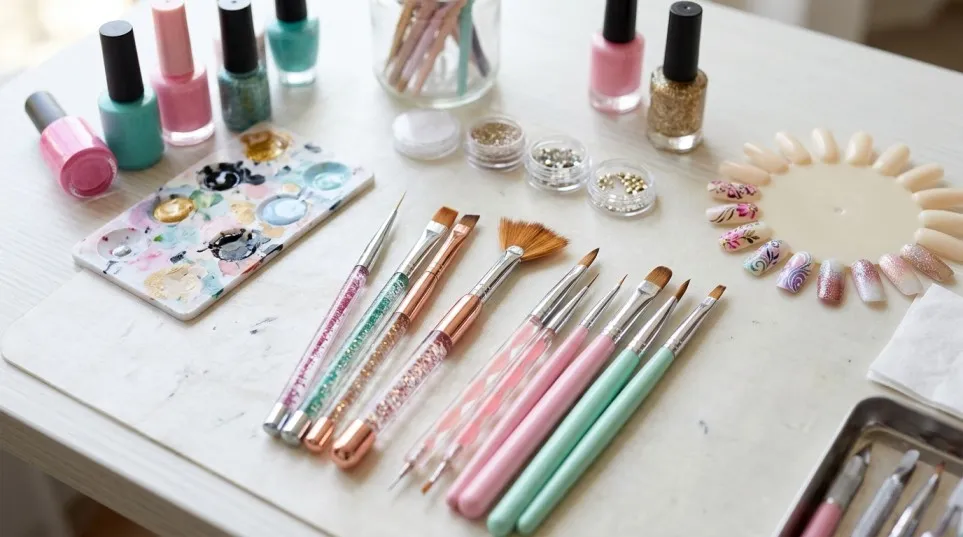
A fine detailing brush helps you paint thin lines, spiderwebs, bat wings and small facial features.
Look for a set that includes different brush lengths and sizes. A brush with a comfortable handle can also make detailed work easier to control.
Browse nail-art brushes on Amazon UK to compare available sets, prices and customer reviews.
Buying tip: Check the brush dimensions and review photographs before purchasing. A large set is not necessarily better if the brushes are difficult to control.
2. Nail Dotting Tools
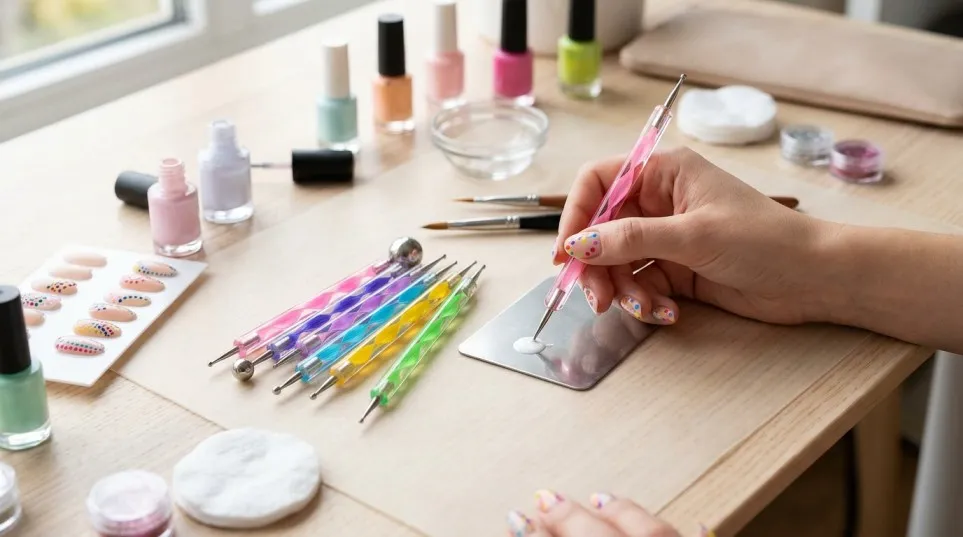
Dotting tools are useful for making ghost eyes, stars, small pumpkins and other rounded details.
Different tip sizes allow you to create small or large dots without needing advanced painting skills.
Explore nail dotting tools on Amazon UK if you want an affordable addition to your DIY manicure kit.
Buying tip: Choose a set with several tip sizes rather than paying extra for decorative handles you may not need.
3. Halloween Nail Stickers
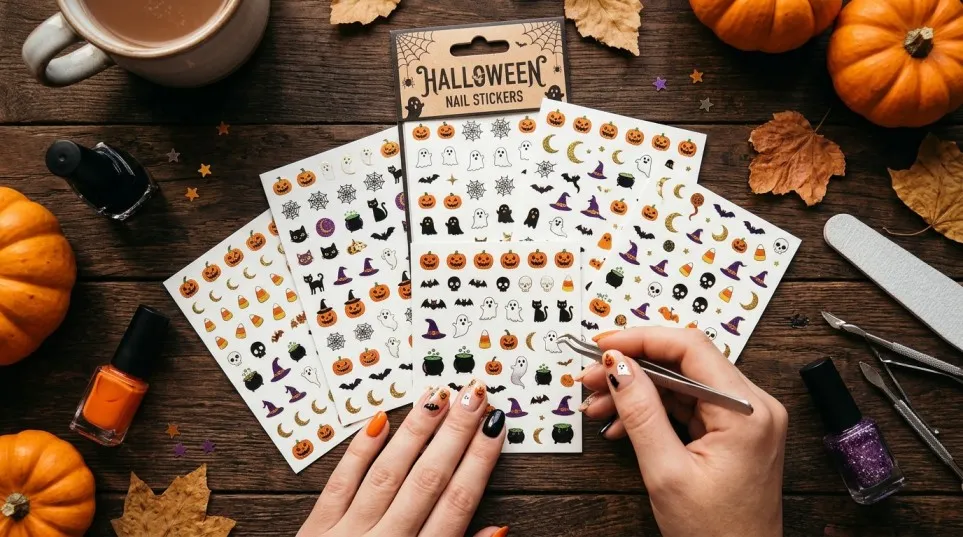
Nail stickers can save time when you want detailed artwork but do not feel confident painting it by hand.
Common designs include ghosts, pumpkins, bats, skulls and spiderwebs. Some are suitable for regular polish, while others are designed for use with particular nail systems.
Browse Halloween nail stickers on Amazon UK.
Buying tip: Read the application instructions carefully. Check whether the stickers are self-adhesive, water-transfer decals or designed for use with another product.
4. Nail Polish and Top Coat
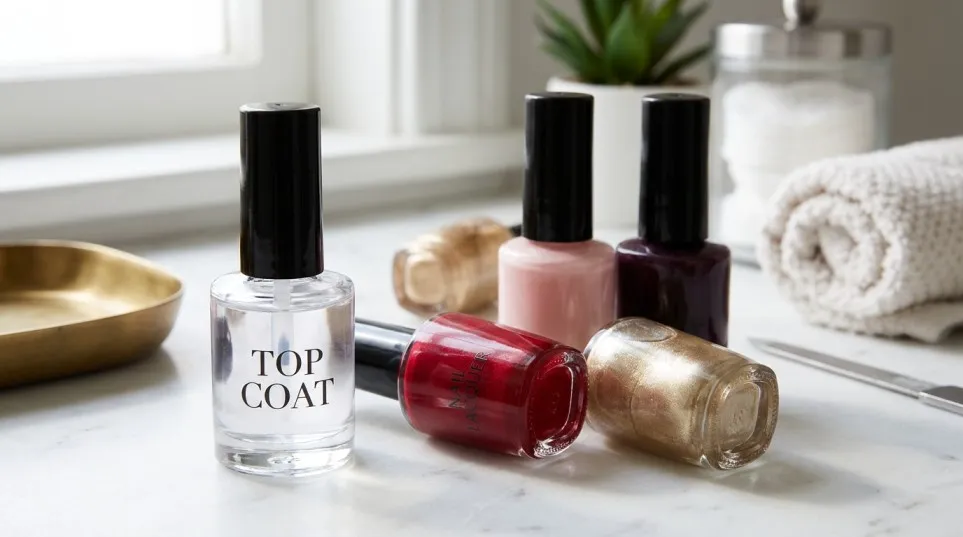
A small collection of good-quality colours is often more useful than a large kit containing shades you will rarely use.
For Halloween, consider black, white, orange, burgundy and a sheer nude. Add a suitable top coat to help protect the finished manicure.
Browse Halloween nail polish options on Amazon UK.
Buying tip: Compare the bottle size, finish, drying time, ingredients and customer feedback. Choose regular polish if you want a simple air-dry manicure, or use a gel system only when you understand its application and curing requirements.
Product availability, prices and reviews can change, so check the current listing before placing an order.
How to Make Your Halloween Manicure Last Longer
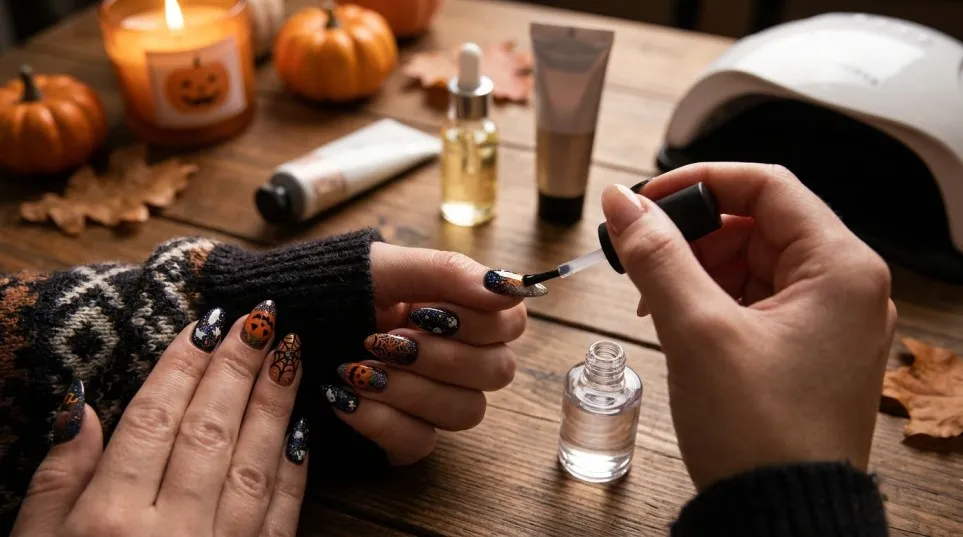
A beautiful design is more enjoyable when it stays neat for as long as possible.
Follow these practical tips:
- Prepare the nail surface. Remove old polish and clean the nails before application.
- Use thin coats. Thick layers can take longer to dry and may smudge more easily.
- Allow each layer to dry. Follow the polish manufacturer’s recommended drying times.
- Seal the free edge. When suitable for your polish system, lightly brush top coat across the tip of the nail.
- Protect your hands. Wear appropriate gloves when cleaning or washing dishes.
- Avoid picking at polish. Peeling it away can remove layers of the natural nail.
- Remove the manicure gently. Use a remover suited to the product and follow its instructions.
If you use gel polish, make sure the product is compatible with your lamp and follow the specified curing times. Avoid skin contact with uncured gel products, as they can cause allergic reactions.
If you develop itching, redness, swelling or other signs of a reaction, stop using the product and seek appropriate medical advice.
Should You Choose DIY Halloween Nails or a Salon Manicure?
Both options have advantages, and the right choice depends on your budget, available time and preferred design.
DIY nail art is ideal if you enjoy experimenting, want to save money or prefer simple designs. Regular polish, stickers and dotting tools can create many attractive looks at home.
A salon manicure may be a better choice if you want intricate hand-painted artwork, sculpted extensions, a specialist chrome finish or detailed designs that require professional experience.
Before booking, look at recent photographs of the technician’s work and ask about pricing, hygiene, products and removal. A clear reference photograph can help you explain exactly what you want.
If you choose a salon, remember that a complex design may cost more than a plain manicure. Ask for the total price before the appointment.
Ultimately, the best Halloween nail design is one that fits your style, budget and comfort level.
How to Choose the Right Halloween Nail Design for You
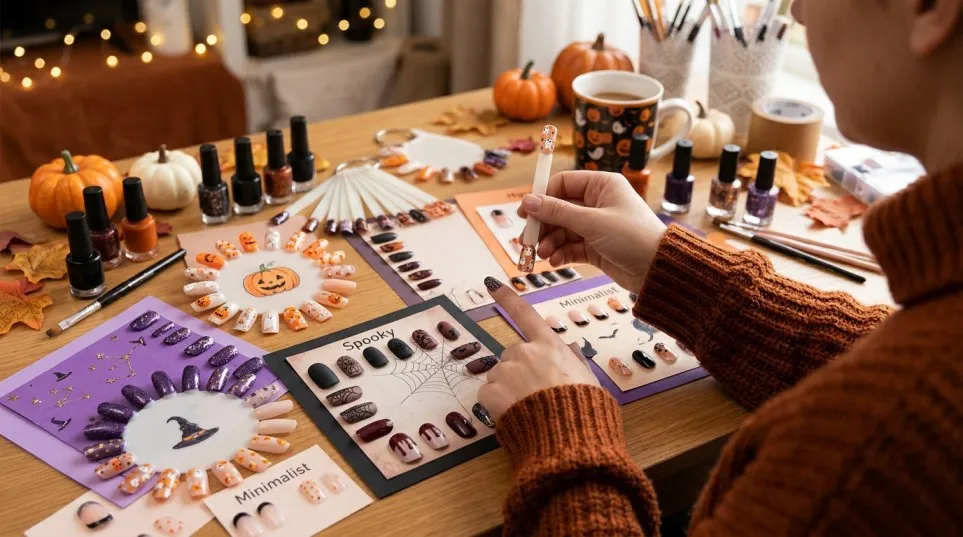
With so many options available, it helps to narrow your choices before buying products or booking an appointment.
- If you are a beginner: Start with ghost nails, stickers or black French tips.
- If you have short nails: Choose tiny ghosts, small bats or simple colour combinations.
- If you prefer elegant nails: Try burgundy polish, a black French manicure or delicate spiderwebs.
- If you want a dramatic look: Consider blood-drip art, black-and-red ombre or a gothic mix-and-match manicure.
- If you want something reusable for autumn: Choose black cherry, dark purple, chocolate brown or smoky chrome.
- If you have a Halloween costume: Match your nail colours to one or two details in the outfit rather than trying to include every costume element.
You can also save reference photographs before making your final decision. Seeing the design on a similar nail length and shape can help you judge whether it will suit your hands.
Final Thoughts
A great Halloween nail design does not have to be complicated, expensive or difficult to maintain. From cute ghost nails and tiny pumpkins to glossy black manicures and dramatic vampire-red tips, there is an option for almost every taste.
If you are new to nail art, begin with a simple design and a few basic tools. Nail stickers and dotting tools can make the process easier, while a fine brush gives you more freedom to create personalised details.
Before buying products, compare the available options, read customer reviews and check the instructions. A small, carefully chosen kit can be enough to create several different Halloween manicures.
Most importantly, choose a look that makes you feel comfortable and confident. Your nails should be an enjoyable part of your Halloween style, whether you prefer something cute, spooky, glamorous or understated.
Frequently Asked Questions About Halloween Nail Design
Related BIAB Guides
- 21 Halloween Nail Design Ideas 2026 That Are Easy, Cute and Stylish
- Halloween Nail Stickers: Easy Spooky Nail Art Ideas for Halloween
- Halloween Nails: 25 Spooky, Cute and Easy Nail Ideas to Try
Popular styles include black nails, ghost nail art, spiderwebs, pumpkin designs, blood-red French tips, vampire nails and minimalist Halloween manicures. The best choice depends on whether you prefer a cute, elegant or dramatic look.
Ghosts, small pumpkins, black French tips, tiny bats and minimalist stars work well on short nails. Simple artwork is usually easier to see and looks less crowded than complicated patterns.
Prepare your nails, apply a base coat and choose a simple design. Use a fine brush or dotting tool to create the artwork, allow each layer to dry and finish with a suitable top coat.
Black, orange, white, burgundy, deep purple and dark red are classic choices. Nude, silver, chocolate brown and smoky grey are also useful if you prefer a softer or more modern manicure.
Apply a nude or pale pink base, paint a small white ghost shape on an accent nail, and add two tiny black eyes. Allow the design to dry before applying a compatible top coat.
Press-on nails can be a convenient choice for parties and special occasions because the designs are ready-made. Check the sizing, adhesive, product instructions and removal method before buying.
Wear time depends on the nail product, application, nail condition and daily activities. Regular polish may chip sooner than some professionally applied systems, while press-ons and gel manicures have different care requirements. Follow the product instructions rather than relying on a guaranteed number of days.
Yes. Black, burgundy, dark purple, smoky chrome and simple French tips can transition easily into November. If you want a longer-lasting seasonal look, choose colours over character-based artwork.
Start with a nail file, base coat, a few regular polishes, a fine brush, a dotting tool and a top coat. Nail stickers are another useful option if you prefer not to paint detailed designs yourself.
Neither option is always better. Stickers are convenient and can provide consistent details, while hand-painted art gives you more freedom to customise the design. Choose based on your skill level, budget and the result you want.
Burgundy French tips, glossy black nails, delicate spiderwebs, tiny silver moons and nude nails with small ghost details are good options. Limiting the design to one or two accent nails can create a more understated finish.
You can compare nail-art brushes, dotting tools, stickers, polish and press-on nails through Amazon UK nail-art supplies. Check current prices, product specifications, delivery details and reviews before purchasing.
A plain black manicure, orange nails with one accent nail, or a simple ghost design is a good starting point. These styles require fewer tools and less detailed painting than elaborate skulls or haunted-house scenes.
Use a consistent colour palette, prepare the nails neatly, apply thin coats and keep the artwork clean. A glossy top coat or a well-executed minimalist design can look more polished than a manicure with too many competing details.
Consider your costume, outfit, nail length and how much time you want to spend on the manicure. Choose bold designs for dramatic costumes or a simple dark manicure if you want something that works for both the party and everyday wear.