Liquid Gel Nails: Types, Benefits, Application, and Expert Nail Care Guide
Liquid gel nails are a popular choice for anyone who wants beautiful, shiny, and long-lasting nails without the thick appearance of traditional artificial nails. Whether you have short natural nails, weak nails that break easily, or simply love a clean and stylish manicure, liquid gel nails can help you achieve an elegant look. They offer a beautiful combination of strength, flexibility, and shine, making them a great option for everyday wear and special occasions.
If you are thinking about trying liquid gel nails, understanding the right products and application methods is important. From choosing the best liquid gel nail kit to learning about different gel formulas, application steps, and safe removal techniques, this guide covers everything you need to know. With the right knowledge and proper nail care, you can enjoy a beautiful manicure while making a confident buying decision.
What Are Liquid Gel Nails?
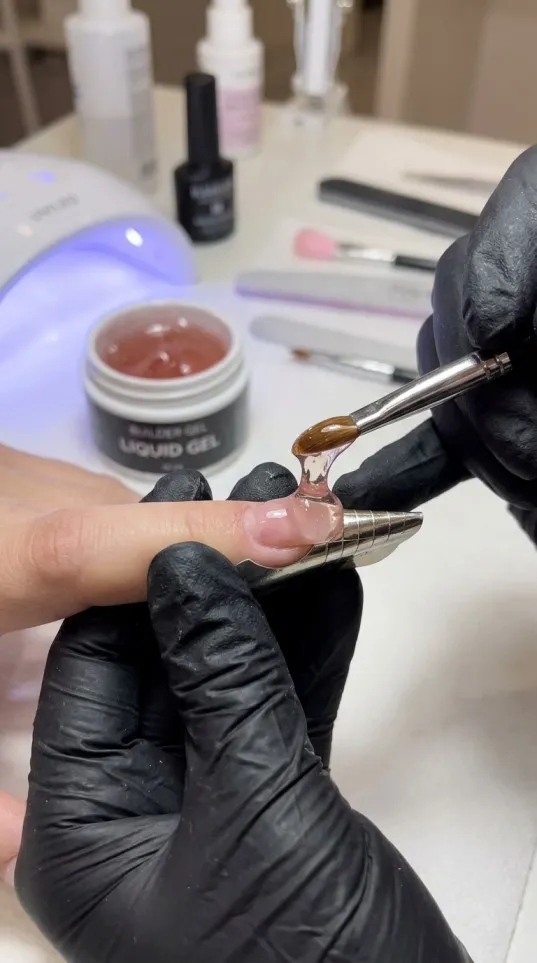
Liquid gel nails are nail enhancements or manicures created using a specially formulated gel product that starts as a liquid or thick gel and becomes hard after exposure to a UV or LED nail lamp.
Unlike traditional nail polish, which dries naturally in the air, gel products need a special lamp to cure (harden). Once properly cured, the gel creates a smooth, durable, and glossy finish.
The term liquid gel is sometimes used broadly in the nail industry. Depending on the product, it may refer to builder gel, soft gel, hard gel, or other UV/LED-curable nail products.
One popular option is builder gel, also known as BIAB (Builder In A Bottle). It is designed to add structure and support to natural nails while maintaining a neat and natural appearance.
According to L’Oréal Paris’s guide to builder gel nails, builder gel can strengthen natural nails, create extensions, and provide a protective layer.
For example, imagine you have naturally thin nails that break whenever they grow beyond your fingertips. A suitable builder gel overlay can provide additional support, helping you maintain your desired nail length.
That is one reason why liquid gel nails appeal to people who want both beauty and practicality.
How Do Liquid Gel Nails Work?
The science behind liquid gel nails is quite simple.
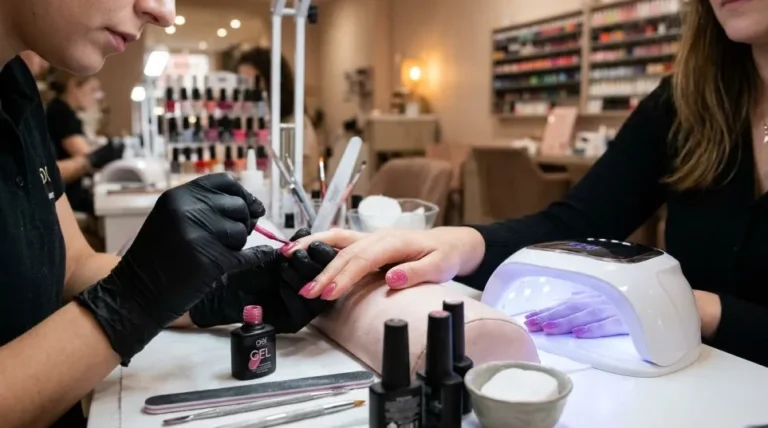
Gel nail products contain ingredients that react to specific UV or LED light wavelengths. When placed under a compatible nail lamp, the gel undergoes a process called polymerization. During this process, the liquid gel changes into a solid coating.
Here is how the process works:
- First, the natural nails are cleaned and prepared.
- Next, a suitable gel base or builder product is applied.
- The nail is placed under the recommended UV or LED lamp.
- The light activates the gel ingredients and hardens the product.
- Additional layers may be applied and cured when required.
- Finally, a top coat can be added to create a smooth, shiny finish.
The result is a manicure that is generally more resistant to everyday chipping than ordinary nail polish.
However, remember that curing time depends on the product formula and lamp specifications. Always follow the manufacturer’s instructions rather than guessing how long to keep your nails under the lamp.
Different Types of Liquid Gel Nails
Before purchasing liquid gel nail products, it helps to understand that not all gel formulas serve the same purpose.
Some are designed mainly for adding color, while others provide additional strength or help create nail extensions.
Here are the most common options.
1. Builder Gel
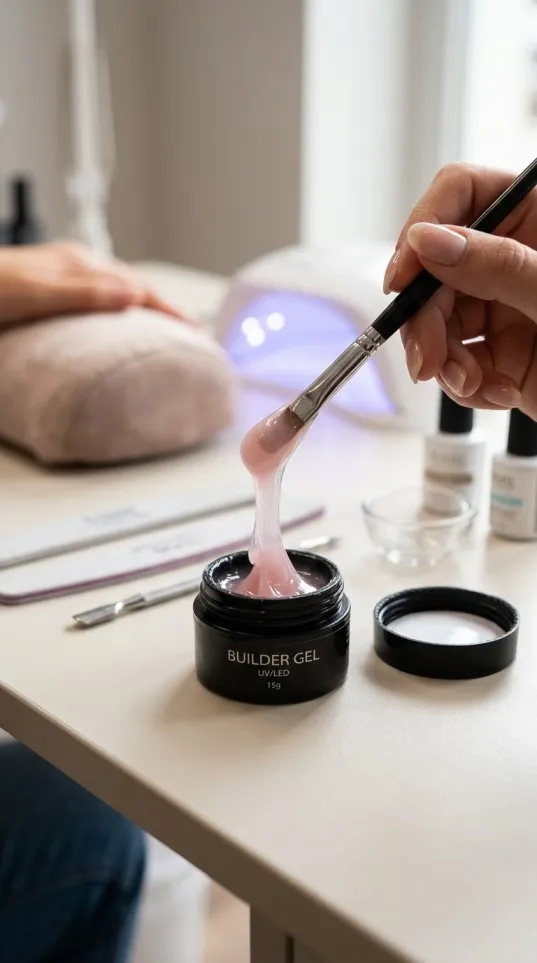
Builder gel is a thicker gel product designed to strengthen natural nails, build structure, and create additional length.
It is particularly useful for people with:
- Thin or flexible natural nails.
- Nails that break frequently.
- Short nails that need extra support.
- A preference for natural-looking nail enhancements.
Builder gel is available in bottles and pots. Bottle formulas are often called BIAB or Builder In A Bottle.
One advantage is that a skilled nail technician can create a balanced nail shape using the gel’s thicker consistency.
2. Soft Gel
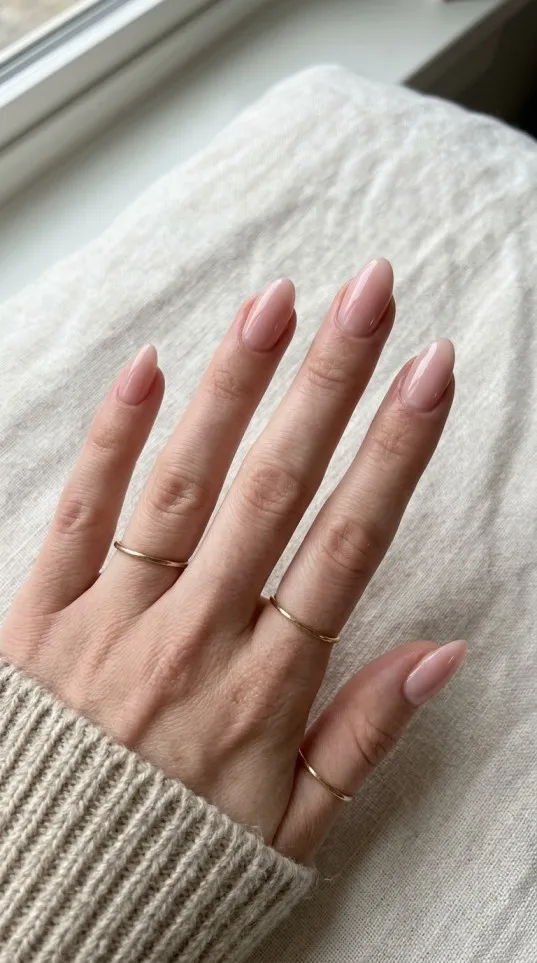
Soft gel is generally more flexible than hard gel. Many soft gel formulas can be removed through soaking in acetone, although the exact removal process depends on the product.
Soft gel is commonly used for gel polish, certain builder products, and full-cover nail extensions.
It is a suitable option when flexibility and easier removal are priorities.
3. Hard Gel
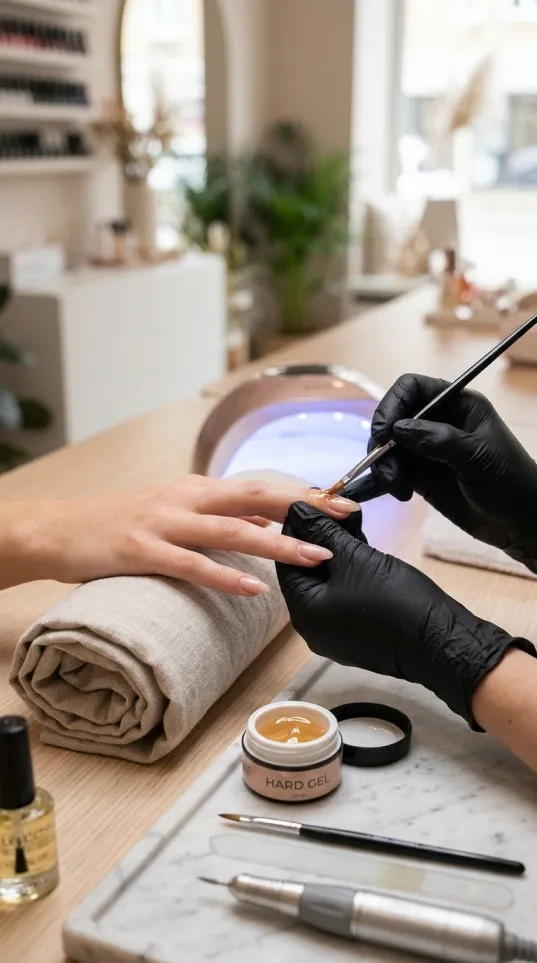
Hard gel creates a strong and durable nail enhancement.
It is often used for sculpted extensions and longer nail shapes. Unlike many soft gel products, traditional hard gel cannot be completely dissolved in acetone.
Instead, it generally requires careful filing by a trained nail professional.
4. Gel Polish
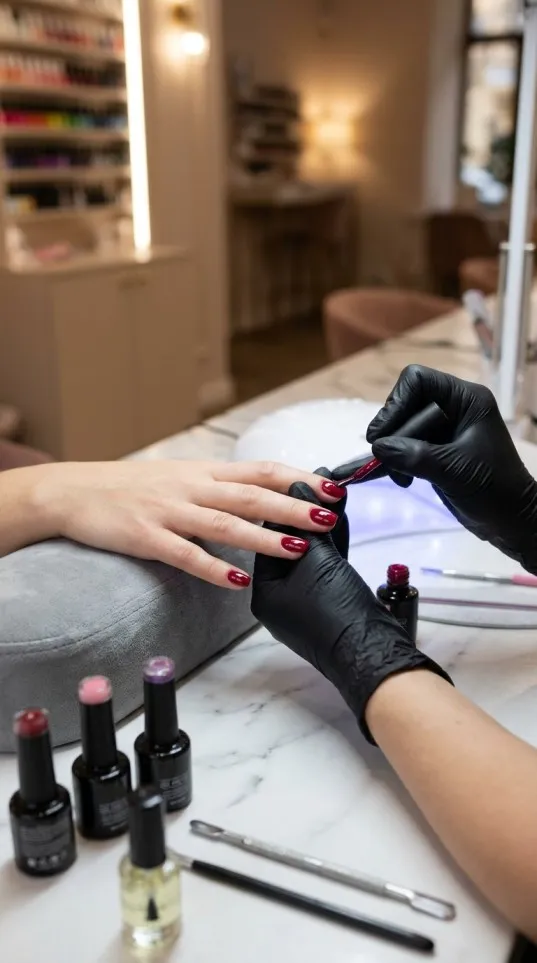
Gel polish is thinner than builder gel and is mainly designed to add color and shine.
It is available in many shades, including:
- Nude and beige.
- Light pink.
- Classic red.
- Milky white.
- Black.
- Glitter and metallic finishes.
If your natural nails already have a good shape and you simply want a beautiful, glossy manicure, gel polish may be enough.
5. Polygel
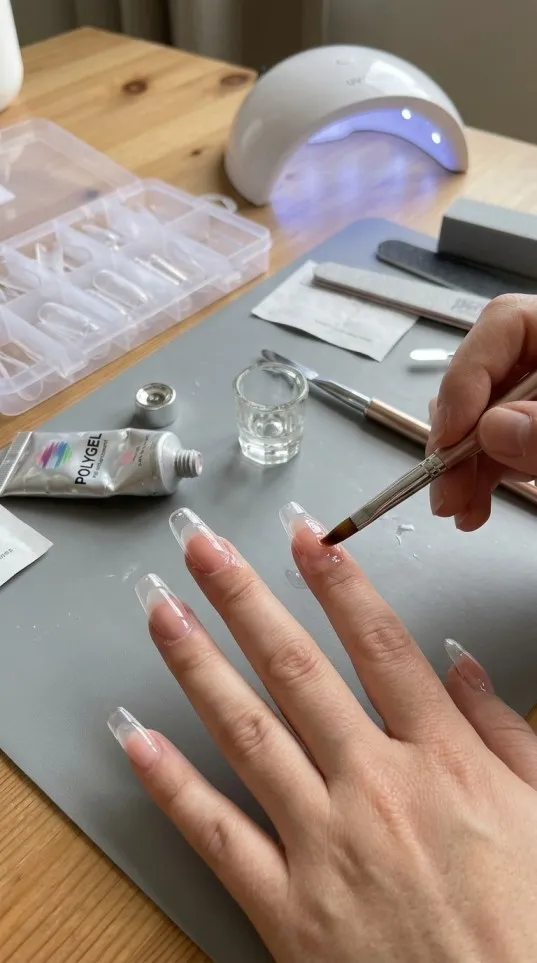
Polygel is another nail enhancement material that combines characteristics associated with acrylic and gel systems.
It usually has a thicker, putty-like consistency and is shaped using a brush and suitable slip solution.
Although it is sometimes discussed alongside liquid gel nails, it is a different type of nail product.
Liquid Gel Nails vs. Acrylic Nails: What Is the Difference?
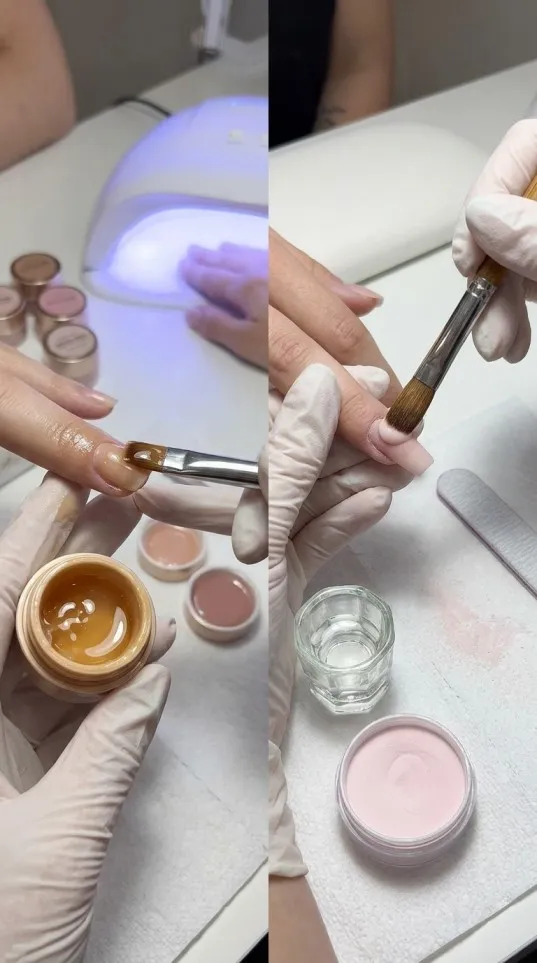
Many people struggle to choose between liquid gel nails and acrylic nails.
Both can create attractive nail enhancements, but their application methods and characteristics are different.
| Feature | Liquid/Builder Gel | Acrylic Nails |
|---|---|---|
| Application | Gel is applied and shaped | Liquid monomer is mixed with powder |
| Hardening | Requires UV/LED curing | Usually hardens in the air |
| Appearance | Can look natural and glossy | Can be natural or more sculpted |
| Flexibility | Depends on the gel formula | Generally more rigid |
| Smell | Usually less noticeable during application | Often has a stronger odor |
| Removal | Depends on soft or hard gel | Usually requires soaking or filing |
| Best for | Natural overlays and gel enhancements | Sculpted length and structured enhancements |
So, which one should you choose?
If you prefer a lightweight-looking manicure with a natural finish, liquid gel nails may be worth considering.
On the other hand, if you want very long, sculpted extensions, acrylics may suit your needs better.
Neither option is automatically healthier. Proper application, maintenance, and removal matter more than simply choosing one product over another.
Top Benefits of Liquid Gel Nails
There are several reasons why people choose liquid gel nails instead of traditional nail polish.
Let’s look at the main advantages.
1. A Natural and Elegant Appearance
One of the biggest attractions of liquid gel nails is their ability to create a neat and natural-looking finish.
A properly applied builder gel overlay can add strength without making the nails look excessively thick.
For everyday use, soft pink, nude, and milky white shades are especially attractive.
2. Extra Support for Weak Nails
If your nails are thin, flexible, or prone to breaking, builder gel can provide an additional protective layer.
This can help you maintain your natural nail length while reducing everyday bending and breakage.
However, gel does not magically make nails grow faster. It helps protect the existing nail so that it has a better chance of growing without breaking.
3. Long-Lasting Shine
Regular nail polish can lose its shine or chip after a few days.
A properly applied gel manicure can maintain its glossy appearance for considerably longer.
Depending on the formula, application, nail growth, and daily activities, builder gel manicures may last around two to four weeks before maintenance is needed.
4. Different Colors and Designs
Another reason to love liquid gel nails is the variety of styles available.
You can choose a simple everyday manicure or experiment with more creative nail art.
Popular designs include:
- French tip gel nails.
- Baby boomer ombre nails.
- Nude builder gel nails.
- Chrome nail finishes.
- Glitter gel manicures.
- Minimalist nail art.
- Milky pink gel nails.
5. Suitable for Different Nail Shapes
Builder gel can be used to create or support several nail shapes, including:
- Square.
- Round.
- Oval.
- Almond.
- Squoval.
A professional technician can help select a shape that suits your fingers and lifestyle.
6. Convenient Home Manicures
With the correct products, equipment, and knowledge, some liquid gel nails systems can be used at home.
A starter kit may include gel products, a curing lamp, brushes, and basic preparation tools.
However, beginners should understand the safety instructions and application process before starting.
What Do You Need for Liquid Gel Nails at Home?
If you want to create liquid gel nails yourself, having the right supplies makes the process easier.
Here is a helpful shopping checklist.
| Product | Purpose |
|---|---|
| Builder gel or suitable liquid gel | Creates the nail enhancement |
| Compatible UV/LED lamp | Cures the gel |
| Nail file | Shapes the natural nail and product |
| Nail buffer | Smooths the surface when required |
| Cuticle pusher | Gently prepares the nail area |
| Nail cleanser | Removes surface residue when specified |
| Gel base coat | Helps product adhesion when required |
| Gel top coat | Adds shine and protection |
| Nail brush | Helps with precise application |
| Lint-free wipes | Clean the nail surface |
| Cuticle oil | Helps moisturize the surrounding skin |
You do not necessarily need every item in every system. Some builder gels require a separate base coat, while others are designed to be used differently.
Always check the product instructions before purchasing additional supplies.
How to Apply Liquid Gel Nails: Step-by-Step Guide
Now comes the exciting part!
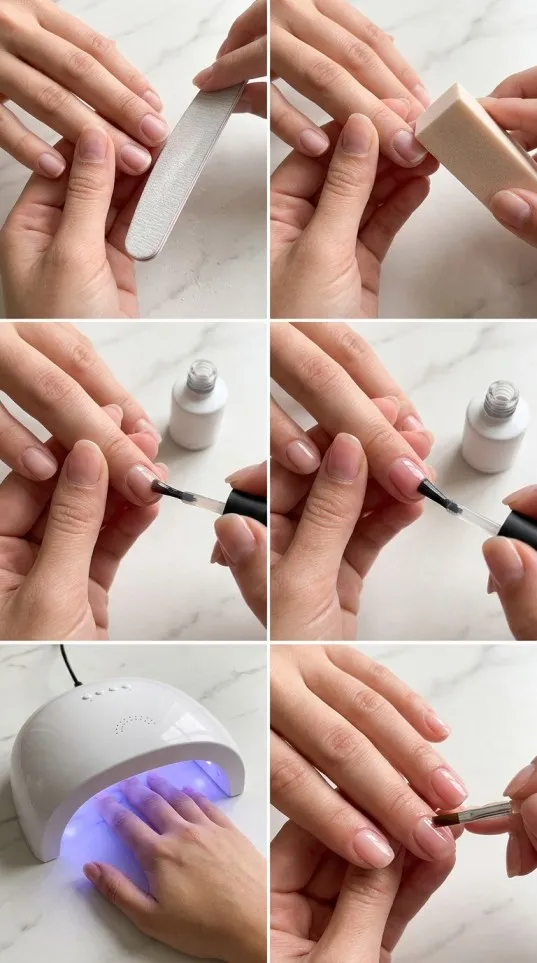
If you have the correct products and a compatible curing lamp, you can learn how liquid gel nails are applied.
For your first attempt, take your time. A neat, thin application is much better than rushing and applying too much gel.
Step 1: Clean Your Natural Nails
Start by removing any existing nail polish.
Wash and dry your hands properly. Remove surface oil and dirt using a suitable nail cleanser.
Your nails should be clean and dry before applying gel.
Step 2: Shape Your Nails
Use a nail file to create your preferred nail shape.
You can choose a square, oval, round, or almond shape.
If your natural nails are short, keep them at a manageable length while learning the application process.
Step 3: Prepare the Nail Surface
Gently prepare the nail surface according to the product manufacturer’s instructions.
Avoid aggressive buffing because excessive filing can make natural nails thin and sensitive.
Also, gently move back the cuticle without cutting living skin.
Step 4: Apply the Recommended Base Layer
If your gel system requires a base coat, apply a thin, even layer.
Keep the product away from your skin and cuticles.
Cure it using the recommended lamp and timing.
Step 5: Apply the Liquid Builder Gel
Take a small amount of liquid builder gel and apply it evenly over the nail.
If you are using a builder gel formula, you may need to create a slightly stronger structure around the nail’s stress area.
Do not apply excessive product. A thick, uneven layer can look unattractive and may not cure correctly.
Most importantly, avoid touching the surrounding skin with uncured gel.
Step 6: Cure the Gel
Place your hand inside a compatible UV/LED lamp.
Follow the exact curing time provided by the manufacturer.
Do not assume that a gel is fully cured simply because the surface feels hard.
If the product is not properly cured, it may increase the risk of irritation or allergic reactions.
Step 7: Add Color if Desired
Once the builder layer is properly cured, you can apply your preferred gel polish if the system allows it.
Choose a color that matches your personal style.
For a natural look, consider nude, beige, or light pink.
For something more noticeable, try red, burgundy, or glitter.
Cure each layer as instructed.
Step 8: Apply the Top Coat
Finish with a suitable gel top coat.
This gives the manicure a smooth and glossy appearance.
Cure the top coat according to the manufacturer’s directions.
If your top coat leaves a sticky layer, clean it only when the instructions recommend doing so.
Step 9: Moisturize Your Cuticles
Finally, apply cuticle oil around your nails.
This helps keep the surrounding skin moisturized and gives your manicure a well-maintained appearance.
Congratulations! Your liquid gel nails manicure is complete.
How Long Do Liquid Gel Nails Last?
One of the most common questions about liquid gel nails is how long they remain beautiful.
In general, many builder gel manicures last approximately two to four weeks before needing maintenance.
However, the actual result depends on several factors:
- The quality of the gel product.
- Proper nail preparation.
- Correct curing.
- Your natural nail growth.
- Your daily activities.
- Your nail care routine.
- The technician’s application skills.
For example, someone who frequently washes dishes, cleans without gloves, or works with their hands may experience more wear than someone with a less demanding routine.
For this reason, do not treat a specific number of weeks as a guarantee.
Regular maintenance and professional advice can help keep your manicure looking neat.
How to Remove Liquid Gel Nails Safely
Removing liquid gel nails correctly is just as important as applying them.
Incorrect removal can damage the natural nail plate, leaving it weak, thin, or flaky.
First, identify which type of gel you have.
Removing Soak-Off Gel
Some soft builder gels and gel polish products can be removed using acetone.
The general process involves:
- Gently reducing the top layer according to the product instructions.
- Applying acetone-soaked cotton to the nail.
- Wrapping the nail as directed.
- Allowing the product to soften for the recommended time.
- Gently removing softened product without scraping aggressively.
- Moisturizing the nails afterward.
Never force gel off your natural nails.
Removing Hard Gel
Hard gel usually cannot be soaked away with ordinary acetone.
It generally needs to be reduced through careful filing.
For beginners, professional removal is the safer option because aggressive filing can damage the natural nail.
Important: Always check whether your product is soak-off or file-off before attempting removal.
Are Liquid Gel Nails Safe?
When used correctly, liquid gel nails can be a convenient cosmetic option.
However, they are not completely risk-free.
Some gel products contain ingredients that may cause allergic contact dermatitis if uncured product touches the skin.
Possible signs of an allergic reaction include:
- Redness around the nails.
- Itching.
- Swelling.
- Burning or irritation.
- Blisters or peeling skin.
If you experience these symptoms, stop using the product and seek advice from a qualified healthcare professional.
Here are some important safety precautions:
Avoid Skin Contact
Never allow uncured gel to touch your fingers or surrounding skin.
Clean up accidental spills before curing, following the product’s safety directions.
Use a Compatible Nail Lamp
Not every UV/LED lamp works correctly with every gel formula.
Use the lamp recommended by the manufacturer.
Protect Your Hands
UV nail lamps expose the skin to ultraviolet radiation.
You can reduce exposure by using appropriately designed, UV-protective fingerless gloves or applying broad-spectrum SPF 30 or higher sunscreen to exposed skin, following the product instructions.
Never Peel Off Gel Nails
Peeling or biting gel can remove layers of your natural nail.
Instead, use the removal method recommended for the specific product.
Choose Quality Products
Purchase products from reputable brands and check ingredient information, instructions, and safety warnings.
If you are new to gel products, professional application is a sensible way to learn how they should be used.
How to Choose the Best Liquid Gel Nails Product
Shopping for liquid gel nails can feel confusing because there are so many brands, formulas, and kits available.
However, you do not need to buy the most expensive product to get started.
The important thing is to choose a formula that matches your needs.
Consider these factors before purchasing.
1. Check the Product Type
First, decide what you want.
Do you need a strengthening builder gel, a colored gel polish, or a product for nail extensions?
Read the product description carefully.
2. Look for Clear Instructions
A good product should provide clear directions for application, curing, and removal.
Avoid products with unclear instructions or no information about lamp compatibility.
3. Consider the Curing Lamp
If you are purchasing a liquid gel nail kit, check whether the included lamp is compatible with the gel.
An attractive kit is not useful if the lamp cannot properly cure its formula.
4. Read Customer Reviews
Customer feedback can help you understand:
- How easy the gel is to apply.
- Whether the consistency is suitable for beginners.
- How well the product stays on.
- Whether the lamp works properly.
- What customers think about the included accessories.
However, remember that individual experiences vary.
5. Check the Removal Method
Before purchasing, find out whether the gel is soak-off or file-off.
This small detail can make a significant difference to your maintenance routine.
Where to Buy Liquid Gel Nails in the USA
If you are looking for liquid gel nails, builder gel, or a complete home manicure kit, Amazon USA is a convenient place to compare different products.
You can explore different brands, read verified customer feedback where available, compare kit contents, and check current prices.
Recommended shopping starting point:
Shop Liquid Gel Nail Kits and Builder Gel Products on Amazon USA
You can also explore builder gel nail products if you prefer a bottle-style product.
Before placing your order, compare the following:
- Product formula and intended use.
- Included UV/LED lamp, if any.
- Lamp compatibility.
- Number of colors included.
- Customer ratings and recent reviews.
- Application and removal instructions.
- Ingredient and allergy information.
My buying recommendation: If you are a beginner, start with a clearly labeled soak-off builder gel system from a reputable brand, provided it suits your nails and comes with suitable application instructions. A simple, complete system is generally easier to understand than purchasing several unrelated products.
Remember that Amazon prices, stock, and available brands can change, so check the current listing before ordering.
Popular Liquid Gel Nails Trends to Try
Another exciting feature of liquid gel nails is the number of styles you can create.
Whether you prefer simple everyday nails or a glamorous manicure, there is something for everyone.
Natural Nude Gel Nails
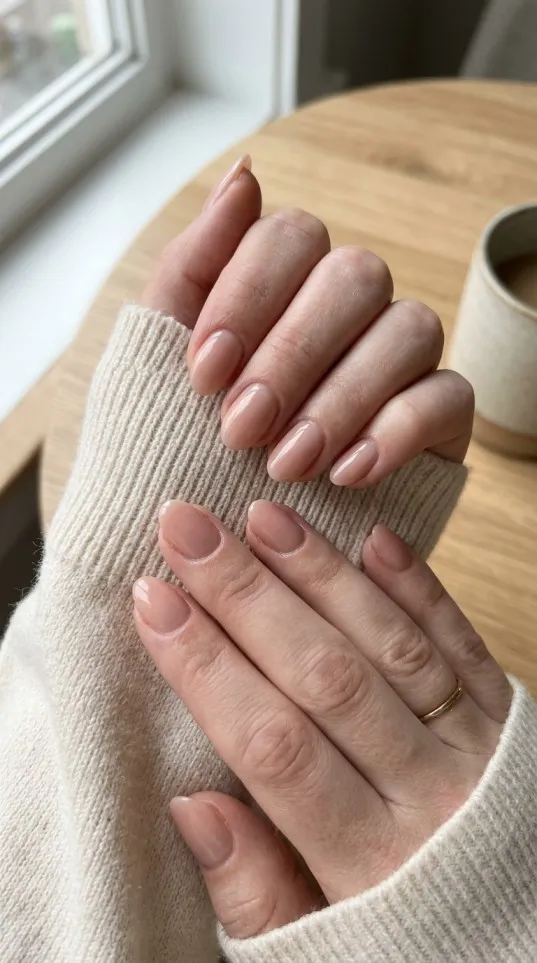
Nude gel nails are perfect for people who prefer a clean and elegant appearance.
They work well for office wear, casual outings, and special occasions.
Milky White Gel Nails
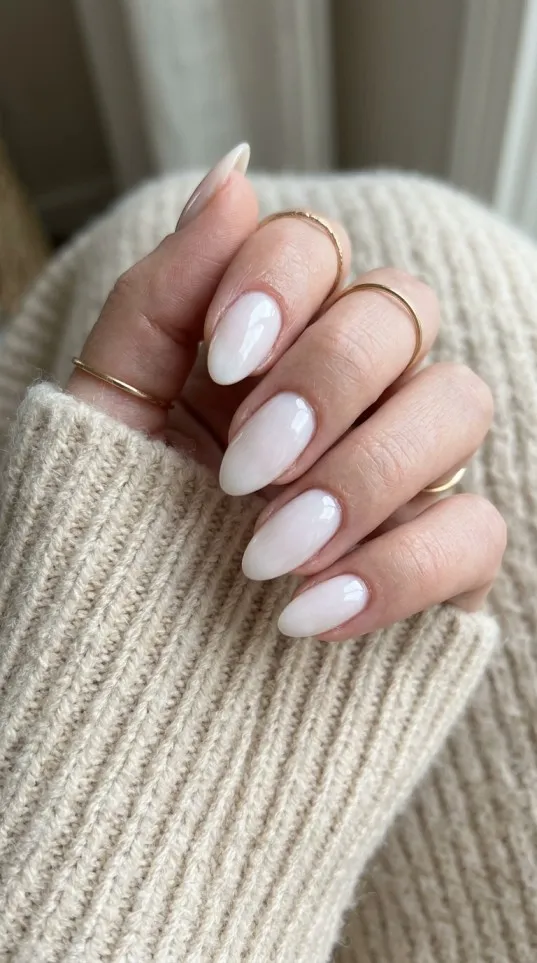
Milky white nails offer a soft, creamy appearance.
They look beautiful on short and medium-length nails.
French Tip Liquid Gel Nails
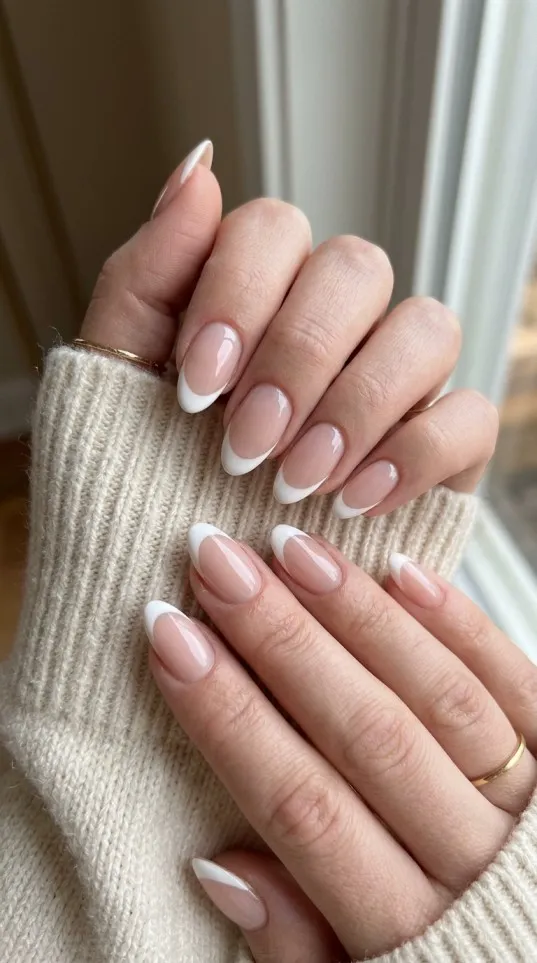
French tips are a timeless manicure style.
A soft pink or nude base combined with white tips creates a neat and polished finish.
Pink Builder Gel Nails
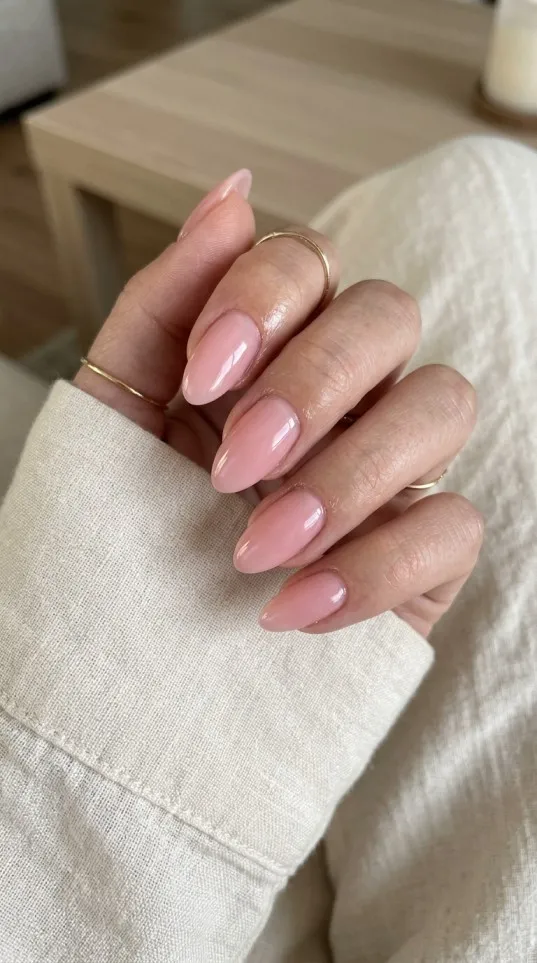
Pink builder gel is an excellent choice for people who want a natural-looking manicure with a little color.
It can make short nails look elegant without needing dramatic extensions.
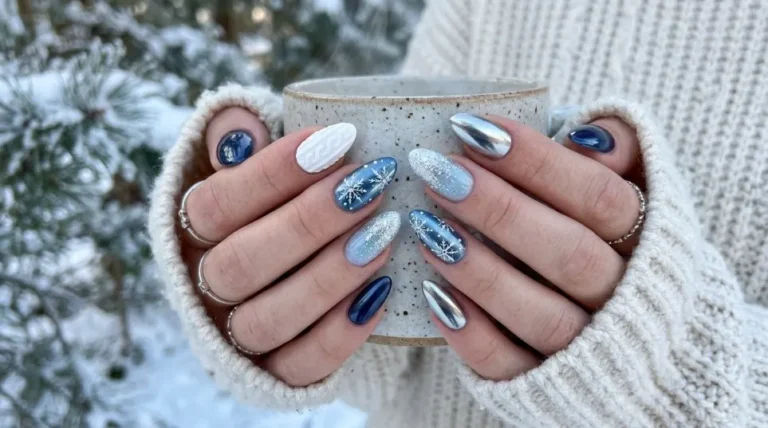
Chrome Gel Nails
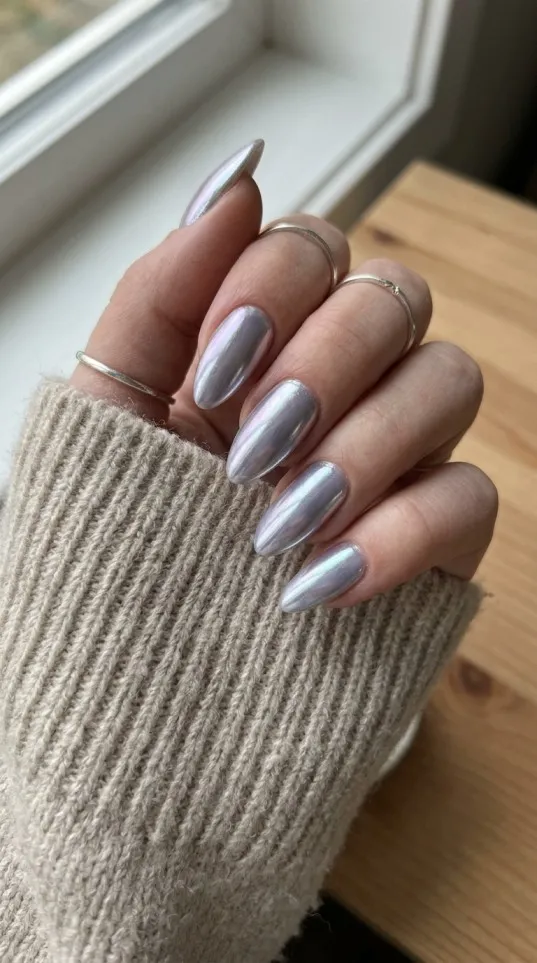
Chrome finishes create a reflective appearance that catches the light.
They are especially attractive for parties, celebrations, and special occasions.
Short Almond Gel Nails
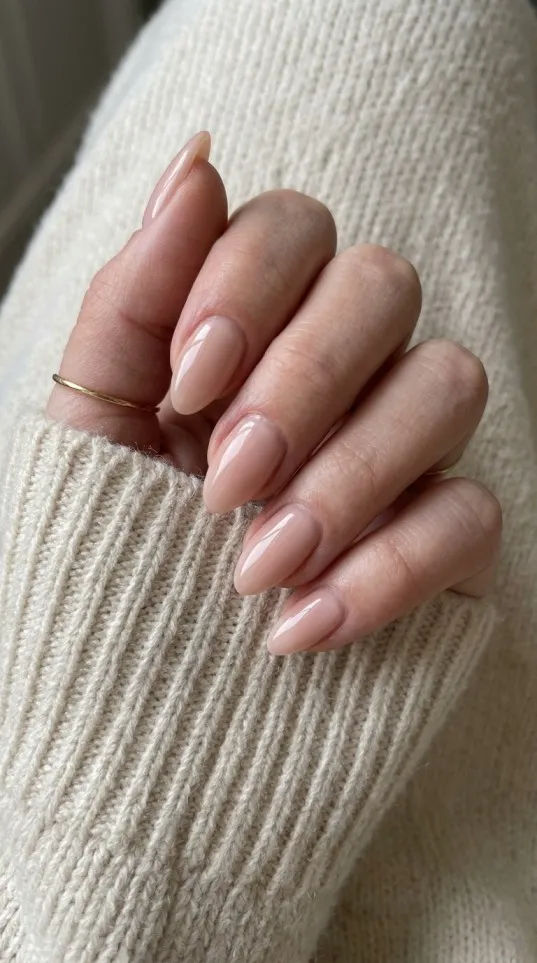
Short almond nails combine a slightly tapered shape with a practical length.
They are a good choice if you want a stylish manicure without the inconvenience of extremely long nails.
Common Mistakes to Avoid When Using Liquid Gel Nails
Even a good product can produce disappointing results if it is used incorrectly.
Here are some common mistakes to avoid.
Applying too much gel: Thick layers may not cure properly and can create an uneven appearance.
Touching the skin: Uncured gel should never be allowed to remain on the skin.
Using the wrong lamp: A lamp that is incompatible with the formula may fail to cure the product correctly.
Skipping nail preparation: Poor preparation can contribute to lifting and premature peeling.
Filing natural nails aggressively: Excessive filing can weaken the nail plate.
Removing gel by force: Peeling or pulling off the product can damage natural nails.
Ignoring maintenance: Leaving lifting or damaged product unattended can create further problems.
By avoiding these mistakes, you can make your liquid gel nails experience more comfortable and enjoyable.
Final Verdict: Are Liquid Gel Nails Worth Buying?
If you love attractive nails but want something more durable than traditional nail polish, liquid gel nails are certainly worth exploring.
They offer a range of possibilities, from natural-looking builder gel overlays to stylish colored manicures and nail extensions.
The biggest advantage is flexibility. You can select a product that matches your natural nail condition, preferred length, and personal style.
However, choosing the right formula is essential. Builder gel is better suited to adding structure, while ordinary gel polish is mainly intended for color. Similarly, soft gel and hard gel have different removal requirements.
If you are a beginner, start with a reputable product, follow the manufacturer’s instructions, use the correct curing lamp, and avoid skin contact with uncured gel.
For an easy starting point, explore the available liquid builder gel nail kits on Amazon USA and compare the features before buying.
Ultimately, beautiful nails are not just about appearance. They are also about choosing products carefully, maintaining healthy nail habits, and enjoying a manicure that fits your lifestyle.
Frequently Asked Questions About Liquid Gel Nails
Liquid gel nails often refer to builder or other UV/LED-curable gel products, while gel polish is mainly used to add color and shine.
A liquid gel nails kit may include builder gel, a UV/LED lamp, base coat, top coat, nail files, and application tools.
Builder gel is a type of liquid gel nail product designed to add strength and structure to natural nails, making it ideal for overlays and extensions.
Liquid gel nails generally offer a flexible, glossy finish, while acrylic nails are often preferred for strong, sculpted extensions and longer nail shapes.
You can find liquid gel nails at local nail salons and beauty supply stores or search Google Maps for nearby nail technicians offering gel manicures.
Liquid gel nails usually involve applying gel directly to the natural nail or building an enhancement, while Gel-X uses full-cover soft gel nail tips.
The best liquid gel nails depend on your needs, but look for quality builder gel, clear application instructions, compatible curing lamps, and reliable customer reviews.
Popular liquid gel nails ideas include nude builder gel, French tips, milky pink nails, chrome finishes, glitter designs, and short almond-shaped nails.
Article takeaway: The best liquid gel nails product is not necessarily the most expensive one. It is the one that suits your natural nails, provides clear application instructions, works with the correct curing lamp, and can be maintained and removed safely.