
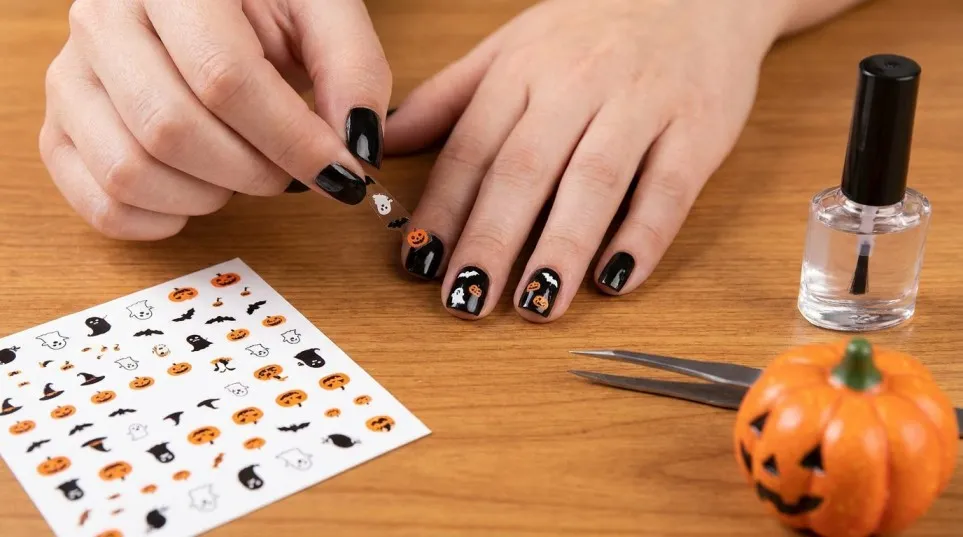
Halloween Nail Stickers: Easy Spooky Nail Art Ideas for Halloween
Halloween nail stickers are an easy way to give your nails a spooky, stylish look without spending hours painting tiny ghosts, pumpkins, bats or spider webs by hand. Whether you prefer cute Halloween nail art, classic black-and-orange designs or something a little darker, the right nail stickers can help you create a festive manicure at home.
For anyone in the UK preparing for Halloween parties, autumn events or a themed night out, nail stickers are a practical option. You can apply them over your favourite nail polish, use them to decorate a gel manicure or add a small detail to an otherwise simple nail design. Best of all, you do not need to be a professional nail artist to achieve a neat result.
In this guide, you will discover the different types of Halloween nail stickers, the designs worth trying, how to apply them step by step, how to make them last longer and what to check before buying a set online.
What Are Halloween Nail Stickers?
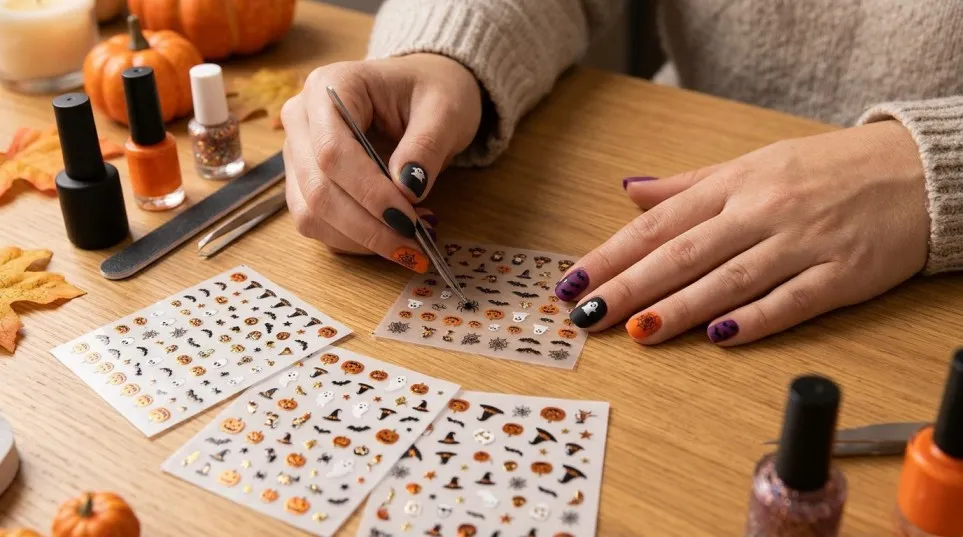
Halloween nail stickers are decorative designs made specifically for applying to fingernails. They usually come on sheets featuring seasonal patterns such as ghosts, pumpkins, skulls, bats, black cats, spiders and spider webs.
Most self-adhesive nail stickers can be peeled from their backing and placed directly onto a prepared nail. Other designs are water-transfer decals, which need to be moistened before the printed design can be moved onto the nail.
They are especially useful if you want detailed nail art without learning how to paint complicated shapes. For example, a tiny ghost or a fine spider web can be difficult to create with a regular nail brush, but a ready-made sticker makes the process much simpler.
If you are new to nail decoration, our guide to nail stickers and how to apply them explains the basics of choosing and using different sticker styles.
Why Are Halloween Nail Stickers Worth Buying?
There are plenty of ways to decorate your nails for Halloween, but stickers offer a useful balance between convenience, design variety and affordability.
1. Create Detailed Nail Art at Home
You do not need advanced nail-art skills to create a themed manicure. Simply choose a design, position it carefully and finish according to the manufacturer’s instructions.
This makes Halloween nail art stickers a good option for beginners who want their nails to look more detailed without buying lots of brushes or practising complicated painting techniques.
2. Save Time Before Halloween
Halloween preparations can involve choosing a costume, planning makeup and deciding what to wear. Spending an entire evening painting your nails may not be realistic.
With self-adhesive Halloween decals, you can add a few small designs to a manicure in a relatively short time. Application time will depend on the number of nails, the type of sticker and whether you need to apply and dry a base colour first.
3. Choose From Different Styles
Not everyone wants long, dramatic nails covered in skulls and dark colours. Fortunately, Halloween nail stickers are available in designs ranging from playful cartoon ghosts to subtle black spider webs.
You can choose a design that suits your personality, nail length and the occasion.
4. Decorate Natural, Gel and Artificial Nails
Many nail stickers are designed for use on different nail surfaces, including natural nails, painted nails, gel polish and artificial extensions. However, compatibility varies between products, so check the packaging before purchasing.
If you enjoy structured manicures, you can also explore BIAB nails and consider adding small Halloween decals to a suitable finished design.
5. Experiment Without Committing to a Complicated Design
A small sticker can change the look of an entire manicure. You might add one ghost to each ring finger or place tiny bats over a nude base colour.
This means you can experiment with several styles without having to repaint every nail whenever you change your mind.
10 Halloween Nail Sticker Designs to Try
Choosing a design is often the most enjoyable part of preparing your Halloween manicure. Here are ten ideas that work with different colours, nail shapes and personal styles.
1. Cute Ghost Nail Stickers
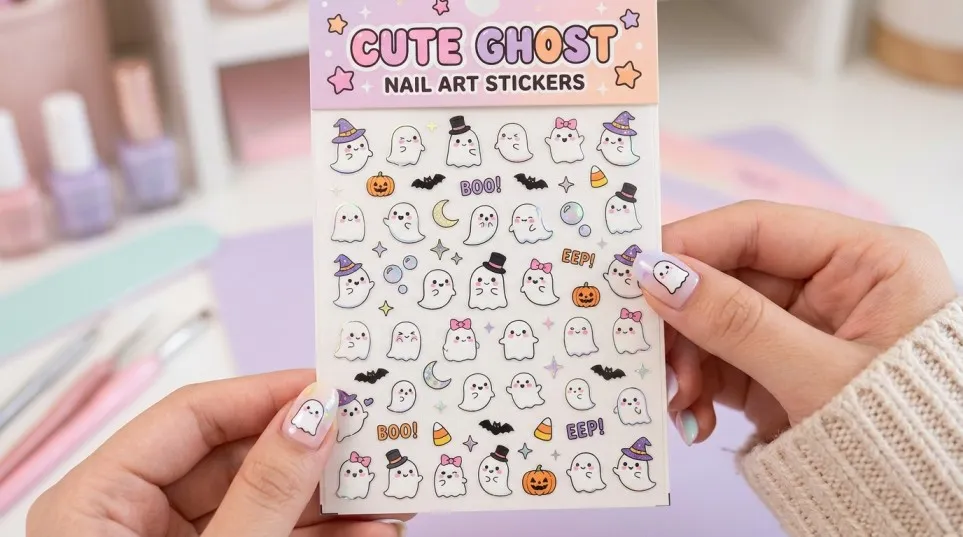
Cute ghost stickers are a great choice if you want something festive without making your nails look too frightening.
White ghosts with black eyes look especially good against nude, pale pink, lavender or black nail polish. You can place one ghost on each accent nail or use several small designs across your hands.
For a simple look, keep most nails in a plain colour and decorate just two nails with ghosts.
Best for: Cute Halloween nails, short nails and beginner-friendly manicures.
2. Black Bat Nail Stickers
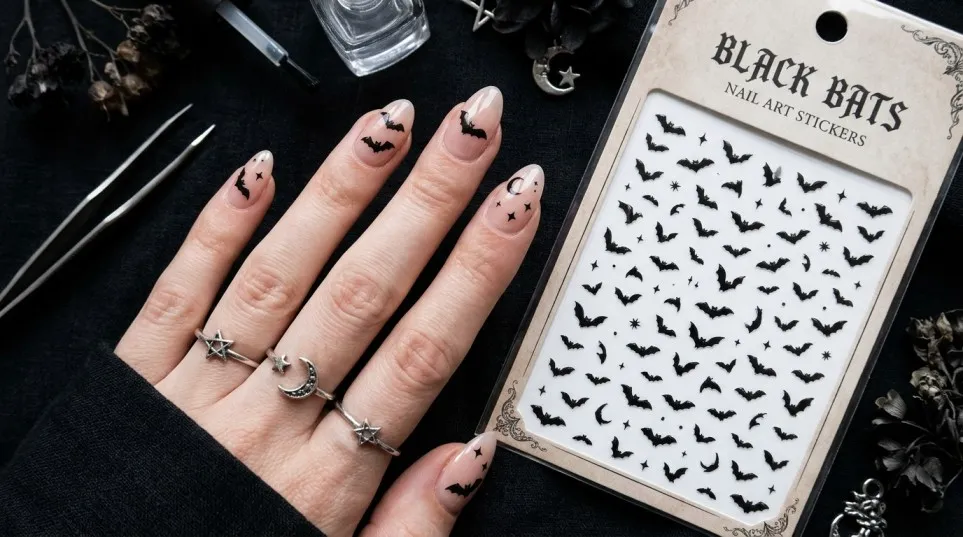
Black bats are ideal for a darker, more classic Halloween look. Their simple shapes also work well on both short and long nails.
Try placing tiny bats over a pale base colour to make them stand out. Alternatively, use black polish with silver or white bat stickers for a more dramatic finish.
If you prefer a minimalist manicure, one or two bats can be enough to create the Halloween theme.
Best for: Gothic nails, minimalist designs and black Halloween manicures.
3. Pumpkin Nail Stickers
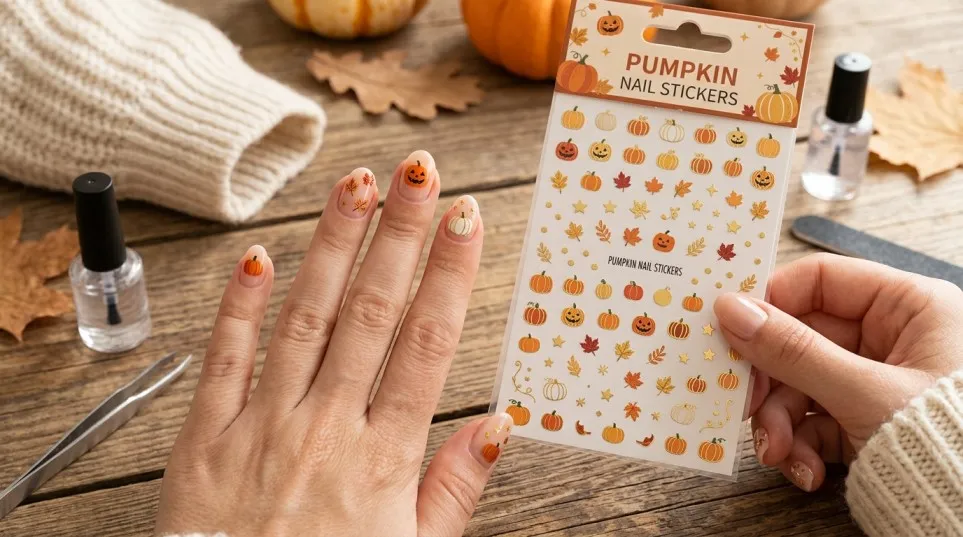
Pumpkin stickers bring the familiar orange colour of Halloween to your nails. You can choose smiling cartoon pumpkins for a playful look or traditional jack-o’-lantern faces for something more recognisable.
Orange pumpkins look attractive over black, cream, nude and deep brown polish. You can also combine pumpkin stickers with autumn leaf designs for a seasonal manicure that suits October.
Best for: Autumn nail art, Halloween parties and colourful seasonal manicures.
4. Spider Web Nail Stickers
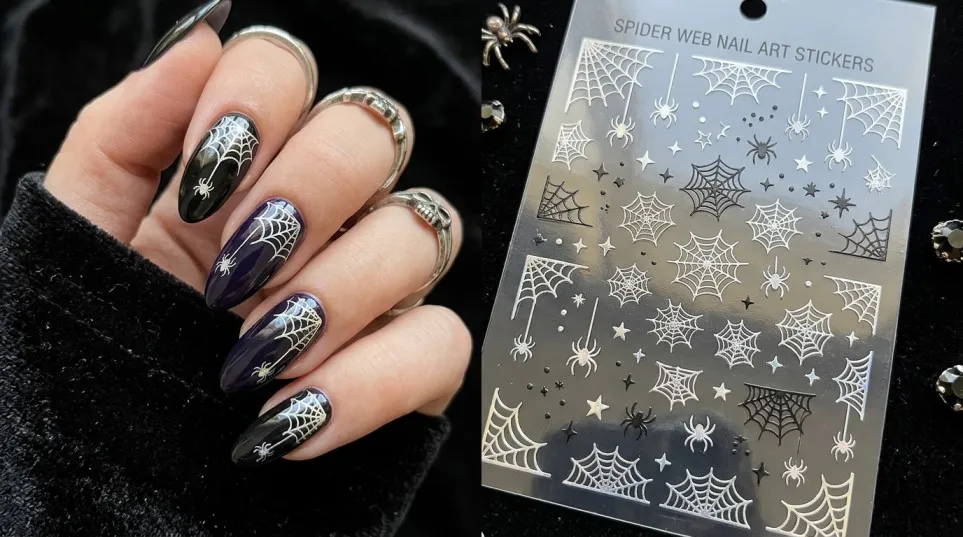
Spider webs are a popular option for anyone who wants a slightly more elegant Halloween design.
White or silver webs stand out against black polish, while black webs can look striking over nude, milky white or pale pink nails.
For a balanced manicure, place a web on one or two accent nails and leave the others plain. This approach keeps the design interesting without making every nail look busy.
Best for: Gothic nail art, monochrome manicures and elegant Halloween looks.
5. Skull Nail Stickers
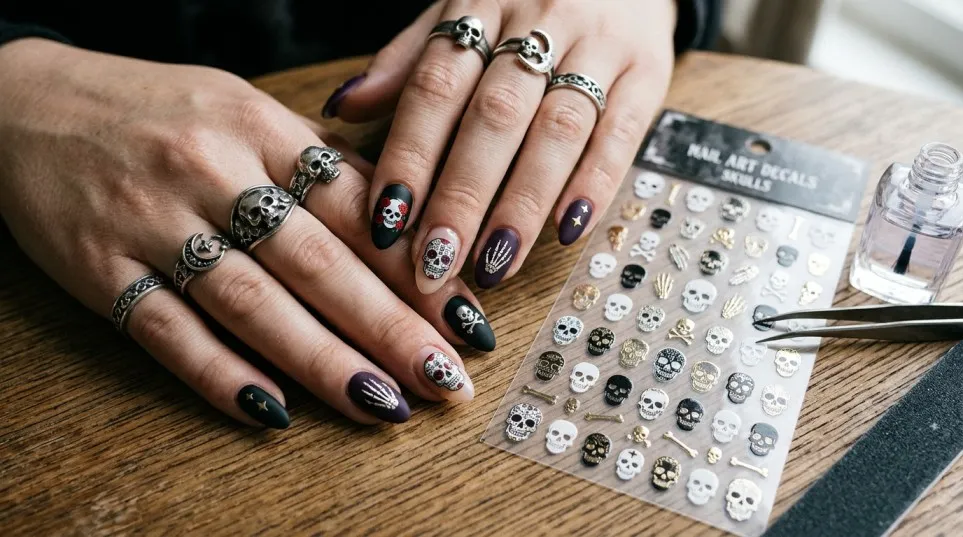
Skull designs are ideal for people who prefer a stronger Halloween theme. They can look playful, gothic or dramatic depending on their size and the colours around them.
For a simple design, use small white skull stickers over black nail polish. If you prefer something more colourful, look for skulls with pink, purple or orange details.
Keep the rest of your manicure relatively simple so the skulls remain the main feature.
Best for: Gothic nail designs, costume parties and dramatic manicures.
6. Black Cat Nail Stickers
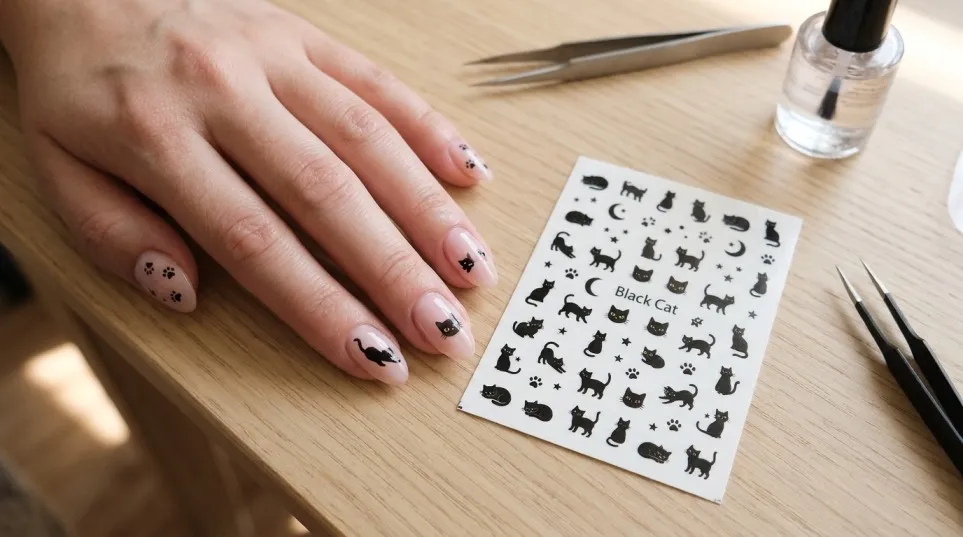
Black cats are a lovely choice if you want something that feels spooky but still cute.
Look for stickers featuring cats with bright eyes, curled tails or small witch hats. They work particularly well with purple, orange, cream and black nail colours.
You can also combine a cat sticker with tiny stars or moons for a witch-inspired Halloween manicure.
Best for: Cute Halloween nail art and witch-themed costumes.
7. Witch Hat and Moon Stickers
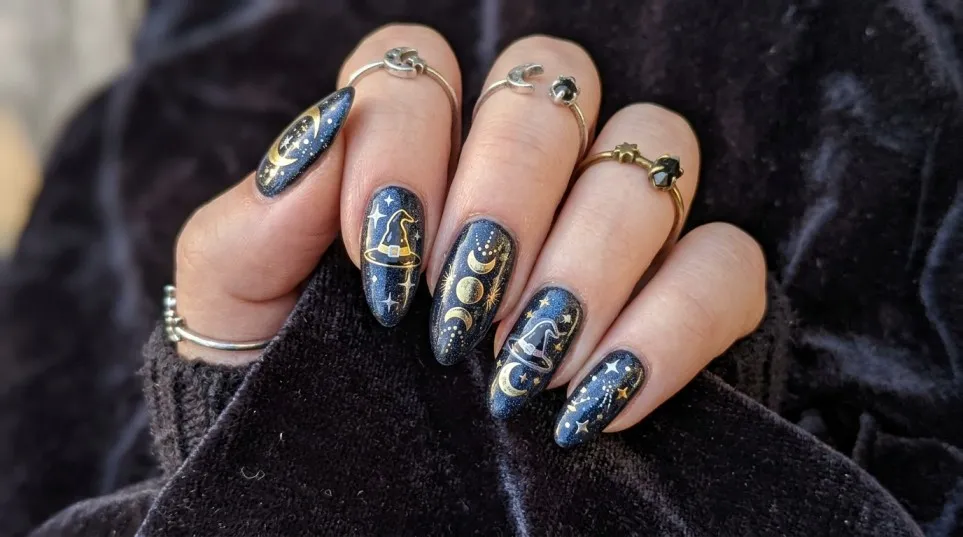
Witch hats, crescent moons, stars and magical symbols are ideal for a more imaginative design.
These stickers look especially attractive over dark purple, midnight blue or black polish. Gold-coloured printed designs can also add contrast, although the actual finish depends on the product you buy.
Try placing a moon on one nail, a witch hat on another and small stars across the remaining nails.
Best for: Witchy nails, fantasy-inspired manicures and Halloween evenings.
8. Glow-in-the-Dark Halloween Nail Stickers
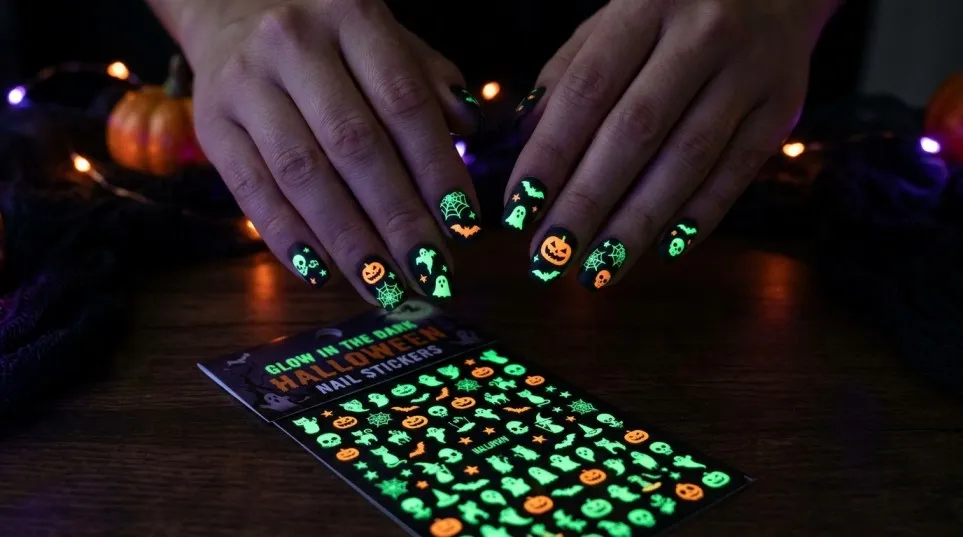
If you are going to a Halloween party after dark, glow-in-the-dark stickers can add something different to your manicure.
Depending on the product, these designs may feature ghosts, pumpkins, skeletons or other seasonal shapes. Check whether the stickers genuinely glow in darkness and whether they need exposure to light to produce the effect.
For the best visibility, follow the manufacturer’s instructions and consider using a light-coloured base underneath the designs.
Best for: Halloween parties, evening events and playful nail art.
9. Bloody Drip and Horror Stickers
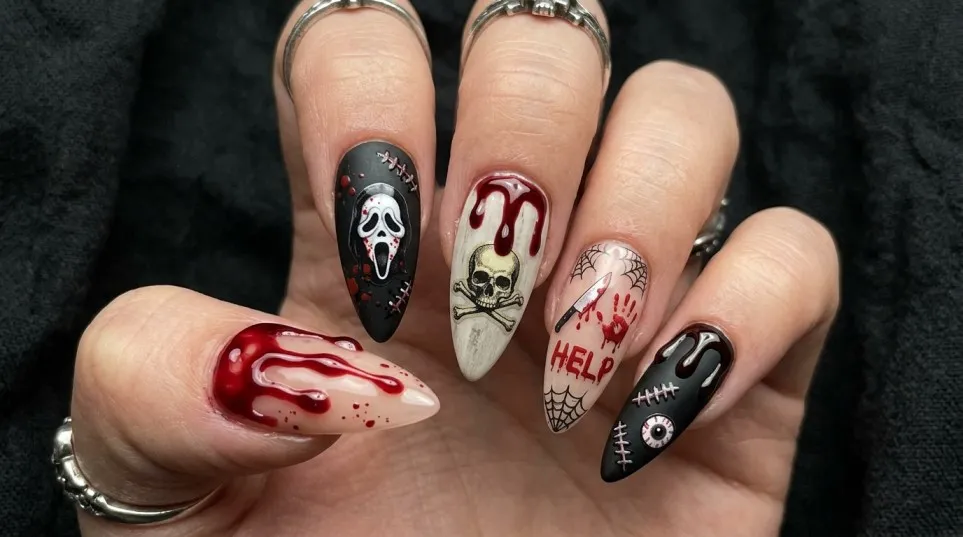
For a more dramatic look, try red drip designs, dark splatters or horror-inspired decals.
These stickers can look effective over black, white or nude nail polish. A red drip sticker on a pale nail creates a strong contrast without requiring you to paint the effect by hand.
Choose designs that suit your preferred level of drama. Small red details can look subtle, while full-nail horror patterns create a bolder appearance.
Best for: Horror costumes, dramatic Halloween manicures and themed parties.
10. Mixed Halloween Nail Sticker Sets
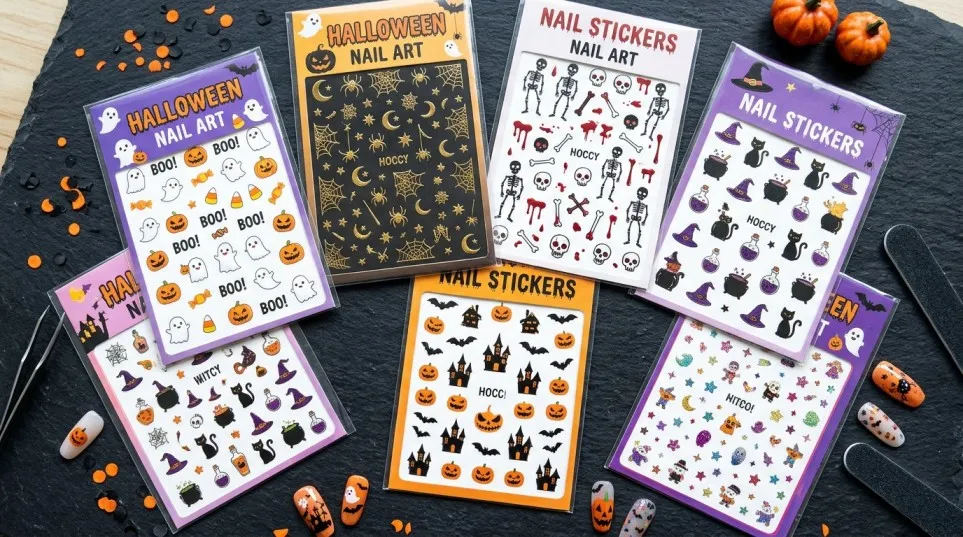
If you cannot decide on one design, a mixed set may be the most practical purchase.
These packs can include ghosts, bats, pumpkins, skulls, spiders and other seasonal motifs. Having several designs available lets you experiment with different manicures throughout October.
Before buying, check the number of sheets, the size of the stickers and whether the pack contains flat decals or raised designs.
Best for: Beginners, nail-art enthusiasts and anyone who wants several designs in one purchase.
Halloween Nail Stickers for Short and Long Nails
The size of your nails can influence which stickers look best.
Halloween Stickers for Short Nails
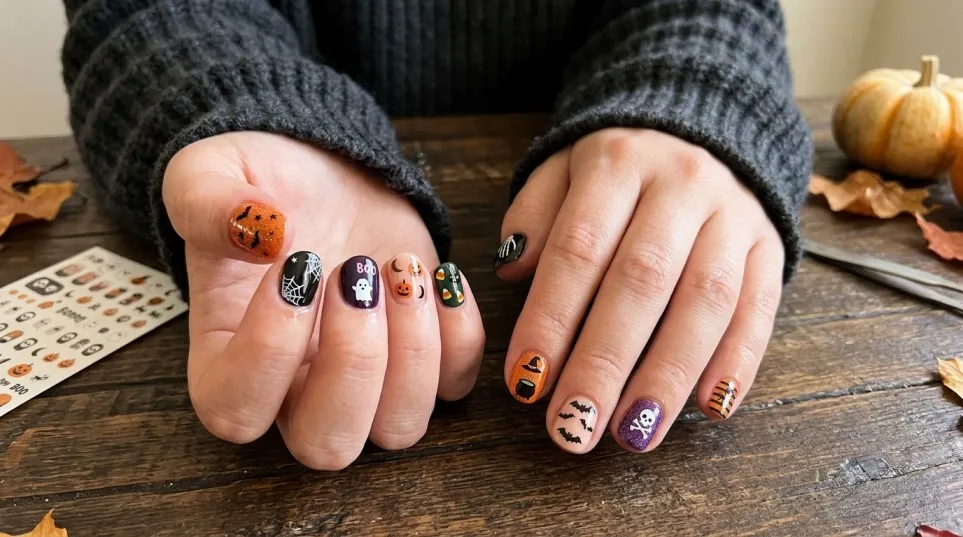
Short nails can look attractive with small, simple designs. Tiny ghosts, miniature pumpkins, little bats and small stars are easier to arrange without covering the entire nail.
A useful approach is to apply one sticker to each ring finger and leave the remaining nails in a matching colour.
Black, orange, cream and nude polish can all provide a good background, depending on the sticker colours.
Halloween Stickers for Long Nails
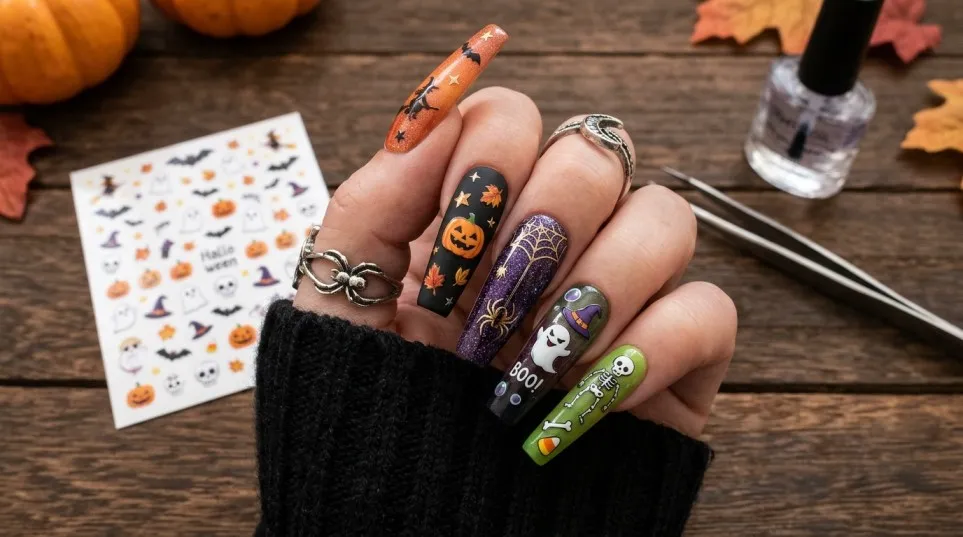
Long nails offer more room for larger designs and combinations of different patterns.
You could place a spider web near the tip, a ghost in the centre and tiny stars around it. Alternatively, decorate each nail with a different Halloween motif while keeping the colour palette consistent.
However, make sure the stickers fit the nail surface without folding over the sidewalls or touching the surrounding skin.
Halloween Stickers for Almond and Coffin Nails
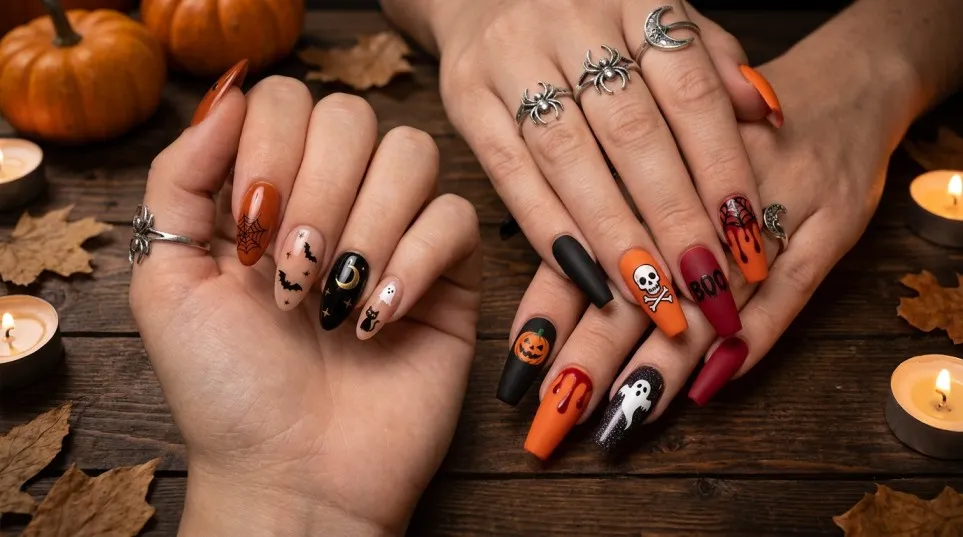
Almond-shaped nails often suit small motifs placed near the centre or upper part of the nail. Coffin-shaped nails provide a wider surface for spider webs, skulls and larger printed designs.
These are style suggestions rather than strict rules. The most important thing is to choose stickers that fit your actual nail size.
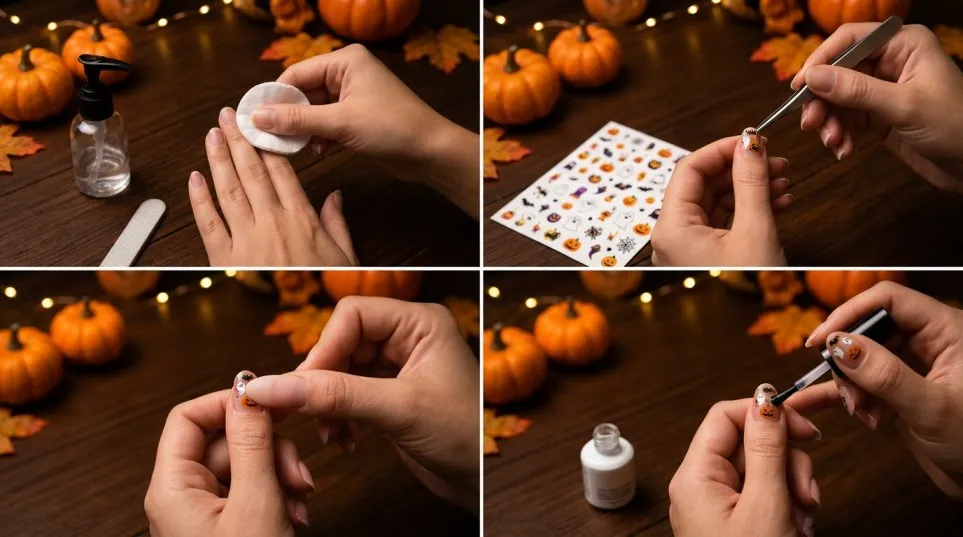
How to Apply Halloween Nail Stickers Step by Step
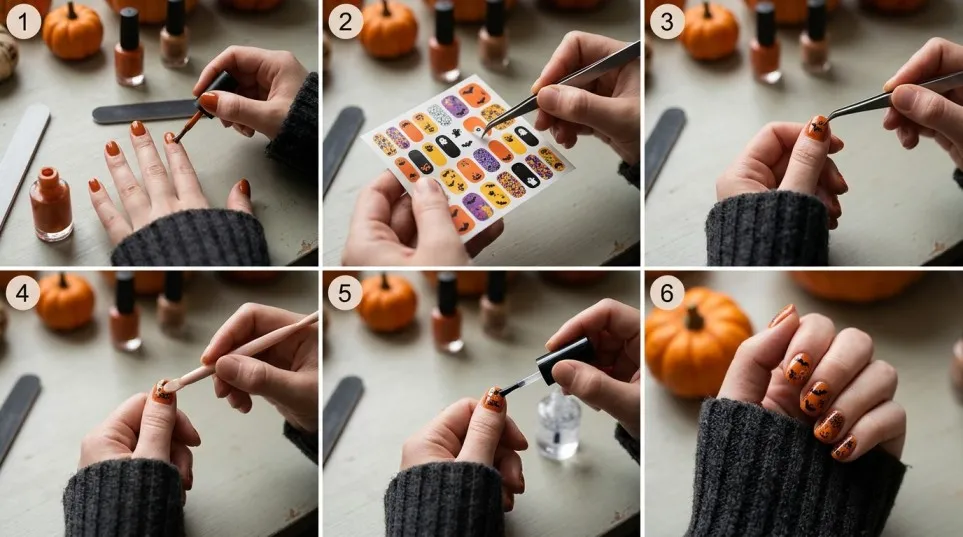
Correct application makes a difference to how neat your manicure looks and how long the stickers stay in place.
The following instructions are for standard self-adhesive nail stickers. Water-transfer decals and semi-cured gel wraps may require different methods, so always follow the instructions supplied with your particular product.
What You Will Need
Before starting, gather the following:
- Halloween nail stickers.
- A nail file.
- A suitable base coat and nail polish, if desired.
- Tweezers for small designs.
- A compatible clear top coat.
- A lint-free wipe and suitable nail cleanser.
Step 1: Clean and Shape Your Nails
Start by removing any old nail polish and shaping your nails with a file.
Wash your hands and make sure your nails are completely dry. If your chosen product recommends removing surface oils, use an appropriate nail cleanser according to its directions.
Avoid applying stickers over oily, wet or dirty nails, as this can interfere with adhesion.
Step 2: Apply Your Base Colour
Choose a nail colour that complements your Halloween stickers.
For example:
- White or cream works well with black bats.
- Black creates contrast with white ghosts.
- Orange complements pumpkin designs.
- Nude and pale pink provide a subtle background.
- Purple works well with witch-themed patterns.
Apply your polish in thin, even coats and allow it to dry completely before placing ordinary stickers on top.
If you are using gel polish, follow the product’s curing instructions. Do not assume that a surface is ready simply because it feels dry.
Step 3: Choose the Right Sticker Size
Look at the sticker sheet and select a design that fits your nail.
For smaller nails, a tiny ghost or bat may look more balanced than a large pumpkin. If the sticker is too wide, choose a smaller one rather than forcing it around the sides of your nail.
Plan the placement before peeling the sticker from its backing.
Step 4: Peel the Sticker Carefully
Use clean fingers or tweezers to lift the sticker, depending on its size and the manufacturer’s instructions.
Avoid touching the adhesive surface more than necessary. Small stickers can bend or fold if handled roughly, so take your time.
Step 5: Place the Sticker on Your Nail
Position the sticker on the nail and gently press it down.
Start near the centre and smooth towards the edges to reduce trapped air. Keep the sticker away from your cuticles and sidewalls.
If the sticker is not positioned correctly, follow the product instructions before trying to move it. Some adhesive designs can be repositioned briefly, while others may lose their grip.
Step 6: Seal the Design if Recommended
Many ordinary nail stickers benefit from a compatible clear top coat.
Apply it carefully over the design, following the product instructions. Cover the sticker without allowing polish to flood the surrounding skin, and pay attention to the free edge of the nail.
Some raised or textured stickers may lose their intended appearance under a thick layer of top coat. Check the manufacturer’s advice before sealing them.
Step 7: Let Your Manicure Set
Allow your finished manicure to dry or cure as directed.
Avoid unnecessary contact with water or household cleaning products immediately after application, especially if the manufacturer recommends a setting period.
Once everything is ready, your Halloween manicure is complete.
How to Make Halloween Nail Stickers Last Longer
One of the most common frustrations with nail stickers is finding that the edges start lifting after a short time. A few simple precautions can help reduce this problem.
Prepare your nails properly. Clean, dry nails provide a better starting surface than nails with oil, moisture or leftover polish.
Choose the right size. Stickers that overlap the cuticle or touch the skin are more likely to lift.
Smooth out air bubbles. Press from the centre towards the edges so the sticker lies flat against the nail.
Use a suitable top coat. Where recommended, a compatible top coat can help protect the design from everyday wear.
Be gentle with your hands. Repeated soaking, cleaning products and friction can affect the appearance and adhesion of some nail decorations. Wear suitable gloves when doing household cleaning.
Follow the product instructions. Different stickers have different adhesive systems and wear times, so there is no single duration that applies to every set.
Remember that the quality of the sticker, nail preparation and your everyday activities can all affect how long the design lasts.
How to Remove Halloween Nail Stickers Safely
Removing stickers properly is just as important as applying them.
For ordinary self-adhesive stickers, follow the manufacturer’s removal instructions. Depending on the product, you may be able to use a suitable nail polish remover or gently lift the sticker after loosening the adhesive.
Do not pull, scrape or force a sticker off if it resists. This can damage the surface of your natural nail.
If the stickers are sealed under regular polish, you may need to remove the top coat and polish first. Use a remover suitable for the products on your nails.
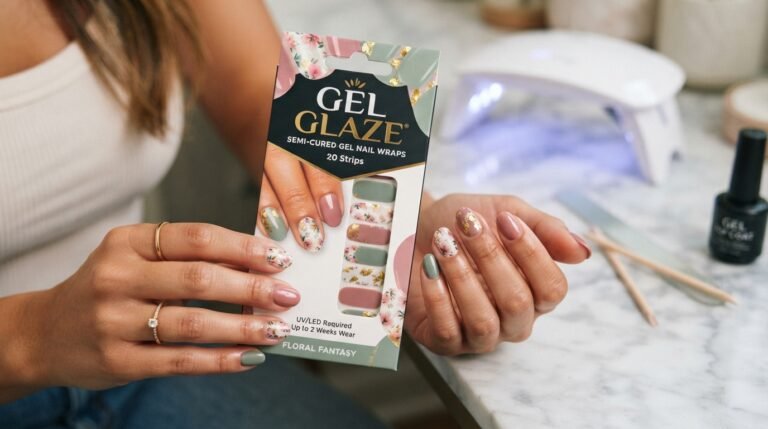
Semi-cured gel strips and other gel-based decorations may require a different removal process. Do not assume that every nail sticker can simply be peeled away.
After removal, wash your hands and apply a little cuticle oil or hand cream if needed.
Halloween Nail Stickers vs Hand-Painted Nail Art
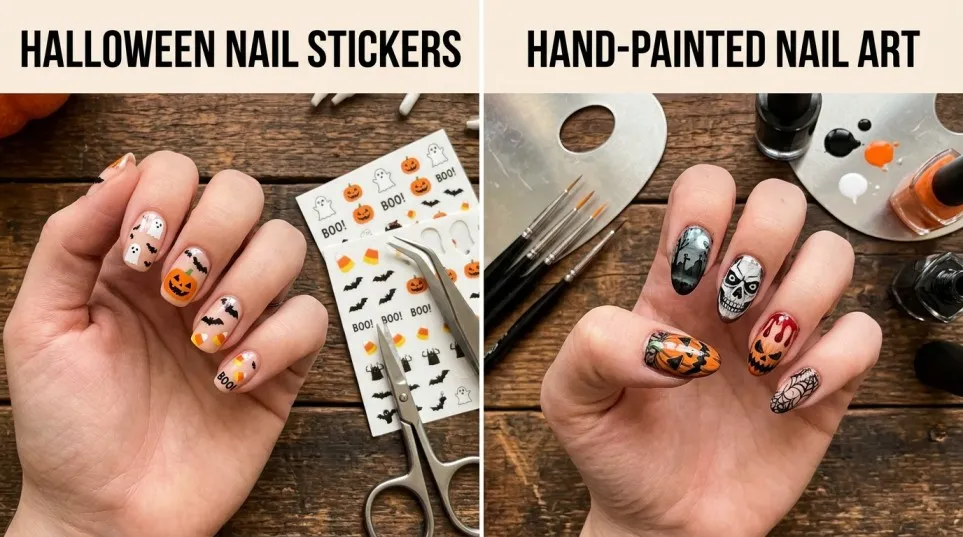
Both methods can produce attractive results, but they suit different needs.
| Feature | Halloween Nail Stickers | Hand-Painted Nail Art |
|---|---|---|
| Ease of use | Usually beginner-friendly | Requires practice |
| Detailed designs | Printed details are ready to apply | Depends on painting skill |
| Time required | Often quicker for small designs | Can take longer |
| Equipment | Basic nail products and stickers | Brushes, polish and other tools |
| Customisation | Limited to available designs | More freedom to create unique art |
| Best for | Quick, repeatable seasonal looks | Custom artwork and artistic designs |
If you enjoy experimenting with detailed patterns, hand painting can be rewarding. However, if you want a quick way to decorate your nails before a Halloween event, stickers may be the more convenient option.
You can also combine the two approaches. Paint your nails in a simple colour, add a few Halloween decals and use a small amount of hand-painted detail where appropriate.
How to Choose the Best Halloween Nail Stickers in the UK
With so many designs available online, it helps to compare more than just the appearance of the product photograph.
Check the Number of Sheets
Some packs contain only a few sheets, while others offer a wider assortment.
A larger pack may provide more choice, but quantity alone does not guarantee better quality. Check whether the designs are varied and whether there are enough small stickers for your nail size.
Look at the Design Style
Decide whether you prefer cute ghosts, classic pumpkins, black cats, skulls or a mixture of motifs.
A focused set may be ideal if you already have a particular manicure in mind. A mixed pack offers more flexibility if you enjoy changing your design.
Check the Sticker Type
Standard self-adhesive decals are generally straightforward to use. Water-transfer decals can create a thin, detailed appearance, while raised 3D stickers add texture.
Full-cover nail wraps are different from small decorative stickers and may require additional shaping or filing.
Read the Application Instructions
Check whether the product is intended for natural nails, regular nail polish, gel polish, acrylic nails or artificial nail tips.
Do not assume that every sticker is compatible with every manicure system.
Compare Reviews and Product Information
Before ordering, look for clear photographs, recent customer feedback and useful information about the size and contents of the pack.
Pay attention to comments about adhesion, ease of placement and whether the stickers match their advertised appearance.
Consider Value Rather Than Price Alone
A low-priced pack can be good value if the designs suit your needs and the stickers are easy to use. However, a larger pack is not necessarily the better purchase if you only want a few specific motifs.
Choose the product that offers the right combination of design, quantity, compatibility and convenience.
Where to Buy Halloween Nail Stickers Online
UK shoppers can compare Halloween nail sticker sets through online marketplaces and specialist nail-art retailers.
Shop Halloween Nail Stickers on Amazon UK
Amazon UK is a useful starting point if you want to compare different packs, designs and customer reviews in one place.
Browse these options:
- Halloween nail stickers on Amazon UK — compare standard self-adhesive decals and seasonal sticker sheets.
- Halloween nail art decals on Amazon UK — explore ghosts, pumpkins, skulls and spider-web designs.
- Glow-in-the-dark Halloween nail stickers on Amazon UK — find options designed for evening events and Halloween parties.
- Halloween gel nail wraps on Amazon UK — compare full-cover strips if you prefer a more complete nail design.
These are search links rather than endorsements of a particular product. Availability, prices, delivery dates and customer ratings can change, so check the current listing before placing an order.
Try a Specialist Nail-Art Retailer
You can also explore MoYou London Halloween nail-art stickers for a themed collection featuring classic spooky motifs. Check the current product page for stock status and delivery information before ordering.
If you are buying for a particular event, allow enough time for delivery and application rather than leaving everything until the last minute.
Are Halloween Nail Stickers Suitable for BIAB and Gel Nails?
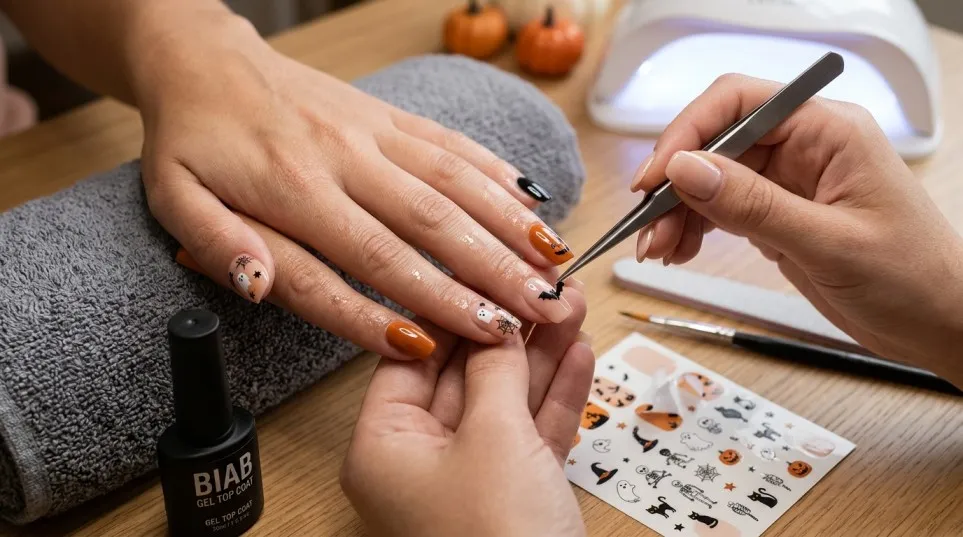
In many cases, nail stickers can be used to decorate a BIAB or gel manicure, provided the sticker is compatible with the products underneath it.
For example, small ghost stickers can look attractive over a nude BIAB manicure, while black bats can add a seasonal detail to a pale pink or milky base.
However, application matters.
Make sure the underlying manicure is properly finished and prepared according to your nail system’s instructions. Avoid placing stickers over uncured gel or allowing nail products to contact the surrounding skin.
If you are using a gel top coat, check that it is suitable for the sticker material. Some decorative films or raised designs may not work well with every coating system.
Important: Never cure ordinary nail stickers under a UV or LED lamp unless the product specifically requires that process. Semi-cured gel wraps are a different product category and should be used exactly as directed.
If you are unsure, test the combination on one nail or ask a qualified nail technician for advice.
Common Mistakes to Avoid
Even a simple manicure can become frustrating if you rush the process. Avoid these common mistakes:
- Applying stickers over wet polish: The design may slide, wrinkle or become damaged.
- Choosing oversized designs: Large stickers may overlap the sidewalls or cuticles.
- Skipping nail preparation: Surface oils and moisture can affect adhesion.
- Pulling stickers off forcefully: This can damage the natural nail surface.
- Using incompatible top coats: Some coatings can affect the appearance or adhesion of certain stickers.
- Expecting every set to last the same amount of time: Wear depends on the product and how you use your hands.
- Ignoring product instructions: Application and removal methods vary between standard stickers, water decals and gel wraps.
Taking a few extra minutes to prepare your nails and position the designs carefully can make the finished manicure look much neater.
Frequently Asked Questions About Halloween Nail Stickers
Related BIAB Guides
- Festive Nail Stickers: Easy Ways to Give Your Nails a Beautiful Holiday Look
- Christmas Nail Stickers: 25 Festive Designs, Easy Application Tips & Beautiful Holiday Nail Ideas
- 21 Halloween Nail Design Ideas 2026 That Are Easy, Cute and Stylish
- Halloween Nail Design: 25 Spooky, Cute and Stylish Ideas to Try
The best Halloween nail stickers are the ones that suit your preferred style, nail length and application method. Ghosts and pumpkins are good choices for cute designs, while bats, skulls and spider webs suit darker manicures. Before buying, compare the design range, sticker size, material and customer reviews.
Clean and dry your nails, apply your chosen base colour if needed, and let it dry completely. Peel off a suitable sticker, place it carefully on the nail and smooth it down from the centre towards the edges. Finish with a compatible top coat if recommended by the manufacturer.
Yes, many standard self-adhesive nail stickers are suitable for natural nails. Check the product description to confirm compatibility, and apply them to a clean, dry surface. Some products are designed specifically for polished, gel or artificial nails.
Many nail stickers can be applied over a properly prepared gel-polish manicure. The gel polish must be cured according to its instructions, and the sticker and finishing coat must be compatible with the system. Ordinary stickers do not normally require lamp curing.
Wear time varies according to the sticker type, adhesive, nail preparation, top coat and daily activities. Some designs may begin lifting sooner than others. Follow the manufacturer’s guidance rather than relying on a fixed number of days.
Not every product requires one, but a compatible top coat can help protect many flat stickers from everyday wear. Some raised or textured designs may look better without a thick coating. Always check the instructions for your specific stickers.
Many stickers can be used over a finished BIAB manicure if the materials are compatible. Apply them only after the manicure has been properly prepared, and check whether your chosen top coat is suitable for the sticker.
Standard stickers can often be removed using the method recommended by the manufacturer, sometimes with suitable nail polish remover. Avoid pulling or scraping them off forcefully. Gel wraps and other specialised products may need a different removal method.
You can compare designs on Amazon UK and browse specialist retailers such as MoYou London. Check current stock, product details, delivery costs and customer feedback before buying.
Yes. Small ghosts, tiny pumpkins, bats and stars can look particularly attractive on short nails. Choose designs that fit comfortably within the nail surface and avoid stickers that extend onto the surrounding skin.
Yes. Self-adhesive decals and water-transfer stickers let you add printed designs without painting every detail yourself. You can combine them with a plain base colour for an attractive manicure with relatively little effort.
Black, orange, white, purple, nude and deep red are popular choices. Black and white create a classic spooky look, orange works well with pumpkins, and nude or pale pink provides a softer background for small Halloween motifs.
They can be a fun option for Halloween parties and evening events. Check that the product specifically states that the stickers glow in the dark, and follow any instructions about exposing them to light before use. The strength and duration of the glow can vary.
Some products are made for children, but not all nail stickers are suitable for every age group. Check the manufacturer’s age guidance, supervise young children and prevent stickers or small decorative pieces from being swallowed. Avoid applying products to irritated or damaged skin.
Start with clean, dry nails and select stickers that fit the nail without touching the skin. Smooth them down carefully, trim any excess where appropriate and use a compatible top coat if recommended. Avoid picking at the edges or exposing the manicure to unnecessary wear.
Final Thoughts: Are Halloween Nail Stickers Worth It?
Halloween nail stickers are a practical choice if you want a seasonal manicure without the time and effort involved in painting every detail by hand. From cute ghosts and orange pumpkins to black bats, spider webs and glow-in-the-dark designs, there are options for almost every style.
The key is to choose stickers that fit your nails, match your preferred look and work with your existing manicure. Prepare the nail surface properly, apply the design carefully and follow the product’s instructions for sealing and removal.
If you are ready to try a new Halloween look, start by browsing Halloween nail stickers on Amazon UK. Compare a few sets, check the reviews and choose a design you will genuinely enjoy wearing.
You do not need an elaborate manicure to get into the Halloween spirit. Sometimes, a simple black manicure with one tiny ghost or pumpkin on each accent nail is all it takes.
One Comment