
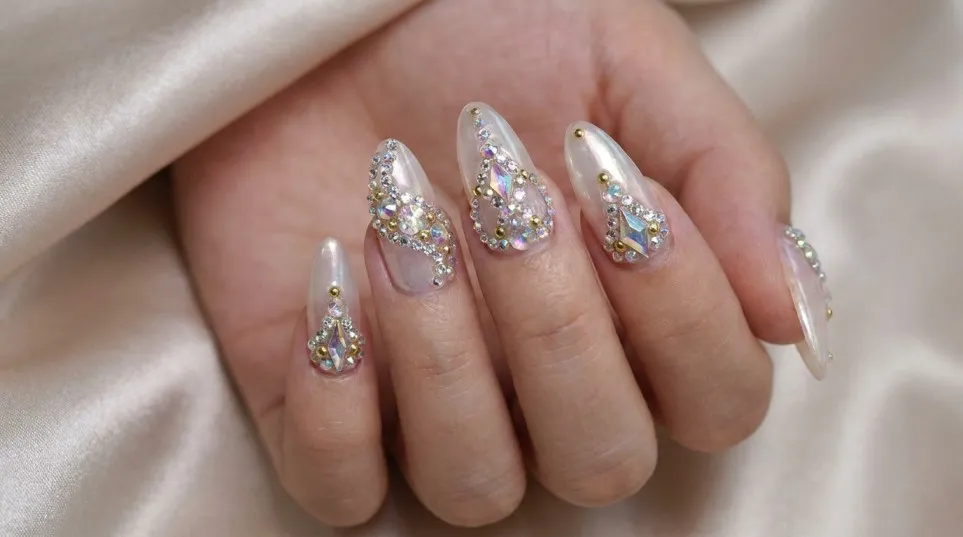
Nail Gems: Easy Designs, Application Tips and How to Make Them Last
Nail gems are a simple way to make an ordinary manicure look more stylish without changing your entire nail design. From tiny crystals on a French manicure to colourful rhinestones on long acrylic nails, these small decorations can add just the right amount of sparkle. They work with natural nails, gel polish, BIAB manicures, acrylic extensions and press-on nails, provided you choose a suitable attachment method.
The best part is that you do not need to be a professional nail artist to try them. A few well-placed stones can make a nude manicure look elegant, while a colourful arrangement can give a party-ready set a completely different feel.
However, choosing the right stones is only half the job. You also need the correct adhesive, a steady application technique and a little patience if you want your design to stay in place.
In this guide, you will discover the different types of nail gems, attractive design ideas, how to apply them at home, which products are worth considering and how to avoid common mistakes.
What Are Nail Gems?
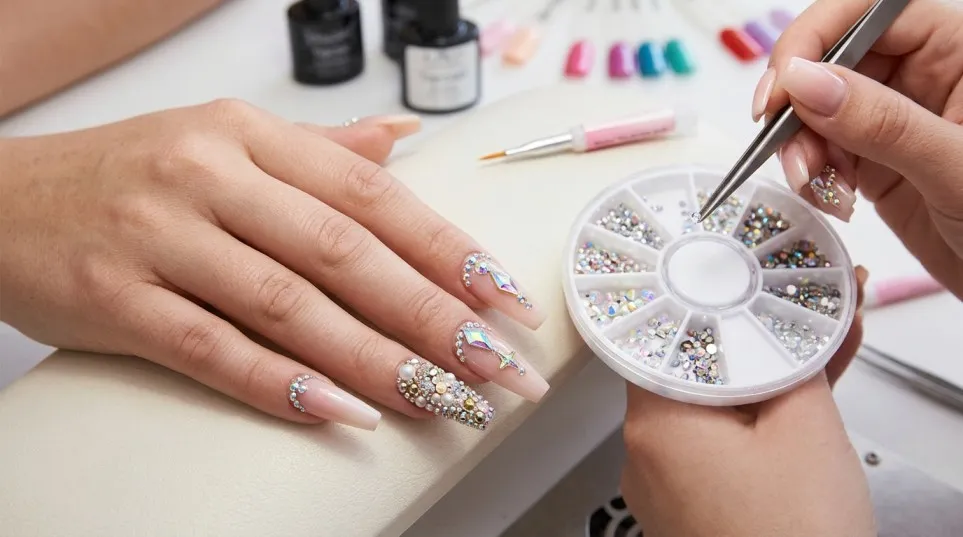
Nail gems are small decorative stones or embellishments used to add colour, shine and texture to a manicure. They are also commonly called nail rhinestones, nail crystals, nail jewels or nail art gems.
Depending on the design, they can be clear, coloured, iridescent or shaped like flowers, hearts, stars and other decorative details. Some are flat-backed crystals that sit close to the nail, while others have a raised shape that creates a more noticeable look.
You can find them in individual packs, mixed-colour collections and complete nail art kits containing different sizes and application tools.
The right choice depends on the finish you want. For example, small clear crystals can add a subtle detail to short nails, whereas larger stones are often better suited to statement designs on longer extensions.
Although the terms are sometimes used interchangeably, not all nail gems are made from the same material. Acrylic stones are usually inexpensive, while glass crystals can offer a sharper shine. The quality of the cut, the backing and the adhesive also affect the final result.
Different Types of Nail Gems to Try
Before buying a set, it helps to understand the main options. This makes it easier to choose decorations that suit your nail length, budget and preferred style.
1. Clear Rhinestones
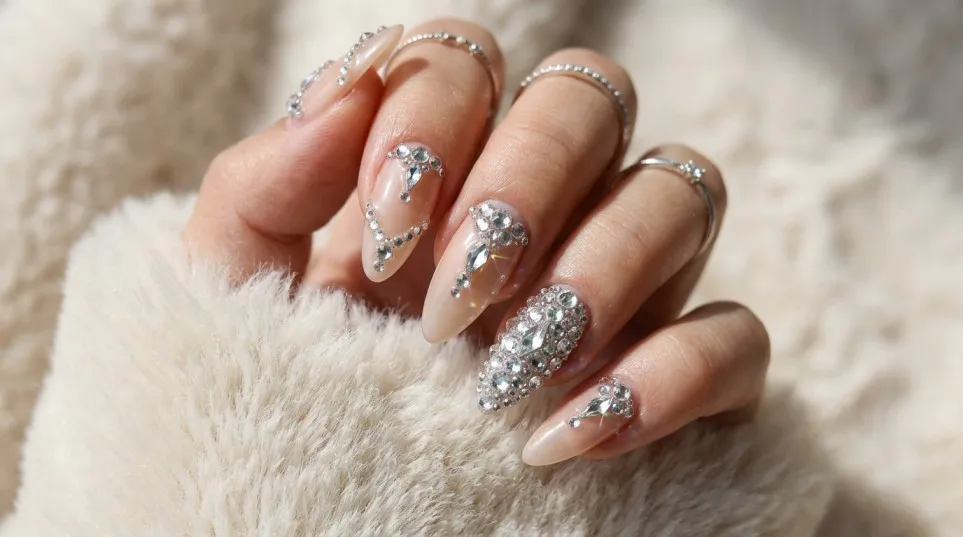
Clear rhinestones are a useful starting point for beginners. Their transparent finish reflects light and works with almost any nail polish colour.
Try them with nude, pink, white, red or black nails. A single crystal on each ring finger can create a neat accent without making the whole manicure look busy.
They are also a good choice if you want to decorate several different nail sets using the same collection.
2. AB Crystal Nail Gems
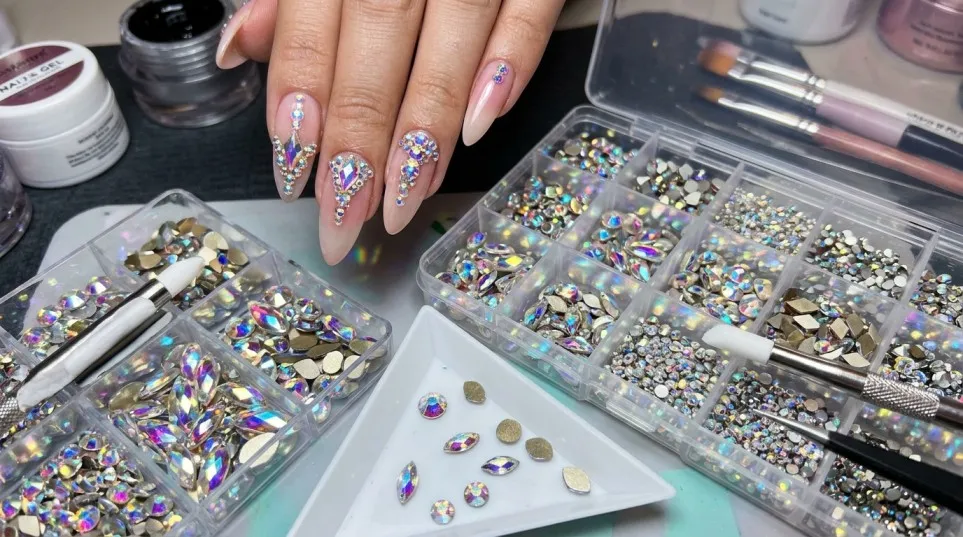
AB stands for Aurora Borealis, a finish that reflects several colours depending on the angle of the light.
These crystals are especially attractive on pale pink, milky white and pastel manicures. They can also complement silver nail art or a soft glitter finish.
If you want sparkle that changes slightly as your hands move, AB crystals are worth considering.
3. Coloured Nail Rhinestones
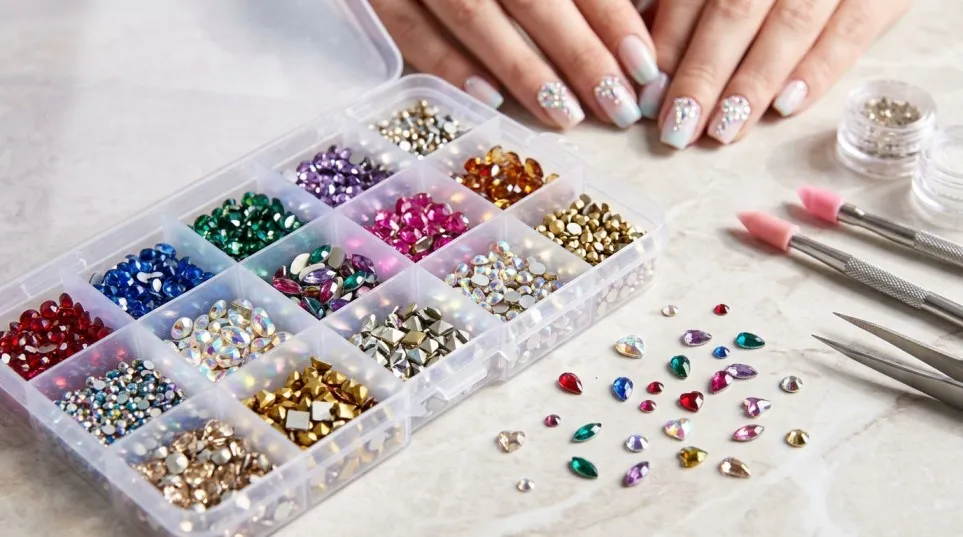
Coloured stones allow you to match your manicure to a particular outfit, season or occasion.
Pink, blue, green, purple and red gems are popular options for creative nail art. You can also choose mixed-colour packs if you prefer experimenting rather than sticking to one shade.
For a more balanced result, choose colours that complement the polish underneath. For example, blue gems can stand out against a pale base, while red stones create a striking contrast against nude or black nails.
4. Pearl Nail Gems
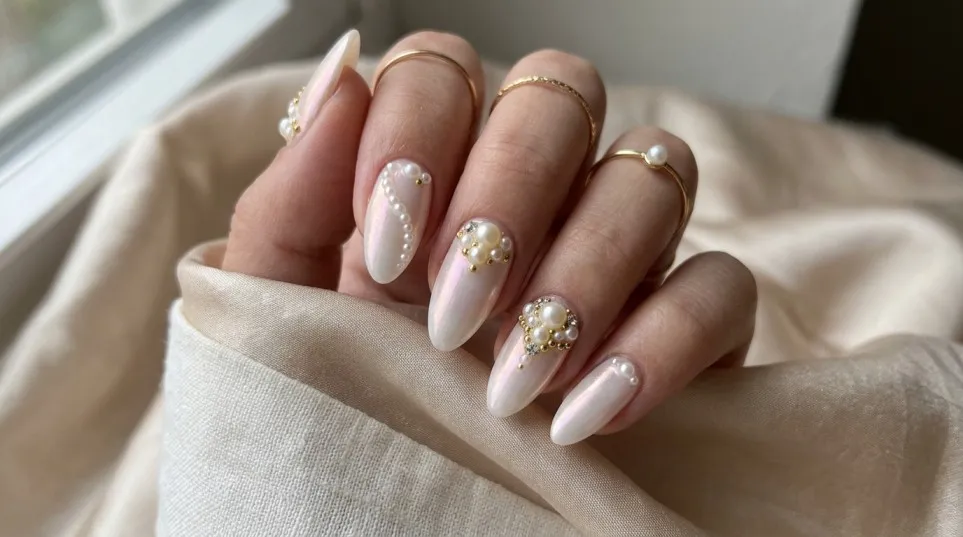
Pearl decorations offer a softer finish than traditional crystals. They are particularly suitable for bridal manicures, engagement celebrations and elegant everyday nail designs.
Small white or cream pearls work well with milky pink polish, a classic French manicure or a simple nude BIAB set.
Use only a few pearls if you want a clean, understated look. A large cluster can work for a special occasion, but it may feel less practical for everyday activities.
5. Flower, Heart and Star Gems
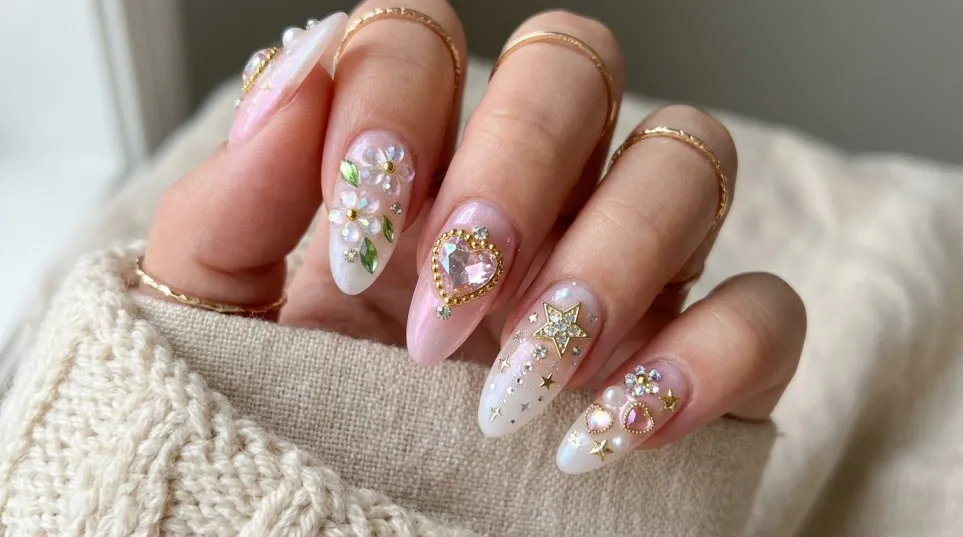
Shaped nail decorations make it easy to create a recognisable design without drawing every detail by hand.
Flower gems look pretty on pastel nails, while tiny hearts suit pink or red manicures. Stars and moon-shaped decorations can add a playful finish to darker polish colours.
Check the size and thickness before buying. Raised charms may catch on clothing or hair, especially when they are placed close to the nail tips.
6. Flat-Back Nail Gems
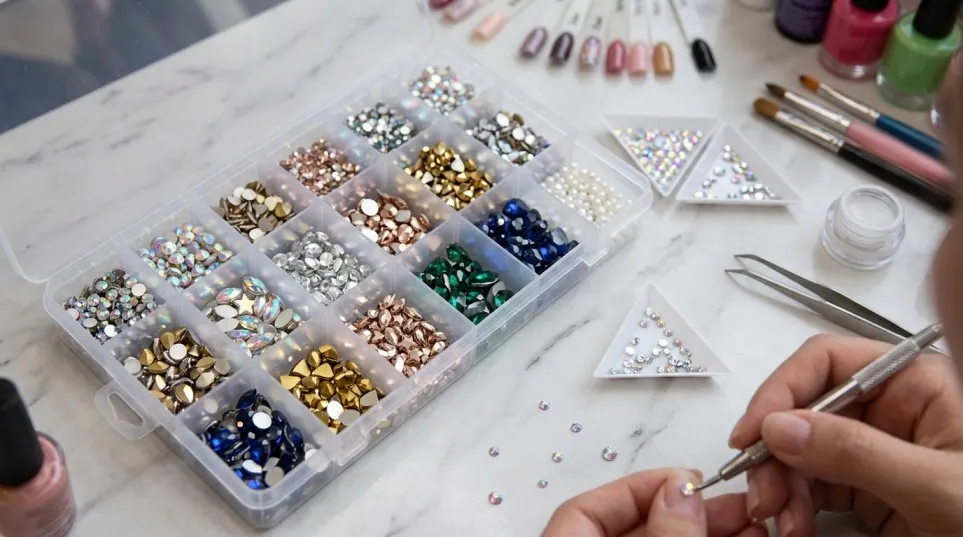
Flat-back stones are designed to sit against a surface, making them useful for many nail art applications.
They are generally easier to position than decorations with bulky settings. However, the curvature of your nail still matters. A large flat stone may not sit securely on a strongly curved nail unless the attachment product fills the gap appropriately.
For short natural nails, smaller flat-back gems are often a practical option.
10 Nail Gems Design Ideas for Different Occasions
You do not need dozens of decorations on every nail to create a beautiful manicure. In many cases, a simple arrangement looks more polished and is easier to maintain.
1. Nude Nails with Tiny Crystals
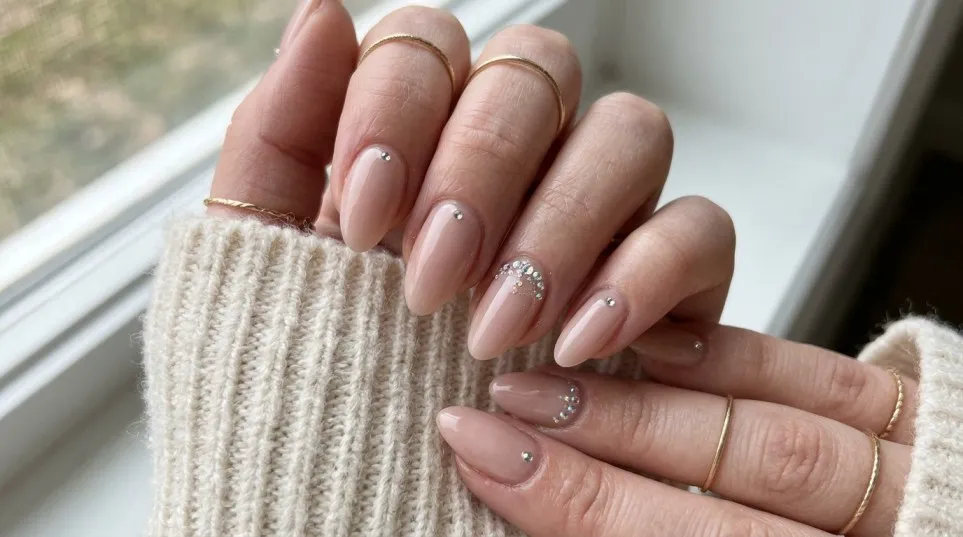
A nude manicure with one or two small crystals is an easy way to try nail gems without making a dramatic change.
Choose a beige, pink or milky nude base. Then place a tiny clear crystal near the cuticle of one or two nails.
This design works well for office wear, everyday outfits and occasions where you want a little sparkle without a heavy nail art look.
2. French Tip Nails with Rhinestones
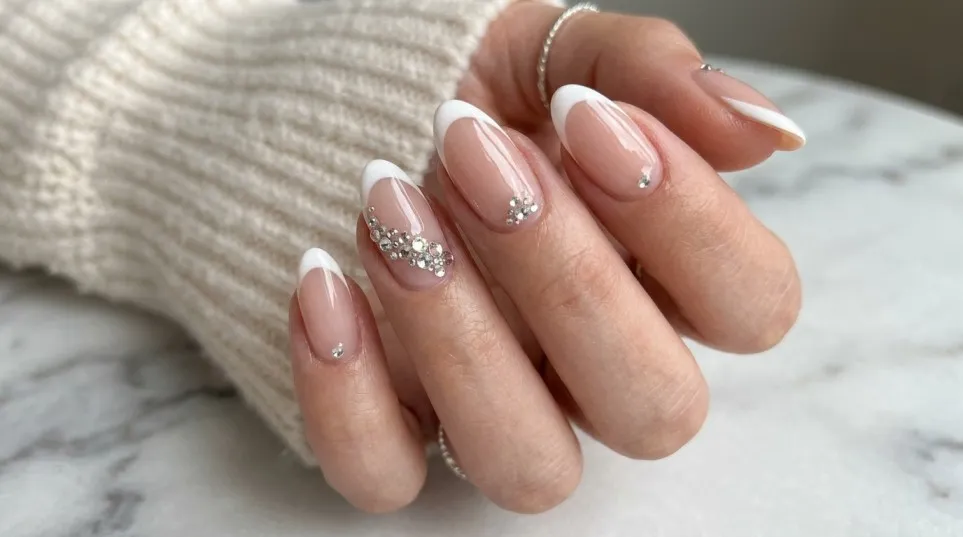
A French manicure and rhinestones make a versatile combination. The white tips keep the design familiar, while the crystals add a decorative detail.
You could place one small stone near the edge of the smile line or create a short line of crystals on an accent nail.
For short nails, keep the stones small so the design does not overwhelm the available space.
3. Pink BIAB Nails with Nail Gems
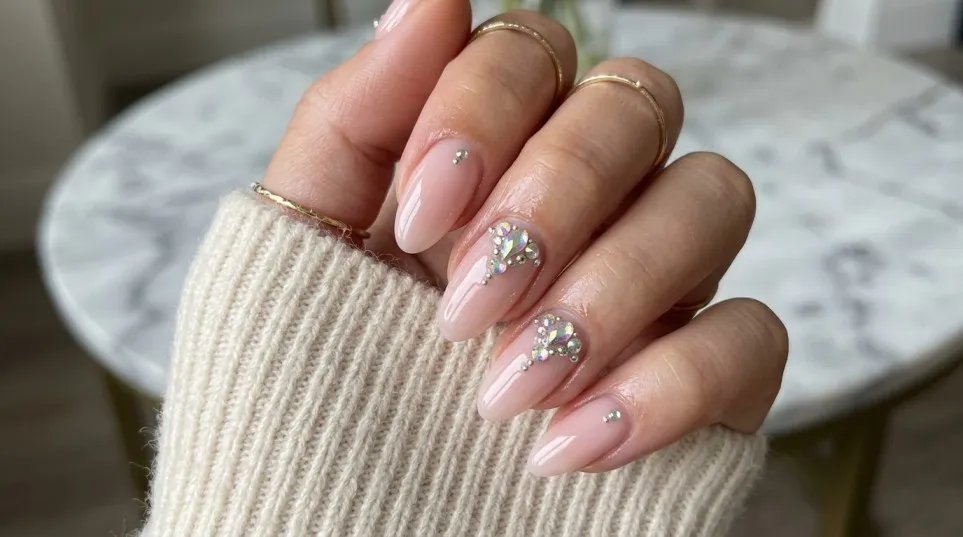
If you enjoy BIAB manicures, tiny crystals can add interest to a simple pink builder-gel finish.
Start with a shade of soft pink, rose or milky blush. Add one crystal to each ring finger or create a small cluster on just one nail.
This is a good option if you prefer a manicure that looks tidy from a distance but has an extra detail when viewed closely.
Choose an attachment product compatible with your BIAB system, and follow its curing instructions if a lamp is required.
4. White Nails with Pearl Decorations
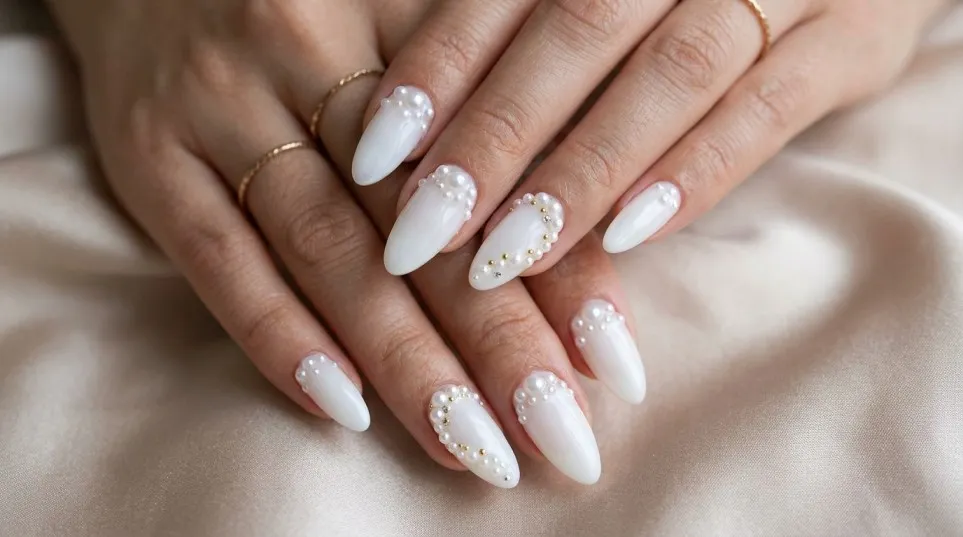
White polish paired with pearl nail gems creates a clean, elegant appearance.
Try a sheer white or milky base rather than an opaque, bright white if you want a softer result. Place a small pearl near the cuticle or combine a few different sizes for a simple accent.
This style can suit weddings, engagement parties, birthdays and summer events.
5. Black Nails with Silver Rhinestones
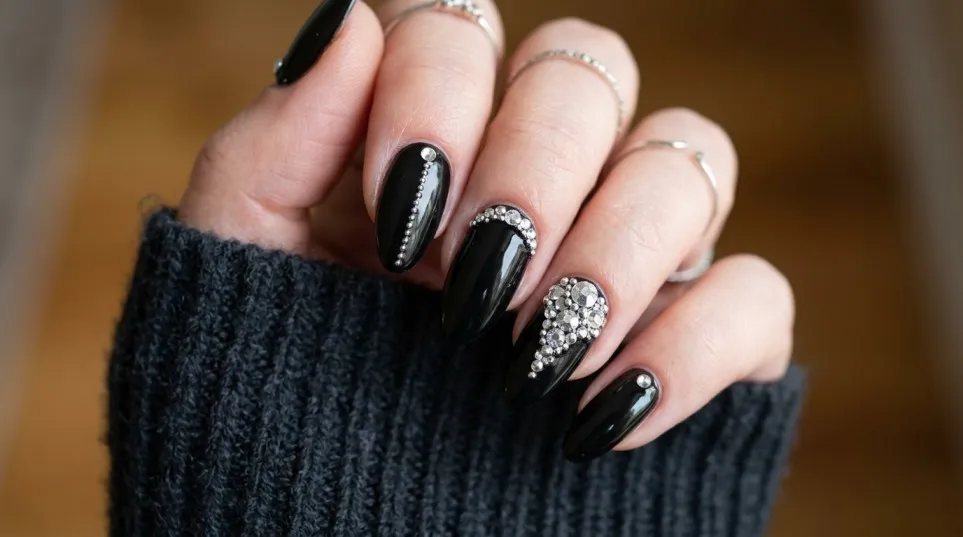
Black nails provide a strong background for silver or clear crystals.
For a simple version, add a single stone to each accent nail. For a more noticeable look, arrange small crystals in a diagonal line.
Avoid placing large stones directly on the nail tips if you use your hands frequently, as the tips are exposed to knocks and friction.
6. Red Nails with Gold-Tone Nail Art
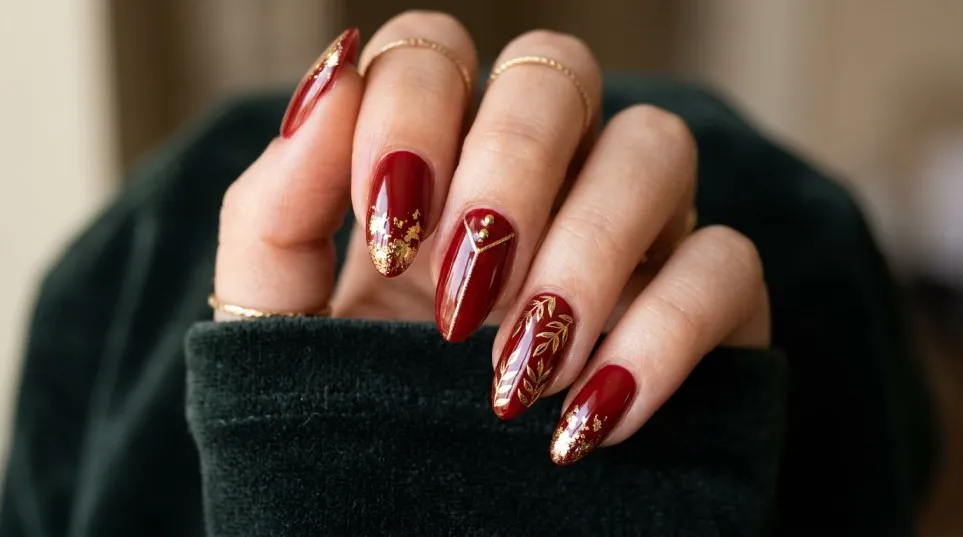
Red nails already make a statement, so a small number of gold-tone embellishments can be enough.
Choose a rich red polish and add one small decorative gem to selected nails. You can also combine red with clear crystals if you prefer a brighter finish.
Check that the embellishments are specifically suitable for nail use rather than assuming every craft decoration is safe to apply with nail products.
7. Glitter Nails with Clear Gems
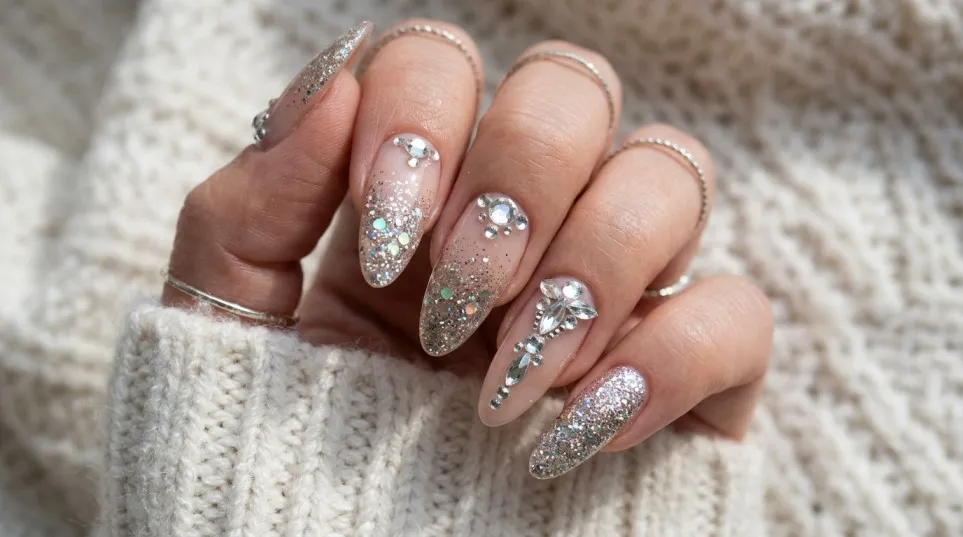
Glitter polish and clear rhinestones can work together, especially when the glitter is fine and the stone placement is planned carefully.
Use a smooth glitter base or seal the glitter with a suitable top coat before attaching the gems. An uneven surface can make it harder for stones to sit securely.
Keep the crystals on one or two nails if the glitter is already bold.
8. Minimalist Cuticle Gems
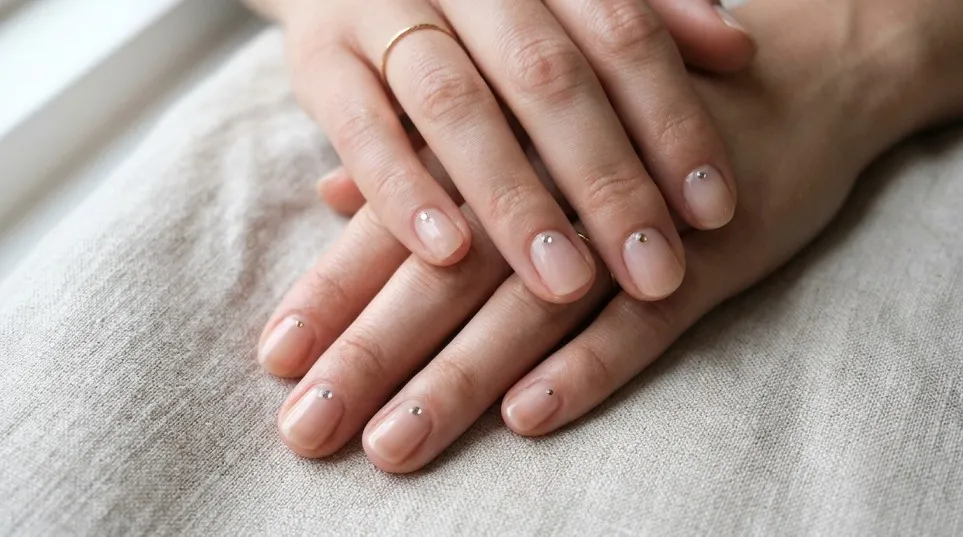
For a neat, modern manicure, place a tiny crystal near the cuticle area of each nail.
Leave a small gap between the stone and the skin. This gives the design a cleaner finish and leaves room for the nail to grow.
This look works particularly well with short nails, neutral polish and simple outfits.
9. Colourful Gem Clusters
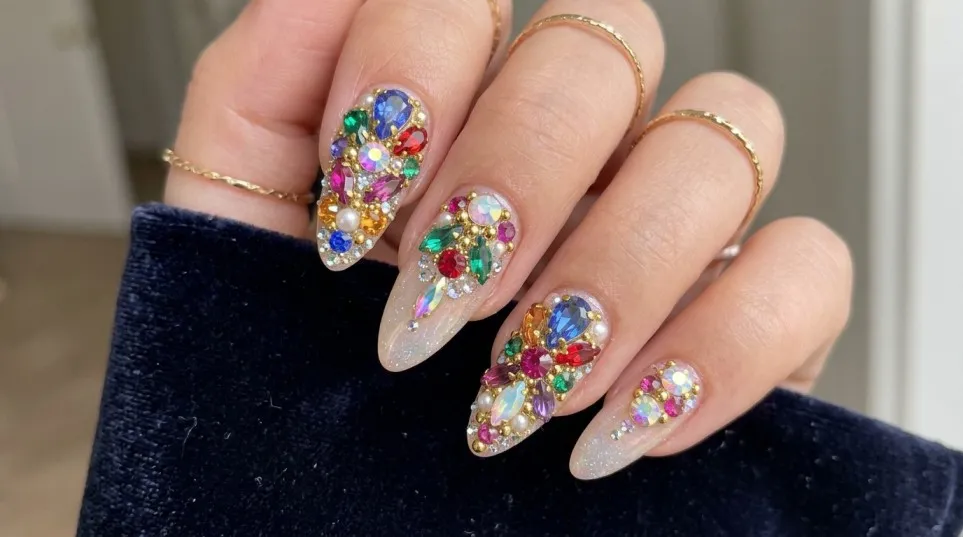
If you prefer playful nail art, combine small stones in two or three complementary colours.
For example, you could arrange pink, purple and clear gems into a tiny flower. Another option is a cluster of blue and silver crystals on a pale base.
Plan the arrangement before applying adhesive. This makes it easier to create a balanced design without moving stones repeatedly.
10. Wedding Nail Gems
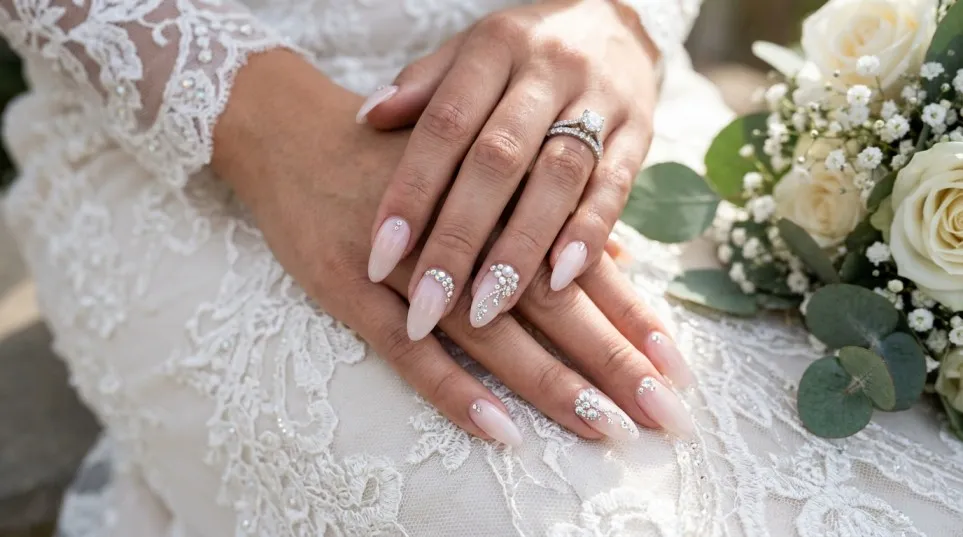
Bridal nail designs often look best when the decoration complements the overall outfit rather than competing with it.
Pearl details, clear crystals and subtle AB stones can work beautifully with white, ivory, pale pink and nude manicures.
If you are preparing for a wedding, test the design before the event. This gives you time to check the comfort, durability and overall appearance.
How to Apply Nail Gems at Home: Step-by-Step Guide
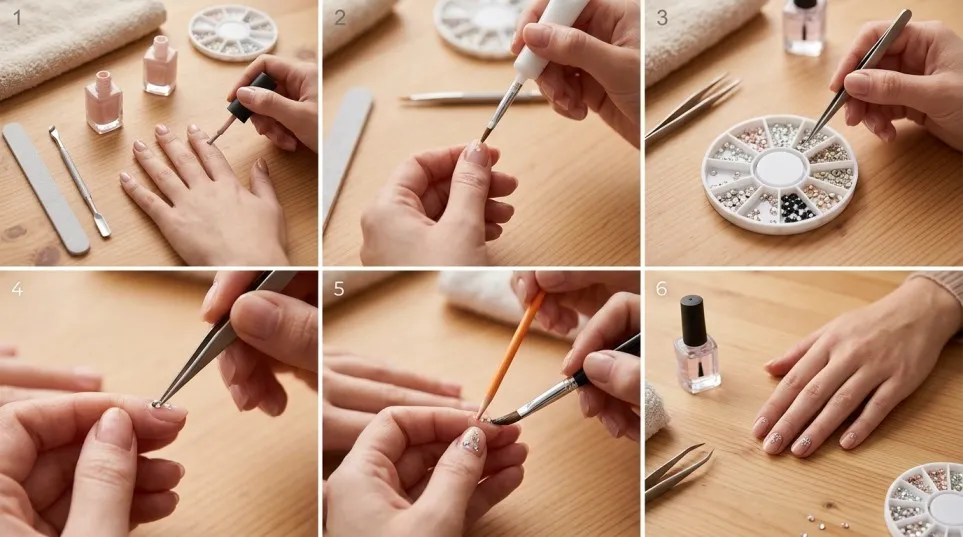
Applying nail gems is straightforward when you prepare your nails properly and use an adhesive suitable for the product and manicure underneath.
Before starting, read the instructions supplied with your nail adhesive or gel. Different products have different application and curing requirements.
What You Will Need
Gather these items before you begin:
- Nail gems or flat-back rhinestones
- Nail polish, gel polish or your preferred nail enhancement
- A compatible nail adhesive or rhinestone gel
- A wax-tipped gem picker, suitable tweezers or another clean placement tool
- A small detail brush, if needed
- A UV/LED lamp if your chosen product requires curing
- A lint-free wipe and the recommended cleanser
- A clean work surface and good lighting
You can find nail gem kits on Amazon UK. Check the product description carefully to confirm whether the pack includes adhesive, a placement tool or only the stones.
Step 1: Prepare Your Nails
Start with clean, dry nails. Remove old polish and gently prepare the nail surface according to your chosen manicure system.
Avoid cutting or aggressively pushing back the living skin around the nails. If you are applying gems over a gel or BIAB manicure, complete the base manicure first and follow the manufacturer’s instructions.
Good preparation helps reduce lifting caused by dust, oil or an unsuitable surface.
Step 2: Finish Your Base Colour
Apply your chosen nail colour and allow it to dry fully, or cure it under the lamp if you are using gel polish.
A nude base, French tip, pink BIAB manicure or glitter polish can all work well.
Do not try to position gems on a base that is still moving or has not been properly cured. The stones may slide out of place or interfere with the finish.
Step 3: Plan the Design
Arrange a few stones on a clean surface before applying adhesive.
Decide whether you want a single accent gem, a line of crystals or a small cluster. For your first attempt, a simple design is easier to control.
Keep the stones away from the skin and avoid putting large decorations too close to the free edge.
Step 4: Choose the Correct Adhesive
The attachment method depends on the type of manicure and how long you want the design to last.
For a temporary look on regular polish, a suitable top coat may work, although it usually offers less staying power than a dedicated adhesive.
For longer-lasting designs, a nail glue specifically intended for nail decorations or a compatible rhinestone gel may be more suitable. Gel products that require curing must be used with the correct lamp and according to the manufacturer’s directions.
Do not use household glue or craft adhesive as a substitute for a product intended for nails.
Step 5: Pick Up and Place the Gems
Use a wax-tipped picker or suitable tweezers to lift each stone.
Apply a small amount of the chosen adhesive to the intended position, following the product instructions. Place the stone gently and adjust it before the adhesive sets.
Avoid flooding the area with glue or gel. Excess product can make the design untidy and may spread onto the surrounding skin.
Work on one nail at a time so you can control the placement.
Step 6: Secure the Edges
For products that allow it, carefully secure the base or edges of each stone without covering its visible top.
This helps reduce snagging while preserving the crystal’s shine. Avoid applying a thick layer of top coat over the facets of clear crystals, as it can make them look less brilliant.
If using gel, ensure the product can cure fully around the decoration. Large or opaque stones may block light, so do not assume that a longer curing time alone will correct an unsuitable application method.
Step 7: Allow the Design to Set
Follow the adhesive manufacturer’s instructions for drying or curing.
Do not touch, file or press the stones repeatedly while the product is setting. Once finished, check that the decorations feel secure and that no adhesive has contacted the surrounding skin.
If a stone feels loose, correct it before carrying on with normal activities.
How to Make Nail Gems Last Longer
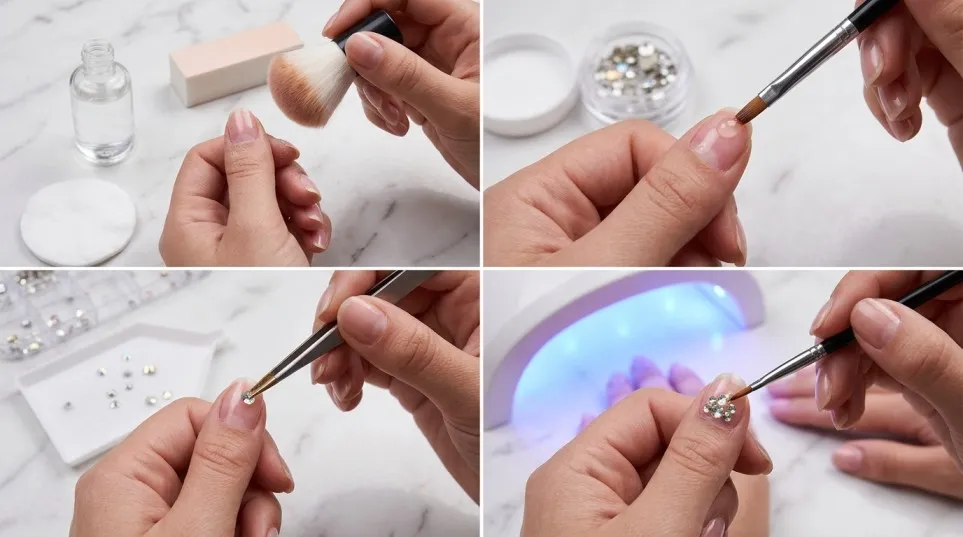
One of the most common problems with nail rhinestones is that they fall off before the manicure needs refreshing. Fortunately, a few practical adjustments can improve the result.
Choose the Right Gem Size
Small stones are usually easier to manage on short natural nails. Larger stones can be attractive on extensions, but they need a stable base and suitable support.
A stone that is too large for the nail’s curve may not sit securely. Choosing a flatter or smaller decoration can help.
Use a Suitable Adhesive
The adhesive should match the stone, the nail surface and the intended wear time.
Professional nail artists often use specialised gem gels for crystal placement, while nail glue may suit some smaller decorations. The correct choice depends on the manufacturer’s guidance and the application method.
For additional technical advice, read this guide from Scratch Magazine on improving the staying power of nail gems.
Keep Gems Away from High-Impact Areas
The free edge of a nail often comes into contact with keyboards, clothing, bags and other objects.
Placing larger stones closer to the centre of the nail or toward the cuticle area can reduce some of this contact. Leave enough space around the cuticle to avoid contact with the skin.
Avoid Covering the Crystal Surface
Clear crystals are designed to reflect light through their cut surfaces. Covering those facets with top coat can reduce their sparkle.
Instead, secure the stone around its base using a compatible method that leaves the visible surface uncovered.
Be Gentle with Your Hands
Gloves can help protect a manicure during cleaning or washing up. Avoid picking at loose stones, using your nails as tools or pulling decorations off when they catch on something.
If a stone becomes loose, remove or repair it safely rather than repeatedly pressing it back onto an unstable surface.
Which Nail Gems Should You Buy?
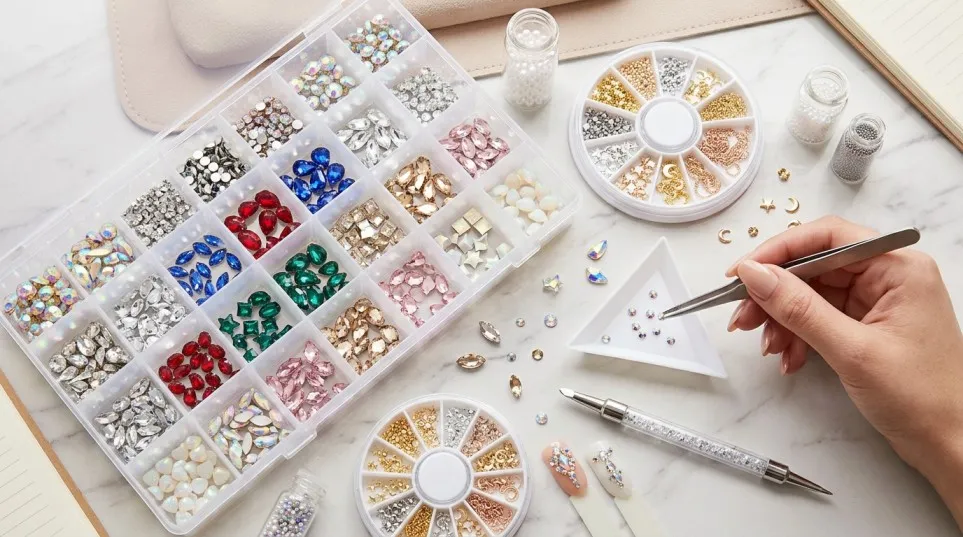
The best nail gems are not necessarily the most expensive ones. Look for stones that suit your preferred designs, sit comfortably on your nails and work with the adhesive you plan to use.
For Beginners
A mixed-size set of clear and AB rhinestones is a practical first purchase.
These colours work with many nail polish shades, and smaller stones make it easier to practise simple designs. A kit with a wax picker can also make placement more convenient.
Browse nail gems and rhinestone kits on Amazon UK.
For BIAB and Gel Nail Users
If you regularly wear BIAB or gel polish, look for decorations that can be attached using a product compatible with your manicure system.
A dedicated rhinestone gel may be useful for designs that include clusters or larger stones. Check whether the product requires a UV/LED lamp and confirm the correct curing procedure before purchasing.
You can compare nail rhinestone gels and adhesives on Amazon UK.
For Weddings and Special Events
Pearl embellishments, clear crystals and subtle AB stones are versatile options for formal occasions.
A small pack of mixed sizes can be more useful than a large collection of colours you may rarely use. Choose a design that complements your outfit and is comfortable enough to wear throughout the event.
What to Check Before Ordering
Before buying, review the following details:
- Stone material: Check whether the gems are acrylic, glass, crystal or another material.
- Size range: Make sure the stones suit your nail length and design.
- Shape: Flat-back stones are often easier to place on nails than bulky decorations.
- Included tools: Check whether a picker, tweezers or adhesive is supplied.
- Customer reviews: Look for useful comments about size accuracy, shine and consistency.
- Application instructions: Confirm that the decorations and adhesive are intended for nail use.
Product descriptions and pack contents can vary, so read the listing rather than relying on the product photograph alone.
Common Nail Gem Mistakes to Avoid
Even an attractive design can look untidy if the stones are poorly positioned or the adhesive is unsuitable.
Using too much glue: Excess adhesive can spread beyond the stone and make the manicure look messy. Use the amount recommended for your chosen product.
Choosing oversized decorations: A large gem may overwhelm a short nail or sit unevenly on a curved surface. Start with smaller stones if you are unsure.
Placing gems on an unfinished base: Dust, oil, wet polish and an unstable surface can interfere with adhesion. Prepare the manicure before decorating it.
Applying top coat over every stone: This may dull the appearance of clear crystals. Secure the edges without coating the visible facets where the product instructions allow.
Ignoring curing instructions: Gel products must be used with a suitable lamp and cured according to the manufacturer’s directions. Never assume that every gel or stone combination will cure properly.
Pulling stones off: Forcibly removing decorations can damage the natural nail. Use a removal method appropriate for the adhesive and manicure, or ask a qualified nail technician for help.
Are Nail Gems Suitable for Natural Nails, BIAB and Acrylics?
Yes, nail gems can be used with different manicure types, but the application method may need to change.
Natural Nails
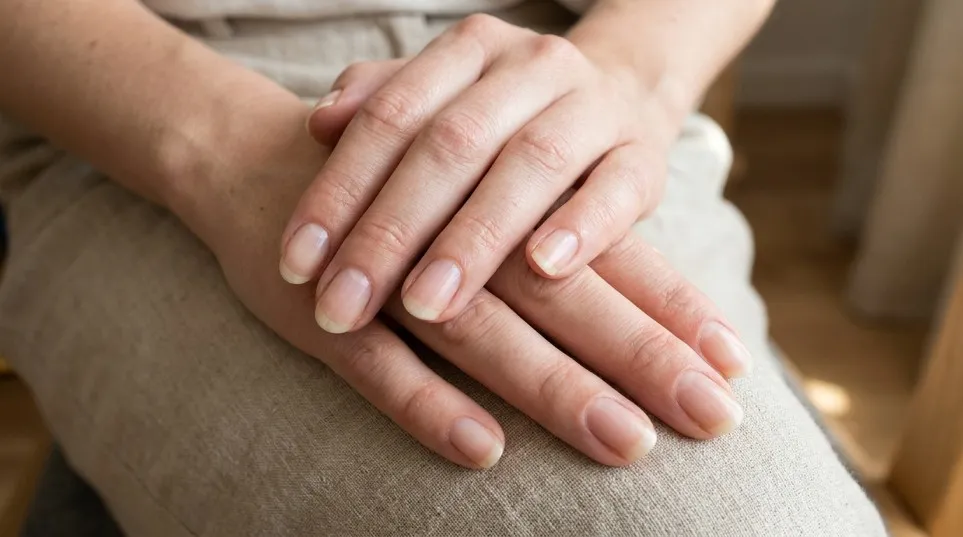
Small, lightweight stones can work well on natural nails. Choose a design that does not interfere with everyday tasks, and avoid aggressive surface preparation that can weaken the nail plate.
BIAB Nails
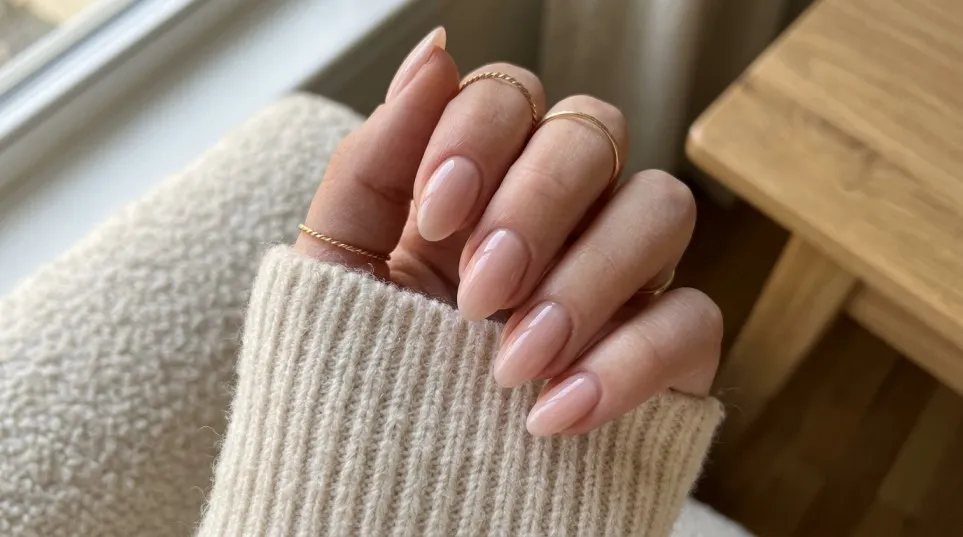
BIAB provides a builder-gel base that can be decorated with crystals. Use an attachment product compatible with the BIAB system and follow the correct curing process.
For a balanced look, try a soft pink base with one or two tiny crystals rather than covering every nail with heavy decorations.
Gel Polish Nails
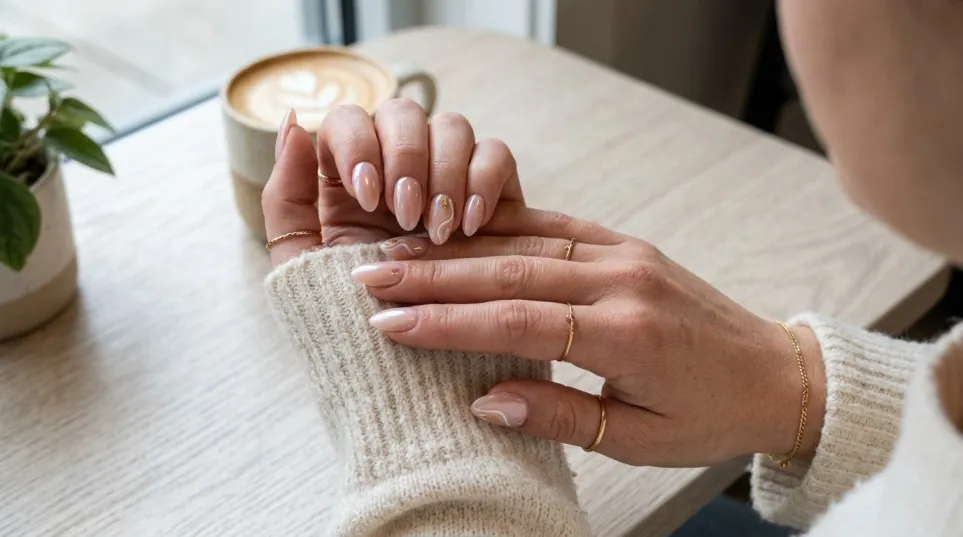
Gel polish offers a cured colour layer onto which compatible nail decorations can be attached.
The surface preparation and adhesive requirements vary between systems. Follow the manufacturer’s instructions rather than assuming that any gem gel will work over any top coat.
Acrylic Nails
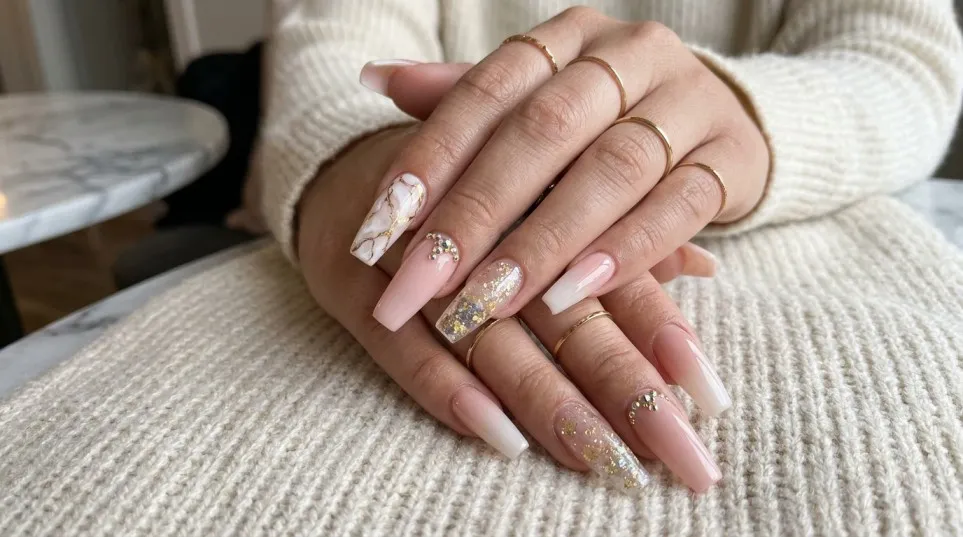
Acrylic extensions can support a wide range of nail art styles, including larger crystal arrangements. However, stone size, placement and the quality of the attachment still matter.
If you are planning a heavy cluster or a detailed design for a special event, a trained nail technician may be able to achieve a more secure and balanced result.
How to Remove Nail Gems Safely
Removal depends on whether the decorations were attached with regular polish, nail glue or a gel product.
Do not pull or twist a stone off simply because one edge has lifted. This can remove layers of the natural nail or damage the manicure underneath.
For temporary decorations, use the removal method recommended for the polish or adhesive. For gel-attached gems, follow the manufacturer’s removal guidance or ask a professional nail technician to remove them.
Avoid cutting, drilling or filing close to your natural nail unless you have the appropriate training and equipment. If the skin becomes irritated, painful or swollen, stop using the product and seek suitable medical advice if symptoms persist or worsen.
After removal, clean the nails gently and apply a suitable moisturiser or cuticle oil if the skin is dry.
Frequently Asked Questions About Nail Gems
Nail gems are decorative stones used to add sparkle, colour and texture to manicures. They can be used on natural nails, gel polish, BIAB, acrylic extensions and press-on nails with a suitable attachment method.
Prepare your nails, finish the base colour, choose a compatible nail adhesive, place each gem with a picker or tweezers, and secure it according to the product instructions. Allow the adhesive to dry or cure fully before using your hands normally.
Use a suitable adhesive, prepare the nail surface properly, select stones that fit the nail’s curve and secure the base without covering the visible facets. Avoid placing bulky decorations where they are likely to catch on clothing or other objects.
The best adhesive depends on the stone, the manicure and the expected wear time. A nail adhesive intended for decorations may suit some designs, while compatible rhinestone gel can be useful for gel manicures and larger crystals. Always follow the manufacturer’s instructions.
Yes. You can decorate BIAB nails with compatible crystals and embellishments. Complete and cure the base manicure as directed, then attach the gems using a suitable product. Avoid placing uncured gel on the skin.
Yes. Small, lightweight gems can be used on natural nails. Keep the design simple, avoid excessive filing and use an adhesive specifically intended for nails.
Not usually over the visible surface of clear crystals if you want to preserve their sparkle. Where the attachment system allows it, secure the edges or base instead. Always follow the instructions for your particular product.
Some gems can be reused if they are removed without damage and cleaned appropriately. However, reuse depends on the material, adhesive and condition of the stone. Do not reuse decorations between people in a salon setting, and follow suitable hygiene practices.
Small flat-back rhinestones, tiny clear crystals and delicate pearl decorations are practical choices for short nails. They add detail without taking up too much space or making the manicure feel bulky.
The stones themselves do not automatically damage the nail, but aggressive removal, excessive filing, unsuitable adhesives and picking at decorations can cause damage. Use nail-safe products and remove gems gently.
You can find nail gems through UK beauty retailers, specialist nail-art suppliers and online marketplaces. Browse nail gems on Amazon UK to compare pack sizes, stone types, included tools and customer feedback before choosing a set.
Final Thoughts
Nail gems make it easy to personalise a manicure, whether you prefer a subtle detail or a bold crystal design. Clear rhinestones, AB crystals, pearls and colourful charms all offer different ways to update your nails without learning complicated nail art techniques.
If you are new to decorating your nails, begin with a small set of flat-back stones, a simple design and an adhesive intended for nail use. Once you are comfortable with placement, you can experiment with French tips, BIAB manicures, pearl accents and colourful clusters.
Before purchasing, check the stone size, material, included tools and application instructions. A carefully chosen set and the right attachment method can make nail art easier, more enjoyable and better suited to your personal style.
Ready to try your first design? Explore nail gems and nail art kits on Amazon UK and choose a set that matches your manicure routine and the designs you want to create.
One Comment