Nail Art Brushes: Types, Uses, Buying Tips and a Complete Beginner’s Guide
Nail art brushes are essential tools for creating beautiful nail designs at home or in a professional salon. Whether you want to paint thin lines, create delicate flowers, design French tips, or add fine details to gel nails, the right brush can make your work easier and more precise. You do not need to be an expert nail artist to get started. With a few good brushes, suitable nail products, and regular practice, you can create attractive designs with greater confidence.
However, choosing the right brush can feel confusing when you first start shopping. Some sets contain just a few brushes, while others include 15, 20, or even more pieces. The important thing is to understand what each brush does and which tools you will actually use.
In this guide, you will learn about the different types of nail art brushes, how to choose a suitable set, how to use them step by step, and how to care for them properly. You will also discover useful buying tips to help you choose brushes that offer good value for money.
What Are Nail Art Brushes?

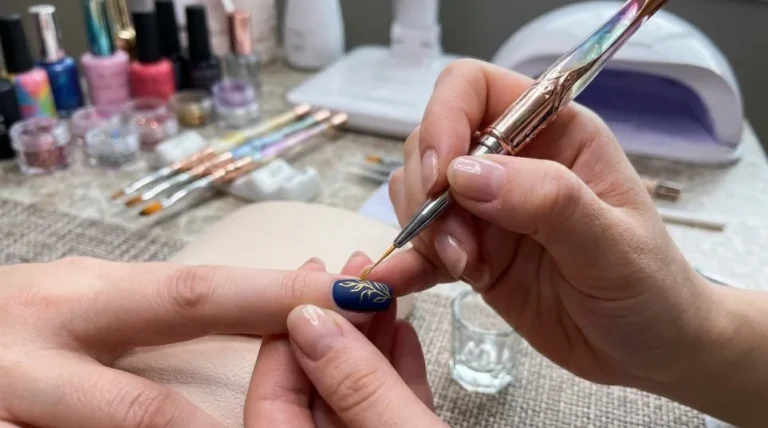
Nail art brushes are small brushes designed to apply nail polish, gel paint, acrylic paint, or other suitable nail art products with control. Unlike ordinary paintbrushes, they are available in shapes and sizes that help artists work on the small surface of a fingernail.
For example, a long liner brush can help you paint smooth curves, while a short detail brush is useful for creating tiny flowers, hearts, and other small patterns. A flat brush, on the other hand, can help fill larger areas with colour or create simple one-stroke designs.
You can use nail art brushes for different manicure styles, including:
- Fine lines and geometric patterns.
- French tip nails and curved smile lines.
- Floral nail art and leaf patterns.
- Minimalist nail designs.
- Abstract nail art and colour blocking.
- Gel polish details and builder gel application, using compatible brushes.
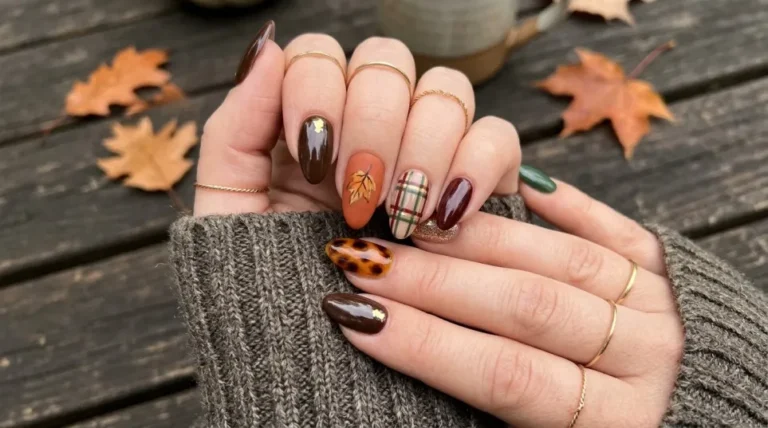
- Seasonal designs, including Christmas, Halloween, and autumn nail art.
If you enjoy experimenting with nail designs, a small collection of suitable brushes can give you more creative options without requiring an expensive salon setup.
For a broader introduction to nail art tools, read this guide to nail art brushes and their uses.
Different Types of Nail Art Brushes and Their Uses
Not every brush is designed for the same job. Understanding the differences will help you avoid buying tools that do not match your needs.
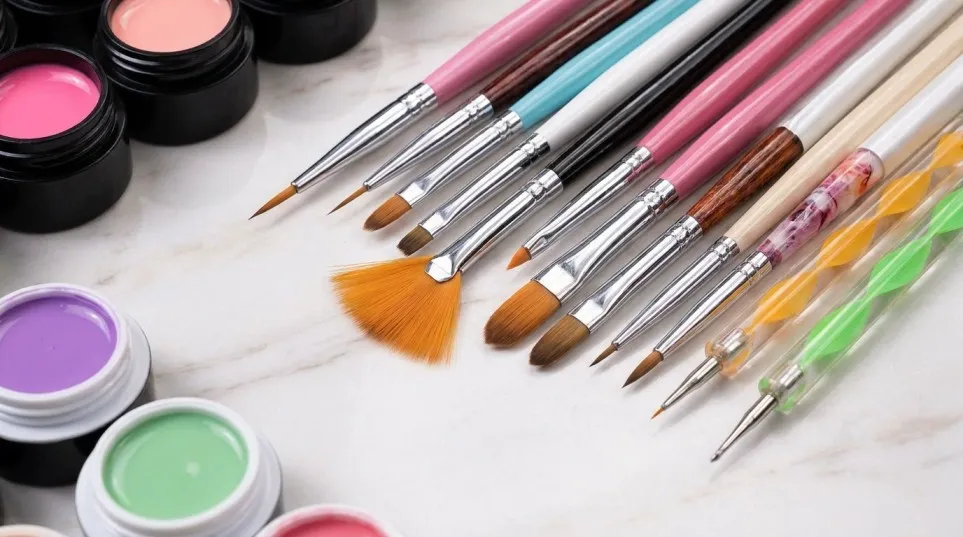
1. Liner Brushes
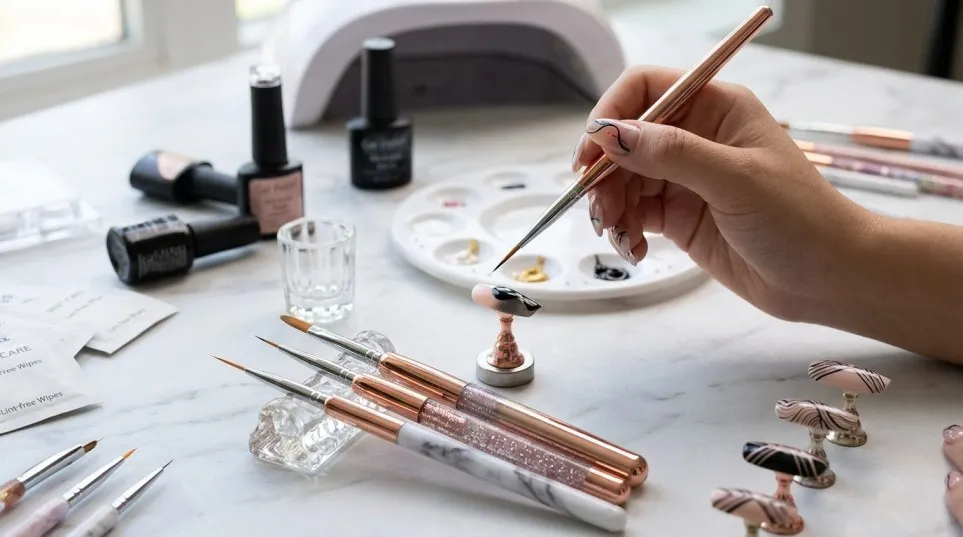
A nail art liner brush has long, narrow bristles that help you draw thin, continuous lines. It is one of the most useful brushes for anyone interested in detailed nail designs.
Liner brushes are commonly used for:
- Straight lines and stripes.
- Swirls and curved patterns.
- French tip outlines.
- Geometric nail art.
- Fine borders and decorative details.
- Outlining flowers and other small shapes.
The length of the bristles affects how the brush behaves. A shorter liner usually offers more direct control for small details, while a longer liner can carry enough product for longer strokes.
For beginners, a short or medium liner is often a practical starting point. It is easier to learn how much pressure to apply before moving on to longer brushes.
Buying tip: Look for a liner with evenly arranged bristles that return to a fine point. If the bristles spread apart, creating clean lines may become difficult.
2. Detail Brushes

A nail art detail brush usually has a small head with a fine, pointed tip. Its shorter bristles provide control when painting small shapes or working in tight spaces.
This type of brush is particularly useful for:
- Tiny flowers and leaves.
- Hearts and stars.
- Fine outlines.
- Small lettering and decorative marks.
- Animal-print patterns.
- Correcting small areas of a design.
Imagine that you want to paint a small white flower on a pale pink nail. A thick brush could cover too much of the background, making the petals look messy. A detail brush allows you to add each petal with smaller, more controlled movements.
When choosing one, check that the tip is neat rather than split or uneven. A good detail brush should make it easier to place colour exactly where you want it.
3. Flat Nail Art Brushes
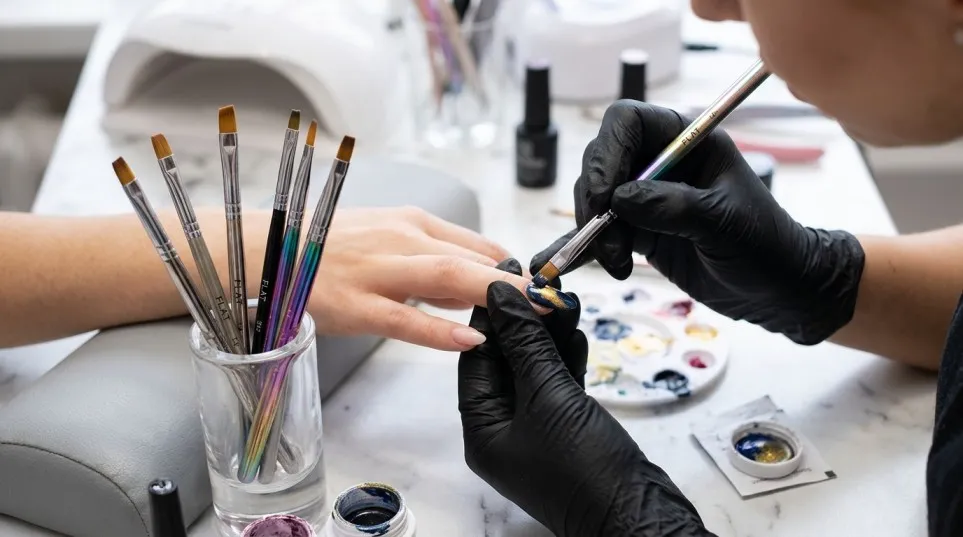
A flat nail art brush has a straight, squared-off edge. Depending on its size and bristle type, it can help you apply colour, fill shapes, and create simple decorative strokes.
Flat brushes are useful for:
- Colour blocking.
- Filling larger design areas.
- Creating one-stroke flowers.
- Painting broad decorative shapes.
- Blending colours with suitable products.
- Applying certain gel products when the brush is designed for that purpose.
A flat art brush should not automatically be treated as a builder gel brush. Brush size, stiffness, and product compatibility matter. If you are applying builder gel, choose a brush specifically intended for that product.
For everyday nail art, a small flat brush can be a useful addition to a liner and detail brush.
4. Angled Brushes
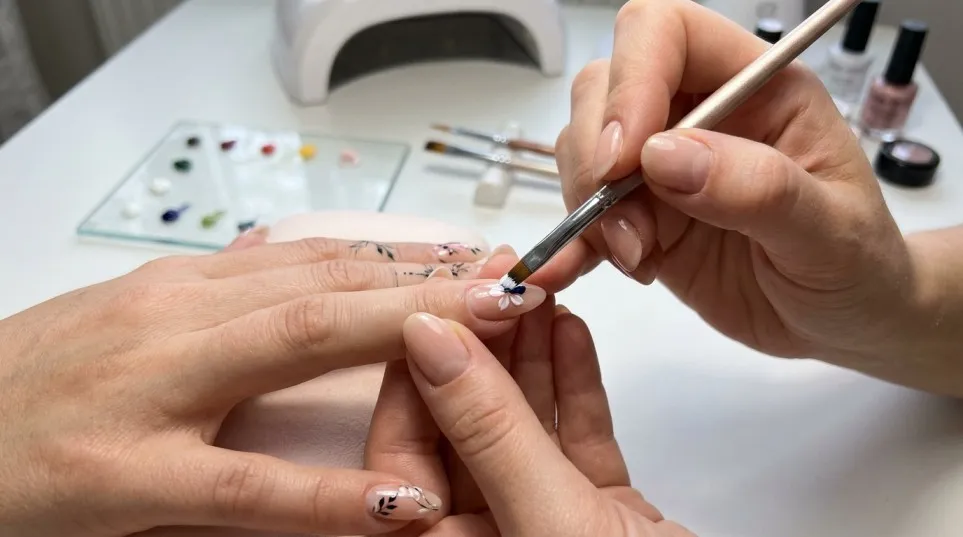
An angled nail art brush has bristles cut diagonally rather than straight across. This shape can help you follow curved edges and create decorative strokes with different widths.
Common uses include:
- French tip designs.
- Curved borders.
- One-stroke floral patterns.
- Colour blending.
- Cleaning up small edges, when the brush is intended for that purpose.
An angled brush can be especially helpful when you want to create a neat French manicure. However, the brush alone will not guarantee a perfect result. The product consistency, nail shape, and your hand movements also affect the finish.
If French tips are your favourite style, consider adding an angled brush to your starter collection.
5. Striping Brushes
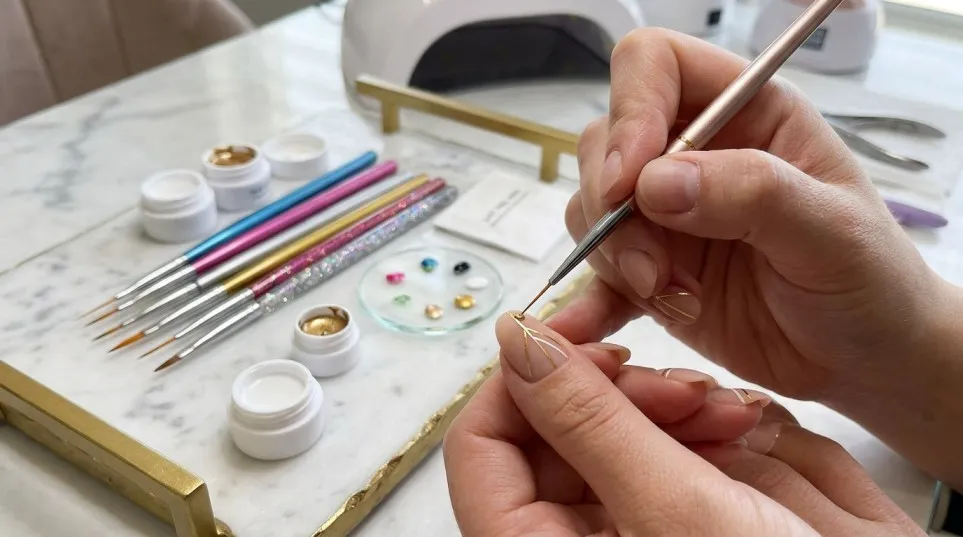
A nail striping brush is designed for long, narrow lines and decorative patterns. Some striping brushes resemble liner brushes, but their bristles may be longer and better suited to continuous strokes.
You can use them to create:
- Vertical and horizontal stripes.
- Checkerboard designs.
- Abstract line patterns.
- Fine borders around nail colours.
- Minimalist nail art.
- Long decorative curves.
The main advantage of a striping brush is that it can help you draw a line without repeatedly stopping and starting.
To improve your results, load the brush with a small amount of suitable product and practise drawing one continuous line on a nail tip or practice surface before working on your natural nails.
6. Fan Brushes
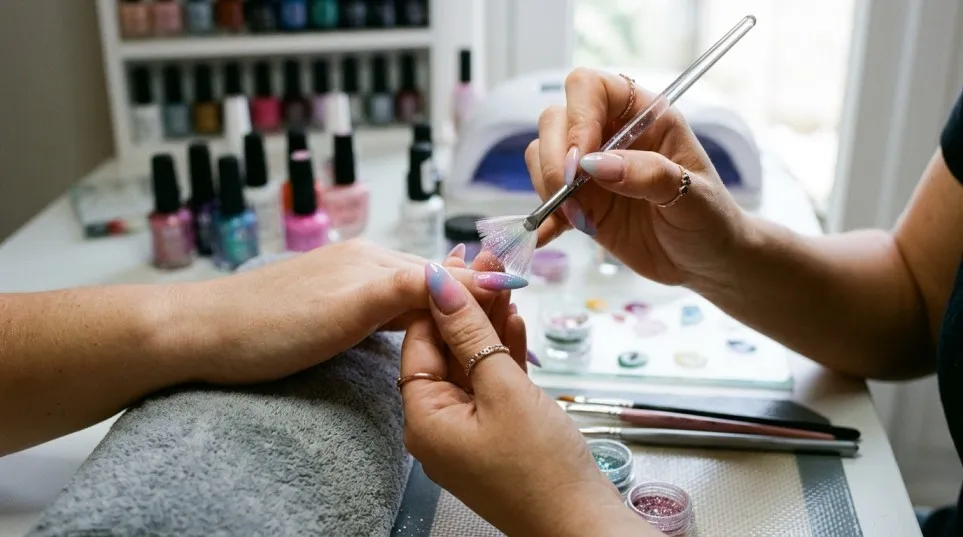
A nail art fan brush has bristles that spread out into a fan shape. It is useful for special effects rather than precise line work.
Typical uses include:
- Feathered patterns.
- Soft, textured strokes.
- Sweeping effects.
- Distributing certain loose nail art pigments.
- Removing loose decorative particles where the brush is suitable.
Fan brushes are not essential for every beginner. If you mainly create French tips, flowers, and simple lines, you may get more use from a liner and detail brush first.
However, if you enjoy experimental or artistic designs, a fan brush can offer a different way to add texture.
7. Ombre Brushes

An ombre nail art brush is designed to help blend colours gradually. The bristles may be soft, flat, or arranged to make gentle blending easier.
It can be useful for creating:
- Pink and white baby boomer nails.
- Sunset-inspired colour fades.
- Soft pastel transitions.
- Two-colour gradients.
- Blended decorative backgrounds.
The result depends on the type of product you use and whether it allows enough working time for blending. Some techniques use gel polish, while others use acrylic paint or other compatible nail art products.
If you regularly create gradient designs, an ombre brush may be worth adding to your kit.
8. Round and Pointed Brushes
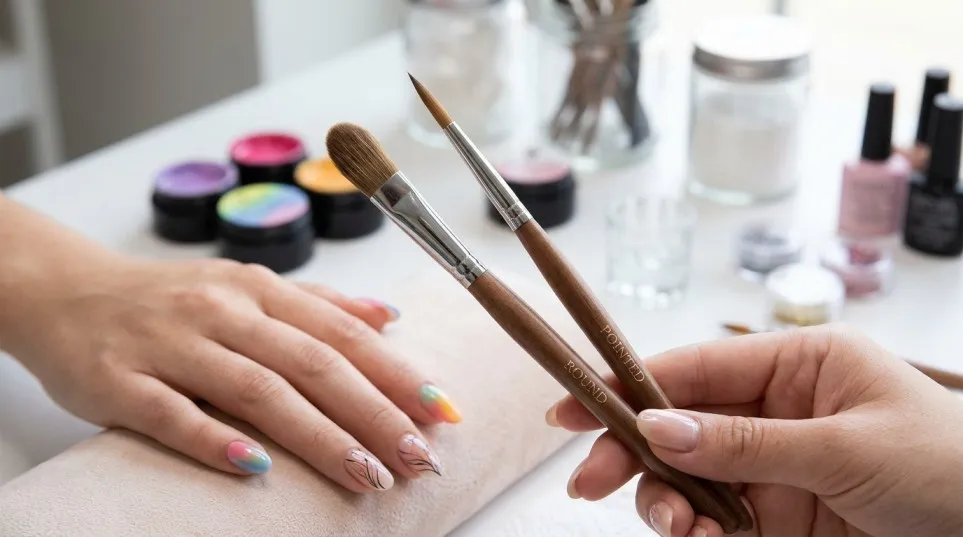
Round and pointed brushes have a rounded body that narrows towards the tip. Their shape makes them useful for creating curved strokes and small decorative forms.
You can use them for:
- Flower petals.
- Leaves and vines.
- Curved shapes.
- Small decorative accents.
- Painting simple artistic patterns.
The pressure you apply changes the width of the stroke. A light touch creates a finer mark, while greater pressure spreads the bristles and creates a wider shape.
Practising on a nail art practice tip can help you understand how the brush responds to different movements.
9. Gel Application Brushes

A gel nail brush is designed to apply compatible gel products rather than only decorative patterns. It may have a flat, oval, or rounded shape, depending on the product and technique.
These brushes can be used for:
- Applying builder gel.
- Spreading gel products evenly.
- Working with certain hard gels.
- Applying gel base products where the manufacturer permits a separate brush.
- Smoothing product over the nail.
Keep your gel application brushes separate from your fine art brushes when possible. This helps you maintain the correct brush shape for each job.
Always follow the product manufacturer’s instructions and avoid allowing uncured gel to contact the skin. If gel touches the skin, remove it before curing, following the product’s safety guidance.
10. Acrylic Nail Brushes
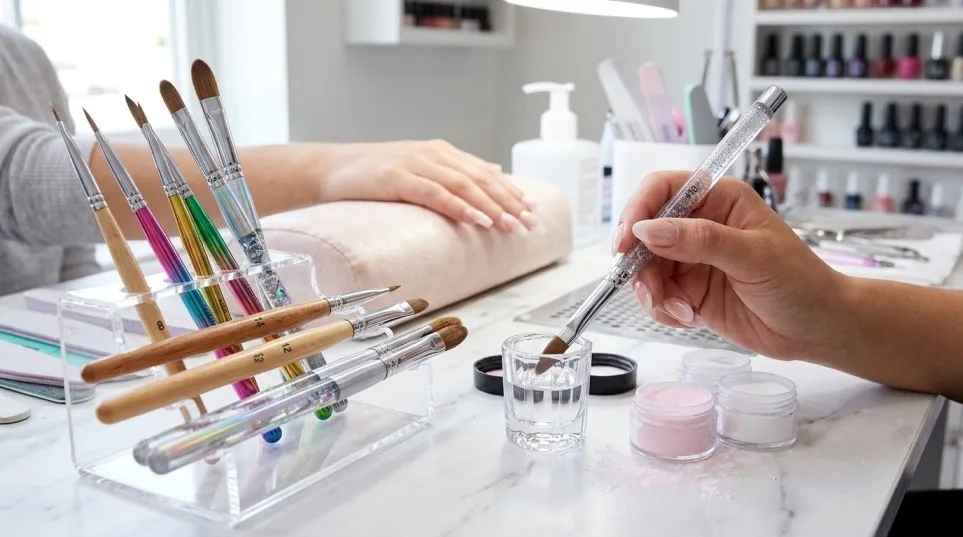
Acrylic nail brushes are made for working with liquid monomer and acrylic powder. They are different from ordinary gel nail art brushes because acrylic application requires the brush to pick up and shape an acrylic bead.
These brushes are commonly used for:
- Acrylic nail extensions.
- Building acrylic nail structures.
- Shaping acrylic beads.
- Creating sculpted acrylic designs.
Brushes made with natural hair and synthetic materials can behave differently with acrylic systems. Choose a brush specifically suited to your acrylic products rather than assuming that every nail brush will work equally well.
If you only plan to paint small designs on gel polish, you probably do not need a specialised acrylic application brush.
Which Nail Art Brushes Should Beginners Buy First?
You do not need to purchase a large professional collection straight away. A smaller set with the right shapes can cover many common designs.
Here is a practical starter selection:
| Brush or tool | Best use | Priority |
|---|---|---|
| Fine liner brush | Lines, swirls and French details | Essential |
| Short detail brush | Small flowers, hearts and outlines | Essential |
| Small flat brush | Filling shapes and decorative strokes | Useful |
| Angled brush | French tips and curved edges | Useful |
| Dotting tool | Polka dots and flower centres | Useful |
| Ombre brush | Blending colours | Optional |
| Fan brush | Texture and special effects | Optional |
A dotting tool is not technically a brush, but it is a helpful addition to a nail art kit.
If your budget is limited, start with a liner and a detail brush. Add other tools as you learn which designs you enjoy creating.
You can browse nail art brush sets on Amazon UK to compare different shapes, set sizes, prices, customer reviews, and delivery options. Check the current product listing carefully because the number of brushes in a set does not necessarily indicate its quality.
How to Choose Good Nail Art Brushes

When shopping for nail art brushes, it is easy to focus on attractive handles or a large number of pieces. However, the working end of the brush is more important.
Check the Bristle Quality
The bristles should be evenly arranged and suitable for the intended product. A liner should form a neat tip, while a flat brush should have a reasonably straight edge.
Avoid brushes with visibly split bristles, loose hairs, or heads that appear uneven before use.
Choose the Right Brush Length
Shorter bristles often provide more direct control for compact designs. Longer bristles can hold more product for continuous strokes but may require a steadier hand.
If you are new to nail art, a small selection of short and medium brushes is generally more practical than buying several extra-long liners immediately.
Look at the Handle
The handle should feel comfortable to hold and allow you to guide the brush without unnecessary tension.
A lightweight handle may suit someone who enjoys detailed designs, while another person may prefer a slightly thicker grip. Comfort is personal, so pay attention to handle shape and balance.
Check the Ferrule
The ferrule is the section that connects the bristles to the handle. It should feel secure and should not wobble.
A loose connection can affect control and may allow the brush head to detach or shed bristles over time.
Match the Brush to the Product
Not every brush is suitable for every nail product. Synthetic bristles are commonly used for gel nail art, while acrylic application may require a brush designed specifically for acrylic systems.
Read the product description before buying. This is particularly important when purchasing a mixed set that includes art brushes, gel brushes, and acrylic tools.
Read Customer Reviews Carefully
Customer reviews can help you identify common concerns, such as bristles falling out, caps not fitting properly, or handles feeling uncomfortable.
Look for detailed reviews that describe actual use rather than relying only on the overall star rating. Also check whether the listing includes the brush sizes and shapes you need.
How to Use Nail Art Brushes: A Step-by-Step Guide
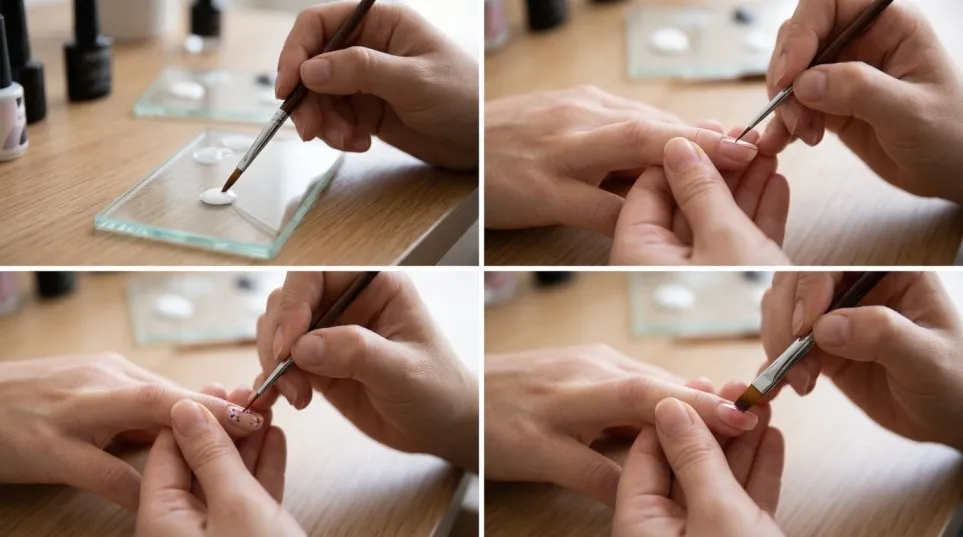
Once you have chosen your brushes, the next step is learning how to use them. Start with simple designs before moving on to more detailed artwork.
Step 1: Prepare Your Nails
Begin with clean, dry nails. Shape them with a suitable file and prepare the nail surface according to the manicure system you are using.
If you are applying gel polish, follow the product instructions for preparation, base coat, and curing. Avoid painting over damaged skin or applying products to irritated nails.
Step 2: Apply Your Base Colour
Apply your chosen nail colour using the correct product and application method. Allow it to dry or cure as directed by the manufacturer before adding your design.
A smooth base makes it easier to see your artwork and control the amount of detail you add.
Step 3: Choose the Correct Brush
Match the brush to the design.
For example, choose a liner for a thin curved line, a detail brush for a small flower, or a flat brush for filling a larger shape.
Using the correct tool reduces the need to correct mistakes and helps you work more comfortably.
Step 4: Load the Brush with Product
Pick up a small amount of compatible nail art paint or gel. Avoid overloading the bristles because excess product can create thick lines and uneven shapes.
If you are using gel products, keep them away from direct sunlight and unintended UV exposure. Follow the manufacturer’s instructions for handling and curing.
Step 5: Practise Your First Strokes
Before painting on your nail, practise on a palette or nail art practice tip.
Try making straight lines, small dots, curved strokes, and simple petals. Notice how the brush responds when you change the angle or pressure.
For a straight line, steady your working hand and move the brush smoothly rather than repeatedly drawing over the same area.
Step 6: Create Your Design
Start with a simple pattern. You could paint two thin lines, add a small flower, or create a few dots along one side of the nail.
Allow enough space between details so the design does not look crowded. Minimalist nail art often looks attractive because each element has room to stand out.
Step 7: Correct Small Mistakes
If a line is slightly uneven, use an appropriate clean-up brush and a product-compatible cleaning method before curing, where applicable.
Avoid repeatedly touching the surrounding skin with uncured gel. Remove any accidental skin contact before curing, following the manufacturer’s safety instructions.
Step 8: Finish the Manicure
Once the design is complete, cure or dry the products according to their instructions. Apply a suitable top coat if the system requires it.
A top coat can help protect the finished design and create a smooth surface. Avoid assuming that every product needs the same curing time or lamp.
Easy Nail Art Designs to Practise with Brushes
You can improve your technique without beginning with complicated designs.
Simple French Tips
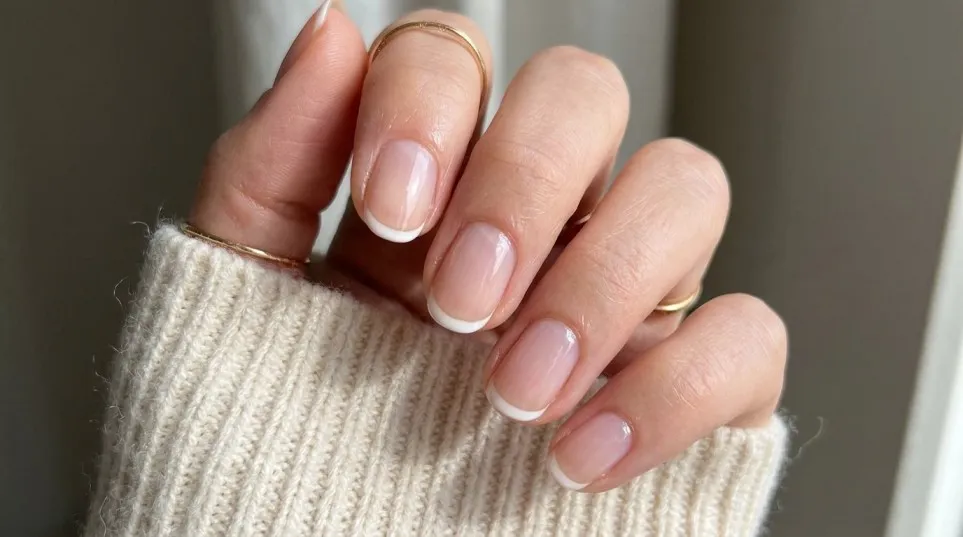
Use a liner or angled brush to create the curved edge of a French tip. Work slowly and keep the amount of product consistent.
Practise on short nail tips first if you find it difficult to create an even curve.
Minimalist Line Art
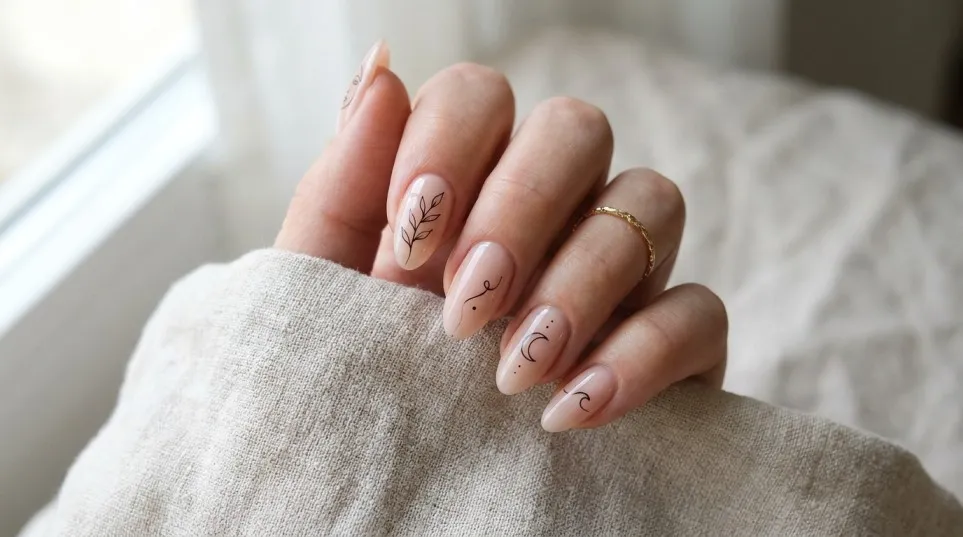
Use a fine liner brush to draw a single curved line, two parallel stripes, or a simple geometric pattern.
Neutral base colours with black, white, or dark brown lines can create a clean, modern look.
Small Floral Designs
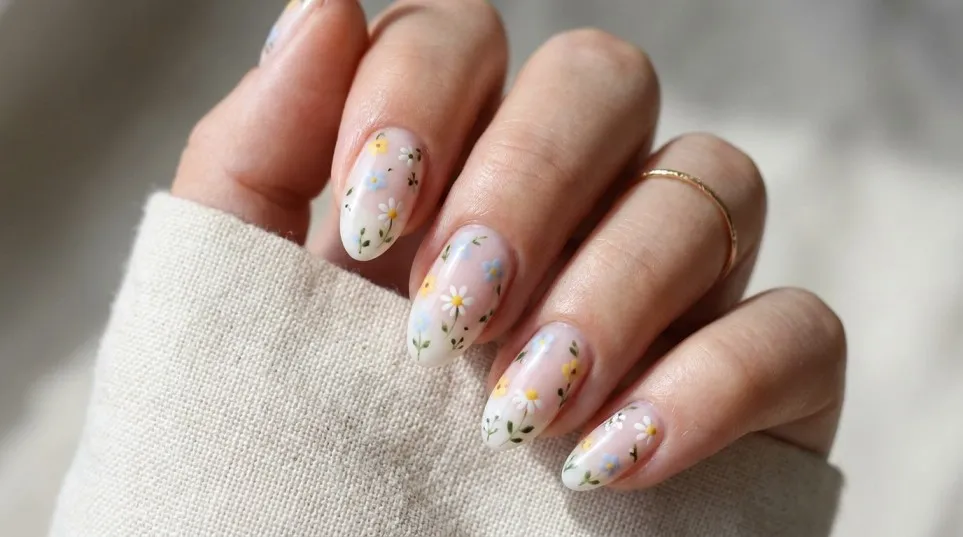
Use a detail brush to create tiny petals around a central point. Add a dot in the middle with a dotting tool.
You can experiment with pastel colours for spring designs or deeper shades for autumn and winter nail art.
Polka Dot Nails
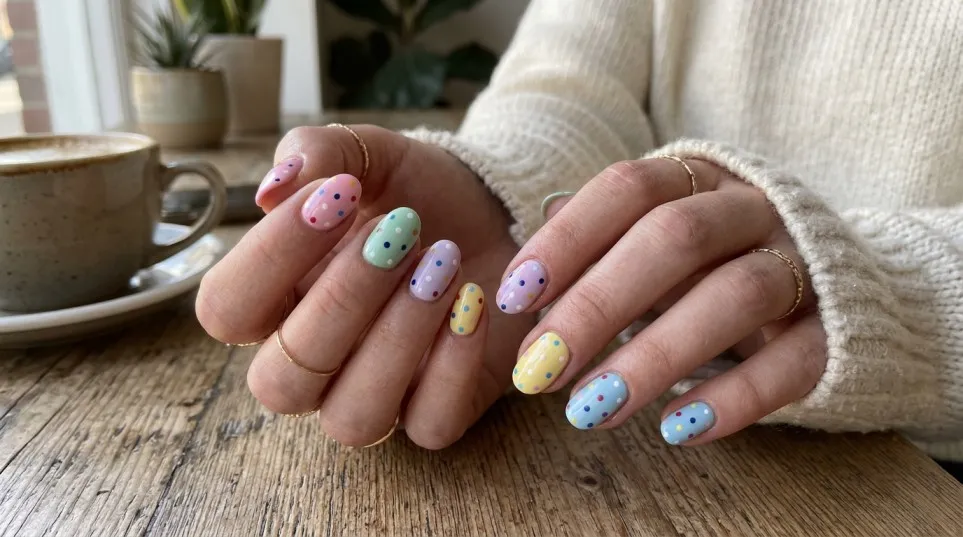
A dotting tool is often easier to control than a brush when creating repeated circles. Place small dots in evenly spaced rows or use different sizes for a playful pattern.
Abstract Nail Art
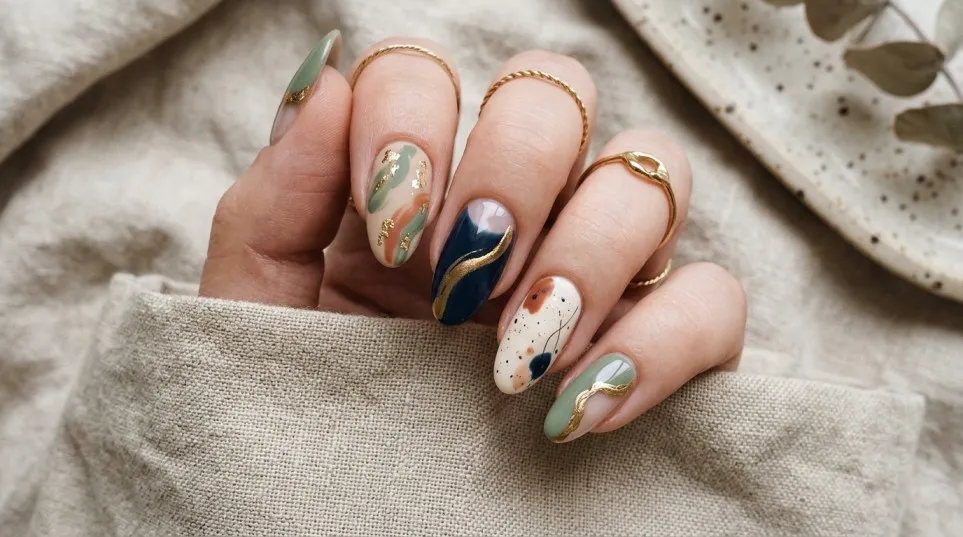
Combine fine lines, small blocks of colour, and simple curves. Choose two or three complementary colours to keep the finished look balanced.
These designs are useful for practice because they teach you how to control brush pressure, spacing, and product quantity.
How to Clean and Care for Nail Art Brushes
Proper brush care helps maintain the shape of the bristles and can extend the useful life of your tools.
Clean Brushes After Every Use
Remove product from the bristles promptly using the cleaning method recommended for that product. Do not leave gel residue in the brush because it may harden if exposed to UV light.
Use a lint-free wipe where appropriate to avoid leaving fibres in the bristles.
Use the Correct Cleaner
Different nail products require different cleaning methods. Gel brushes, acrylic brushes, and ordinary nail polish brushes should not automatically be cleaned in the same way.
Avoid soaking the entire brush in acetone unless the brush manufacturer specifically recommends it. Strong solvents can damage the bristles, handle, or adhesive that holds the brush together.
Reshape the Bristles
After cleaning, gently guide the bristles back into their original shape. Do not pull or twist them aggressively.
A liner brush should retain its fine point, while a flat brush should maintain its straight edge.
Store Brushes Properly
Allow brushes to dry as recommended, then store them with their protective caps in place. Keep them away from direct sunlight, excessive heat, dust, and nail lamps.
Store them in a clean case or holder so the bristles do not bend against other tools.
Keep Different Products Separate
Where possible, dedicate separate brushes to gel application, acrylic products, and decorative art. This reduces product mixing and helps preserve the performance of each brush.
Common Nail Art Brush Mistakes to Avoid
Even a good brush can produce disappointing results if it is used incorrectly.
Using too much product: Excess gel or paint can make lines thick and cause details to spread. Start with a small amount and add more when necessary.
Choosing the wrong brush: A thick flat brush is not ideal for delicate lettering. Use a liner or detail brush for finer work.
Pressing too hard: Heavy pressure can spread the bristles and make narrow lines difficult to control. Use gentle, steady movements.
Ignoring brush care: Dried product and bent bristles can affect the finish. Clean and reshape your brushes promptly after use.
Buying too many brushes too soon: A large set may look like good value, but unused tools can take up space without improving your work. Learn the basics first, then expand your collection.
Using incompatible cleaning products: The wrong solvent can damage the brush. Follow the manufacturer’s cleaning instructions.
Curing gel on the skin: Uncured gel should not be allowed to remain on the skin during curing. Remove accidental contact before curing and follow the product’s safety guidance.
Are Expensive Nail Art Brushes Worth Buying?
The answer depends on how often you create nail art and the type of designs you prefer.
For occasional home manicures, an affordable set with a good liner, detail brush, and flat brush may be enough. You do not necessarily need professional salon brushes to practise simple designs.
However, if you regularly create detailed nail art or work with clients, investing in reliable brushes can be worthwhile. Consistent bristle shape, a secure ferrule, and a comfortable handle may make repeated work easier.
Instead of choosing a set based only on price, compare the quality of its working ends, the included sizes, product compatibility, and customer feedback.
A smaller set of well-made brushes can be more useful than a large collection of tools that are difficult to control.
Where to Buy Nail Art Brushes in the UK
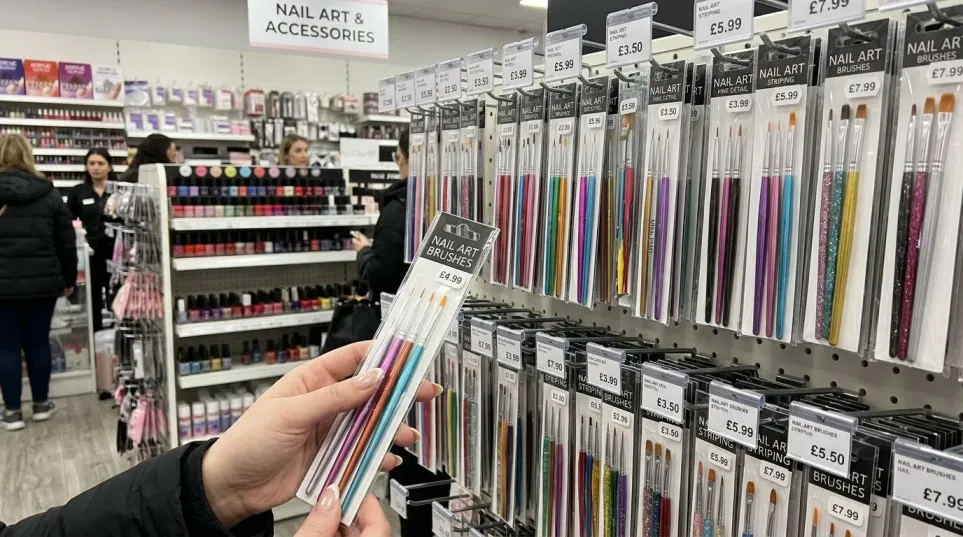
If you are shopping in the UK, online marketplaces and specialist nail supply stores offer a wide range of nail art brushes for beginners and professionals.
Start by deciding which designs you want to create. Then compare products based on the following factors:
- Brush shapes and sizes.
- Synthetic or natural bristle materials.
- Compatibility with gel polish, acrylic paint, or acrylic systems.
- Protective caps and storage options.
- Customer reviews and seller information.
- Current price, postage, and delivery times.
You can start comparing available options through Amazon UK nail art brush sets.
Before placing an order, check the full listing rather than relying on the product image alone. Confirm that the kit contains the brushes you need and that the seller clearly describes their intended use.
For most beginners, a set with a fine liner, a short detail brush, and a small flat brush is a sensible starting point. If you mainly create French tips, look for an angled brush as well. If you enjoy gradient effects, consider an ombre brush later.
Frequently Asked Questions About Nail Art Brushes
Related BIAB Guides
- Art Nail Gel: Complete Beginner’s Guide to Beautiful, Creative and Long-Lasting Nail Art
- Nail Art Polish: Turn Simple Nails into Stunning Art!
- Christmas Nail Art: 25 Festive Ideas, Easy DIY Designs & Tips for Beautiful Holiday Nails
- Festival Nail Art Designs: 25 Creative, Colourful & Trendy Ideas for Every Celebration
The best starting options are a fine liner brush, a short detail brush, and a small flat brush. Together, they can handle thin lines, simple flowers, outlines, and basic colour-filled designs. An angled brush and dotting tool are useful additions.
A fine liner or striping brush is generally the best choice for thin lines. Shorter liners offer more direct control for small details, while longer liners can help create continuous strokes.
Some small paintbrushes may work with suitable nail art paints, but ordinary brushes are not necessarily designed for gel products or nail application. Check the bristle material, product compatibility, and cleaning requirements before using them.
The ideal size depends on your design. Small detail brushes are useful for tiny shapes, while medium or longer liners are suitable for curves and continuous lines. Check the actual bristle length in millimetres because brush numbering can differ between brands.
Synthetic brushes are commonly used for gel nail art because they can be suitable for applying and detailing compatible gel products. Natural-hair brushes are also used in some professional techniques, particularly acrylic application. The best choice depends on the product and task.
Remove the gel residue promptly using the cleaning method recommended by the manufacturer. Keep the brush away from UV light until it is properly cleaned, and avoid using harsh solvents unless they are approved for that brush.
You can begin with two or three brushes and add more as your skills develop. A liner, detail brush, and flat brush cover many everyday designs. A dotting tool is a useful extra for dots and simple flowers.
It is better to use separate brushes for different systems where possible. Acrylic and gel products have different application requirements, and incompatible cleaning methods can damage the bristles. Follow the instructions for each product and brush.
Brushes may split because of dried product, damaged bristles, poor-quality construction, harsh cleaning, or incorrect storage. Clean the brush promptly, reshape it gently, and keep the bristles protected between uses.
You can compare options through Amazon UK and specialist nail supply retailers. Check the brush shapes, sizes, materials, customer reviews, and delivery details before buying.
A liner brush usually has narrow bristles suited to continuous lines and curves. A detail brush generally has a shorter tip that offers more control for small shapes, lettering, and fine decorative work.
A brush set can offer good value if it includes the shapes you will actually use. Beginners should prioritise a few reliable tools rather than buying a large set simply because it contains more pieces.
Final Thoughts
Nail art brushes can make a noticeable difference to the way you create and finish nail designs. The right tools help you work with greater control, experiment with new techniques, and produce cleaner details.
You do not need to buy every brush available. Start with a reliable liner, a short detail brush, and a small flat brush. Add an angled brush, dotting tool, or ombre brush when your preferred designs require them.
Before buying, check the bristle quality, brush shape, handle comfort, and compatibility with your nail products. Once you have the right tools, practise simple lines, dots, flowers, and French tips before moving on to more complicated designs.
If you are ready to build your collection, compare nail art brush sets on Amazon UK and choose a set that suits your budget and the designs you want to create. A carefully chosen brush kit can be a practical investment for anyone who enjoys creating beautiful nails at home or wants to develop professional nail art skills.