
Christmas Nail Art: 25 Festive Ideas, Easy DIY Designs & Tips for Beautiful Holiday Nails
Christmas nail art is a fun and creative way to bring the magic of the festive season to your fingertips. Whether you love classic red and green nails, sparkling gold designs, cute snowflakes, candy cane patterns or elegant winter nail art, there are plenty of beautiful styles to try during Christmas. The best part is that you do not need to visit an expensive nail salon to get gorgeous festive nails. With a few nail polish colours, nail art stickers, glitter, and some simple tools, you can create stunning Christmas nail designs at home. In this guide, we will explore 25 beautiful Christmas nail art ideas, easy DIY techniques, the best products to use, and helpful tips to make your holiday manicure look neat, stylish, and long-lasting.
What Is Christmas Nail Art?
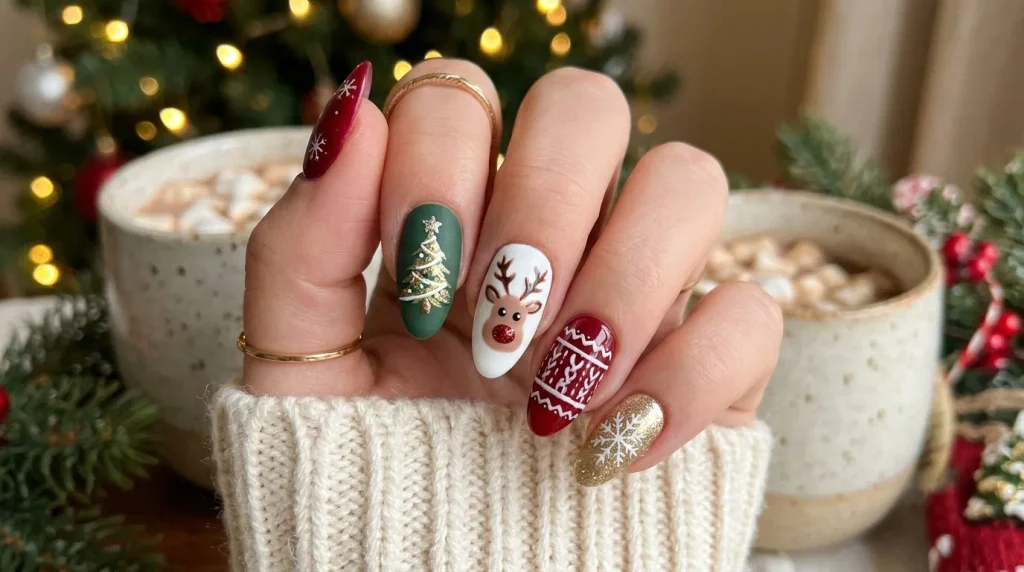
Christmas nail art is a type of festive manicure inspired by Christmas colours, decorations, winter weather, and holiday celebrations. It includes different patterns, colours, textures, and decorative details that make your nails look special during the festive season.
For example, some people prefer traditional red and green nails, while others love soft nude shades with delicate snowflakes. Similarly, glittery gold nails, Christmas tree patterns, reindeer faces, and candy cane stripes are popular choices.
The beauty of Christmas nail art is that there is something for everyone. You can choose a simple design for everyday wear or a bold manicure for Christmas parties, family gatherings, and New Year celebrations.
Why Is Christmas Nail Art So Popular?
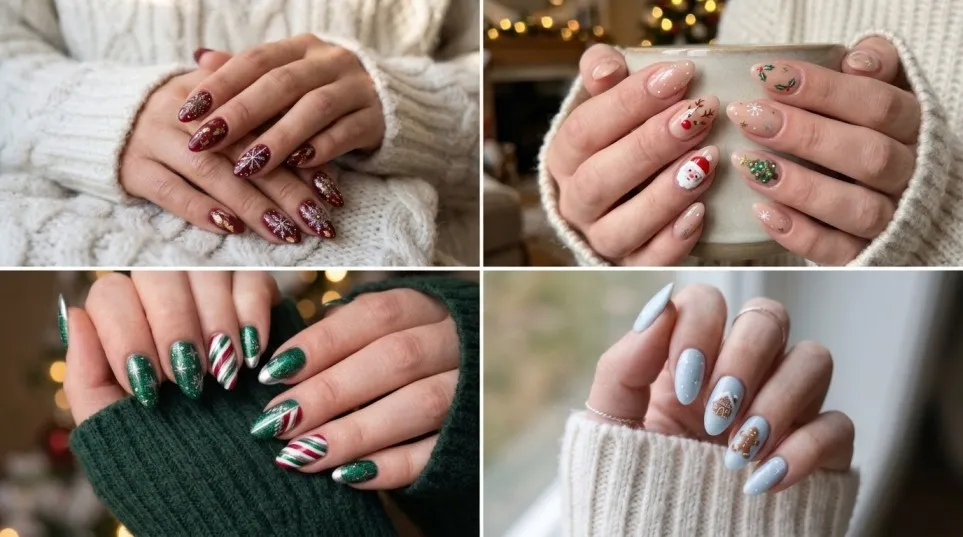
Christmas is one of the most exciting times of the year. People decorate their homes, buy gifts, wear festive outfits, and prepare for celebrations. Naturally, nails become another way to enjoy the holiday spirit.
Here are a few reasons why festive nail designs are so popular:
- A festive appearance: Christmas colours and patterns instantly create a holiday feeling.
- Personal style: You can choose designs that match your clothes, jewellery, and personality.
- Easy DIY options: Nail stickers and simple nail art tools make home manicures easier.
- Perfect for parties: Glitter, metallic finishes, and detailed patterns look beautiful at Christmas events.
- Creative fun: Trying new nail designs can be an enjoyable part of your holiday preparation.
Moreover, you can change your manicure every few weeks to enjoy different Christmas nail ideas throughout December.
25 Beautiful Christmas Nail Art Ideas to Try
Not sure which design to choose? Here are 25 festive nail art ideas, from simple everyday styles to glamorous Christmas party manicures.
1. Classic Red Christmas Nails
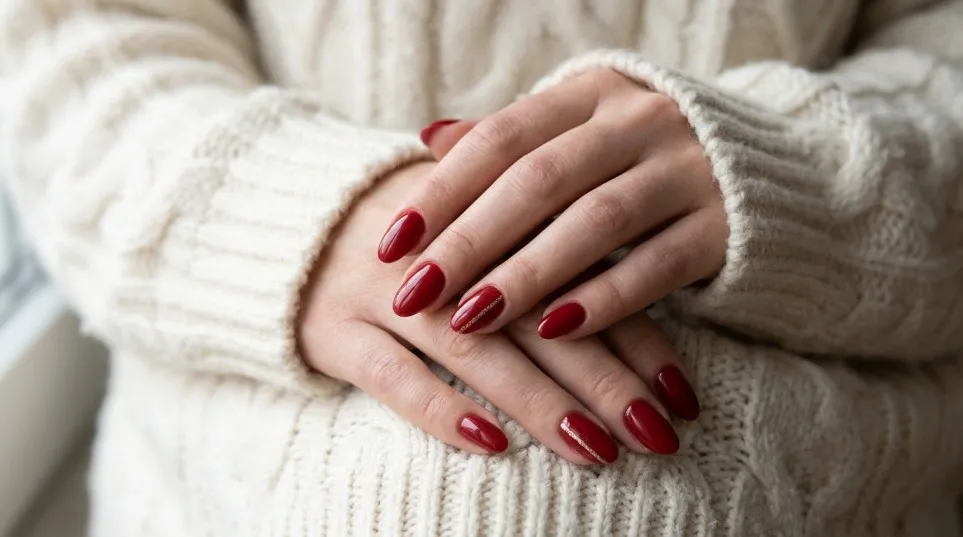
You can never go wrong with classic red nails. Red is one of the most recognisable Christmas colours, and it looks beautiful on short, medium, and long nails.
Choose a rich cherry red, burgundy, or bright festive shade. Apply two thin coats and finish with a glossy top coat.
Best for: Christmas dinners, family gatherings, and everyday festive looks.
2. Green Christmas Tree Nail Art
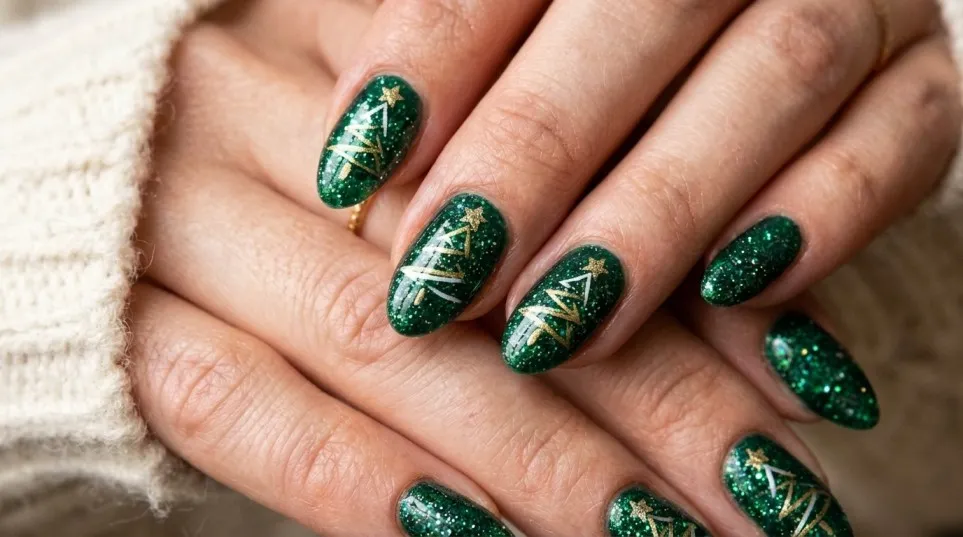
Green Christmas tree nails are a lovely choice if you want something creative. Paint your nails in a nude or white base colour and create small green Christmas trees using a fine nail art brush.
Add tiny gold dots or a star at the top of each tree. You can also decorate just one accent nail to keep the look simple.
3. Candy Cane Christmas Nails
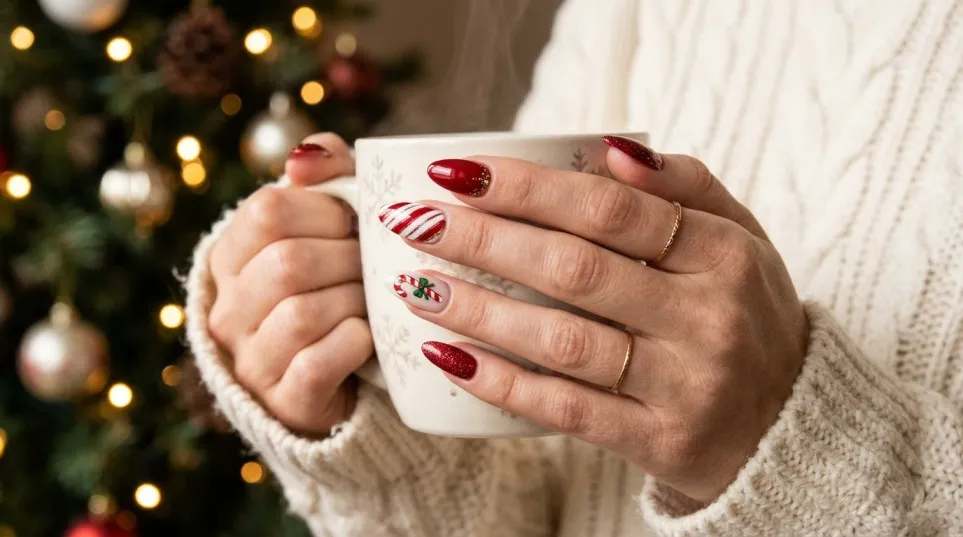
Candy cane nail art is playful, colourful, and instantly recognisable. It usually features red and white diagonal stripes inspired by traditional Christmas sweets.
You can create this pattern using a thin nail brush or nail striping tape. For an easier option, use ready-made candy cane nail stickers.
4. Snowflake Christmas Nail Designs
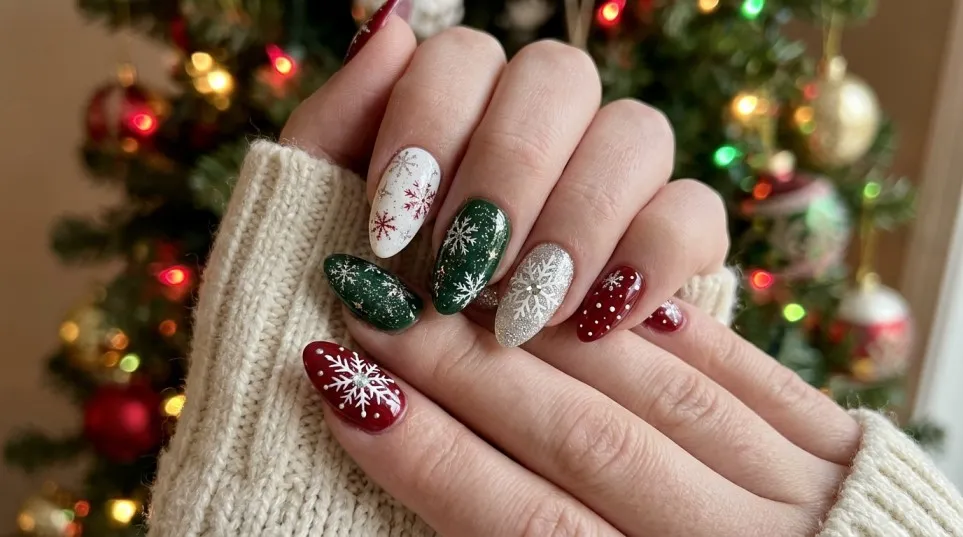
Snowflake nails are perfect for anyone who loves a soft winter manicure. Start with a light blue, milky white, or nude base. Then add delicate white snowflakes using a fine brush or stamping plate.
A little silver glitter can make the design look even more beautiful.
5. Gold Glitter Christmas Nails
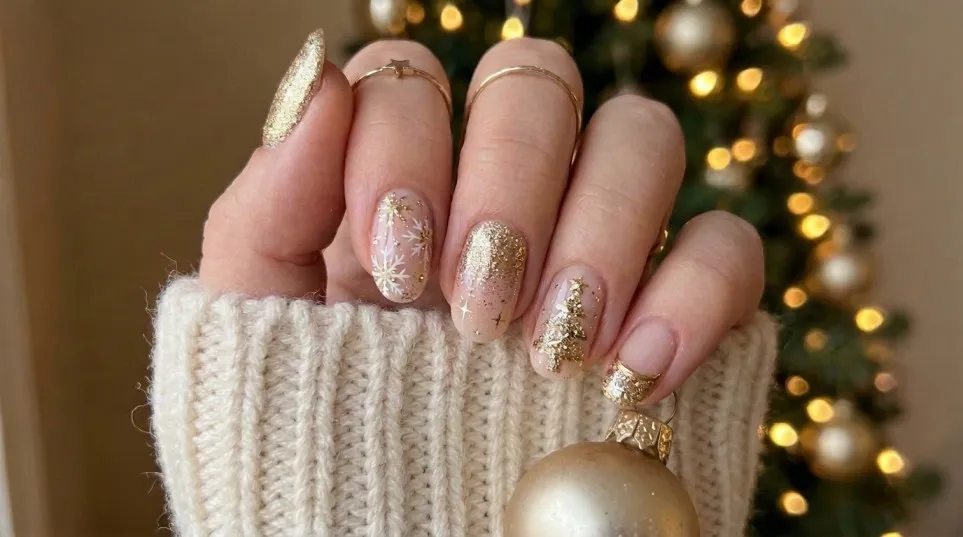
If you enjoy glamorous manicures, gold glitter nails are an excellent choice. They look especially attractive under Christmas party lights.
Apply gold glitter polish over a nude base or use it on one or two accent nails. You can also combine gold with black, red, or deep green for a luxurious finish.
6. Santa Claus Nail Art
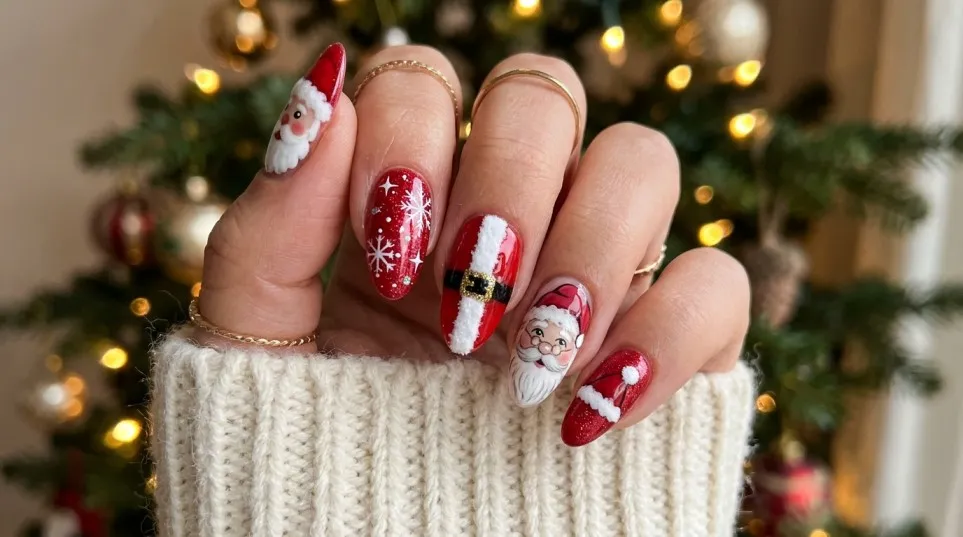
Santa-inspired nails are cute and fun. Create a simple Santa face using red, white, black, and skin-tone nail polish.
For a less detailed design, paint a red nail with a white French tip and add a small black belt detail.
7. White Christmas Nails
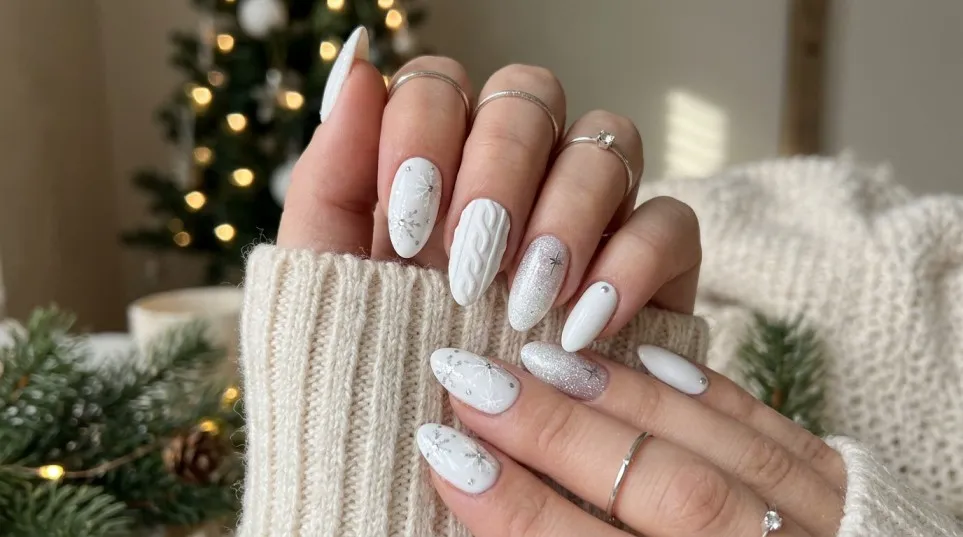
White Christmas nails are perfect for a clean and elegant winter look. They remind people of fresh snow and frosty mornings.
Use creamy white polish and decorate with silver glitter, tiny snowflakes, or pearl details. This design works beautifully on both short and long nails.
8. Reindeer Christmas Nails
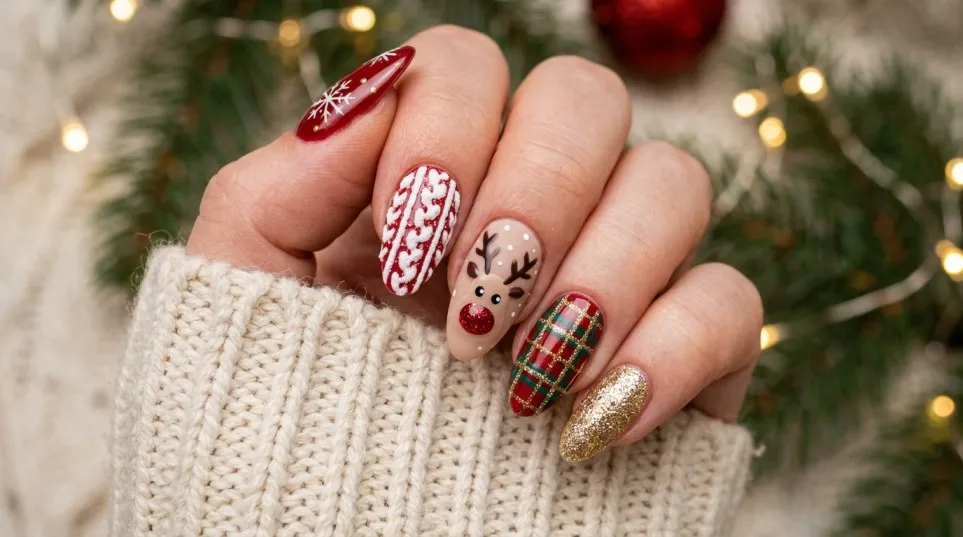
Reindeer nail art is another adorable festive option. Use a light brown base and add a small face, antlers, and a red nose.
You can create Rudolph on one accent nail and keep the remaining nails in a matching brown or nude shade.
9. Christmas French Tip Nails
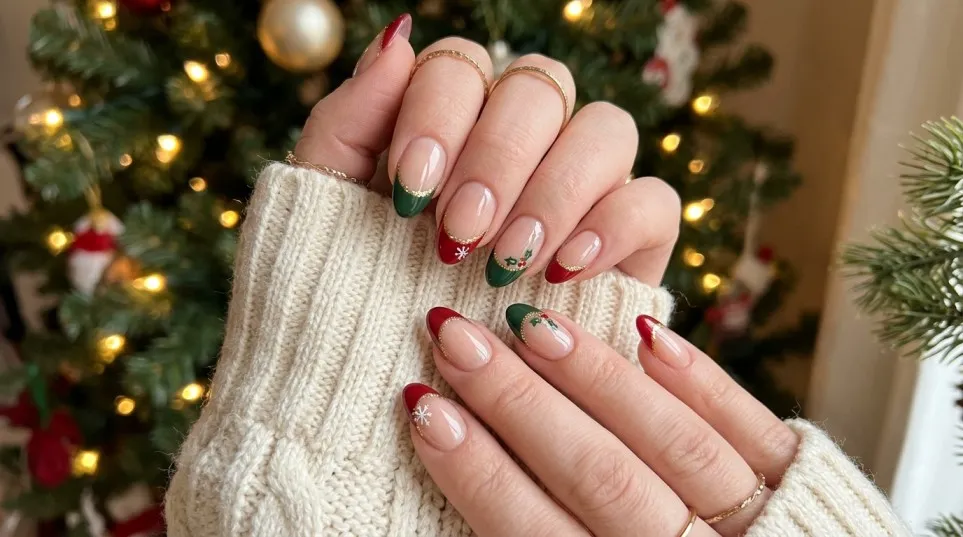
French tips are a timeless manicure style, but you can give them a festive update by replacing the traditional white tips with red, green, gold, or silver.
For an extra festive touch, add tiny stars or glitter along the tips.
10. Pink Christmas Nail Art
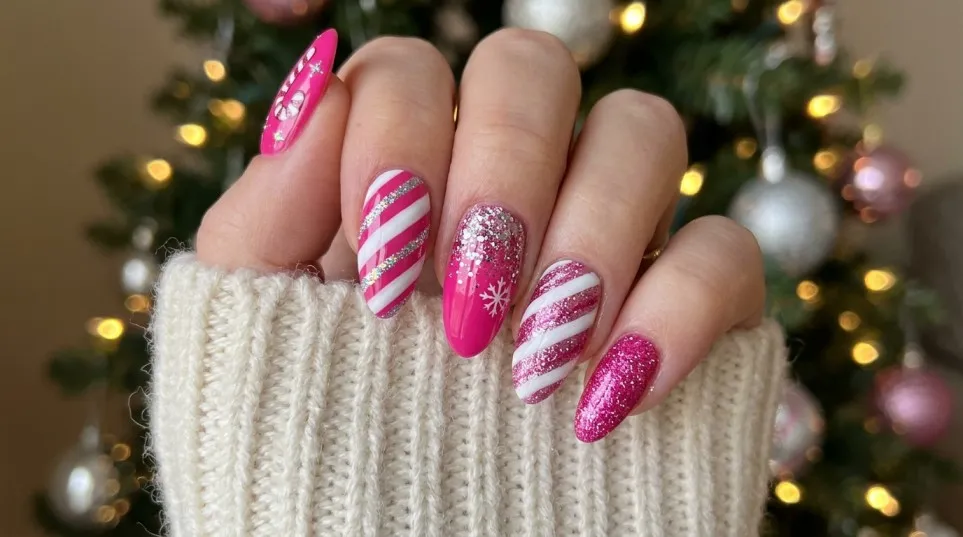
Not everyone likes traditional Christmas colours. If you prefer softer shades, pink Christmas nails are a lovely alternative.
Try baby pink, rose gold, or dusty pink with small white snowflakes and glitter. This design feels feminine without looking too busy.
11. Christmas Present Nail Designs
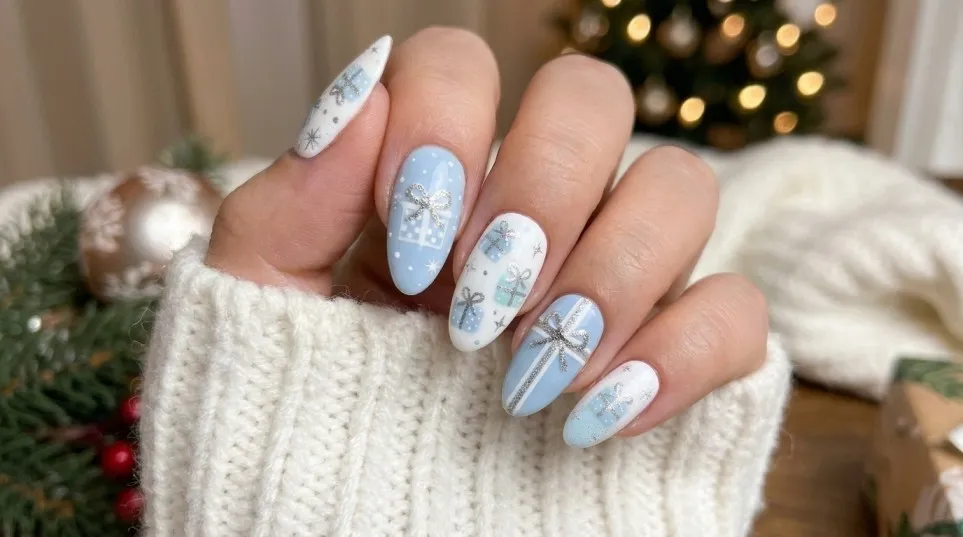
Turn your nails into little Christmas presents by painting colourful squares and adding thin ribbon details.
Red, green, gold, and white work particularly well. You can draw tiny bows on your accent nails to complete the look.
12. Silver Glitter Winter Nails
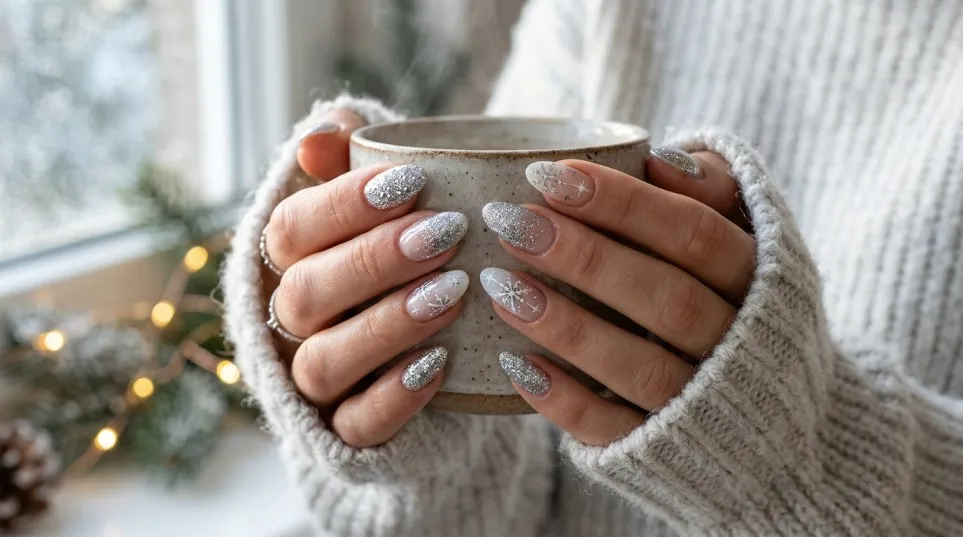
Silver glitter nails are a beautiful option for people who enjoy cool-toned manicures. Combine silver polish with pale blue or white to create a frosty appearance.
This style also works well for New Year’s Eve.
13. Christmas Holly Berry Nails
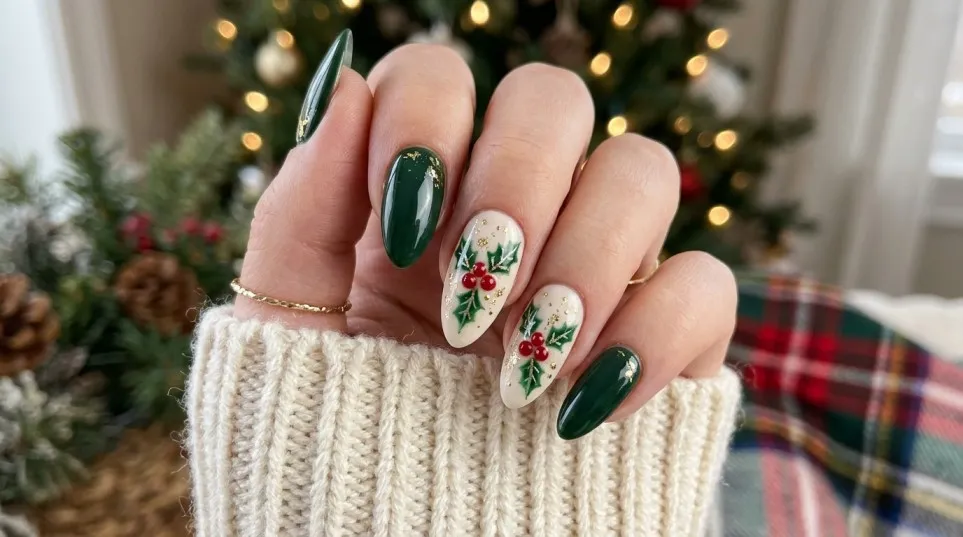
Holly leaves and red berries are traditional Christmas decorations. You can bring the same look to your nails with a small green leaf pattern and tiny red dots.
A nude or milky white background helps the design stand out.
14. Gingerbread Man Nail Art
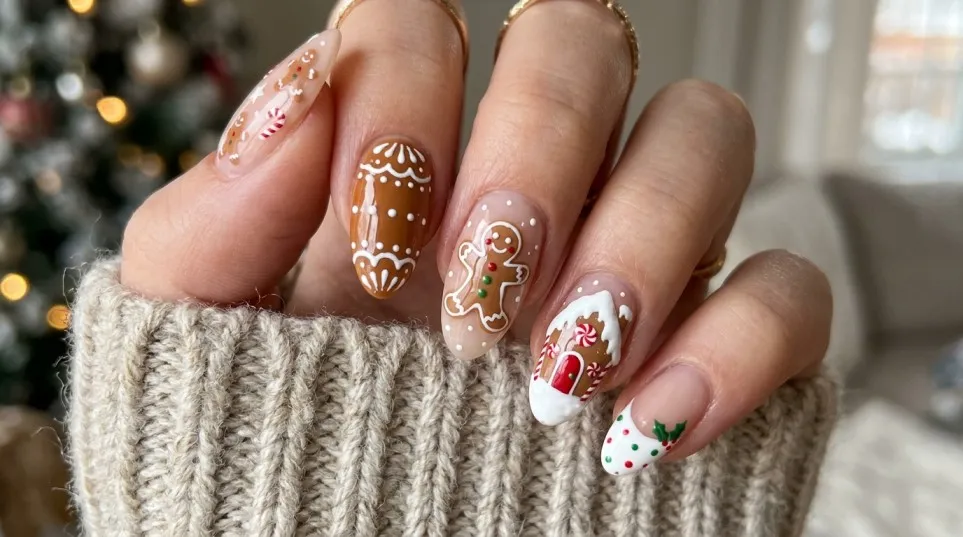
Gingerbread-inspired nails are ideal if you love cute and playful designs. Use warm brown polish to create a little gingerbread figure, then add white icing details.
You can keep the rest of your nails in cream or caramel shades.
15. Matte Christmas Nails
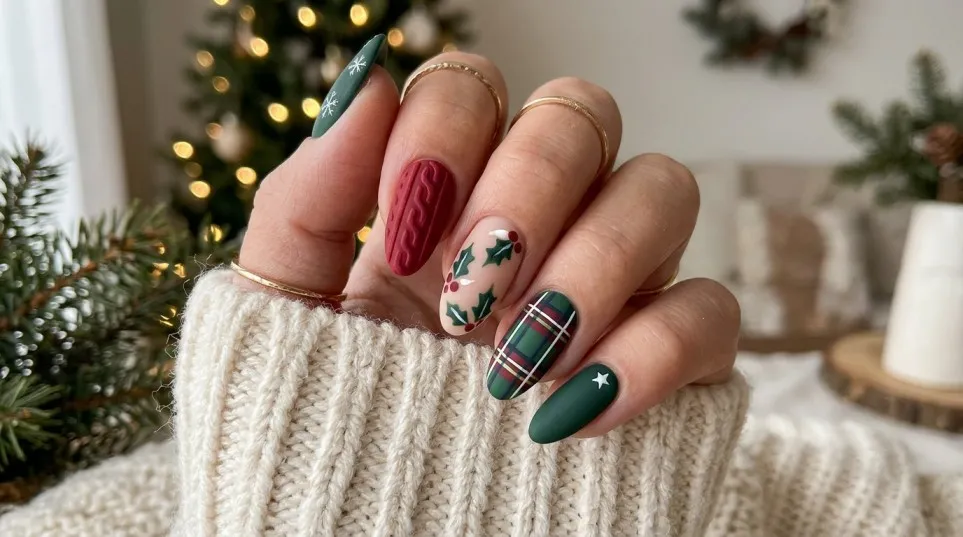
Matte nails offer a different finish from traditional glossy manicures. Deep red, forest green, and chocolate brown look particularly attractive with a matte top coat.
Add glossy snowflakes or tiny metallic details for an interesting contrast.
16. Blue and Silver Christmas Nails
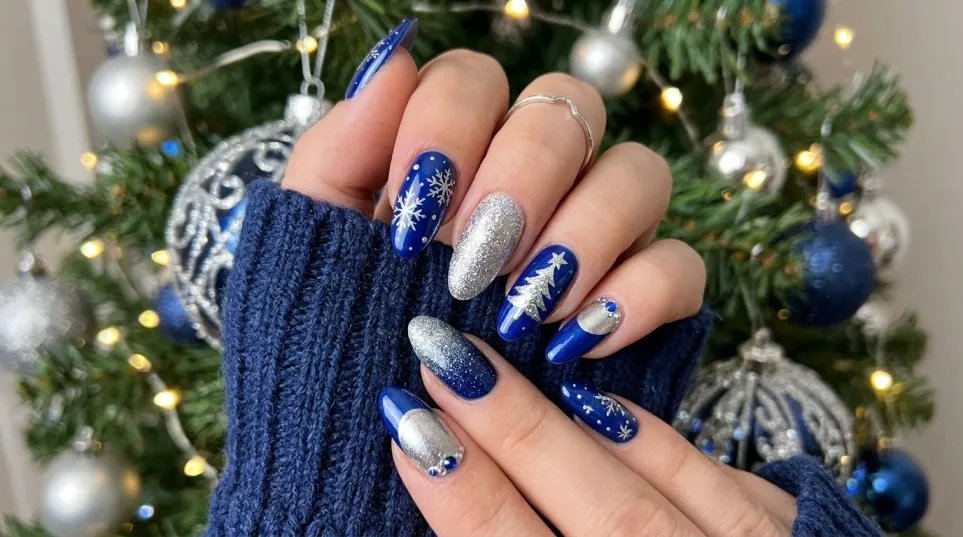
Blue and silver nails create a beautiful winter-inspired appearance. Choose a pale icy blue or deep midnight blue and decorate it with silver snowflakes.
This combination is especially suitable for people who prefer cool colours.
17. Christmas Star Nail Art
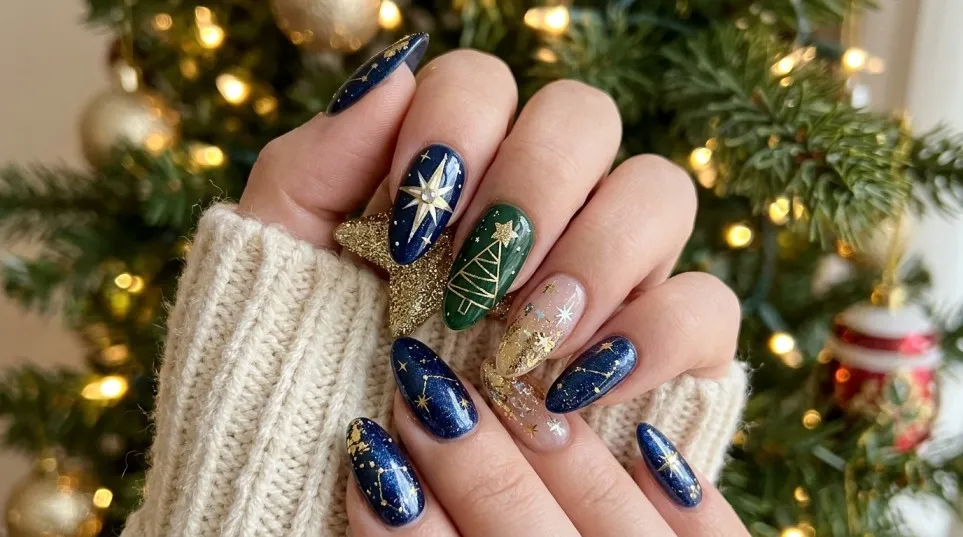
Small stars can make even a simple manicure look festive. Apply a nude or dark green base and add gold or silver star stickers.
You can use stars on every nail or keep them as small accent details.
18. Burgundy Christmas Nails
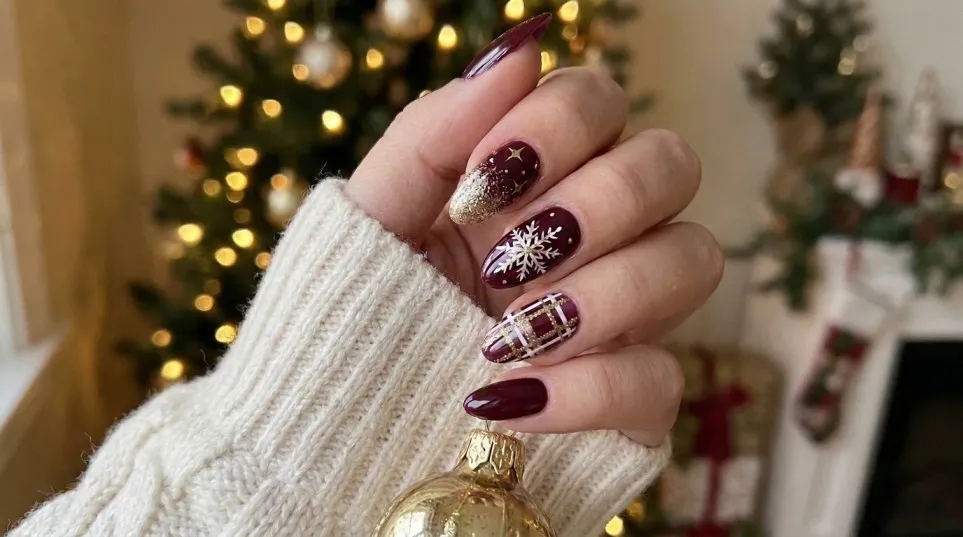
Burgundy is a rich and elegant alternative to bright red. It looks beautiful with gold glitter, delicate stars, and simple metallic lines.
If you want festive nails that also look sophisticated, this is a great option.
19. Christmas Plaid Nail Art
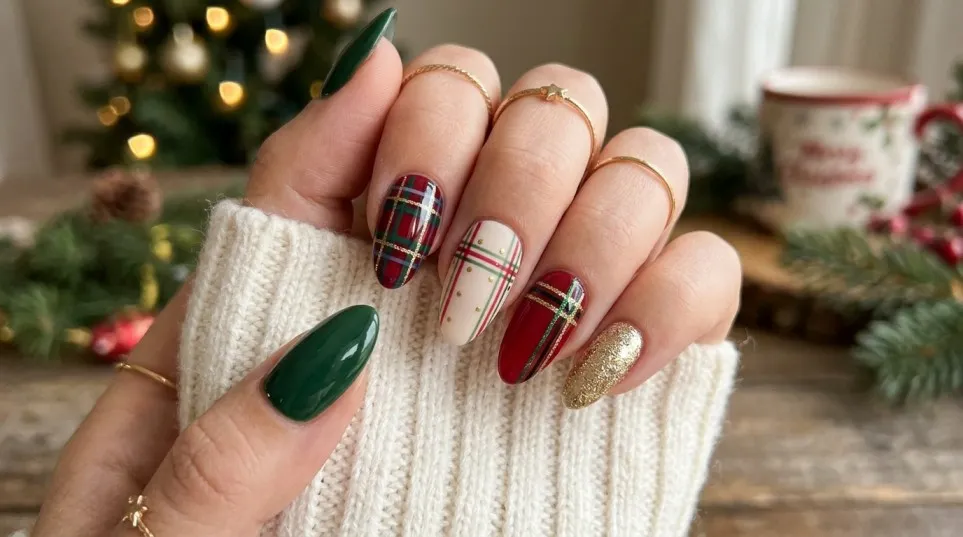
Plaid patterns are inspired by traditional winter clothing and cosy Christmas blankets. Use red, green, black, and white lines to create a tartan-inspired design.
Although it may look complicated, a thin nail brush or striping tape can make the process easier.
20. Nude Christmas Nail Designs
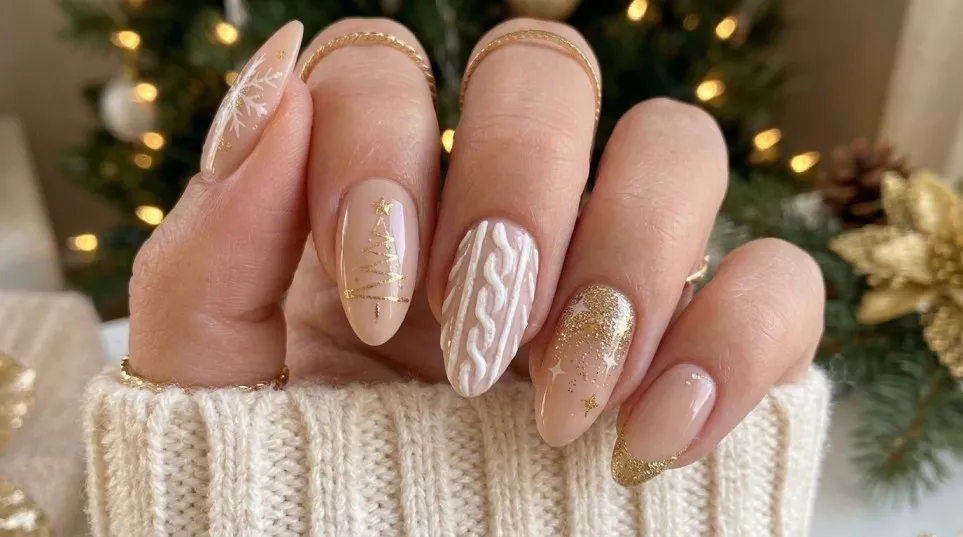
Nude Christmas nails are perfect if you prefer natural-looking manicures. Choose beige, blush, or milky pink polish and add small festive details.
Tiny snowflakes, gold stars, and delicate glitter are all beautiful options.
21. Christmas Lights Nail Art
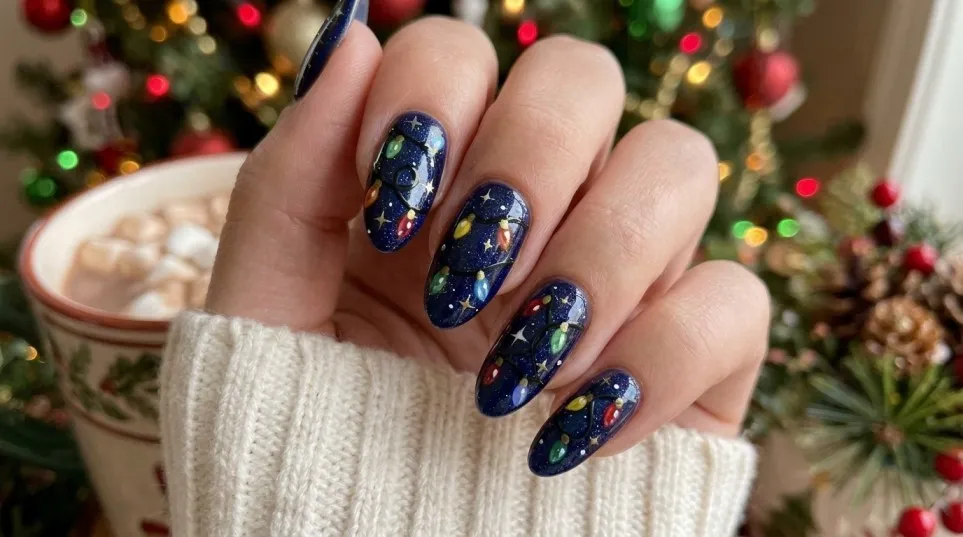
Christmas lights are a fun way to add colour to your manicure. Draw a thin black or dark green curved line and add tiny colourful dots to represent glowing bulbs.
This design looks especially pretty on a pale background.
22. Emerald Green and Gold Nails
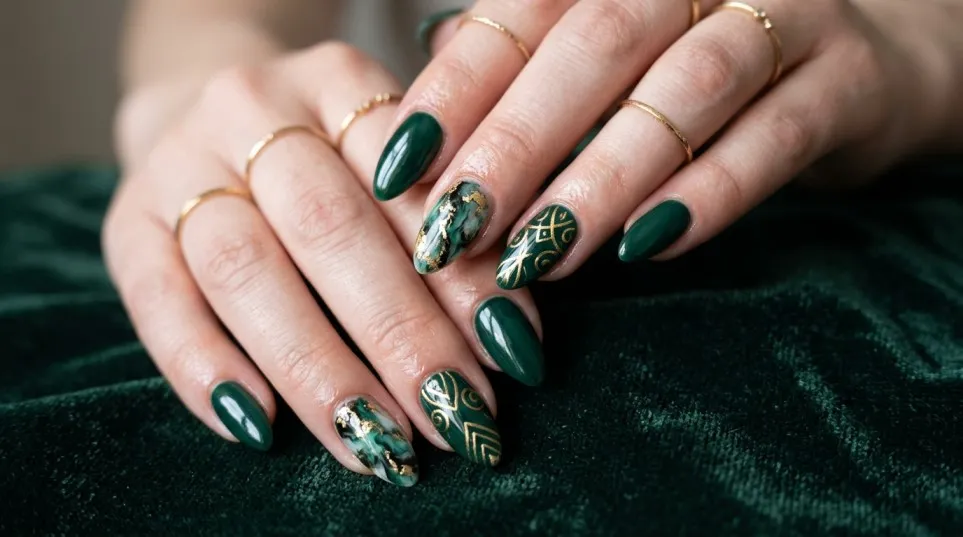
Emerald green and gold create a rich festive combination. Use a deep green polish and add gold foil, glitter, or fine metallic lines.
This is an excellent choice for Christmas parties and evening celebrations.
23. Minimalist Christmas Nail Art
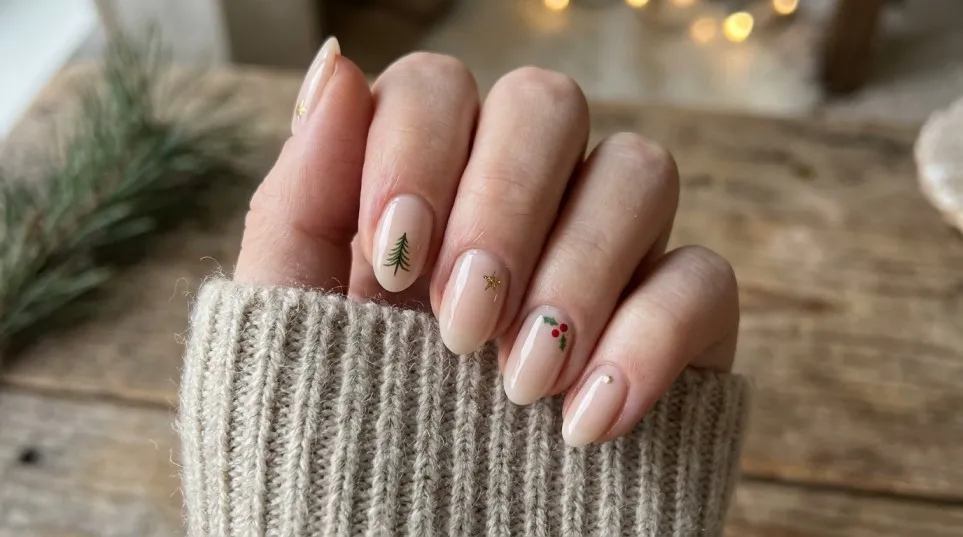
If you do not enjoy detailed patterns, minimalist Christmas nail art may be your favourite style.
Try a tiny red heart, a small Christmas tree, or a single gold star on a nude base. The result is simple, modern, and easy to wear.
24. Christmas Ombre Nails
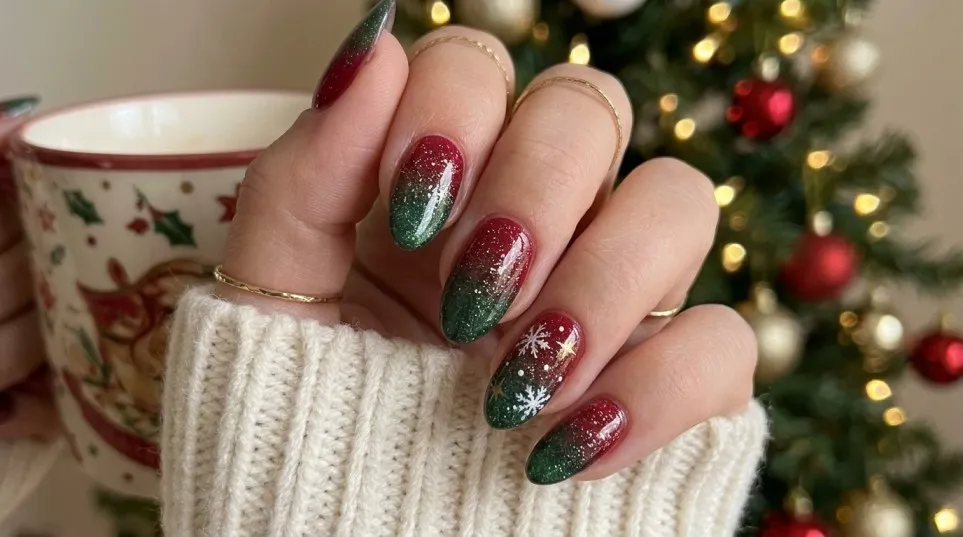
Ombre nails blend two or more colours to create a soft gradient. For Christmas, you can combine red and gold, green and silver, or white and icy blue.
A makeup sponge can help you create the gradient at home.
25. Christmas Chrome Nails
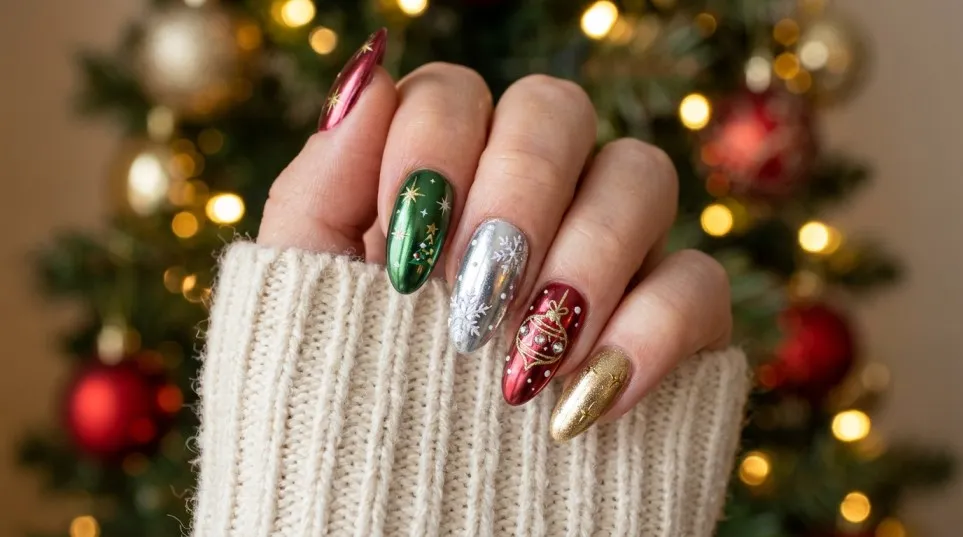
Chrome nails are a stylish option for anyone who loves shiny finishes. Red, silver, green, and champagne chrome all work beautifully for Christmas.
For gel chrome manicures, use compatible chrome powder and follow the manufacturer’s application and curing instructions.
Best Christmas Nail Art Products to Buy in the UK
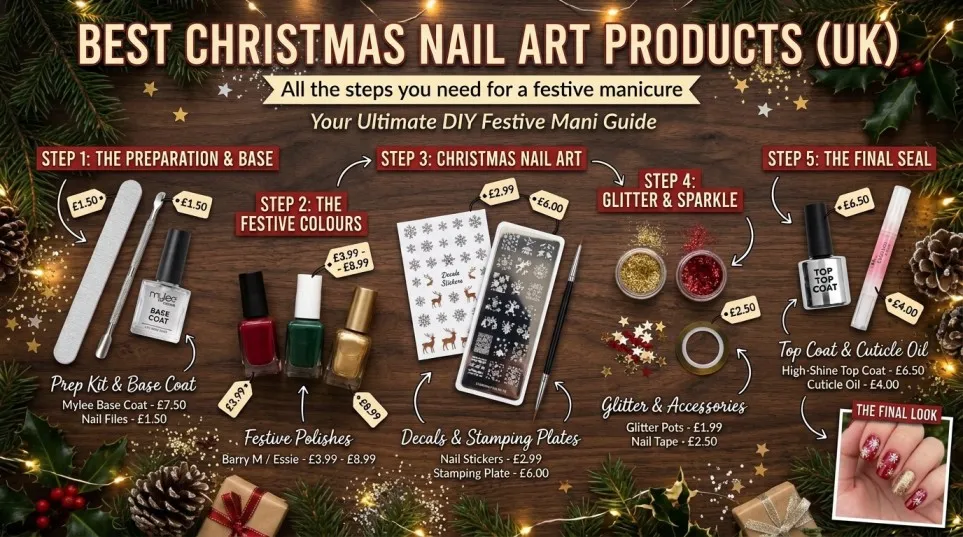
Creating beautiful Christmas nail art at home becomes much easier when you have the right products. You do not need to purchase everything at once. Instead, start with a few useful tools and add more as your nail art skills improve.
Here are some products worth considering:
1. Nail Art Brush Set
Fine brushes help you create snowflakes, Christmas trees, stripes, and other detailed patterns.
2. Christmas Nail Stickers
Stickers are ideal for beginners who want detailed designs without drawing everything by hand.
3. Christmas Nail Polish Set
A selection of red, green, white, gold, and silver shades gives you plenty of colour combinations.
4. Nail Glitter Powder
Glitter is useful for festive tips, snow effects, sparkling accent nails, and glamorous Christmas manicures.
5. Nail Dotting Tools
Dotting tools make it easy to create snowflakes, Christmas lights, berries, and small decorative patterns.
6. Clear Nail Top Coat
A good top coat adds shine and helps protect your finished nail design from everyday wear.
My recommendation: If you are a beginner, start with a nail art brush set, Christmas stickers, a few festive nail colours, and a clear top coat. These basics can help you create many different designs without spending too much money.
Before buying, check the product description, customer reviews, included accessories, and whether the polish is regular or gel. This helps you choose products that suit your experience and manicure routine.
How to Do Christmas Nail Art at Home: Step-by-Step Guide
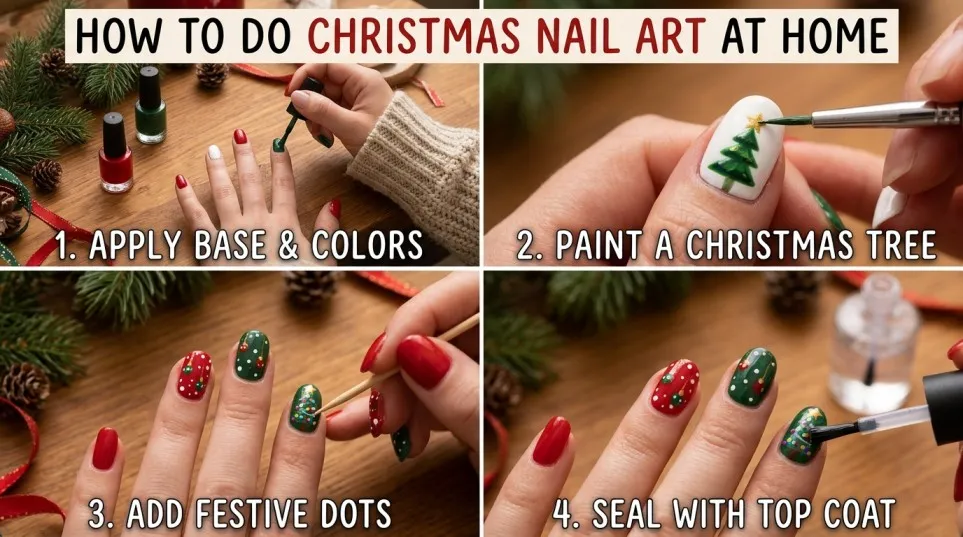
You do not need professional nail artist skills to create attractive Christmas nails. With a little patience and the right tools, you can achieve lovely results at home.
Here is a simple guide for beginners.
Step 1: Prepare Your Nails
Start by removing old nail polish with a suitable nail polish remover. Wash and dry your hands, then gently shape your nails with a nail file.
Push back your cuticles gently if needed, but avoid cutting or damaging the surrounding skin.
Good preparation makes your manicure look cleaner and helps the polish apply more evenly.
Step 2: Apply a Base Coat
Apply one thin layer of base coat to each nail. Allow it to dry according to the product instructions.
A base coat creates a smoother surface for your nail polish and helps reduce staining from darker colours.
Step 3: Choose Your Christmas Colours
Now comes the fun part! Choose two or three colours that match your preferred design.
For example:
- Red and white for candy cane nails.
- Green and gold for Christmas tree designs.
- White and silver for snowflake nails.
- Nude and gold for minimalist Christmas nail art.
- Burgundy and glitter for glamorous festive nails.
You do not need ten different colours. A small collection can create many beautiful combinations.
Step 4: Paint Your Base Colour
Apply two thin coats of your chosen nail polish, allowing each coat to dry before applying the next.
Avoid applying thick layers because they can take longer to dry and may smudge more easily.
Step 5: Create Your Christmas Design
Choose a simple pattern if this is your first attempt.
For example, you can create:
- Small white dots to represent falling snow.
- Red and white stripes for candy cane nails.
- Tiny green triangles for Christmas trees.
- Gold stars for a festive accent.
- Small red dots and green leaves for holly designs.
If freehand painting feels difficult, use Christmas nail stickers or nail stamping tools instead.
Step 6: Add Glitter or Decorative Details
Once your design is complete, you can add a little glitter, metallic polish, or nail decoration.
However, avoid adding too many details to every nail. Sometimes one beautifully decorated accent nail looks more attractive than a manicure filled with different patterns.
Step 7: Apply a Top Coat
Finish your manicure with a clear top coat. Apply it evenly over the nail design and seal the free edge where possible.
This adds shine and helps protect your Christmas nail art.
Step 8: Allow Your Nails to Dry
Give your nails enough time to dry completely before touching clothes, opening bags, or doing household tasks.
A little patience at this stage can prevent smudges and keep your manicure looking neat.
Christmas Nail Art for Short Nails
Short nails can look just as beautiful as long nails. In fact, smaller nails are perfect for simple and delicate Christmas designs.
Here are some ideas:
- Tiny snowflakes: Add one or two small snowflakes to a nude or white base.
- Red French tips: Create a festive look without covering the entire nail.
- Gold dots: Add tiny metallic dots for a simple, elegant finish.
- Minimalist Christmas trees: Paint a small green tree on one accent nail.
- Glitter tips: Apply silver or gold glitter to the ends of your nails.
If your nails are short, avoid overcrowding them with large decorations. Simple patterns usually look cleaner and more balanced.
Christmas Nail Art for Long Nails
Long nails provide more space for detailed nail art. You can experiment with larger patterns, colourful combinations, and decorative elements.
Some beautiful options include:
- Full Christmas tree designs.
- Detailed Santa Claus faces.
- Candy cane patterns across multiple nails.
- Red and gold glitter ombre.
- 3D Christmas bows and decorative charms.
- Snowflakes combined with rhinestones.
Almond, coffin, square, and stiletto nail shapes can all work beautifully with festive nail designs.
Christmas Nail Art for Beginners: Which Designs Are Easiest?
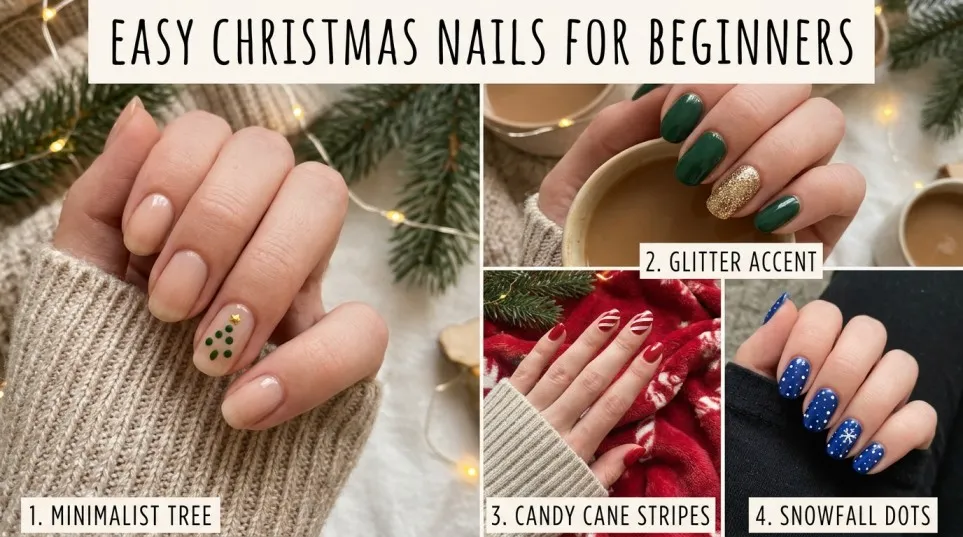
If you have never tried nail art before, do not start with complicated designs. Choose patterns that use simple shapes and basic tools.
| Design | Difficulty | Tools needed |
|---|---|---|
| Gold glitter nails | Very easy | Glitter polish |
| Snowfall dots | Very easy | Bobby pin or dotting tool |
| Christmas stickers | Very easy | Nail stickers |
| Candy cane stripes | Easy | Thin brush or nail tape |
| Christmas tree | Easy | Fine brush |
| Snowflakes | Medium | Fine nail art brush |
| Plaid patterns | Medium | Striping brush |
One helpful trick is to decorate only your ring fingers at first. Keep the other nails in a matching solid colour. This gives you a beautiful festive manicure without having to create ten detailed designs.
Christmas Nail Colours That Look Beautiful Together
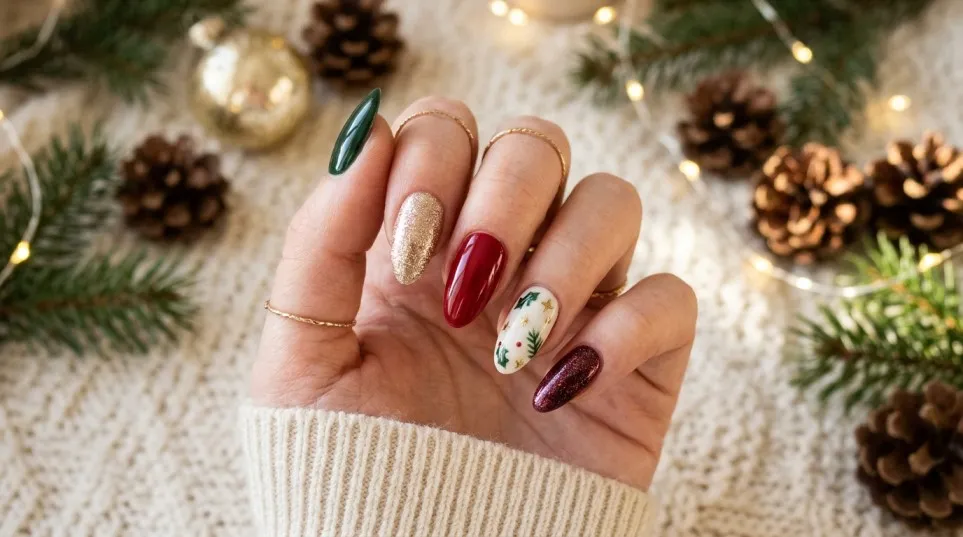
Choosing the right colours can make a big difference to your final manicure. Although traditional Christmas colours remain popular, modern festive nail designs also include soft neutrals and metallic shades.
| Colour combination | Overall look | Best design |
|---|---|---|
| Red and white | Traditional and playful | Candy cane nails |
| Green and gold | Rich and luxurious | Christmas trees |
| White and silver | Soft and frosty | Snowflakes |
| Nude and gold | Elegant and minimal | Star accents |
| Burgundy and black | Bold and sophisticated | Glitter nails |
| Pink and silver | Soft and feminine | Winter nail art |
| Blue and white | Cool and fresh | Snowflake designs |
You can also experiment with different finishes. For example, a matte green base with glossy gold details creates a beautiful contrast.
How to Make Your Christmas Nail Art Last Longer
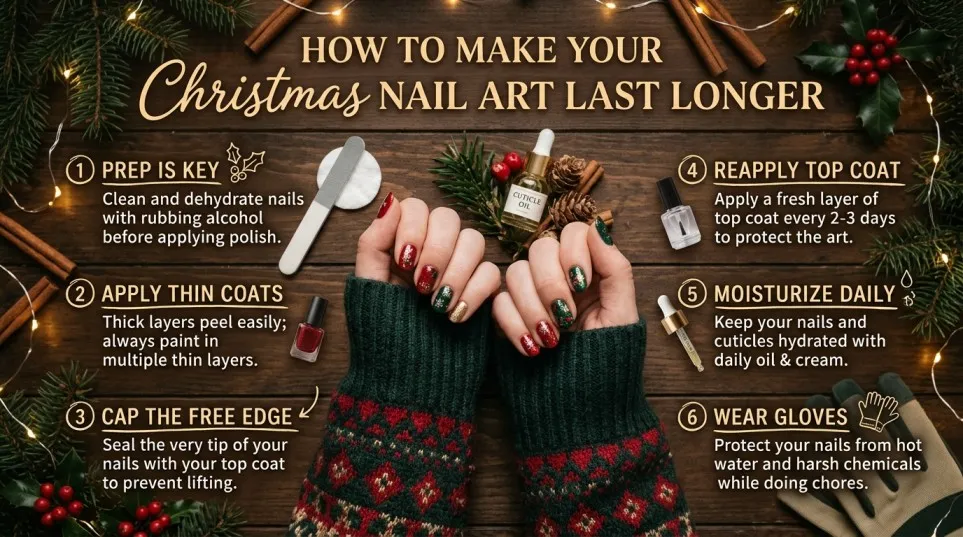
Nobody wants their beautiful festive manicure to chip after just one day. Fortunately, a few simple habits can help your nail design stay attractive for longer.
1. Always prepare your nails. Clean, dry nails provide a better surface for polish application.
2. Use a base coat. It helps create an even foundation and can reduce colour staining.
3. Apply thin layers. Several thin coats are usually easier to manage than one thick coat.
4. Choose quality products. Good nail polish, brushes, and top coats can make application easier.
5. Seal the tips. Applying top coat over the free edge can help reduce early tip wear.
6. Protect your hands. Wear household gloves when washing dishes or using cleaning products.
7. Avoid picking your polish. If your manicure starts to chip, do not peel the remaining polish away.
8. Refresh your top coat. For regular polish, a fresh layer every few days may help maintain shine, provided the original manicure is fully dry.
These small steps can make a noticeable difference to the appearance of your manicure.
Regular Nail Polish vs Gel Christmas Nail Art
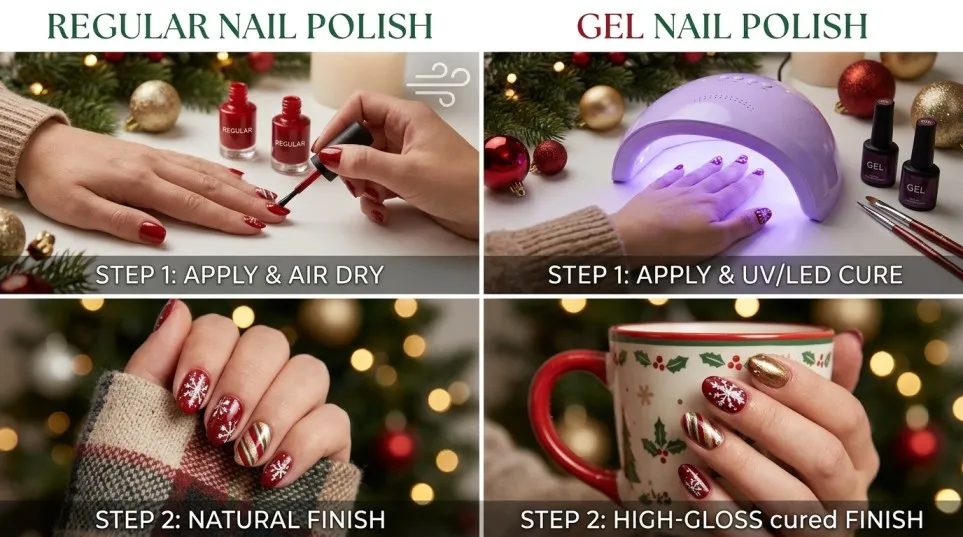
Both regular polish and gel polish can create beautiful festive nails. However, they have different application methods and requirements.
| Feature | Regular nail polish | Gel nail polish |
|---|---|---|
| Application | Air dries | Requires a compatible curing lamp |
| Designs | Suitable for simple and detailed art | Suitable for detailed nail art |
| Equipment | Basic manicure tools | Gel products and suitable lamp |
| Removal | Usually polish remover | Product-specific removal |
| Best for | Beginners and occasional manicures | People familiar with safe gel application |
If you are new to nail art, regular nail polish is usually the easier starting point. You can practise Christmas trees, stripes, dots, and snowflakes without needing a curing lamp.
Gel polish can be useful for longer-wearing manicures, but it needs careful application. The British Association of Dermatologists warns that uncured gel products contacting the skin and insufficient curing can increase the risk of allergic reactions. Read its artificial nail safety guidance before choosing a home gel kit.
Christmas Nail Art Mistakes to Avoid
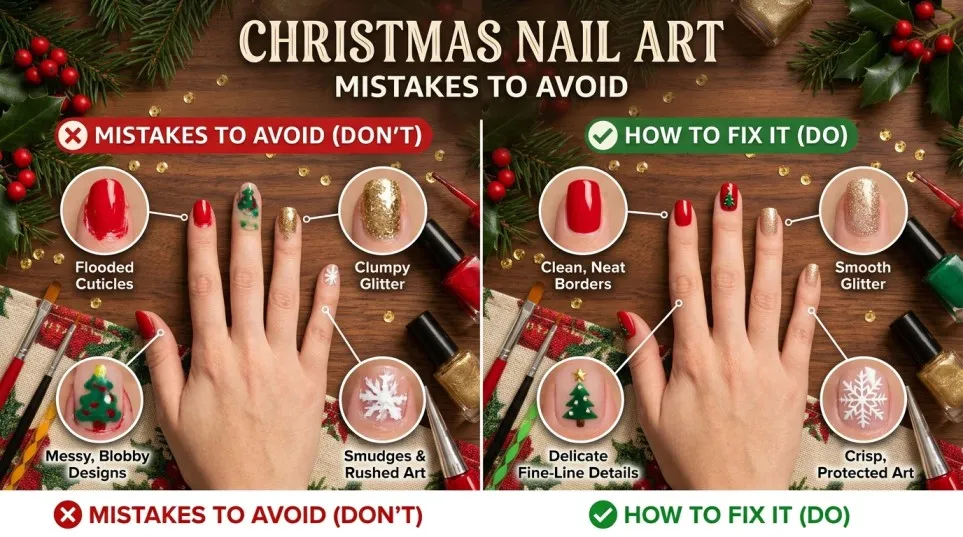
Even a beautiful nail design can look messy if you rush the process. Here are some common mistakes worth avoiding:
- Applying thick layers of nail polish.
- Starting detailed artwork before the base colour has dried.
- Using too many colours in one design.
- Applying stickers over wet polish.
- Skipping the base coat and top coat.
- Using unsuitable tools for fine details.
- Pulling off nail polish instead of removing it properly.
Remember, your first attempt does not need to look perfect. Practising on one nail before decorating the entire manicure can help you feel more confident.
Where to Find More Christmas Nail Art Inspiration
If you are looking for more ideas before choosing your festive manicure, these resources can help:
- Boots Christmas nail art ideas – festive designs and practical nail art techniques.
- Glamour Christmas nail inspiration – a variety of seasonal manicure styles.
- InStyle Christmas nail designs – simple festive looks and creative design inspiration.
You can also save your favourite designs from Pinterest and create a small inspiration board before buying your nail art supplies.
Final Thoughts
Christmas nail art is a wonderful way to enjoy the festive season and express your personal style. Whether you prefer classic red nails, sparkling gold glitter, cute reindeer patterns, delicate snowflakes, or modern chrome finishes, there are countless ways to make your manicure special.
You do not have to spend a lot of money at a nail salon to achieve beautiful results. With a few essential products, some creativity, and a little practice, you can create attractive Christmas nail designs at home.
If you are a beginner, start with simple nail stickers, glitter, and dotting tools. As your confidence grows, experiment with more detailed patterns and different colour combinations.
Most importantly, choose a design that makes you happy. Your Christmas manicure should be fun, comfortable, and a lovely finishing touch to your holiday celebrations!
Frequently Asked Questions About Christmas Nail Art
Related BIAB Guides
- Art Nail Gel: Complete Beginner’s Guide to Beautiful, Creative and Long-Lasting Nail Art
- Nail Art Polish: Turn Simple Nails into Stunning Art!
- Christmas Nail Varnish Sets: The Perfect Festive Gift for Beautiful Nails This Christmas
- Christmas Nail Polish Sets: Festive Colours & Gift Ideas
Some popular Christmas nail art designs include candy cane stripes, snowflakes, Christmas trees, Santa Claus faces, reindeer patterns, gold glitter nails, and festive French tips. Red, green, white, gold, and silver are especially popular colours.
The easiest designs include glitter accent nails, snowflake stickers, gold dots, and simple candy cane stripes. You can create these looks using basic nail polish and affordable nail art tools without professional experience.
Traditional Christmas nail colours include red, green, white, gold, and silver. However, burgundy, nude, pink, icy blue, and champagne are also beautiful choices for modern festive manicures.
Yes! Short nails are perfect for Christmas nail art. You can try tiny snowflakes, red French tips, glitter accents, small Christmas trees, and minimalist festive patterns.
Start by cleaning and shaping your nails. Apply a base coat, followed by two thin coats of your chosen colour. Use a fine brush, dotting tool, or nail stickers to create your festive design. Finish with a clear top coat.
Yes, Christmas nail stickers are a convenient option, especially for beginners. They make it easier to create detailed designs such as snowflakes, Santa faces, stars, and Christmas trees without freehand painting.
The duration depends on the products and application method. Regular nail polish may last several days, while a carefully applied gel manicure can last longer. Daily activities, nail preparation, and product quality also affect how long the design stays attractive.
Use clean nail preparation, thin polish layers, suitable nail art brushes, and a good top coat. Keep your designs balanced and avoid overcrowding every nail with decorations.
Gold glitter nails, red chrome nails, emerald green manicures, burgundy designs, and silver snowflake nails are excellent choices for Christmas parties. They look particularly attractive with festive outfits and jewellery.
Absolutely! Regular nail polish works well for Christmas trees, snowflakes, stripes, dots, glitter, and many other festive designs. You do not need gel polish to create beautiful Christmas nails.
The basic tools include a nail art brush set, dotting tools, nail stickers, nail polish, a base coat, a top coat, and a nail file. You can also use a makeup sponge for ombre designs.
Almond-shaped nails look beautiful with red French tips, gold glitter ombre, snowflakes, Christmas trees, and elegant nude designs. Their tapered shape also works well with delicate patterns and metallic details.