Mylee Nail Kit: A Complete Guide to Easy At-Home Gel Nails
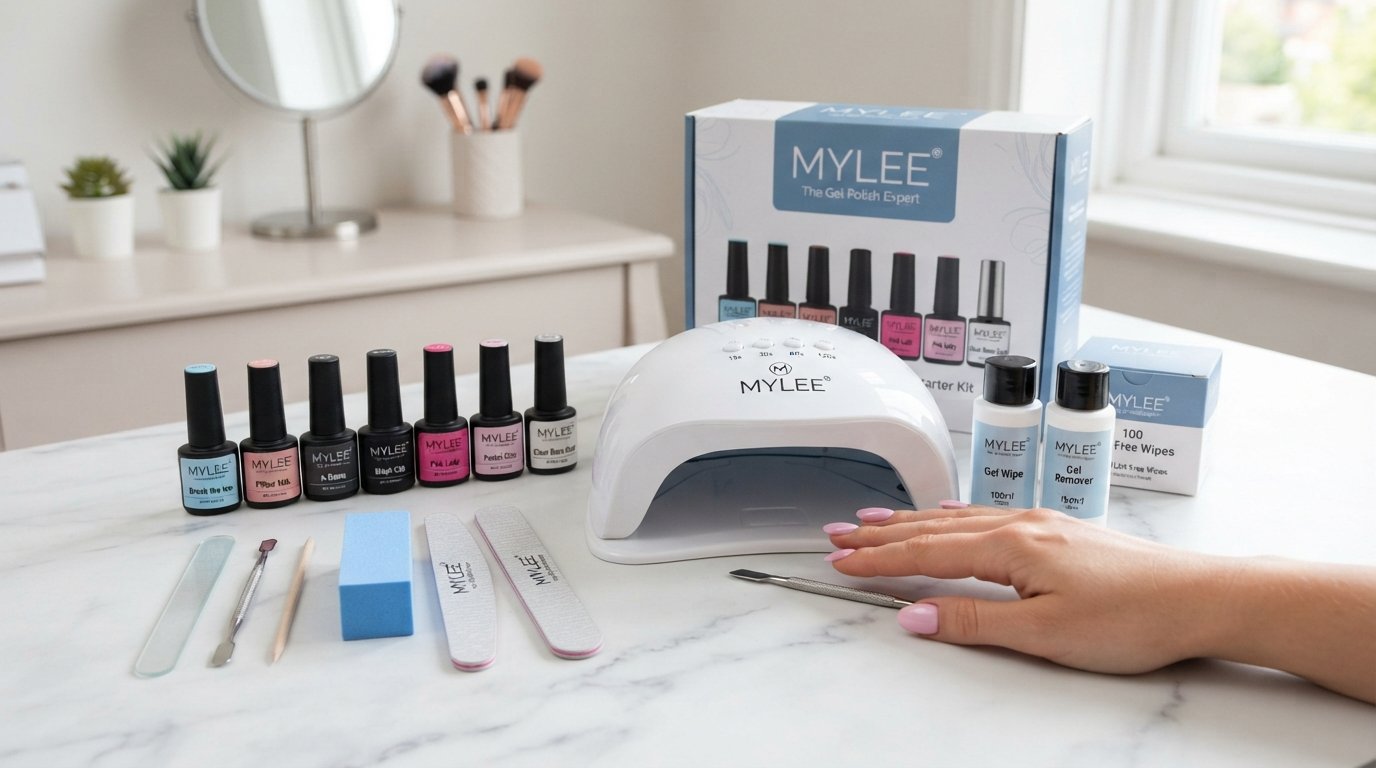
Doing your nails at home can be much easier when you have the right tools in one place. Instead of buying a gel nail lamp, base coat, gel colours, nail prep products, and removal tools separately, a Mylee nail kit brings many of the essentials together in a convenient package.
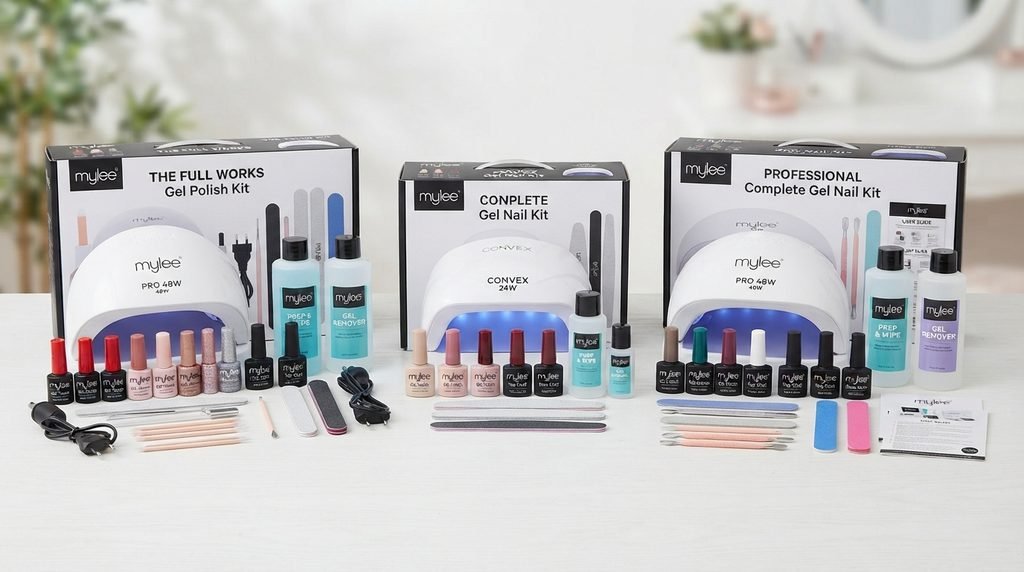
Mylee has built its range around at-home gel manicures, with kits designed for different levels of experience. Its current gel nail kit collection includes The Mini Kit, The Main Kit, and The Massive Kit, giving beginners and more experienced users different options depending on how much equipment and colour choice they want.
If you have never done a gel manicure before, the idea can seem slightly confusing. Which lamp should you use? How much gel polish should you apply? Do you need a base coat? And how do you remove gel polish without damaging your nails?
This guide answers those questions in simple language.
What Is a Mylee Nail Kit?
A Mylee nail kit is an at-home manicure set designed to help you create a gel manicure without needing to visit a salon every time.
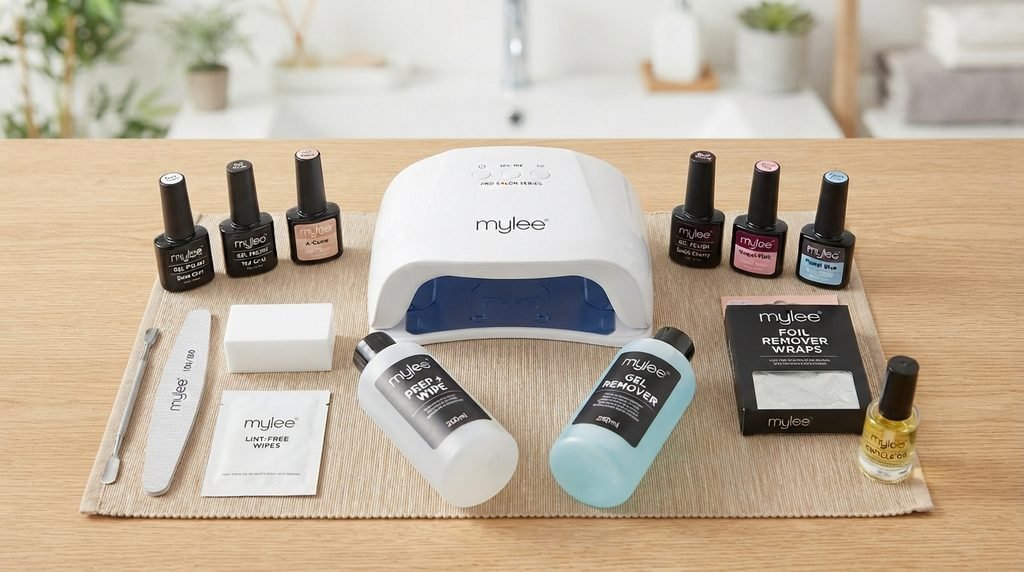
Depending on the kit you choose, you may get items such as an LED nail lamp, gel polish colours, base coat, top coat, nail preparation products, files, and removal essentials.
Mylee currently describes its three main gel kits as:
- The Mini Kit – aimed at beginners and includes three shades with a compact Petite LED Lamp.
- The Main Kit – designed for beginners as well as people who already have some experience.
- The Massive Kit – the larger option, with eight shades and the Grande LED Lamp.
You can check the current kit range directly on the official Mylee gel nail kits collection.
The biggest advantage is convenience. Rather than trying to work out which products are compatible with one another, you can start with a kit and add extra Mylee gel polish colours as your collection grows.
Why Are Mylee Nail Kits Popular for Home Manicures?
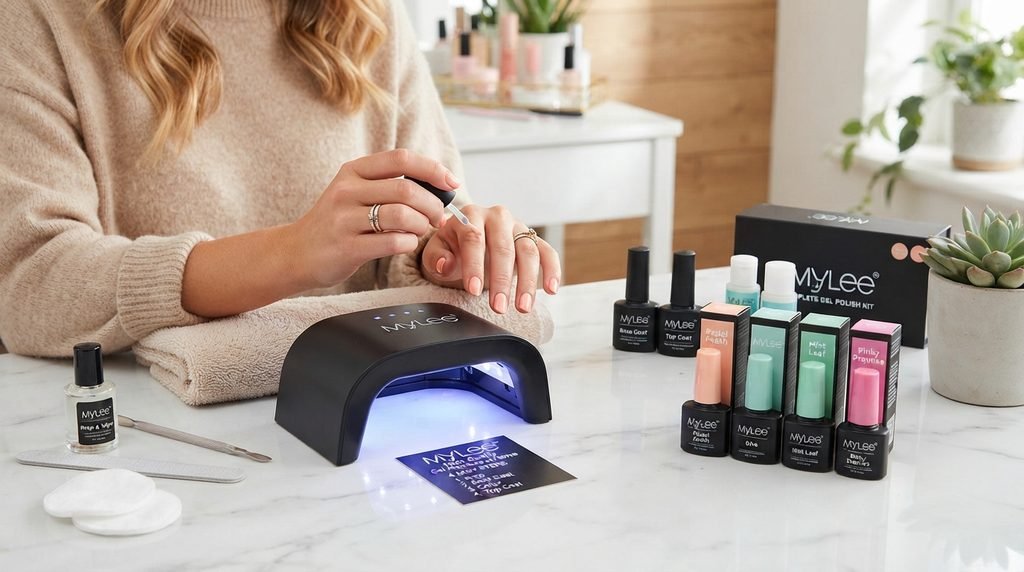
One reason people choose a Mylee gel nail kit is that it makes the home manicure process more straightforward.
Think about a typical salon visit. You choose a colour, have your nails prepared, apply several layers of product, cure the gel and finish the manicure. With a home kit, you can learn the same basic process and repeat it whenever you want.
Mylee says its LED lamps are designed to cure each layer in 60 seconds, and the brand states that its gel manicure can last for up to three weeks when applied correctly.
Of course, actual wear time can vary depending on your nails, preparation, application technique, lifestyle and how well you look after the manicure.
For someone who enjoys doing their own nails regularly, this can make a home gel kit a useful addition to their beauty routine.
Mylee Mini Kit vs Main Kit vs Massive Kit
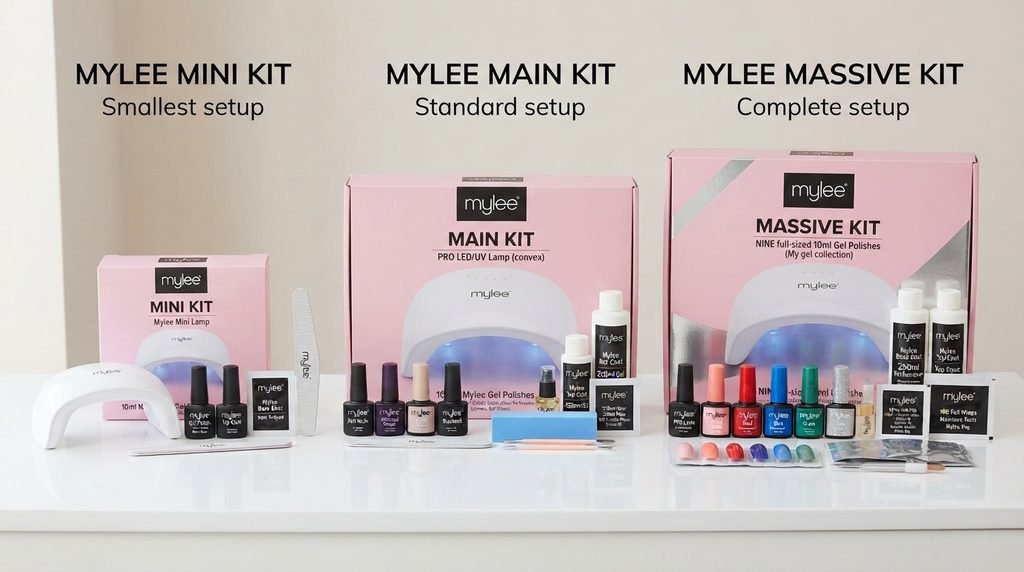
Choosing between different Mylee nail kits can initially feel difficult. However, the differences become easier to understand when you look at what you actually need.
Mylee The Mini Kit
The Mylee Mini Kit is positioned as the beginner-friendly option.
According to Mylee, it includes a Petite LED Lamp, preparation tools and three versatile colours. The company specifically recommends this option for people who are learning the basics of gel manicures.
It can make sense if you:
- Are completely new to gel nails
- Want a smaller starter kit
- Do not need lots of colours immediately
- Want to learn the application process first
- Prefer a compact lamp
You can view the current Mylee Mini Kit on the official website.
Mylee The Main Kit
The Mylee Main Kit sits between the smaller starter option and the larger collection.
Mylee describes it as suitable for both beginners and nail enthusiasts who want to develop their at-home manicure skills.
This type of kit may be useful if you want more than the basics but do not necessarily need the largest possible collection.
It is particularly interesting for someone who expects to do gel manicures regularly.
Mylee The Massive Kit
The Mylee Massive Kit is the largest of the three main gel nail kits currently listed by Mylee.
It includes eight shades and the Grande LED Lamp, along with preparation, polish, nail-art and removal essentials. Mylee currently identifies it as a bestseller on its website.
This option may appeal to people who:
- Already enjoy gel manicures
- Want several colours
- Like experimenting with nail art
- Want a larger collection from the beginning
- Plan to do manicures regularly
The exact contents and pricing can change, so it is worth checking the official Mylee kit collection before purchasing.
What Do You Need for a Mylee Gel Manicure?
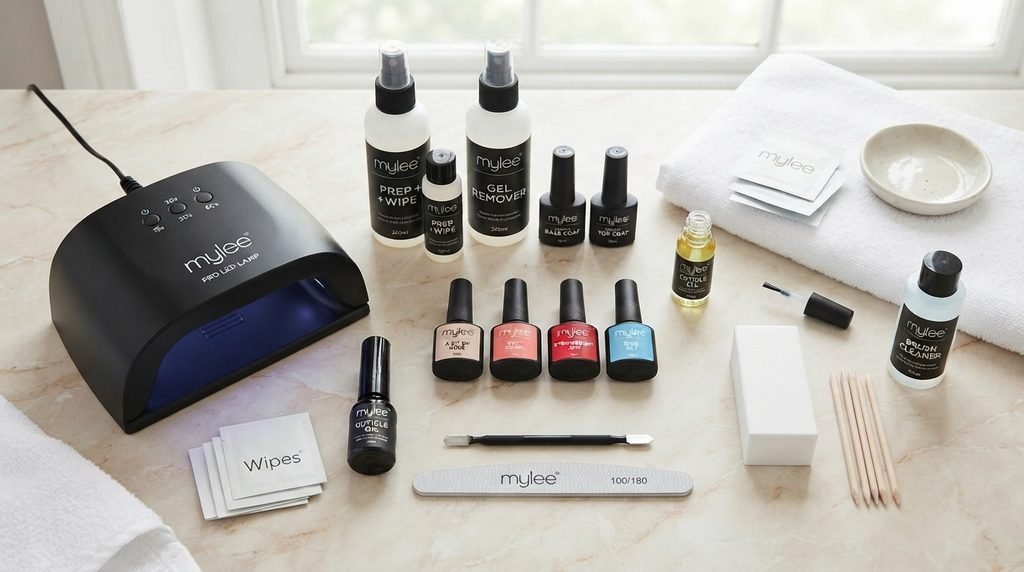
Before starting your manicure, make sure you understand the basic products involved.
A typical gel manicure kit uses several important components.
1. Nail File
A nail file helps you shape the natural nail and create a neat edge.
Do not aggressively file the natural nail. The goal is simply to create your desired shape and prepare the surface.
2. Buffing Block
A nail buffing block can gently remove surface shine.
Mylee recommends gently buffing the nail plate during preparation.
3. Nail Prep
Nail preparation removes oils and residue from the nail surface.
This step is important because excess oil can affect how well gel products adhere.
4. Base Coat
A gel base coat provides the foundation for the colour layer.
It should generally be applied in a thin layer before curing.
5. Gel Polish
This is the coloured layer that creates the main look of your manicure.
Mylee currently offers a wide selection of gel colours and finishes, including pink, nude, red, blue, green, pastel and other shades.
6. LED Nail Lamp
The lamp cures the gel products.
Mylee states that its LED lamps are designed to cure layers in 60 seconds.
7. Top Coat
The gel top coat provides the final layer and helps create the finished appearance.
Mylee offers both regular and no-wipe top-coat options.
How to Use a Mylee Nail Kit Step by Step
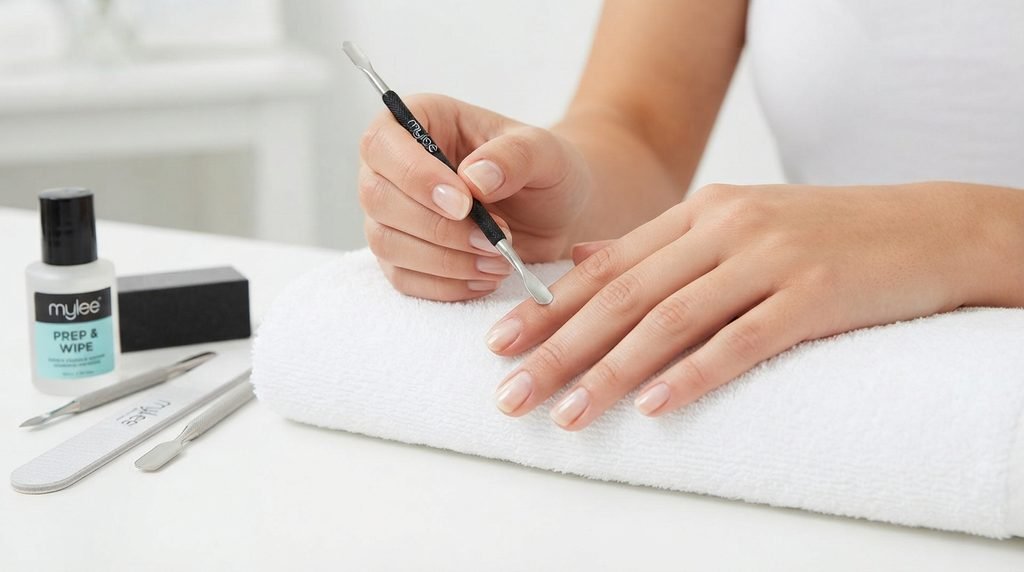
The good news is that the process does not need to be complicated.
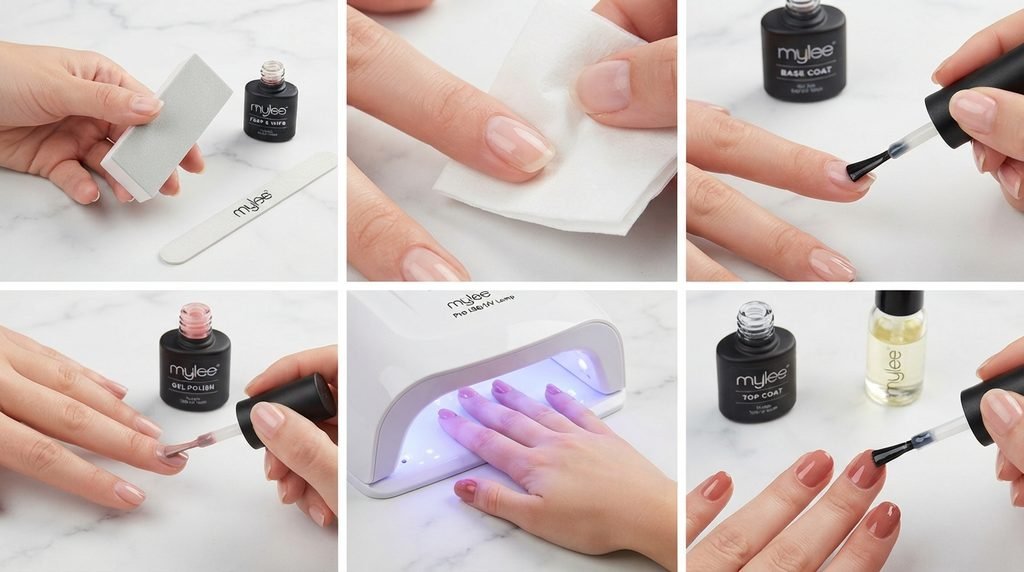
Mylee itself breaks the basic manicure process into four main stages: prep and prime, base coat and cure, colour and cure, and top coat/cure/finish.
Here is a simple version of the process.
Step 1: Prepare Your Nails
Start with clean, dry nails.
Remove any old polish and gently shape your nails with a file.
Next, gently push back the cuticles if appropriate for your normal manicure routine. Then use a buffing block to lightly remove surface shine.
Do not over-buff.
The purpose is preparation, not making the natural nail extremely thin.
Mylee recommends using its Nail Prep & Wipe on a lint-free wipe to remove oils and residue.
Step 2: Apply Base Coat
Once your nails are clean and prepared, apply a thin layer of gel base coat.
Try to keep the product away from the surrounding skin.
Then place your hand under the LED lamp and cure according to the product instructions.
Mylee’s current application guidance specifies a 60-second cure using its LED lamp.
A common beginner mistake is applying too much product.
Remember:
Thin, even layers are easier to control than thick layers.
Step 3: Apply Your Gel Colour
Now comes the fun part.
Choose your favourite Mylee gel polish colour and apply a thin coat.
Do not worry if the first layer looks slightly transparent. Gel manicures are normally built using multiple thin coats rather than one very thick coat.
Cure the first layer.
Then apply another thin layer and cure again.
Mylee recommends building opacity with thin coats and curing each layer. It also recommends capping the free edge of the nail with polish.
Step 4: Apply Top Coat
After your colour has been properly cured, apply your gel top coat.
Try to create a smooth, even layer.
Cure the top coat according to the product instructions.
If you use a regular top coat that leaves a tacky layer, Mylee recommends wiping it with its 2-in-1 Nail Prep & Wipe after curing. A no-wipe top coat removes the need for this step.
Step 5: Finish Your Manicure
Once the manicure is complete, wash your hands if appropriate and apply nail and cuticle oil.
Moisturising your hands and caring for the cuticles can make the finished manicure look more polished.
Then you are ready to enjoy your new nails.
How Long Does a Mylee Gel Manicure Last?
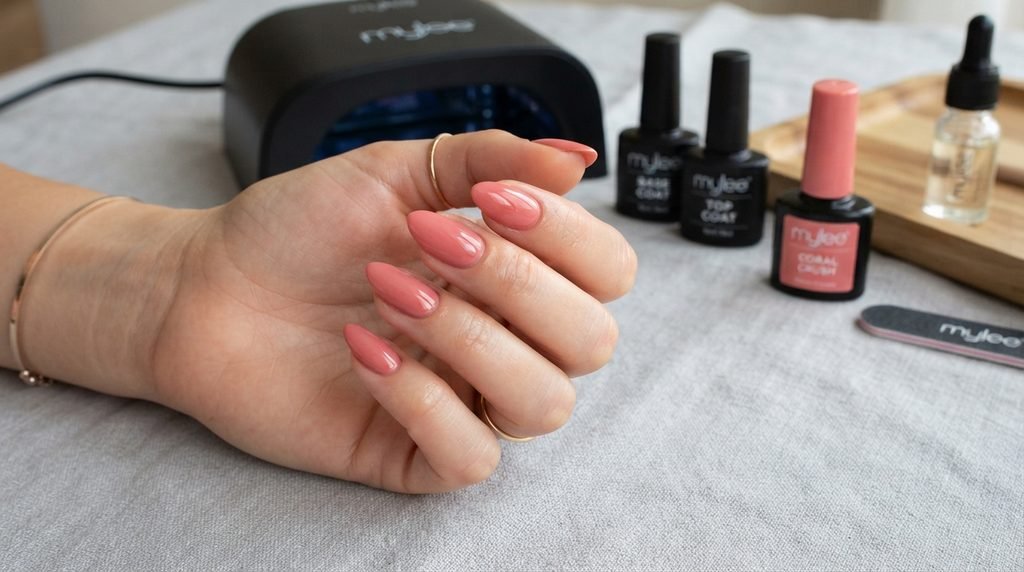
One of the main reasons people choose gel polish is its durability.
Mylee states that its gel manicures can last for up to three weeks when properly applied.
However, this should be treated as a maximum guideline rather than a guarantee for every person.
Your results can depend on:
- Nail preparation
- Application technique
- Product compatibility
- How thin or thick your layers are
- Exposure to water and chemicals
- Your daily activities
- Natural nail growth
- How carefully you remove the manicure
For example, someone who works with their hands all day may experience different wear from someone whose daily routine is less demanding.
A Realistic Beginner Experience
Imagine you have just bought your first Mylee nail kit.
On your first attempt, you may expect perfectly smooth nails immediately. But then you notice one nail has slightly uneven polish.
That is normal.
Instead of becoming frustrated, treat your first few manicures as practice.
You learn how much product to put on the brush. You learn how close you can work to the cuticle without touching the skin. You learn how to hold your hand under the lamp.
By the third or fourth manicure, the process can feel much more natural.
This is one of the biggest benefits of doing your nails at home: you can develop your technique over time.
Mylee Nail Kit for Beginners
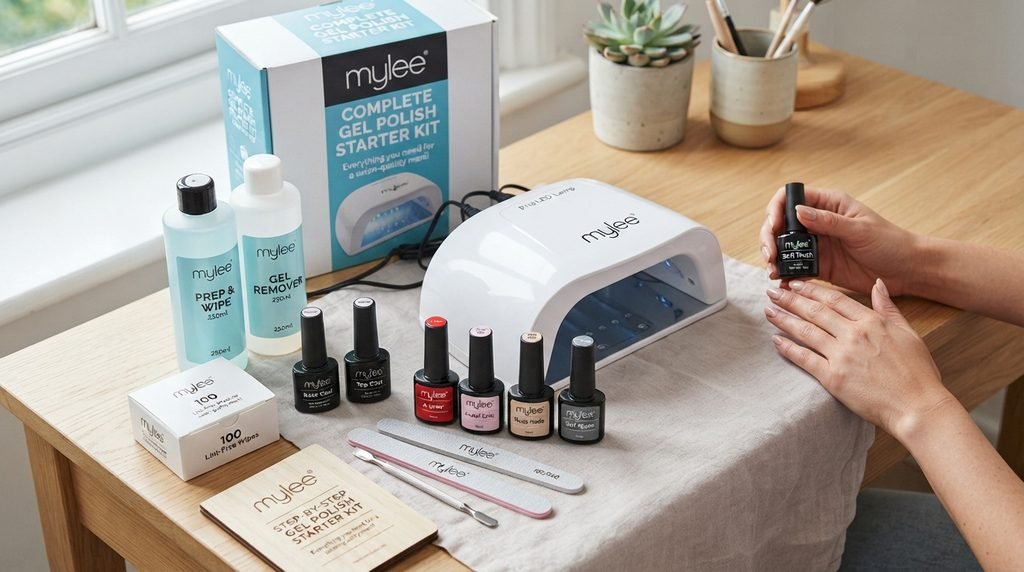
If you are completely new to gel polish, start with the basics.
You do not need dozens of colours or complicated nail-art accessories immediately.
Focus on learning:
- How to prepare your natural nails
- How to apply a thin base coat
- How to apply thin colour layers
- How to cure correctly
- How to apply top coat
- How to remove gel safely
Mylee specifically recommends The Mini Kit for beginners because it provides essential tools, three shades and a compact LED lamp.
Once you become comfortable, you can add more colours, nail-art tools and builder-gel products.
Can You Do Nail Art With a Mylee Nail Kit?
Yes.
A basic gel kit can be the starting point for much more creative manicures.
You can add:
- Nail stickers
- Nail gems
- Glitter
- Nail-art brushes
- Dotting tools
- Builder gel
- Metallic decorations
- French-tip designs
For example, Mylee’s Be Jewelled Nail Art Kit includes clear 5-in-1 Builder Gel, assorted gems, pearls, gold leaf, a mixing palette, a nail-art brush and a dotting tool.
This means you can gradually turn a simple home manicure setup into a more creative DIY nail-art station.
How to Remove Mylee Gel Polish
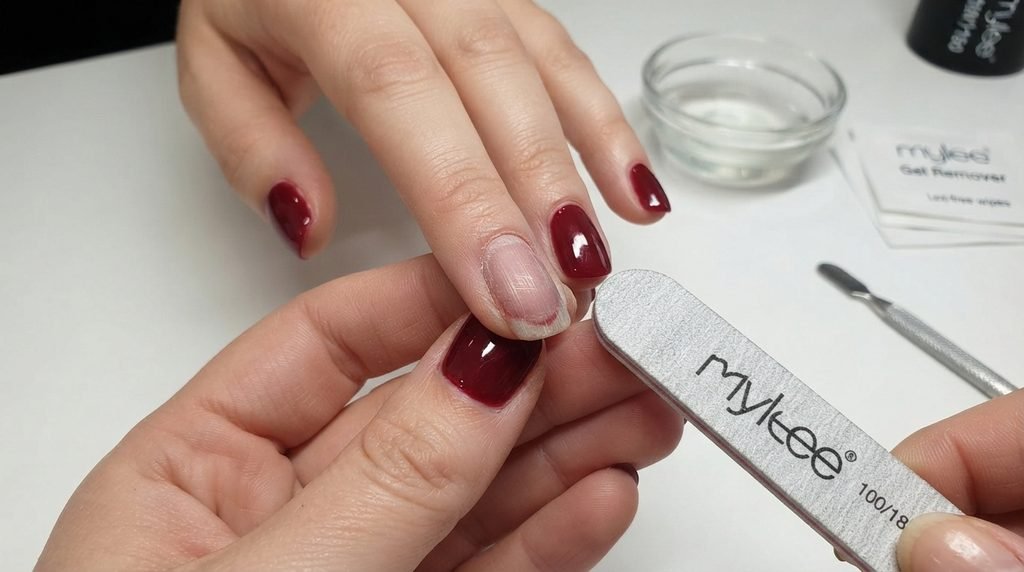
Removal is just as important as application.
Never peel or rip gel polish from the natural nail.
Peeling can take layers of the natural nail with the product and leave your nails feeling weak or damaged.
Instead, follow the removal instructions supplied with your specific products.
Mylee also sells dedicated nail-prep and gel-removal products, including a Nail Prep & Wipe + Gel Remover Duo.
A typical removal routine involves carefully breaking the top layer, soaking or using the recommended removal method, and gently removing softened product.
If the gel does not come away easily, do not force it.
How to Make Your Mylee Manicure Last Longer
Want your Mylee gel nails to stay neat for as long as possible?
Start with preparation.
Keep Nails Clean and Dry
Oil and moisture on the nail plate can affect adhesion.
Use Thin Layers
Thick gel layers may not cure as intended and can create an uneven finish.
Avoid Getting Gel on Your Skin
Keep the product on the nail rather than the surrounding skin.
Cure Each Layer Properly
Do not rush the curing process.
Follow the instructions supplied with the product and lamp.
Cap the Free Edge
Mylee recommends running polish along the free edge of the nail during colour application.
Look After Your Cuticles
Regular use of cuticle oil can help keep the surrounding skin looking moisturised.
Is a Mylee Nail Kit Worth Buying?
Whether a Mylee nail kit is worth buying depends on how often you plan to do gel manicures and what you already own.
If you regularly visit a salon for gel manicures, an at-home kit may give you the opportunity to do some manicures yourself.
The convenience is also important.
Instead of arranging an appointment, travelling to a salon and waiting for your manicure, you can work on your nails at home when you have free time.
Mylee specifically positions its kits as a way to achieve a professional-style manicure at home without paying salon prices every time.
However, remember that buying a kit is only the beginning. Your results will also depend on learning the correct application and removal techniques.
Which Mylee Nail Kit Should You Choose?
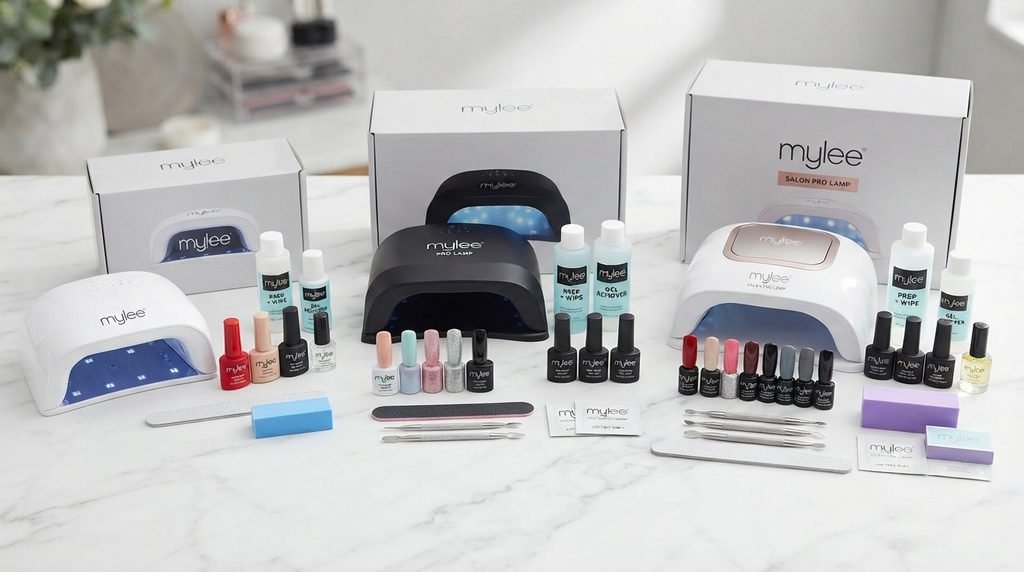
The simplest way to decide is to consider your experience and how much variety you want.
| Kit | Suitable For | Main Idea |
|---|---|---|
| Mylee Mini Kit | Beginners | Compact starter option |
| Mylee Main Kit | Beginners & regular users | More complete setup |
| Mylee Massive Kit | Regular users & nail enthusiasts | Larger collection with more colours |
Mylee’s current collection gives shoppers these three main options, although kit contents and prices can change over time.
Therefore, always check the current product page before ordering.
What Makes a Good At-Home Gel Nail Kit?
When comparing a gel nail kit, do not only look at the number of products inside the box.
Consider the quality and usefulness of the essentials.
A useful kit should make it easier to:
- Prepare the nails
- Apply base coat
- Apply colour
- Cure gel correctly
- Finish the manicure
- Remove the product
- Maintain your nails
It is also useful if you can purchase additional colours and accessories from the same brand later.
Mylee currently offers a broad selection of gel colours, finishes, builder gels, lamps, nail-care products and nail-art accessories, making it possible to expand your collection gradually.
Mylee Nail Kit Safety Tips
Gel products should be used carefully.
Always read the instructions supplied with your specific products before use.
A few basic habits can make the experience safer and cleaner:
- Keep gel products away from the skin.
- Avoid curing product that has spread onto the surrounding skin.
- Follow the manufacturer’s curing instructions.
- Do not peel cured gel from your nails.
- Use products only as directed.
- Keep products away from children.
- Store gel products appropriately.
For example, Mylee’s nail-art products include warnings about small parts and advise that certain products are not suitable for children under three because of choking hazards.
If you develop irritation or an unusual reaction, stop using the product and seek appropriate professional advice.
How to Build Your Mylee Nail Collection Over Time
You do not have to buy everything at once.
A smart approach is to start with a basic Mylee nail kit and then build your collection according to your needs.
Start With Essentials
Begin with:
- LED lamp
- Base coat
- Top coat
- A few gel colours
- Nail file
- Nail-prep products
- Removal products
Add More Colours
Once you know which shades you actually wear, add more colours.
Mylee currently offers colours across categories such as pink, nude, red, blue, green, white, black, purple and more.
Experiment With Nail Art
After you are comfortable with basic application, try:
- French tips
- Ombre effects
- Simple dots
- Glitter accents
- Nail gems
- Chrome-style decorations
- Seasonal designs
This makes the kit more useful because you are not limited to one basic manicure style.
Final Thoughts on the Mylee Nail Kit
A Mylee nail kit can be a practical option for anyone who wants to learn how to create gel manicures at home.
The biggest attraction is convenience. You can start with a beginner-focused kit, learn the basic process and then expand your collection as your skills improve.
The current Mylee range includes The Mini Kit, The Main Kit and The Massive Kit, so there are different starting points depending on your experience and how much variety you want.
The most important thing is not simply buying the biggest kit. Instead, choose the setup that matches your actual needs.
If you are completely new to gel nails, a smaller kit can give you the essentials without overwhelming you. If you already enjoy doing your nails, a larger kit with more colours and accessories may give you more room to experiment.
Most importantly, take your time with nail preparation, apply thin layers, cure each layer correctly and remove the gel carefully.
Once you learn the process, an at-home Mylee gel manicure can become a simple part of your regular beauty routine.
For current kits, colours, accessories and product information, visit the official Mylee website.