
BIAB Nail Kit: Best Starter Kits & How to Use One at Home
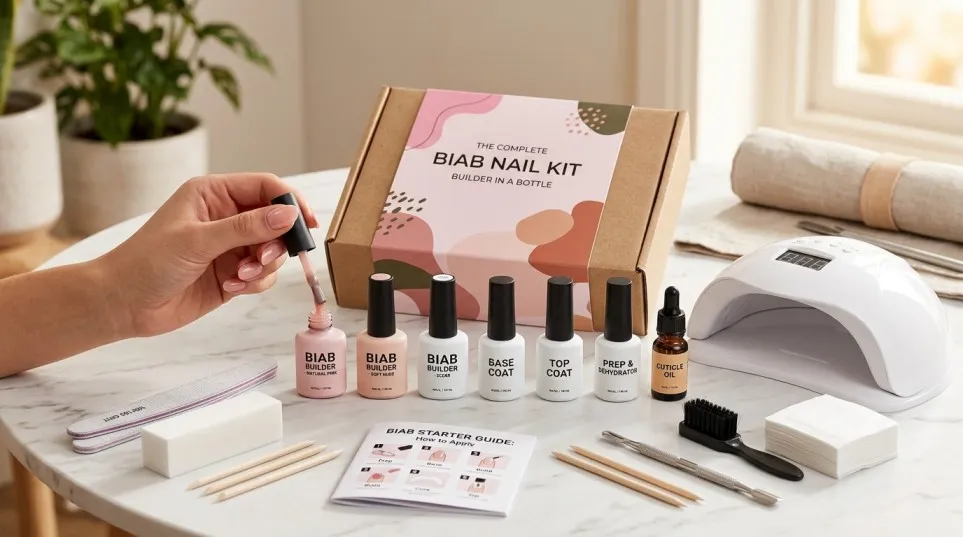
What is the best BIAB kit for beginners? A good beginner BIAB kit includes a builder gel (clear or milky nude), a base or primer, a no-wipe top coat, an LED/UV lamp (36W or more), a file, a buffer and lint-free wipes. Expect to pay around £30-£70 in the UK. If you have sensitive skin, choose a HEMA-free, self-levelling gel.
If you love neat, glossy nails but your natural nails are weak, break easily, or never seem to grow, a BIAB nail kit can be an appealing way to create a stronger-looking manicure at home.
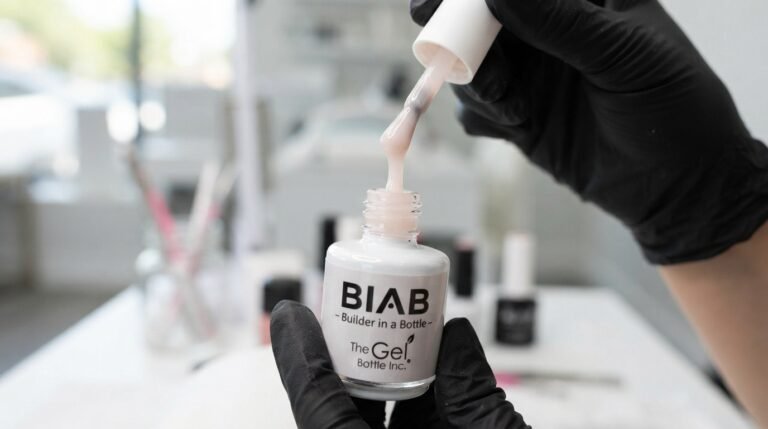
BIAB stands for Builder in a Bottle. It is a type of builder gel designed to add structure and support to the natural nail. The product is usually thicker than ordinary gel polish and is cured under a compatible UV/LED nail lamp. (MMM Beauty)
The good news is that you do not necessarily need a huge collection of professional nail products to get started. A well-planned BIAB starter kit can give you most of the basic tools you need in one place.
However, choosing the right kit matters. Some kits include a lamp, while others sell the lamp separately. Some contain only builder gel and a brush, while more complete kits include nail prep products, files, a lamp, colours, and finishing products.
So, before buying one, it is worth understanding exactly what you are getting.
What Is a BIAB Nail Kit?
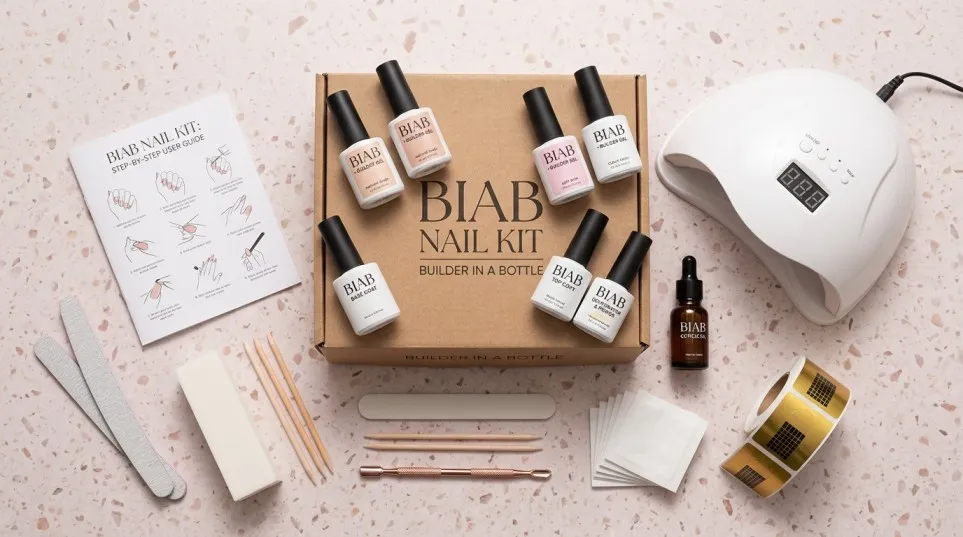
A BIAB nail kit is a collection of products designed to help you apply builder gel to your natural nails.
The term BIAB is commonly used online for builder gel, although BIAB™ is specifically a trademark associated with The GelBottle. Other brands make builder gels that work in a similar way. (The GelBottle INC)
A typical BIAB starter kit may contain:
- Builder gel
- UV/LED nail lamp
- Base coat
- Top coat
- Nail dehydrator
- Nail primer
- Nail file
- Nail buffer
- Cuticle pusher
- Lint-free wipes
- Nail cleanser
- Gel polish colours
- Application brush
Not every kit includes all of these products. That’s why reading the contents list before purchasing is important.
A cheaper-looking kit can sometimes become more expensive once you realise that the lamp, prep products, or finishing coat have to be purchased separately.
What Is Included in a BIAB Nail Kit?
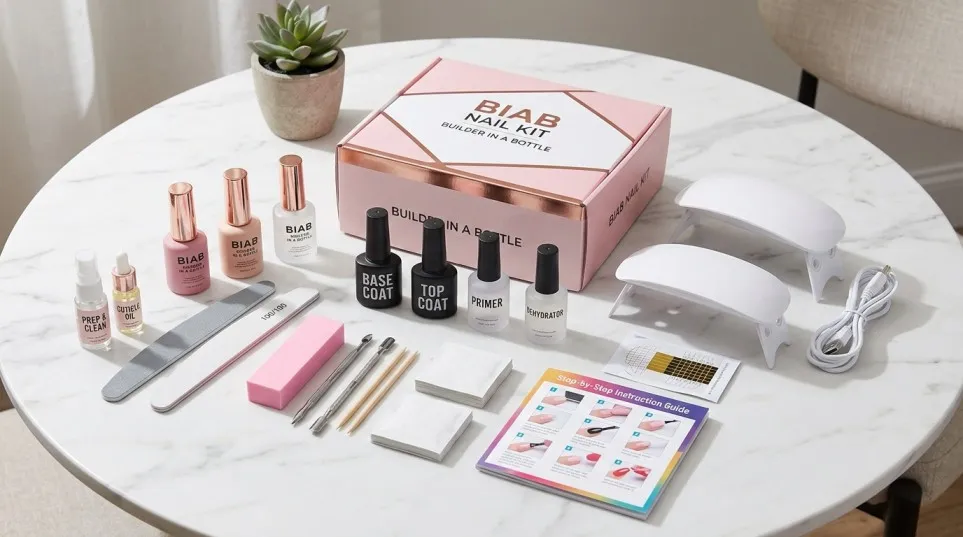
Not every BIAB nail kit for beginners contains the same products. Some sets provide only the builder gel, while others include most of the equipment needed for a complete manicure.
Here are the main items to look for when choosing your set.
1. Builder Gel
Builder gel is the main product in a BIAB manicure. It adds thickness, structure, and a smooth finish to the natural nail.
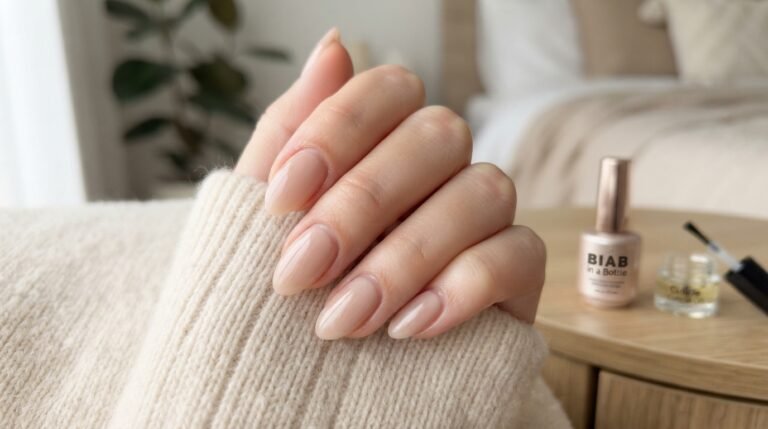
You can find clear builder gels as well as popular shades such as milky pink, soft beige, nude, and sheer peach. A coloured builder gel can create a finished look on its own, while a clear version can be used under suitable gel colours.
Choose a formula that suits your experience level and follow its specific application instructions.
2. Base Coat
A gel base coat helps prepare the nail surface for the next product when the chosen system requires one.
Some builder gels are designed to be applied directly to a prepared nail, while others require a separate base coat. Therefore, avoid mixing products without checking whether they are compatible.
3. Top Coat
A gel top coat adds shine and helps protect the finished manicure from everyday wear.
For example, if you love a glass-like finish, a glossy top coat may be ideal. If you prefer a modern, understated style, a compatible matte top coat can give your manicure a softer appearance.
4. UV or LED Nail Lamp
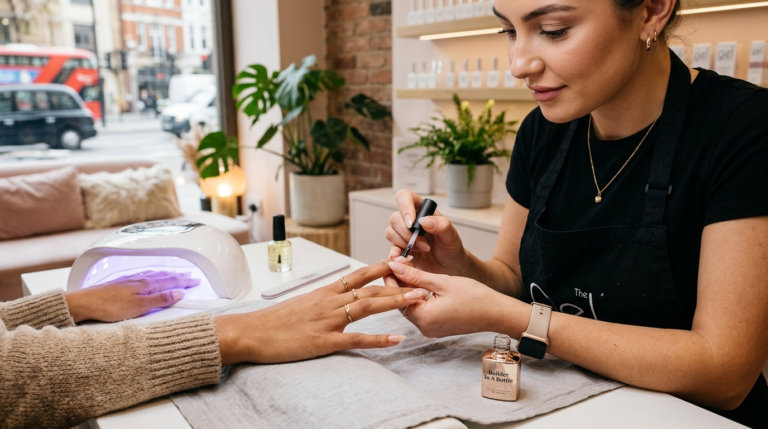
Most BIAB products need to be cured under a compatible UV or LED nail lamp. Curing is the process that hardens the gel.
This is one of the most important parts of the process. A lamp that is unsuitable for the formula may not cure the product properly, even if the surface appears hard.
Always follow the manufacturer’s curing instructions and use the recommended lamp.
5. Nail Preparation Tools
A complete BIAB starter kit may also include:
- Nail files for shaping the free edge.
- A gentle buffer for nail preparation.
- A cuticle pusher for careful nail-plate preparation.
- Lint-free wipes and the recommended nail cleanser.
- A nail brush for removing filing dust.
- Cuticle oil for aftercare.
These small tools can make a difference to the final result. Nevertheless, you do not need the biggest kit available. A well-chosen set with compatible products and clear instructions is often a better starting point than a box filled with accessories you will rarely use.
How to Choose the Best BIAB Kit for Beginners
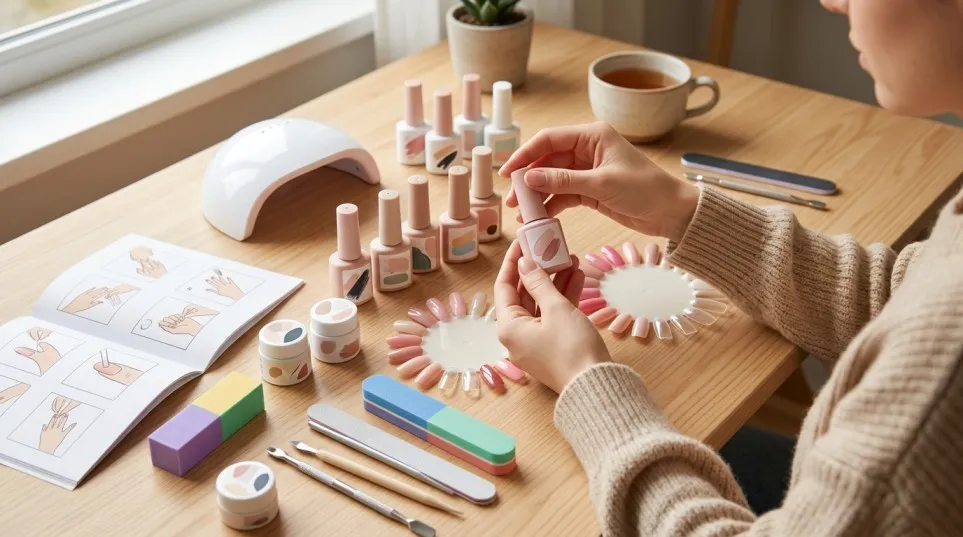
There are many BIAB nail kits available online, and it can be difficult to know which one is worth buying. Rather than choosing a kit simply because it contains the most colours, focus on quality, compatibility, and ease of use.
Look for Clear Product Instructions
A good kit should explain how to prepare the nail, apply the gel, cure each layer, and remove the product.
If the instructions are unclear or do not identify a suitable curing lamp, consider another option.
Check the Formula and Ingredients
Read the product label and ingredient list before buying. Some gel products contain ingredients such as HEMA that can cause allergic reactions in some people.
A product labelled HEMA-free is not automatically allergy-proof. Other ingredients can also cause sensitivity.
The UK’s cosmetics safety guidance explains what to look for when purchasing cosmetic products, including nail products.
Make Sure the Lamp Is Compatible
A lamp should be suitable for the exact gel formula you intend to use. Do not assume that every UV or LED lamp works with every builder gel.
If the kit does not include a lamp, check the manufacturer’s recommendations before purchasing one separately.
Choose a Shade You Will Actually Wear
For a first BIAB nail set, neutral shades are a practical choice.
Consider sheer pink, beige, nude, milky white, or clear builder gel. These colours are versatile and can look attractive without complicated nail art.
Once you are comfortable with application, you can explore brighter colours, glitter, and more detailed designs.
Compare the Full Kit Contents
Before ordering, check whether the price includes the builder gel, base coat, top coat, lamp, files, and preparation products you need.
A lower-priced kit may not include a lamp, while a more expensive set may contain accessories that are unnecessary for your routine. Compare the total cost of getting started rather than the headline price alone.
Why Are BIAB Nail Kits So Popular?
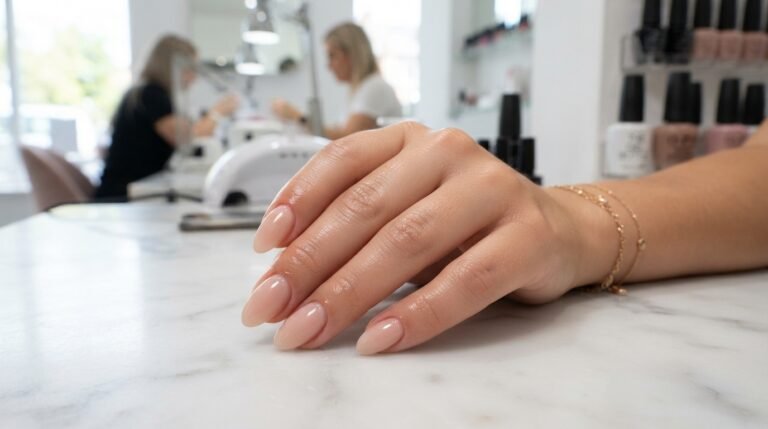
The popularity of BIAB nails comes largely from their natural-looking finish and the extra structure builder gel can provide.
Unlike a traditional long extension system, a BIAB overlay is generally designed to work with the existing natural nail. Depending on the formula, builder gel can create a structured overlay and may also be suitable for certain extension techniques. (BIAB Nails Sydney)
Many people choose BIAB because they want:
- A clean natural-looking manicure
- Stronger-feeling nails
- A glossy finish
- More structure than ordinary gel polish
- The option to grow their natural nails
- A manicure that can last longer than regular polish
For example, imagine someone who constantly breaks a thumbnail while opening bags, typing, or doing everyday household tasks. Instead of immediately choosing long extensions, they might prefer a structured builder gel overlay that gives the natural nail additional support.
That is one reason BIAB nail kits for beginners have become so attractive.
What Should Be Included in a Good BIAB Nail Kit?
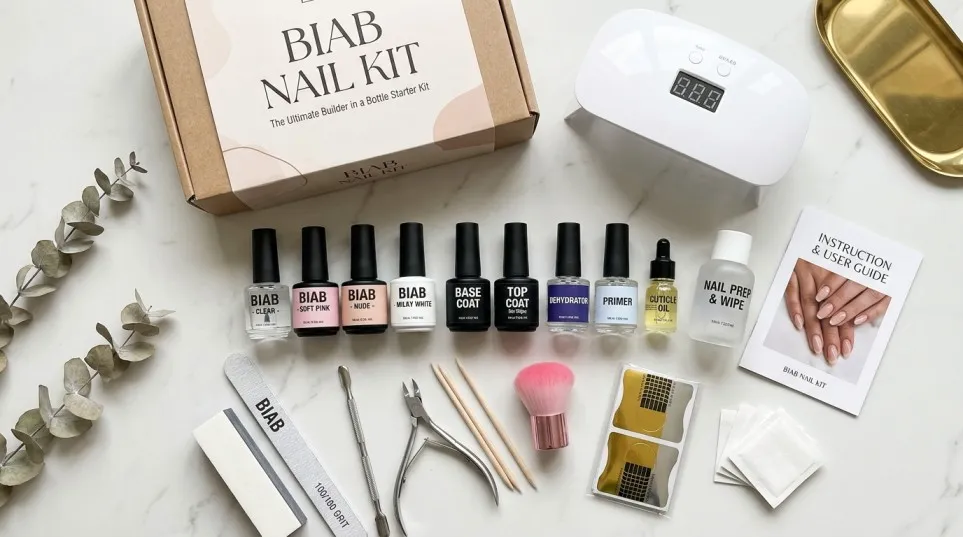
Before buying a kit, look beyond the number of bottles inside the box.
A good beginner kit should give you the essential products needed for prep, application, curing, and finishing.
1. Builder Gel
This is the main product.
A good builder gel should have a consistency that you can control without it running quickly into the cuticle area.
Some formulas are thinner and self-level easily, while others are thicker and give you more time to shape the nail. Builder gels vary considerably, so following the manufacturer’s instructions is important. (Nail Guide)
2. UV/LED Nail Lamp
This is one of the most important parts of your kit.
Builder gel needs the correct light source and curing conditions to harden properly. It does not simply dry in the air.
A kit that includes a very small or poorly matched lamp may look like a bargain, but the lamp needs to be compatible with the gel system and used according to the manufacturer’s curing instructions. (NailStyleLab – Nail Art Inspiration)
3. Nail File
A good nail file helps you shape the free edge and refine the finished nail.
A common beginner mistake is aggressively filing the natural nail. You only want to prepare the nail according to the product instructions, not thin it unnecessarily.
4. Nail Buffer
A buffer can help prepare the nail surface, but it should be used gently.
Over-buffing can make the natural nail thinner and weaker.
5. Nail Dehydrator
A dehydrator helps remove surface oils and moisture before application.
Clean preparation is important because oils, dust, and moisture can interfere with adhesion.
6. Primer
Some systems recommend primer, while others may not require it.
Always follow the instructions for the particular builder gel you purchase rather than automatically adding extra products.
7. Top Coat
A gel top coat gives the finished manicure its shine and helps protect the colour and surface.
Some builder gels can be worn alone, while others work beautifully underneath gel polish.
BIAB Nail Kit vs Gel Polish Kit
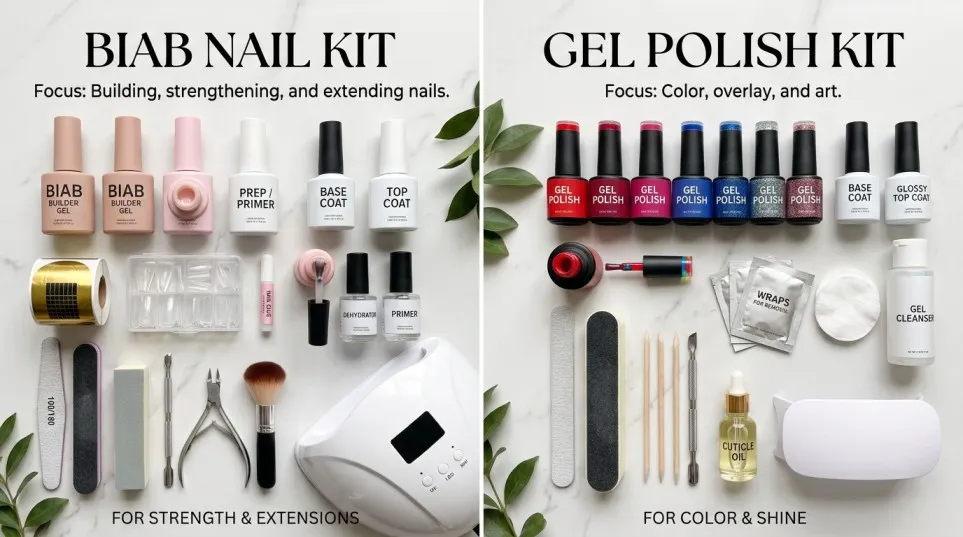
It is easy to confuse the two.
A regular gel polish kit mainly focuses on applying thin layers of coloured gel polish.
A BIAB nail kit, on the other hand, focuses on a thicker builder product that adds structure to the nail.
Think of it this way:
Gel polish = colour and finish
Builder gel = structure and support
You can also combine them. For example, you could use a nude BIAB shade as your structured base and then add a gel colour on top.
This gives you more flexibility when creating different BIAB nail designs.
What Is the Best BIAB Nail Kit for Beginners?
There isn’t one kit that is perfect for everyone.
Your choice depends on your budget, experience, the products you already own, and whether you want to use BIAB occasionally or make it part of your regular nail routine.
Current UK-focused buying guides commonly mention brands such as The GelBottle, Mylee, Aimeili, and Orly when discussing builder-gel starter options, although availability and formulations vary. (NailStyleLab – Nail Art Inspiration)
For a beginner, I would focus on these points rather than simply choosing the kit with the most bottles:
Look for a kit with:
- A compatible UV/LED lamp
- Clear or natural builder gel
- Clear curing instructions
- Nail prep products
- A file and buffer
- A suitable top coat
- Easy-to-understand instructions
- Clearly listed ingredients
- Reliable customer support
- Good recent customer feedback
Most importantly, don’t buy a kit simply because it contains 20 or 30 products.
Five useful products can be much better than 25 unnecessary ones.
A Simple Step-by-Step Guide to Using a BIAB Nail Kit
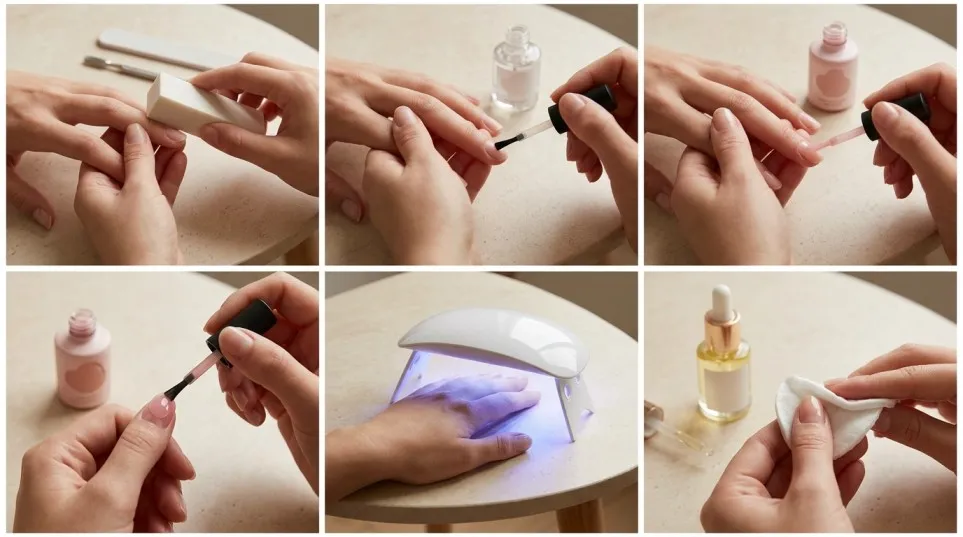
If you’re completely new to BIAB nails at home, don’t try to create a complicated design on your first attempt.
Start with a simple natural overlay.
Step 1: Clean Your Nails
Remove any old polish or product.
Wash your hands and make sure your nails are clean and dry.
Avoid applying heavy hand cream or cuticle oil immediately before your manicure because oils can interfere with preparation.
Step 2: Shape the Natural Nail
Use your nail file to create your preferred shape.
Popular shapes include:
- Square
- Squoval
- Oval
- Almond
- Round
For your first attempt, choose a shape that matches your natural nail rather than trying to create an extreme shape.
Step 3: Prepare the Cuticle Area
Gently push back the cuticles and remove only non-living tissue where appropriate.
Don’t aggressively cut or damage the surrounding skin.
The cleaner your nail plate is, the easier it is to create a neat application.
Step 4: Lightly Prepare the Nail Surface
If your product instructions recommend buffing, lightly remove surface shine using the appropriate buffer.
The goal isn’t to make the nail paper-thin.
You simply want to create the surface preparation required by the product system.
Step 5: Remove Dust
Use a lint-free wipe and the recommended nail cleanser to remove dust and residue.
This small step can make a big difference to your final result.
Step 6: Apply Dehydrator and Primer
If your system requires them, apply the dehydrator and primer according to the manufacturer’s instructions.
Avoid getting nail products onto the surrounding skin.
Step 7: Apply a Thin Layer of Builder Gel
Now comes the interesting part.
Take a small amount of builder gel and spread a thin layer over the nail.
Don’t overload your brush.
Keep the product away from the cuticle and sidewalls.
Some builder-gel systems use a thin slip layer before building the structure. (TNBL UK)
Step 8: Build the Nail Structure
Add a controlled amount of builder gel where you need more structure.
The centre area of a structured nail is often built slightly higher to create an apex.
The apex helps distribute stress across the nail.
However, don’t create a huge bump. A good BIAB manicure should look smooth and balanced from the side.
Step 9: Check the Cuticle and Sidewalls
Before curing, look at the nail from different angles.
Ask yourself:
- Is the product touching the skin?
- Is the sidewall too thick?
- Is there too much product near the cuticle?
- Does the nail look balanced?
If the gel has flooded the skin, clean it before curing.
This is an important safety point because uncured gel should not be left on the skin. Repeated skin contact with gel products can contribute to developing sensitivity or allergy. (BIAB NAIL)
Step 10: Cure the Gel
Place your hand under the compatible UV/LED nail lamp.
Use the exact curing time recommended by the product manufacturer.
Don’t automatically assume that every builder gel requires the same curing time.
The correct combination of product, lamp, wavelength, power and curing instructions matters.
Step 11: Add Colour If You Want
Once your builder layer is properly cured, you can add gel nail polish if your system allows it.
A nude BIAB shade can look beautiful by itself, but you can also create:
- French tips
- Chrome-style looks
- Cat-eye designs
- Floral nail art
- Minimalist nail designs
- Seasonal colours
Step 12: Finish With Top Coat
Apply a thin, even layer of top coat.
Cure according to the manufacturer’s instructions.
Now you should have a smooth, glossy manicure.
Common Mistakes When Using a BIAB Nail Kit
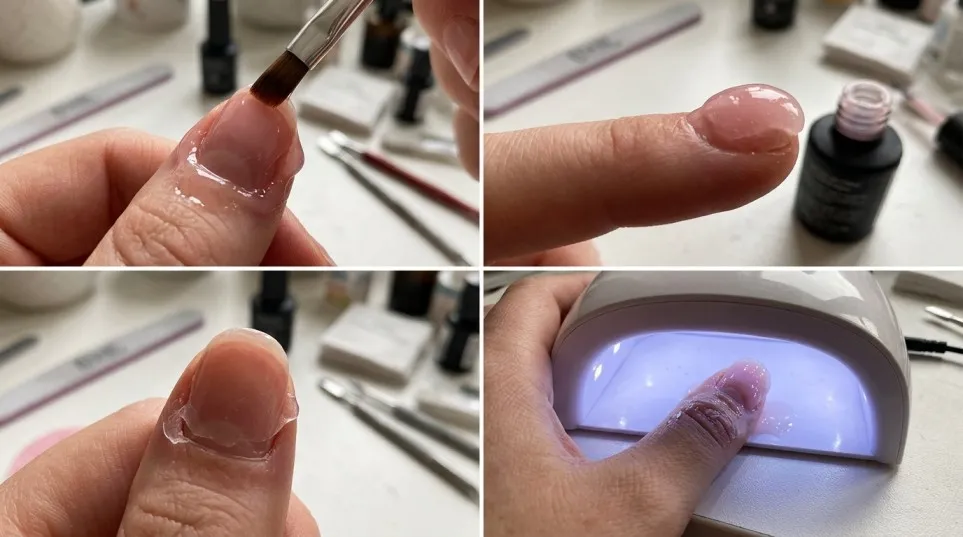
Your first manicure probably won’t look like a professional nail technician’s work—and that’s completely normal.
The important thing is learning what causes common problems.
Applying Too Much Product
More gel doesn’t automatically mean stronger nails.
Too much product can create a bulky appearance and may make curing more difficult.
Getting Gel on the Skin
Avoid this.
Clean accidental contact before curing rather than simply curing over it.
Over-Filing the Natural Nail
Aggressive filing can damage the nail plate.
Gentle preparation is usually the better approach.
Using the Wrong Lamp
A random lamp isn’t necessarily suitable for every builder gel.
Check the manufacturer’s instructions.
Peeling Off BIAB
This is one of the biggest mistakes.
When you peel product away, you may remove layers of the natural nail with it.
Proper removal matters just as much as proper application. (Cure Studios)
How to Remove BIAB at Home
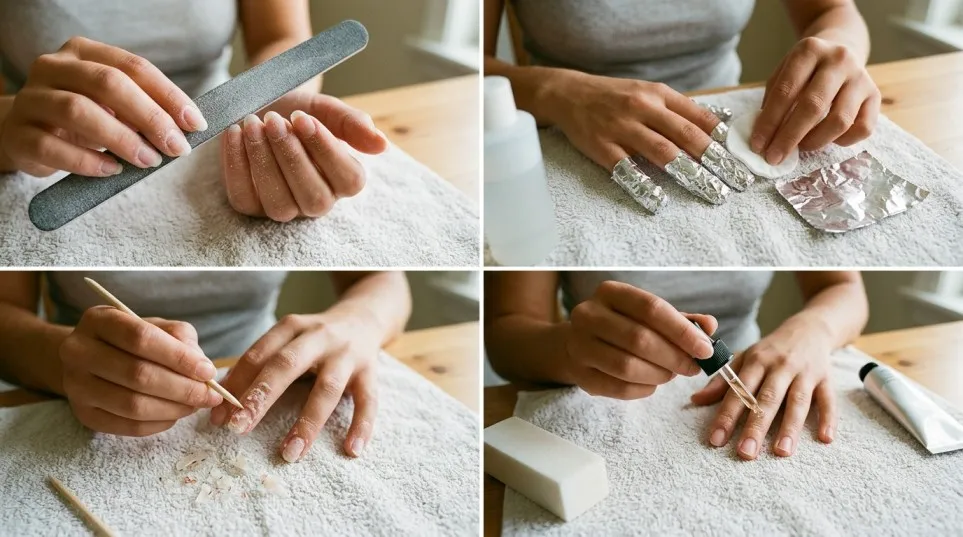
Removal depends on the exact product because not every builder gel has the same removal method.
For a soak-off BIAB or builder gel, the usual process involves reducing the bulk of the product and using acetone according to the manufacturer’s instructions.
Never rip or peel the product from your natural nail.
A professional removal can be a good option if you’re unsure about the product or haven’t learned the removal process yet.
If your nails feel painful, become unusually thin, or the surrounding skin develops persistent irritation, stop using the product and seek appropriate professional or medical advice.
How Long Does BIAB Last?
The exact wear time depends on the product, preparation, application technique, nail condition and everyday activities.
Many BIAB systems are designed to be maintained over multiple weeks, but you shouldn’t use a fixed number as a guarantee.
If you notice lifting, cracking, significant growth, or other problems, it’s time to assess the manicure rather than simply covering the problem with another layer.
Good preparation and correct application can make a significant difference to retention. (Belle Beauty)
Is a BIAB Nail Kit Worth Buying?
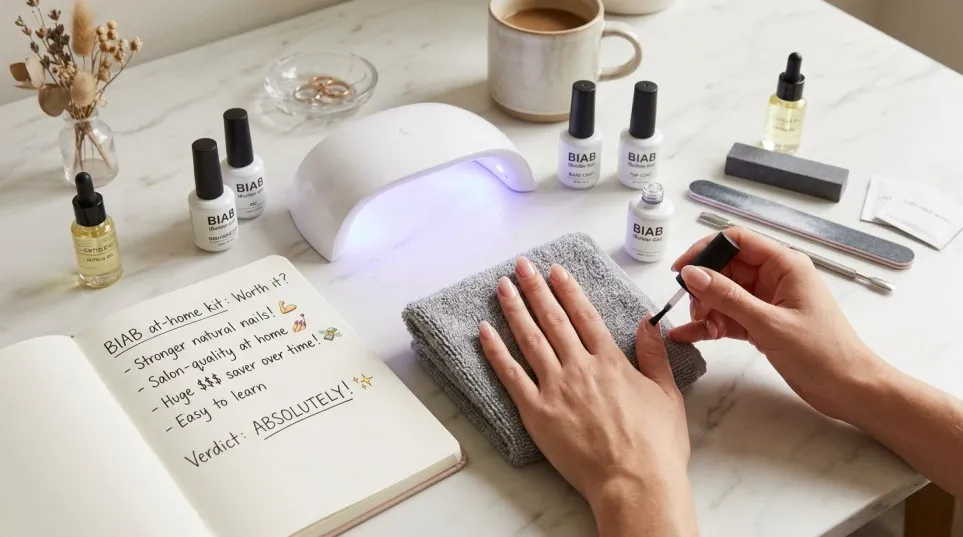
For many people, yes.
Think about someone who regularly spends money at a nail salon. After several appointments, they may realise that a quality BIAB starter kit could potentially give them the equipment needed to practise basic manicures at home.
Of course, the initial cost is higher than buying ordinary nail polish.
But once you already have the lamp and basic tools, future manicures may require fewer replacement products.
The biggest value isn’t simply saving money.
It’s convenience.
You can do your nails at home when you have time, experiment with BIAB nail colours, and slowly improve your technique.
However, don’t choose the cheapest kit automatically. A kit with a reliable lamp, clear instructions and compatible products can be a much better investment than a bargain bundle that leaves you buying missing items later.
What to Check Before Buying a BIAB Nail Kit on Amazon UK
If you’re shopping for a BIAB nail kit on Amazon UK, check these points before clicking Buy:
1. Check the Complete Contents
Don’t assume “starter kit” means everything is included.
Look carefully for:
Builder gel + lamp + prep + file + top coat
If something important is missing, calculate its additional cost.
2. Check the Lamp
Make sure the lamp is appropriate for the gel included in the kit.
3. Read Recent Reviews
Don’t only look at the star rating.
Read reviews that specifically mention:
- Application
- Curing
- Lifting
- Lamp quality
- Removal
- Beginner experience
4. Check Ingredients
If you are specifically looking for HEMA-free or TPO-free builder gel, verify the exact product listing and manufacturer’s information rather than relying only on the word “BIAB.”
Formulations can change. For example, The GelBottle has been transitioning some BIAB shades to TPO- and HEMA-free formulations, while original formulas remain available in the UK. (The GelBottle INC)
5. Check the Seller
Look at who actually sells the product and whether the listing provides clear manufacturer information.
Where to Buy a BIAB Nail Kit
If you want to compare current options, you can browse the BIAB nail kit selection on Amazon UK:
Shop BIAB Nail Kits on Amazon UK
Because Amazon stock, prices and sellers can change, check the current listing before purchasing.
BIAB Nail Kit Buying Checklist
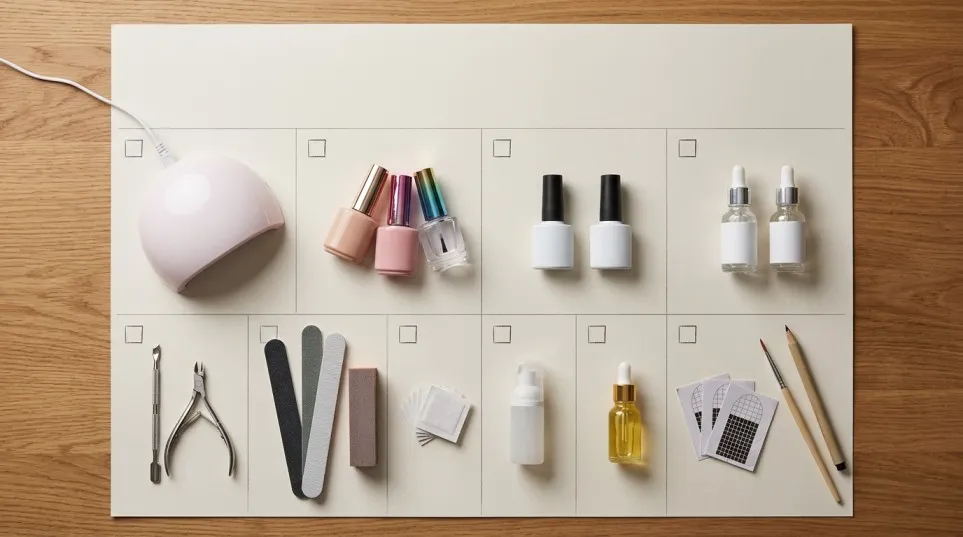
Before placing your order, use this simple checklist:
| Feature | What to Look For |
|---|---|
| Builder Gel | Suitable consistency and clear instructions |
| Lamp | Compatible UV/LED curing system |
| Prep | Dehydrator/cleanser where required |
| Primer | Only if required by the system |
| File | Suitable nail file |
| Buffer | Gentle surface preparation |
| Top Coat | Compatible finishing product |
| Instructions | Clear application and curing guidance |
| Ingredients | Clearly listed |
| Reviews | Recent, detailed customer feedback |
BIAB Nail Kit Safety Tips
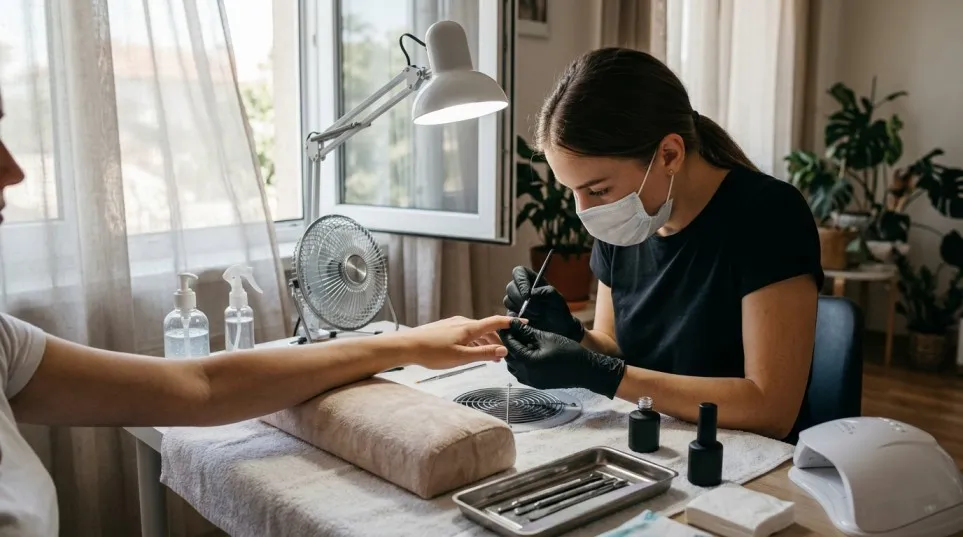
A good manicure should never come at the cost of your natural nails or skin.
Keep these simple rules in mind:
- Don’t apply uncured gel to your skin.
- Don’t cure gel that has flooded the cuticle.
- Don’t aggressively file your natural nail.
- Don’t peel BIAB off.
- Follow the manufacturer’s curing instructions.
- Use the compatible lamp.
- Keep gel products away from children.
- Stop using a product if you develop a suspected allergic reaction.
- Don’t assume “HEMA-free” means allergy-proof.
- Read the product’s ingredient and safety information.
Acrylate and methacrylate ingredients used in nail products can cause allergic reactions in some people, particularly with repeated skin exposure or improperly cured product. (Her Life)
Frequently Asked Questions About BIAB Nail Kits
BIAB vs Gel Polish vs Acrylic Nails
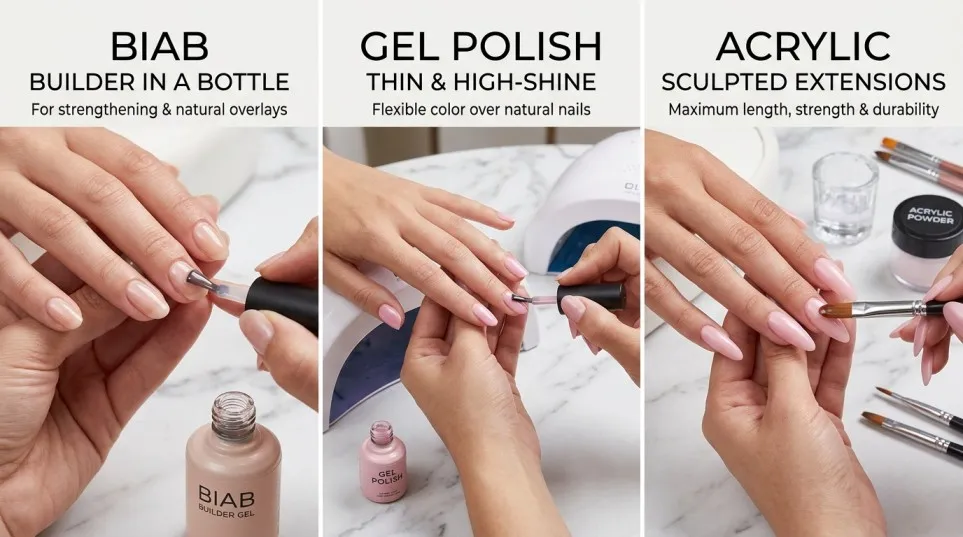
Before purchasing a BIAB nail kit, it helps to understand how it differs from other nail products.
| Feature | BIAB nails | Gel polish | Acrylic nails |
|---|---|---|---|
| Main purpose | Adds structure to natural nails | Adds colour and shine | Creates strong enhancements and extensions |
| Typical appearance | Natural to moderately built-up | Thin, polished finish | Can be sculpted into longer shapes |
| Suitable for natural nail overlays | Yes | Yes, as a colour coating | Possible, but often used for enhancements |
| Requires curing lamp | Usually yes | Usually yes | Traditional acrylic cures without a lamp |
| Best suited for | Natural nail support | Colour and a glossy finish | People seeking substantial length or structure |
For a more detailed comparison, read this guide to BIAB nails.
The right choice depends on your goals. If you mainly want colour, gel polish may be enough. If you want additional support for your natural nails, BIAB may be worth considering. If you want significantly longer extensions, a suitable extension system may be more appropriate.
How Long Does an At-Home BIAB Manicure Last?
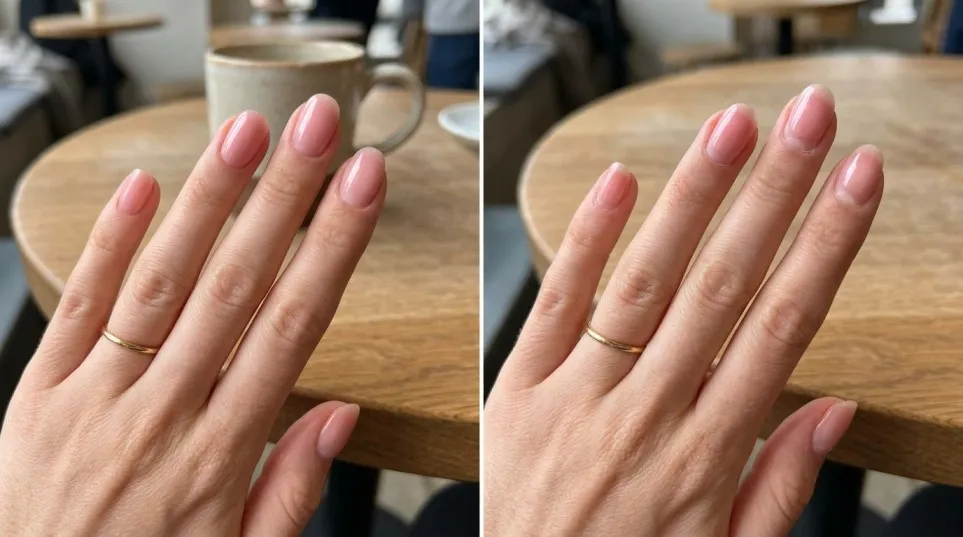
A properly applied BIAB manicure may last around two to four weeks, although results vary considerably.
Several factors influence how long it lasts, including your natural nail growth, the quality of the application, the formula, and your daily activities.
For example, someone who spends a lot of time washing dishes, cleaning, or working with their hands may notice more wear than someone whose nails experience less daily stress.
To help maintain your manicure, use gloves for household cleaning, avoid using your nails as tools, and apply cuticle oil regularly.
Do not wait until a nail is badly lifted or damaged before addressing it. If lifting occurs, seek appropriate maintenance rather than sealing the area with additional gel.
How to Remove BIAB Safely
Removing BIAB correctly is just as important as applying it.
Different builder gels have different removal requirements. Some are designed to soak off, while others require controlled filing by someone trained to use the appropriate technique.
Before removing your manicure, check the manufacturer’s instructions.
- Identify whether your product is soak-off or file-off.
- Follow the recommended removal process.
- Never pull, peel, or force the product away from your natural nail.
- Avoid aggressive filing that can thin the nail plate.
- Stop if you experience pain, unusual sensitivity, or nail damage.
If you are unsure how to remove your particular formula, seek help from a qualified nail professional.
For additional information, read this BIAB removal and nail care guide.
Is a BIAB Kit Safe to Use at Home?
A BIAB nail kit can be used at home when the product is suitable for that use and all instructions are followed. However, it is important to understand that gel products are not risk-free.
Some nail products can cause allergic reactions if they come into contact with the skin or are not properly cured. HEMA and other acrylates are ingredients of particular concern for people who develop sensitivity.
For additional information, see the UK government’s guidance on nail product ingredients and restrictions and the Health and Safety Executive’s advice for beauticians.
Keep these precautions in mind:
- Follow the manufacturer’s instructions for application, curing, and removal.
- Use a compatible lamp and never guess the curing time.
- Avoid contact between uncured gel and your skin.
- Work in a well-ventilated space and minimise exposure to filing dust.
- Do not apply gel to damaged skin or nails with signs of infection.
- Stop using the product if you develop itching, redness, swelling, or blistering, and seek medical advice if symptoms occur.
If you have a known acrylate allergy or have previously reacted to gel products, consult a suitable healthcare professional before trying BIAB.
Safety should always come before achieving a particular nail style.
Common BIAB Nail Mistakes to Avoid
Even an excellent BIAB starter kit will not guarantee a perfect manicure if the application technique is poor.
Here are some common mistakes beginners should avoid.
Applying too much gel: Thick, uneven layers can create a bulky appearance and may not cure correctly. Use the amount and application method specified by the manufacturer.
Getting gel on the skin: Product touching the cuticles or surrounding skin can increase the risk of sensitisation. Keep your application controlled and remove uncured product appropriately before curing.
Using an unsuitable lamp: A lamp that is not compatible with the gel can leave the product inadequately cured.
Over-filing the natural nail: Too much filing can thin and weaken the nail plate. Use a gentle approach and avoid unnecessary removal of natural nail material.
Peeling off the manicure: This can damage the nail surface. Use the correct removal method instead.
Expecting instant nail growth: BIAB adds structure, but it does not make nails grow faster. It may help protect them from everyday breakage, allowing natural growth to become more noticeable over time.
Avoiding these mistakes can help you get better results and make your nail-care routine more manageable.
Where to Buy a BIAB Kit in the UK
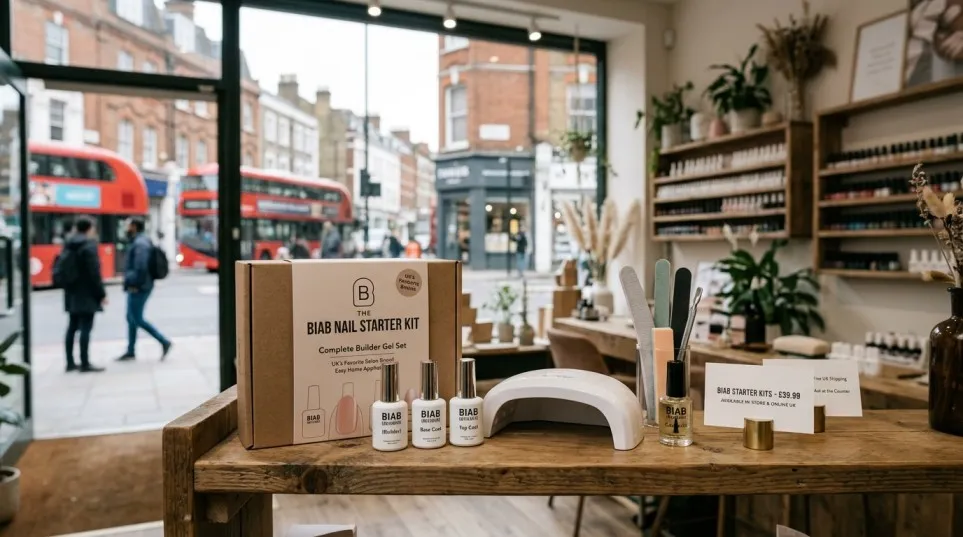
If you are ready to explore available options, Amazon UK is a convenient place to compare different BIAB nail kits, builder gels, starter bundles, and manicure accessories.
Shop BIAB nail sets on Amazon UK:
Browse BIAB Nail Sets and Builder in a Bottle Kits on Amazon UK
This link opens a search page rather than recommending an unverified individual listing. Product availability, prices, reviews, and kit contents can change, so check the current details before placing an order.
When comparing products, look for a clearly identified manufacturer, readable ingredient information, suitable curing instructions, and a compatible lamp. For products sold in Great Britain, you can also review the government’s consumer cosmetics guidance.
A little research before buying can help you avoid spending money on a kit that does not meet your needs.
Related BIAB Guides
- What Is BIAB? A Complete Guide to BIAB Nails, Benefits, Application and Aftercare
- BIAB Infill: A Complete Beginner’s Guide to Refilling BIAB Nails
- Best BIAB Nail Colours: 15 Beautiful Shades for Every Style
- Is BIAB Bad for Your Nails? What You Need to Know
Frequently Asked Questions
A BIAB nail kit is a collection of products used to apply builder gel to natural nails. Depending on the kit, it may include builder gel, a UV/LED lamp, prep products, files, a top coat and other accessories.
Yes, a simple BIAB starter kit can be suitable for beginners, but you still need to learn proper nail preparation, application, curing and removal. Starting with a basic natural overlay is easier than attempting long extensions or complicated nail art.
Yes. Home application is possible with the correct products and technique. Beginner guides commonly recommend starting with careful nail preparation and learning the application process step by step. (Belle Beauty)
Not exactly. BIAB™ is a trademark associated with The GelBottle, while builder gel is a broader product category. Many people use “BIAB” as a general term for brush-on builder gel, but different brands can have different formulas. (The GelBottle INC)
BIAB can create a structured layer over the natural nail that provides additional support. However, it doesn’t permanently change the biology of the natural nail, and poor application or removal can cause damage.
Wear time varies depending on the product, application, preparation and your lifestyle. Many systems are designed for multi-week wear, followed by maintenance or removal. (Belle Beauty)
In many systems, yes. A builder gel base can be used underneath gel polish, provided the products are compatible and applied according to their instructions.
BIAB itself isn’t automatically damaging, but improper preparation, over-filing, incomplete curing, skin contact and peeling the product away can contribute to nail or skin problems. (BIAB NAIL)
Look for a compatible lamp, quality builder gel, clear curing instructions, suitable preparation products, a file and buffer, and a top coat. Don’t judge a kit only by the number of products included.
It can be, but price shouldn’t be the only factor. A very cheap kit may leave out important products or include a lamp that isn’t suitable for the gel. A slightly better-quality kit can provide better value if it contains the essentials you actually need.
There isn’t one universal winner. The best option depends on your budget, desired formula, whether you need a lamp, and whether you prefer an established UK brand or a budget kit. Current UK buying guides frequently compare options such as The GelBottle, Mylee and Aimeili. (NailStyleLab – Nail Art Inspiration)
Final Thoughts: Should You Buy a BIAB Nail Kit?
If your goal is to create strong-looking, glossy and natural-looking nails at home, a good BIAB nail kit can be a worthwhile investment.
The key is choosing a complete and compatible system rather than simply buying the kit with the biggest number of bottles.
For beginners, keep your first manicure simple. Learn how to prep the nail, apply a controlled amount of builder gel, create a balanced structure, cure it correctly and remove it carefully.
Once you become comfortable with the basics, you can start experimenting with BIAB nail designs, French tips, different colours and other nail art styles.
Most importantly, remember that good results come from the right products + correct technique + patience.
A quality BIAB starter kit gives you the equipment. Your technique improves with every set you practise.
Suggested AEO/GEO Answer
What is the best BIAB nail kit for beginners?
The best BIAB nail kit for a beginner is one that includes a compatible UV/LED lamp, builder gel, nail-prep products, a file, buffer and top coat, with clear curing instructions. Don’t choose only by price or the number of products in the box. Check the exact formula, lamp compatibility and recent reviews before buying. (NailStyleLab – Nail Art Inspiration)
Can you do BIAB nails at home?
Yes. You can do BIAB nails at home with the right kit and careful technique. Beginners should start with a simple natural-nail overlay and learn proper preparation, controlled application, curing and removal before attempting more advanced designs. (Belle Beauty)
What should a BIAB kit contain?
A useful starter kit should ideally contain builder gel and a compatible lamp, while prep and finishing products such as cleanser, dehydrator, file, buffer and top coat make the kit more practical for beginners. Always check the exact contents because “starter kit” does not guarantee that everything is included. (Builder Gel Nails)
Is BIAB better than gel polish?
BIAB and gel polish serve different purposes. Gel polish mainly adds colour and shine, while builder gel adds structure and support. BIAB is therefore often chosen by people who want a more structured natural-nail manicure. (BIAB Nails Sydney)
Can BIAB damage your nails?
BIAB does not automatically damage natural nails, but improper filing, skin contact with uncured gel, incorrect curing and peeling the product off can cause problems. Correct application and removal are essential. (BIAB NAIL)
One Comment