
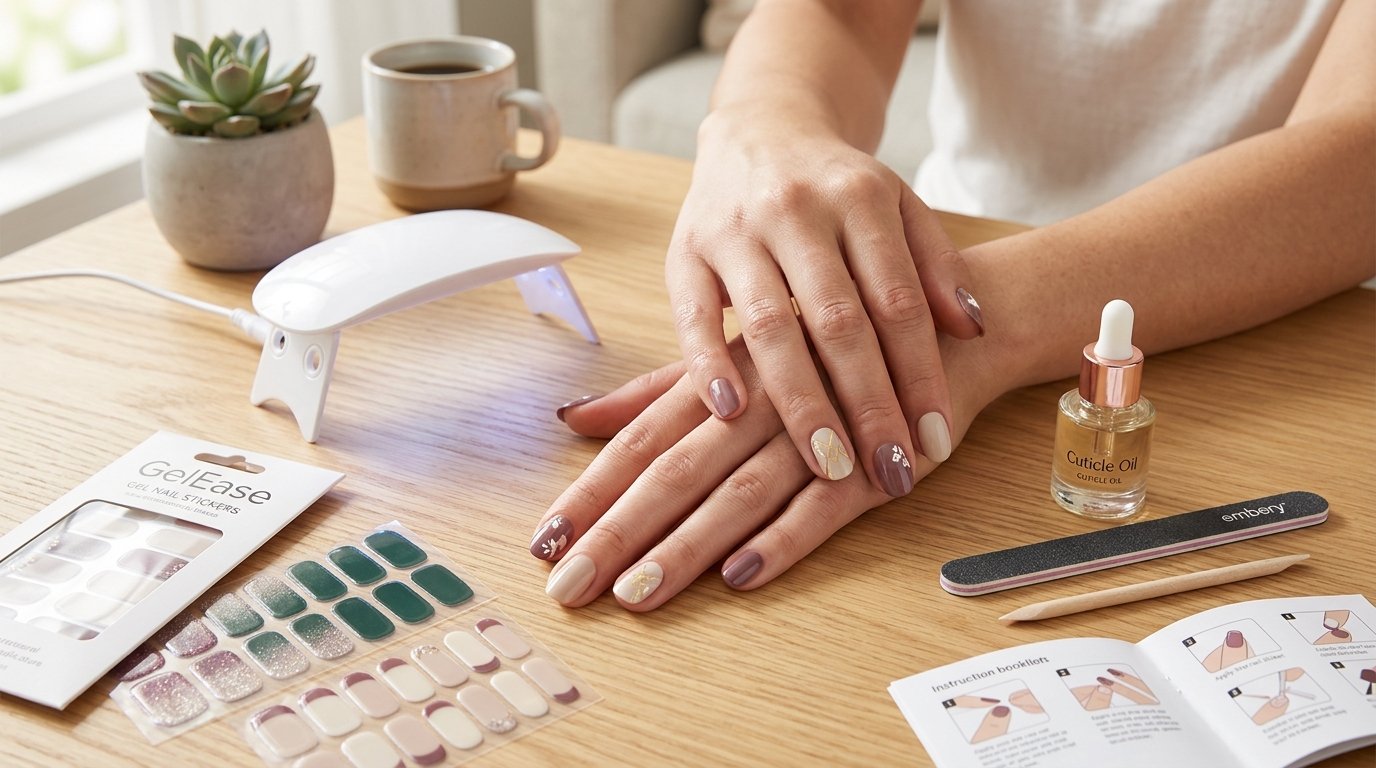
Gel Nail Stickers: The Complete Guide to Easy, Salon-Looking Nails at Home
Getting a fresh manicure can instantly make you feel more put together. The only problem is that regular salon appointments can take time, cost money, and become difficult to fit into a busy schedule.
That is one reason gel nail stickers have become so popular.
Instead of painting each nail yourself, you start with a finished design. You simply prepare your nails, choose the right size, apply the strip, shape the excess, and, when required, cure it under a UV or LED nail lamp.
For someone who has ever tried to paint a perfect French tip with their non-dominant hand, the appeal is obvious.
You do not have to create the design from scratch. The design is already there.
However, not all gel nail stickers work in exactly the same way. Some are simple peel-and-stick nail wraps, while others are made from semi-cured gel and need a UV or LED lamp to finish the curing process.
This guide explains what they are, how they work, how to apply them, how to remove them properly, what to look for when buying them, and which features are worth paying attention to.
What Are Gel Nail Stickers?
Gel nail stickers are pre-shaped nail strips designed to cover your natural nails and create the appearance of a finished manicure.
Depending on the product, they may be made from adhesive film, nail wrap material, gel polish, or partially cured gel.
One of the most popular types is the semi-cured gel nail strip.
These strips are partially cured during manufacturing, so they are firm enough to handle while still having enough flexibility to fit the shape of your natural nail. After you apply them, you finish the curing process under a compatible UV or LED lamp.
This is different from ordinary nail stickers.
A regular nail sticker is mainly decorative and normally does not require curing. A semi-cured gel strip is designed to provide a more gel-like manicure and usually needs a lamp.
That distinction is important when shopping because you do not want to buy a product expecting one application method and discover that it requires completely different tools.
Why Are Gel Nail Stickers So Popular?
The biggest reason is simple: convenience.
Imagine you have a wedding on Saturday.
You want elegant nude nails or a clean French manicure, but you do not have time to visit a salon.
With traditional polish, you might spend 30 minutes preparing, painting, correcting mistakes, and waiting for everything to dry.
With gel nail stickers, much of the design work is already finished.
You mainly need to prepare your nails and apply the strips carefully.
They can save time
You do not have to paint multiple layers by hand.
For semi-cured gel products, the process usually involves preparation, application, filing, and curing. The exact curing time depends on the manufacturer and the lamp, so always follow the instructions supplied with your product.
They are beginner-friendly
You do not need to know how to create complicated nail art.
You can buy a finished design and simply position it on your nail.
They offer lots of designs
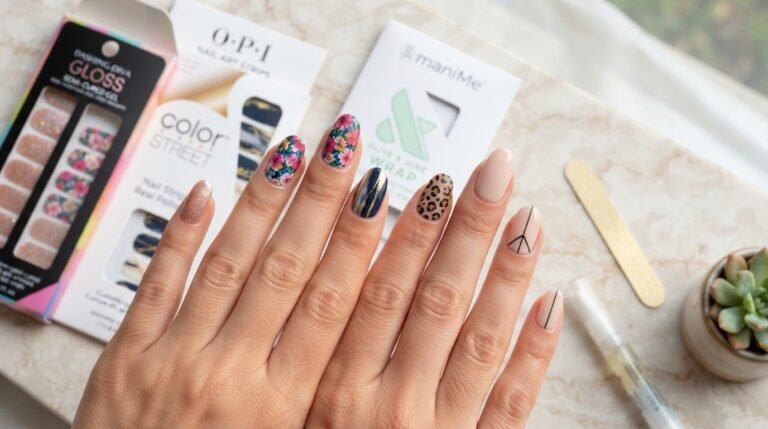
You can find gel nail stickers in styles such as:
- French tips
- Nude nails
- Pink nails
- Chrome nails
- Glitter
- Marble
- Floral designs
- Ombre
- Animal prints
- Seasonal designs
- Minimalist patterns
They are convenient for special occasions
A manicure can completely change the appearance of your hands.
That makes nail stickers useful for weddings, holidays, parties, vacations, birthdays, dates, photoshoots, or even a normal work week when you want your nails to look polished.
Gel Nail Stickers vs. Regular Nail Stickers
These terms are sometimes used interchangeably, but there is a difference.
Regular nail stickers are usually thin adhesive decorations. You peel them from their backing and stick them onto your nail.
Gel nail stickers, particularly semi-cured gel strips, are generally made with gel material and may require UV or LED curing.
A semi-cured product can feel more substantial than an ordinary sticker and is designed to give a finish that resembles gel polish.
Before buying, check the packaging for terms such as:
- Semi-cured gel
- UV gel strips
- LED gel strips
- Gel nail wraps
- Semi-cured nail strips
If the product requires curing, you will also need a compatible lamp.
How to Choose the Best Gel Nail Stickers
Choosing the right product can make the difference between a manicure that looks professionally done and one that starts lifting after a short time.
Here are the most important things to check.
1. Check the curing requirements
First, find out whether the product needs a UV/LED nail lamp.
Some nail wraps are ready to use without curing.
Semi-cured gel strips generally need additional curing.
Never assume that all products use the same process.
2. Look at the available sizes
Your fingernails are not all the same width.
That is why a good set should provide multiple sizes.
The ideal strip should cover the nail without extending onto the surrounding skin.
If you are between two sizes, choosing the slightly smaller option is often easier than trying to force a strip that is too wide onto the nail.
3. Consider the design
Think about where you plan to wear them.
For everyday use, neutral shades can be easy to match with different clothes.
Popular everyday choices include:
- Nude
- Soft pink
- Milky white
- Beige
- French tips
- Sheer pink
If you want something more noticeable, try:
- Chrome
- Glitter
- Red
- Black
- Floral
- Marble
- Metallic designs
4. Read the reviews
Do not look only at the star rating.
Read what customers actually say.
Pay particular attention to comments about:
- Adhesion
- Nail sizes
- Application
- Curing
- Lifting
- Removal
- Overall finish
- Durability
If several buyers mention the same issue, take it seriously.
What Do You Need to Apply Gel Nail Stickers?
The exact supplies depend on the product you choose.
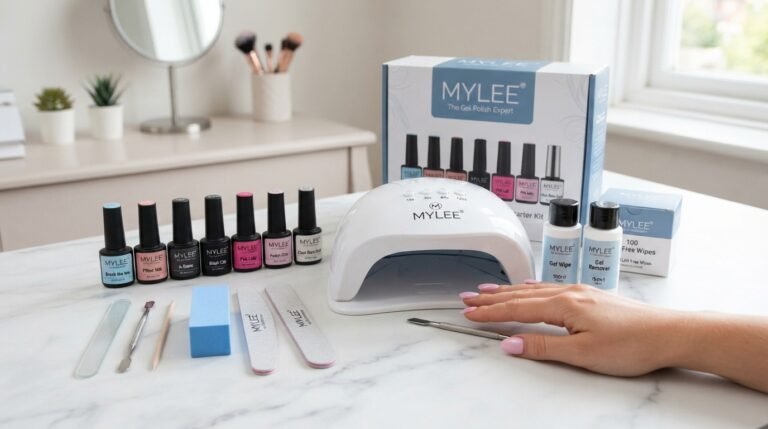
For most semi-cured gel strips, it helps to have:
- Gel nail stickers
- Nail file
- Nail buffer
- Cuticle pusher
- Alcohol wipe or nail cleanser
- Small nail scissors or clippers
- UV/LED nail lamp
- Cuticle oil
Some sets include basic preparation tools.
For example, the ohora Semi Cured Gel Nail Strips listing for the N Cream Beige style includes prep pads, a nail file, and a wooden stick in addition to the strips. The product is listed under Amazon ASIN B09M5J4N48.
Amazon product: ohora Semi Cured Gel Nail Strips, N Cream Beige
For a compatible curing lamp, you can also look at the GAOY UV LED Nail Lamp. Current product information describes it as a UV/LED nail lamp with an automatic sensor and multiple timer settings.
Amazon: GAOY UV LED Nail Lamp
Buying tip: The first link above is a verified product-specific Amazon URL. The lamp link is intentionally an Amazon search link because I am not going to invent an ASIN or pretend that an unverified product page is a confirmed listing.
How to Apply Gel Nail Stickers Step by Step
Getting a clean result is less about being naturally good at nails and more about taking your time.
Here is a simple process beginners can follow.
Step 1: Remove old nail polish
Start with clean, bare nails.
Remove any old polish, gel, oil, lotion, or residue.
Your nails need to be clean before you begin.
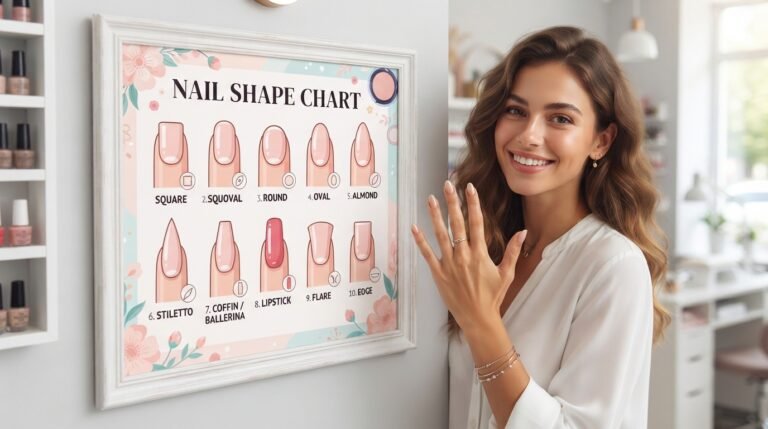
Step 2: Shape your nails
File your nails into the shape you like.
Common shapes include:
- Square
- Squoval
- Round
- Oval
- Almond
Do not worry about having long nails.
Gel nail stickers can look excellent on short natural nails too.
Step 3: Prepare your cuticles
Gently push the cuticles back if necessary.
Do not aggressively cut or damage the skin around the nail.
The goal is simply to create a clean area where the sticker can sit neatly.
Step 4: Remove oil from the nail
Use an alcohol wipe or nail cleanser to remove oil and residue from the nail plate.
Let your nails dry completely.
This is one of the most important preparation steps because excess oil can interfere with adhesion.
Step 5: Choose the correct sticker
Look through the sizes before removing the backing.
Hold the strip over your nail and compare the width.
Choose the size that fits the nail without covering your surrounding skin.
Step 6: Position the sticker
Carefully peel the strip from its backing.
Position it close to the cuticle, but do not place the sticker directly over the skin.
Once positioned, press it down from the center toward the sides.
Take your time.
If you place it incorrectly, gently reposition it before pressing it firmly into place.
Step 7: Smooth the surface
Use your finger or the tool supplied with the set to smooth the sticker.
Work from the center toward the edges.
Try to remove wrinkles and air pockets before moving on.
Step 8: File or trim the excess
If the strip extends beyond the end of your natural nail, trim the excess material.
Then gently file the edge to match the shape of your nail.
Do not aggressively file the nail surface.
Step 9: Cure the gel
If your product is a semi-cured gel nail sticker, place your hand under the recommended UV or LED lamp.
Follow the manufacturer’s instructions for curing time.
Do not simply assume that every gel strip requires the same number of seconds.
Different formulations and lamps can have different curing requirements.
Step 10: Finish with cuticle oil
Once the manicure is finished, apply a small amount of cuticle oil around the nails.
This helps keep the surrounding skin moisturized and gives your finished manicure a more polished appearance.
How to Make Gel Nail Stickers Last Longer
The application itself is only half of the process.
Your daily habits can also affect how long the manicure stays in place.
Keep your nails clean and dry before application
Water and oil can interfere with adhesion.
Always start with clean, dry nails.
Avoid placing the strip on your skin
The strip should sit on the nail rather than the surrounding skin.
Seal the free edge
Pay attention to the tip of your nail when smoothing the strip.
Follow the curing instructions
If your product requires curing, use the recommended lamp and follow the manufacturer’s instructions.
Avoid using your nails as tools
Opening cans, scratching surfaces, peeling labels, or prying objects with your nails can cause lifting.
Use gloves for cleaning
Household cleaners and repeated exposure to water can be hard on your manicure.
Wearing gloves during cleaning can help reduce that exposure.
How Long Do Gel Nail Stickers Last?
There is no single wear time that applies to every product.
Some brands advertise around two weeks of wear, while real-world results depend on:
- Nail preparation
- Product quality
- Nail shape
- Application technique
- Curing
- Water exposure
- Household work
- How much you use your hands
For example, Ohora’s semi-cured strips are marketed as long-lasting, and independent reviews have reported wear around one to two weeks depending on the user and application.
That is why it is better to think of advertised wear time as a guideline rather than a guarantee.
How to Remove Gel Nail Stickers Safely
Removal deserves just as much attention as application.
This is where many beginners make a mistake.
They notice a small corner lifting and pull the entire strip away.
That can damage the natural nail.
The American Academy of Dermatology specifically advises against picking or scraping gel products from the nail because doing so can damage the nail plate.
The correct removal method depends on the specific product.
Some semi-cured gel strips can be loosened with an oil-based remover or the manufacturer’s recommended removal solution. Other gel products may require acetone.
A general removal routine
- Read the product’s removal instructions.
- Do not forcibly peel the strip.
- Apply the recommended remover.
- Give the adhesive time to loosen.
- Gently lift the product.
- Stop if you feel resistance.
- Clean the nail.
- Apply cuticle oil.
If the product does not come away easily, do not force it.
Are Gel Nail Stickers Better Than Gel Polish?
That depends on what you want from your manicure.
| Feature | Gel Nail Stickers | Traditional Gel Polish |
|---|---|---|
| Beginner friendly | Very | Moderate |
| Nail art | Pre-designed | You create it |
| Application | Quick | More involved |
| Mess | Low | Higher |
| Curing | Depends on product | Yes |
| Design consistency | Excellent | Depends on your skill |
| Salon appointment | Not necessary | Not necessary |
| Customization | Moderate | High |
If you enjoy painting and creating your own nail designs, traditional gel polish gives you more control.
But if you want a quick, consistent design, gel strips are extremely convenient.
Gel Nail Stickers vs. Press-On Nails
These products are often confused.
Press-on nails are artificial nail tips that are placed over your natural nails.
Gel nail stickers are thin strips that follow the shape of your natural nail.
That means stickers generally do not give you the same length extension as press-ons.
If you want extra length, press-ons may be the better option.
If you mainly want color, shine, and nail art without painting, gel stickers are often the more natural fit.
Semi-Cured Gel Nail Strips: Are They Worth It?
For many people, yes.
Semi-cured gel strips combine the convenience of nail stickers with a gel-based application.
The concept is simple:
- The gel is partially cured during production.
- You apply it to your nail.
- You trim and shape it.
- You finish curing it under a UV/LED lamp.
Ohora is one example of a brand offering this type of product. Its strips are sold through Amazon, and independent coverage has noted that the brand uses semi-cured gel that is finished under a UV lamp.
One advantage is that you can get intricate designs without having to paint them yourself.
That is especially useful for French tips, gradients, glitter and detailed nail art.
Best Gel Nail Sticker Designs for Beginners
If this is your first time using nail stickers, start simple.
Nude gel strips
Nude nails are easy to match with almost any outfit.
They are also forgiving if your application is not perfect.
French tips
French tips are classic and work for almost any occasion.
Using pre-designed strips means you do not have to manually paint the tips.
Milky white
Milky nails give you a clean, soft appearance.
They are a good option for weddings and everyday wear.
Soft pink
Pink works particularly well if you want something feminine without being too dramatic.
Glitter
Glitter is a fun choice for parties, holidays and celebrations.
Chrome
Chrome designs create a more noticeable, high-shine look.
Recommended Amazon Products for a DIY Gel Manicure
If you are building your first at-home nail setup, you do not need a huge collection of products.
Start with the basics.
1. ohora Semi Cured Gel Nail Strips
The ohora Semi Cured Gel Nail Strips are a good example of the semi-cured format. The verified Amazon listing for the N Cream Beige style is ASIN B09M5J4N48, and the set includes prep pads, a nail file, and a wooden stick.
View ohora Semi Cured Gel Nail Strips on Amazon
2. GAOY UV LED Nail Lamp
If your chosen strips require curing, a compatible UV/LED lamp is essential.
The GAOY lamp is listed as a UV/LED nail lamp with automatic sensing and timer settings.
View GAOY UV LED Nail Lamps on Amazon
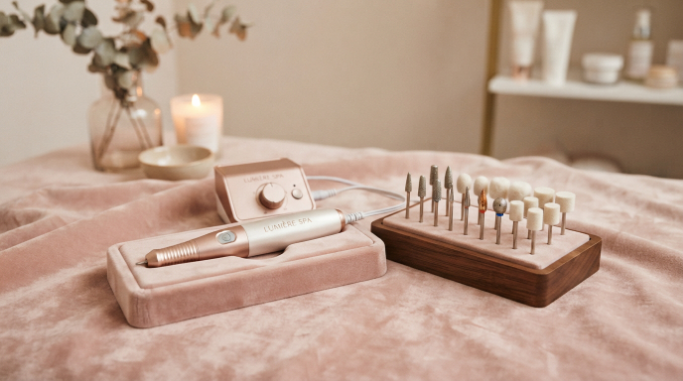
3. Nail preparation tools
A nail file, buffer and cuticle tool can make application easier.
View nail files and buffers on Amazon
4. Cuticle oil
Keeping cuticles moisturized is a simple addition to your nail-care routine.
Important: Prices, availability, sellers, and product variations on Amazon can change. Always check the current product page before purchasing.
Common Gel Nail Sticker Mistakes to Avoid
Even a high-quality product can give poor results if the application is rushed.
Applying over oily nails
Oil can interfere with adhesion.
Fix: Clean the nail properly before application.
Choosing a strip that is too large
A large strip can overlap the skin.
Fix: Choose a size that fits the nail plate.
Applying over the cuticle
This can cause the product to lift.
Fix: Leave a tiny gap around the cuticle rather than placing the strip directly onto the skin.
Leaving wrinkles
Wrinkles can affect the appearance and adhesion.
Fix: Smooth from the center toward the edges.
Not curing correctly
An improperly cured gel product may not perform as intended.
Fix: Follow the manufacturer’s curing instructions.
Peeling the product off
This can remove layers from the natural nail.
Fix: Use the recommended removal method and never force the product.
Frequently Asked Questions About Gel Nail Stickers
Are gel nail stickers actually gel?
Some are and some are not.
Regular nail stickers are adhesive decorations. Semi-cured gel nail strips are made with gel material and are designed to be finished under a UV or LED lamp.
Always check the product description.
Do gel nail stickers need UV light?
Not all of them.
Traditional adhesive nail stickers normally do not require curing. Semi-cured gel strips generally do.
Check the manufacturer’s instructions before buying a lamp.
How long do gel nail stickers last?
Wear time varies by brand and application. Some products advertise approximately two weeks, but actual results depend on preparation, application, curing and daily activities.
Can you use gel nail stickers on short nails?
Yes.
Short natural nails can work very well with gel stickers.
In fact, beginners may find short nails easier because there is less material to trim and shape.
Can you use gel nail stickers without a lamp?
Only if the specific product is designed for no-lamp application.
Semi-cured gel strips generally require curing.
Are gel nail stickers better than regular nail polish?
They can be more convenient because the design is already finished.
However, regular polish gives you more freedom to mix colors and create your own designs.
Can gel nail stickers damage your nails?
Improper application or removal can contribute to nail damage.
Aggressive scraping, picking, or peeling is particularly problematic. The American Academy of Dermatology recommends avoiding these practices when removing gel products.
Can you put gel nail stickers over acrylic nails?
It depends on the product.
Some may work on artificial nail surfaces, but you should check the manufacturer’s instructions before applying them over acrylic, builder gel, or extensions.
What should I use to remove gel nail stickers?
Use the removal method recommended by the manufacturer.
Some products loosen with oil or a dedicated remover, while other gel products may require acetone.
Never force a firmly attached strip off your nail.
What are the best gel nail stickers for beginners?
Look for a set with multiple nail sizes, clear instructions, simple designs and included preparation tools.
Neutral colors, French tips and simple solid colors are usually easier starting points than highly detailed designs.
Do you need a UV or LED lamp for semi-cured gel strips?
Generally, yes.
Semi-cured gel strips are designed to be finished by curing under a compatible lamp. The exact curing time should come from the product manufacturer.
Final Verdict: Are Gel Nail Stickers Worth Buying?
If you want attractive nails without spending a lot of time painting them, gel nail stickers are worth considering.
They are especially useful for beginners, busy people, travelers, students, professionals, and anyone who enjoys changing their nail design regularly.
The biggest advantage is simplicity.
Instead of creating a design yourself, you choose one you already like.
Then you:
Prepare your nails → choose the right size → apply the strip → smooth it → trim it → cure it if required → finish with cuticle care.
That is the basic process.
The key is to buy the right type of product and follow its instructions. Do not assume that every nail sticker requires a lamp or that every gel strip can be removed in the same way.
If you are completely new to this, start with a simple nude, pink, milky, or French design. Once you become comfortable with the application process, you can experiment with chrome, glitter, floral designs and more detailed nail art.
For a semi-cured gel option, the ohora Semi Cured Gel Nail Strips are one product you can investigate, with a verified Amazon listing available for the N Cream Beige style.
Shop the verified ohora Gel Nail Strips listing on Amazon
Ultimately, the best manicure is not necessarily the most expensive one.
Sometimes, it is the one you can apply confidently at home, enjoy for days, and remove carefully without turning your nail-care routine into a chore.
2 Comments