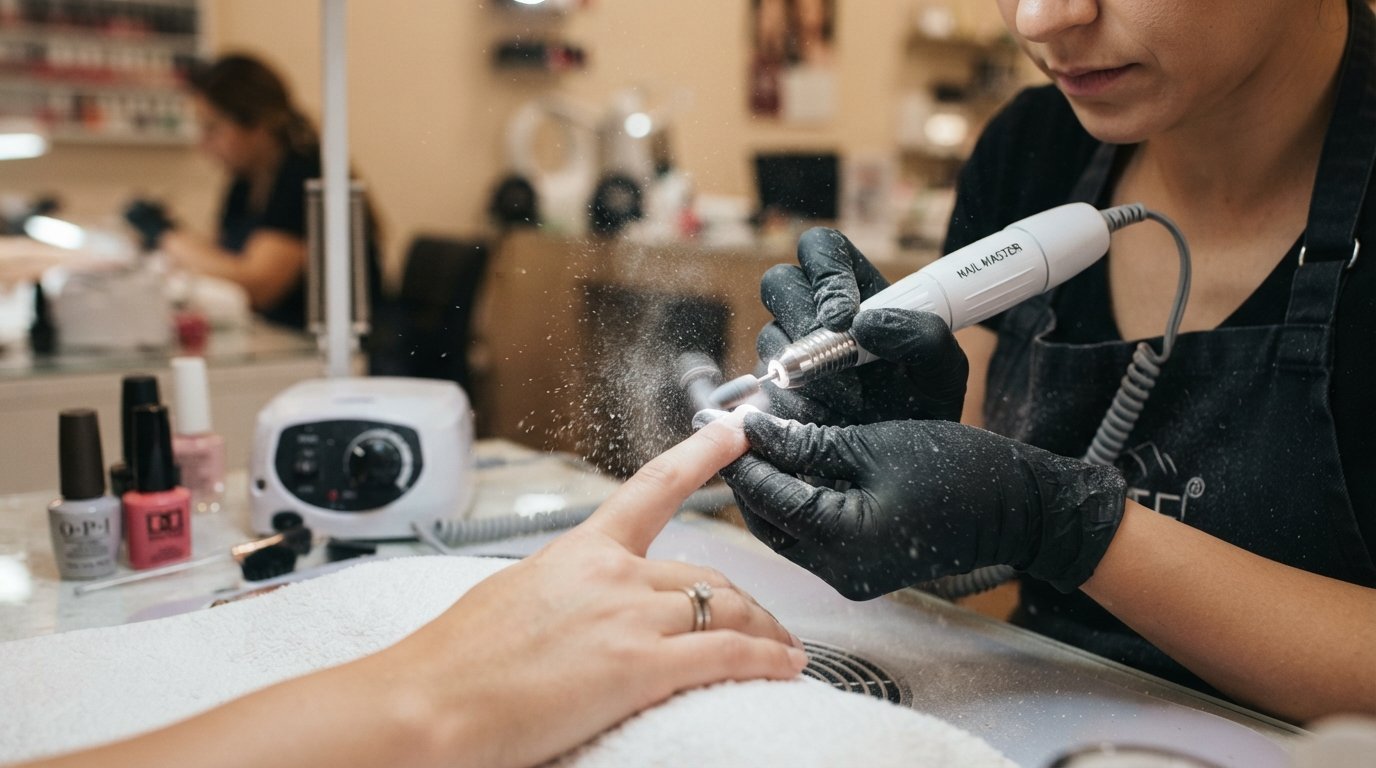
Nail Grinder: A Complete Guide to Choosing, Using, and Caring for Your Nails
If you love neat, smooth, salon-looking nails, you have probably heard of a nail grinder. This handy electric tool has become increasingly popular among people who enjoy doing their manicures and pedicures at home. Unlike a traditional nail file, a nail grinder uses a small rotating bit to shape, smooth, buff, and work on different types of nail surfaces.
For beginners, however, an electric nail grinder can look a little intimidating. There are different speeds, different bits, sanding bands, shapes, and features. You may wonder: Which bit should I use? How fast should it spin? Can I use it on natural nails? Is it really worth buying?
The good news is that once you understand the basics, using a nail grinder becomes much easier.
Important: An electric nail grinder is a precision tool, so gentle pressure and good technique matter. Dermatologists also recommend protecting the cuticle rather than aggressively cutting or removing it because the cuticle helps protect against infection. (AAD)


What Is a Nail Grinder?
A nail grinder is a small electric nail-care device designed to file and shape nails using a rotating attachment called a nail drill bit or nail bit.
Depending on the attachment, the tool can be used for different tasks, including:
- Shaping natural nails
- Smoothing rough nail edges
- Removing product buildup
- Refining gel nails
- Working on acrylic nails
- Smoothing builder gel
- Buffing certain nail surfaces
- Cleaning around some areas of the nail
- Preparing artificial nails for further work
A nail grinder is also commonly called an electric nail file, nail drill, electric nail drill, or e-file.
Professional nail technicians often use electric files because they allow controlled and precise filing. At home, they can also be useful, but beginners should start slowly and learn how each bit behaves before using higher speeds.
The American Academy of Dermatology recommends keeping nails shaped and free from snags and emphasizes gentle nail care as part of maintaining healthy nails. (AAD)
Why Use a Nail Grinder Instead of a Traditional Nail File?
A traditional nail file certainly has its place. In fact, it can be the simplest choice for basic natural-nail shaping.
However, a nail grinder offers something different: speed, control, and versatility.
Imagine that you have just finished applying a thick layer of builder gel. You notice that one side is slightly higher than the other. With a hand file, you can fix it, but it may take quite a bit of time.
With the correct electric file bit and a controlled speed, you can refine the surface more efficiently.
Here are some of the main reasons people choose an electric nail grinder.
1. Faster Nail Filing
The rotating bit does much of the filing work for you. This can be particularly helpful when working with artificial nail products.
2. Better Control
Many models have adjustable speeds. That means you can select a slower setting when you are learning and increase the speed when you become more comfortable.
3. Useful for Different Nail Products
A good electric nail file can be used with various manicure systems, including gel, acrylic, builder gel, and other enhancements.
4. Convenient for Home Manicures
If you regularly do your own nails, an electric nail grinder can save time and make your manicure setup feel much more professional.
5. Multiple Attachments
Most kits come with several nail drill bits, allowing one tool to perform several different jobs.
Nail Grinder vs Nail File: What’s the Difference?
The basic difference is simple.
A traditional nail file requires you to move the file backward and forward manually. A nail grinder uses a rotating motor.
| Feature | Traditional Nail File | Nail Grinder |
|---|---|---|
| Power | Manual | Electric |
| Speed | Depends on your hand | Adjustable on many models |
| Learning curve | Very easy | Requires practice |
| Precision | Good | Very good with practice |
| Artificial nails | Useful | Particularly useful |
| Natural nails | Excellent for basic shaping | Can be used carefully |
| Attachments | Usually none | Multiple bits available |
| Portability | Very easy | Depends on model |
For simple nail shaping, you may not need an electric tool at all. But if you frequently wear gel polish, builder gel, acrylic nails, or extensions, an electric nail grinder can become a useful addition to your nail kit.
Understanding Nail Grinder Bits
One of the most confusing parts of buying an electric nail grinder is understanding the bits.
Don’t worry—you don’t need to memorize every bit on day one.
Instead, think about each bit according to its shape, material, and purpose.
Carbide Bits
Carbide nail drill bits are commonly used for working with artificial nail products.
They can be quite aggressive, so beginners should use them carefully and avoid applying unnecessary pressure.
They are generally more appropriate for experienced users working on enhancement products rather than casually filing natural nails.
Diamond Bits
Diamond nail bits are available in many shapes and grits. They can be useful for detailed work and controlled refinement.
Their shape determines where they are most useful.
Sanding Bands
Sanding bands fit over a mandrel and are available in different grits.
They are convenient for smoothing and refining artificial nail products. Because the abrasive surface is exposed, however, you should avoid lingering in one spot.
Ceramic Bits
Ceramic nail drill bits are another popular option. They can be used for product removal and surface refinement, depending on the specific shape and grit.
What Do the Different Nail Bit Shapes Do?
You will often see bits with names such as:
- Cone
- Flame
- Barrel
- Ball
- Mandrel
- Needle
- Safety bit
- Tapered bit
Each shape has a different purpose.
Barrel Bit
A barrel nail bit has a wider surface and is often used to remove or refine product on larger areas.
Cone Bit
A cone bit narrows toward the tip and can be useful for detailed areas.
Flame Bit
A flame bit has a curved shape and is commonly used by experienced nail technicians for detailed work around certain areas.
Ball Bit
A ball bit has a rounded end and can be useful for smoothing certain rough areas, depending on the material and application.
Mandrel Bit
A mandrel is usually used with sanding bands.
Needle Bit
A needle bit is very narrow and precise. Because of its shape, it requires particularly careful handling.
The important rule is this: never choose a bit simply because it looks professional. Choose it based on the task, material, and your experience level.
How to Choose the Best Nail Grinder
There are dozens of electric nail drills available, so what should you look for?
A good buying decision comes down to a few important features.


1. Adjustable Speed
This is one of the most important features.
A beginner-friendly nail grinder should allow you to control the speed rather than forcing you to use one fixed setting.
Start slowly. Once you understand how the tool behaves, you can gradually increase the speed when appropriate.
2. Low Vibration
A vibrating handpiece can make precision work uncomfortable.
When comparing models, look for a grinder designed to operate smoothly with minimal vibration.
This matters even more if you plan to use the tool for longer manicure sessions.
3. Comfortable Handpiece
A lightweight, comfortable handpiece can make a surprisingly big difference.
If the handle feels bulky or difficult to control, you may struggle to maintain consistent pressure.
4. Rechargeable Battery
A cordless nail drill is convenient because you don’t have to keep the tool beside a power outlet.
For people who travel or move around while doing nails, rechargeable models can be especially practical.
5. Forward and Reverse Rotation
Many professional-style electric nail files offer both forward and reverse directions.
This can be useful for people who regularly work on both hands and want more flexibility.
6. Good Selection of Bits
A kit with several attachments gives you more flexibility.
However, don’t assume that a kit is automatically better just because it contains 20 or 30 bits. Quality and suitability are more important than quantity.
7. Easy Speed Control
A clear speed dial or digital control makes the tool easier to operate.
For beginners, simple controls are often better than unnecessary features.
How to Use a Nail Grinder: Step-by-Step Guide
Now let’s get to the part most beginners want to know.
Here is a simple nail grinder tutorial.
Step 1: Prepare Your Nails
Before turning on the grinder, wash and dry your hands.
Remove old nail polish if necessary and inspect your nails.
If a nail is painful, badly damaged, inflamed, discolored, or showing unusual changes, don’t use the grinder to cover up the problem.
Dermatologists recommend paying attention to changes in the nail and surrounding skin rather than simply covering nail problems with artificial products. (AAD)
Step 2: Choose the Correct Bit
Don’t start with the most aggressive bit.
For basic natural-nail work, choose a suitable fine-grit attachment and begin gently.
If you are removing artificial product, choose a bit specifically designed for that material.
Step 3: Insert the Bit Securely
Turn the grinder off.
Insert the bit according to the manufacturer’s instructions and make sure it is firmly secured.
Never start the machine with a loose attachment.
Step 4: Start at a Low Speed
This is especially important for beginners.
Turn the grinder on at a low speed.
Get used to the movement before working directly on the nail.
Step 5: Keep the Tool Moving
One of the biggest beginner mistakes is staying in one place for too long.
Instead, use controlled movements.
Think of the grinder as a pencil rather than a heavy sanding machine.
Move it smoothly across the intended area.
Step 6: Use Light Pressure
Let the bit do the work.
You shouldn’t have to press hard.
Heavy pressure can create unnecessary heat and friction and can make it easier to over-file the nail.
Step 7: Check Your Progress Frequently
Stop every so often and look at the nail from different angles.
It is much easier to remove a little more product than to fix a nail that has been over-filed.
Step 8: Finish With Gentle Hand Filing
For certain natural-nail shaping jobs, you can finish with a fine manual nail file to smooth the edge.
The AAD recommends filing nails to keep them shaped and free of snags. (AAD)
Step 9: Moisturize
After your manicure, apply moisturizer or cuticle oil to the surrounding skin.
Regular moisturizing can help keep the skin around the nails comfortable, especially after nail-care routines.
Can You Use a Nail Grinder on Natural Nails?
Yes, but care is extremely important.
Natural nails are much thinner and more delicate than layers of acrylic or gel.
If you are new to electric nail files, you may be better off using a traditional file for basic natural-nail shaping until you have learned how the electric tool behaves.
Never assume that a lower speed makes aggressive filing completely safe. The bit type, pressure, angle, duration, and technique all matter.
The goal should be minimal filing necessary to achieve the desired result.
Can a Nail Grinder Remove Gel Polish?
Electric nail files are often used professionally to remove or reduce gel products. However, this does not mean that using a grinder is automatically the safest choice for removing gel from natural nails.
The American Academy of Dermatology notes that picking or filing off gel polish can significantly damage nails and recommends a careful removal process using acetone for gel polish at home. (AAD)
Therefore, if you’re simply trying to remove ordinary gel polish from natural nails, learn the appropriate soak-off method rather than assuming an electric file is always better.
A nail grinder becomes particularly useful when working with thicker artificial enhancements, where controlled product reduction is part of the service.
Nail Grinder Safety Tips
Safety should always come before speed.
Here are some simple rules to remember.
Don’t Rush
A manicure isn’t a race.
Don’t Push Hard
Let the rotating bit work instead of forcing it into the nail.
Don’t Stay in One Spot
Constant movement helps you avoid excessive filing in one area.
Don’t Cut or Aggressively Remove Cuticles
The cuticle provides a protective barrier around the nail. Dermatologists caution against cutting or breaching it because doing so can increase infection risk. (AAD)
Don’t Use a Damaged Bit
Replace worn or damaged attachments.
Don’t Share Unclean Tools
If a grinder or its attachments are being used between people, proper cleaning and disinfection are essential.
The AAD recommends checking that manicure tools are cleaned and disinfected properly and advises asking how tools are cleaned when visiting a salon. (AAD)
A Beginner Mistake I Learned the Hard Way
Imagine someone buying their first electric nail drill.
They open the box, see all those shiny bits, and think:
“The faster setting must be better.”
So they turn the speed up, press the bit against the nail, and start working quickly.
Five minutes later, the nail feels sensitive.
This is exactly why beginners should take the opposite approach.
Start slow. Use light pressure. Learn the tool.
A nail grinder is powerful because it can remove material quickly. That is also why it deserves respect.
The goal isn’t to make the grinder work as hard as possible.
The goal is to make it work precisely.
How to Clean Your Nail Grinder Bits
Keeping your nail drill bits clean is just as important as learning how to use them.
After use:
- Remove the bit from the grinder.
- Remove visible nail dust and product debris.
- Clean the attachment according to the manufacturer’s instructions.
- Disinfect reusable bits with an appropriate product when compatible with the bit material.
- Allow everything to dry properly.
- Store bits in a clean, dry container.
Remember that not every bit can be treated in exactly the same way. Always follow the manufacturer’s cleaning instructions, especially for specialized materials.
How to Make Your Nail Grinder Last Longer
A quality nail grinder can become a useful part of your manicure setup, but it still needs proper care.
Keep It Clean
Dust can build up around the handpiece and ventilation areas.
Store Bits Properly
Don’t throw expensive bits into a drawer where they can become damaged.
Avoid Dropping the Handpiece
The motor and internal components can be sensitive to impact.
Don’t Overload the Motor
If the grinder sounds strained, don’t simply push harder.
Charge It Correctly
For rechargeable models, use the recommended charger and charging instructions.
Replace Worn Attachments
A worn bit may not perform as smoothly as a fresh one.
Is a Nail Grinder Worth Buying?
For someone who only files their natural nails once every few weeks, a basic nail file may be perfectly adequate.
But if you regularly do:
- Gel manicures
- Builder gel nails
- BIAB nails
- Acrylic nails
- Nail extensions
- Detailed nail art
- At-home professional-style manicures
then a nail grinder can be a very useful investment.
The biggest benefit isn’t simply speed.
It is control and versatility.
Instead of keeping several different manual tools for different jobs, one good electric nail file can accept multiple attachments designed for different tasks.
What Should You Look for in a Nail Grinder Kit?
If you’re ready to buy one, here’s a simple checklist.
Look for:
- Adjustable speed
- Comfortable handpiece
- Low vibration
- Forward and reverse rotation
- Rechargeable battery if you want cordless use
- Good-quality bits
- Sanding bands
- Easy controls
- Replacement-bit availability
- Clear manufacturer instructions
You don’t necessarily need the most expensive professional machine.
Instead, choose a model that matches your skill level and how often you plan to use it.
For a beginner, an easy-to-control model is usually more useful than a powerful machine with complicated controls.
Nail Grinder for Beginners: A Simple Starting Routine
If you’re completely new, keep your first few sessions simple.
Beginner Routine
1. Clean your hands.
2. Inspect your nails.
3. Choose a fine, suitable attachment.
4. Start at a low speed.
5. Practice on a nail tip or artificial nail surface if available.
6. Use very light pressure.
7. Keep the tool moving.
8. Stop frequently to check your work.
9. Clean the tool and attachments afterward.
10. Moisturize your hands and surrounding skin.
Once you become comfortable with the movement, you can gradually learn more advanced techniques.
Nail Grinder for Gel, Acrylic, and Builder Gel
One reason professional nail technicians love electric files is their usefulness with nail enhancements.
Gel Nails
An electric file can help reduce bulk and refine cured gel product when used correctly.
Acrylic Nails
Acrylic is much harder than a natural nail, so appropriate professional bits are commonly used to shape and reduce the product.
Builder Gel
A nail grinder can help refine the structure of builder gel and create a smoother surface.
BIAB Nails
If you regularly wear BIAB nails, an electric file can be useful for controlled product refinement. However, beginners should learn the structure of the product and avoid accidentally filing into the natural nail.
The key idea is simple:
Use the grinder to work on the product—not to aggressively thin the natural nail underneath.
Common Nail Grinder Mistakes to Avoid
Even an excellent grinder cannot compensate for poor technique.
Avoid these mistakes:
Using Too Much Pressure
More pressure doesn’t necessarily mean faster results.
Using the Wrong Bit
A bit designed for heavy product removal isn’t automatically appropriate for natural nails.
Starting at Maximum Speed
Beginners should learn control first.
Holding the Bit in One Place
Keep it moving smoothly.
Ignoring Heat
If the nail or surrounding area becomes uncomfortable, stop and reassess your technique.
Filing Healthy Cuticle Tissue
The cuticle serves an important protective function, so aggressive cuticle work isn’t something beginners should attempt. (AAD)
Buying Based Only on RPM
A high RPM number may sound impressive, but speed isn’t the only factor that determines whether a grinder is good.
Control, vibration, handpiece comfort, bit quality, and your technique matter too.
Nail Grinder Buying Checklist
Before pressing the buy button, ask yourself:
Do I need it for natural nails or artificial nails?
Do I want a cordless model?
Does it have adjustable speed?
Is the handpiece comfortable?
Does it come with useful bits?
Can I buy replacement bits later?
Are the instructions clear?
Does the product have suitable safety information?
Will I actually use it regularly?
If the answer to most of these questions is yes, an electric nail grinder can make a valuable addition to your manicure collection.
Final Thoughts: Should You Buy a Nail Grinder?
A nail grinder isn’t just another gadget to add to your beauty drawer. When chosen carefully and used correctly, it can make nail shaping and enhancement work faster, more controlled, and more convenient.
For someone who regularly does gel, acrylic, builder gel, BIAB, or other nail enhancements, the investment can make a noticeable difference.
However, the smartest approach is to focus on control rather than power.
Choose adjustable speed. Pick suitable bits. Start slowly. Use light pressure. Keep the tool moving. And most importantly, respect your natural nails.
If you’re new to electric nail files, give yourself time to practice. You don’t need to master every bit on the first day. Start with the basics and build your confidence gradually.
A good nail grinder should make your manicure routine easier—not more stressful.
And once you’ve learned how to control it, you may wonder how you ever managed your more complicated nail routines without one.
Frequently Asked Questions About Nail Grinders
Is a nail grinder the same as an electric nail file?
Yes. The terms nail grinder, electric nail file, nail drill, and e-file are often used to describe similar manicure tools.
Can beginners use a nail grinder?
Yes, but beginners should start slowly, use an appropriate bit, avoid heavy pressure, and practice before attempting advanced techniques.
Can I use a nail grinder on natural nails?
You can, but natural nails require extra care because they are much thinner than artificial enhancements. For basic shaping, a traditional file may be simpler.
What speed should a beginner use?
There isn’t one universal speed that works for every grinder, bit, nail type, and task. Start at the lowest practical setting and increase gradually as your control improves.
Can a nail grinder remove gel polish?
Electric files can be used by trained users to reduce nail products, but for ordinary gel polish removal from natural nails, dermatologists caution that filing or picking can damage the nails and recommend an appropriate soak-off removal process. (AAD)
How often should I use a nail grinder?
There is no need to use an electric file simply because you own one. Use it when you have a specific nail-care or enhancement task that requires it.
Are expensive nail grinders better?
Not necessarily. Look beyond price and RPM. Adjustable speed, low vibration, comfortable handling, suitable attachments, and reliable instructions are more useful factors to consider.
What is the most important nail grinder safety rule?
Don’t rush. Use the correct bit, light pressure, controlled movement, and avoid aggressive work on the natural nail or cuticle. For persistent nail problems or unusual changes, consult a dermatologist rather than trying to file the problem away. (AAD)
Useful Resources
- American Academy of Dermatology: Manicure and Pedicure Safety — practical dermatologist guidance for safer nail care.
- American Academy of Dermatology: Healthy Nail Tips — basic advice for keeping nails healthy.
- American Academy of Dermatology: Gel Polish Removal — dermatologist guidance on removing gel polish at home.
- American Academy of Dermatology: Artificial Nail Safety — information about reducing damage from artificial nails.