How to Remove Gel Nail Polish at Home
If you love a glossy, long-lasting manicure, gel nail polish is hard to beat. The problem usually starts when it is time to take that manicure off. The gel can feel firmly attached, and it is very tempting to peel, pick, or scrape it away.
If you have ever thought, “There must be an easier way to remove gel nail polish at home,” you are not alone.
The good news is that you can remove most soak-off gel polish at home with a few simple supplies and the right technique. The key is patience. Instead of forcing the product off your nails, you soften it first and then gently remove what has loosened.
The American Academy of Dermatology (AAD) recommends acetone as an effective way to remove gel polish at home and warns that picking or filing gel away can significantly damage the natural nails. (AAD)


In this guide, you will learn how to remove gel nail polish at home step by step, what products you need, how long to soak your nails, what to do when stubborn gel will not come off, and how to care for your natural nails afterward.
Why Is Gel Nail Polish Hard to Remove?
Unlike regular nail polish, gel polish is cured under a UV or LED lamp. This creates a durable coating that can last much longer than traditional polish.
That durability is one of the main reasons people love gel manicures. However, it also means you cannot usually wipe it away with ordinary nail-polish remover.
The safest approach for a typical soak-off gel manicure is to soften the product with acetone rather than trying to physically pull it from the nail.
The AAD explains that picking and scraping gel polish can damage the nail, while its at-home removal method uses acetone, cotton and a wrapping material to soften the product. (AAD)
What You Need to Remove Gel Nail Polish at Home
Before you start, collect everything you need. There is nothing worse than having one hand wrapped in foil and then realizing your cotton pads are in another room!
For a basic gel nail polish removal routine, you will need:
- 100% acetone
- Cotton balls or cotton pads
- Small pieces of aluminum foil or plastic food wrap
- Petroleum jelly
- Nail file
- Scissors
- Warm water
- Mild soap
- Clean towel
- Cuticle oil
- Hand cream
The AAD’s dermatologist-recommended method specifically includes petroleum jelly, cotton, scissors, 100% acetone, plastic food wrap, a washcloth and a towel. (AAD)
Choosing the right products
You do not need to buy a huge professional nail kit just to remove one manicure.
However, buying the right basics can make a noticeable difference.
When shopping for acetone, check the label carefully. For traditional soak-off gel removal, 100% acetone is the product recommended in the AAD’s at-home method. (AAD)
For cotton, choose pieces that are large enough to cover the nail but not so large that they soak the surrounding skin unnecessarily.
A good nail file is also worth buying because you only need to gently break the shiny surface of the gel rather than aggressively filing your natural nail.
Finally, keep a quality cuticle oil and hand cream nearby. After removal, your nails and surrounding skin can feel dry, so having aftercare products ready makes the whole process much more comfortable.
Step-by-Step: How to Remove Gel Nail Polish at Home
Step 1: Prepare Your Workspace
Start by choosing a comfortable, well-ventilated area.
Cover the surface where you will work because acetone can damage some countertops, furniture and other surfaces. The AAD recommends protecting your work area before beginning the removal process. (AAD)
Place your supplies nearby:
- Acetone
- Cotton
- Foil or plastic wrap
- Nail file
- Petroleum jelly
- Towel
- Cuticle oil
- Hand cream
It is generally easier to work on one hand at a time.
That way, you can still use your free hand to prepare cotton, open products and remove the wraps.
Step 2: Wash and Dry Your Hands
Wash your hands with mild soap and water.
Dry them completely with a clean towel.
You do not need to scrub your nails aggressively. The goal is simply to remove dirt, oil and leftover hand products.
Once your hands are dry, you are ready to begin.
Step 3: Protect the Skin Around Your Nails
Acetone can dry and irritate the skin, so protecting the surrounding area is an important part of safe gel nail removal.
Apply a thin layer of petroleum jelly around each nail.
Focus on:
- Cuticles
- Nail sidewalls
- Skin immediately surrounding the nail
Try not to coat the actual gel surface heavily.
The AAD recommends applying petroleum jelly to the cuticles and surrounding skin before acetone removal because it can help protect the skin. (AAD)
This takes less than a minute, but it can make the process much more comfortable.
Step 4: Gently File the Top Coat
Now take your nail file.
Very gently file the shiny top surface of the gel manicure.
You are not trying to remove the entire manicure with the file.
Instead, you are simply dulling the shiny surface so the acetone can work on the gel underneath.
Think of it like opening a sealed package.
Important:
Do not keep filing once you have removed the shine.
If you aggressively file the gel all the way down to your natural nail, you may thin or weaken the nail.
This is one of the reasons it is important to use a reasonably fine, comfortable nail file and light pressure.
Step 5: Cut Cotton to Fit Your Nails
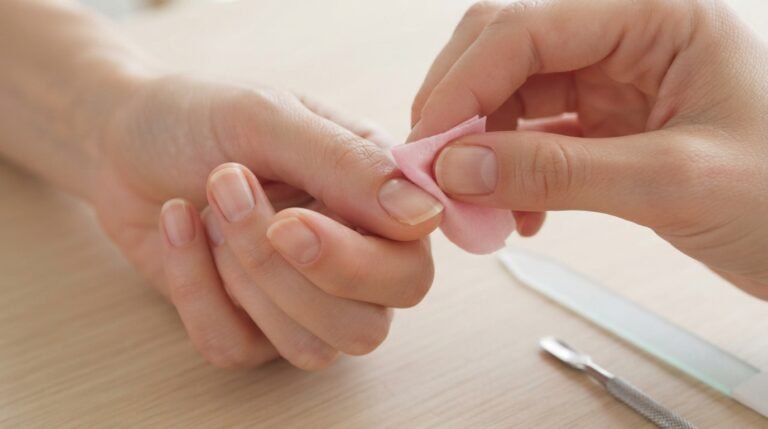
Take your cotton balls or cotton pads and cut them into small pieces.
Each piece should be approximately the size of your nail.
This is better than placing one large cotton ball over your entire fingertip.
The AAD recommends using cotton pieces approximately the size of each nail because this reduces unnecessary acetone contact with the surrounding skin. (AAD)
Small cotton pieces also mean less product waste.
Step 6: Soak the Cotton in Acetone
Pour some 100% acetone into a suitable container.
Soak one cotton piece thoroughly.
It should be wet enough to stay in contact with the gel.
You do not need to completely flood the cotton.
Acetone safety
Acetone should be handled carefully.
Keep it away from:
- Flames
- Cigarettes
- Candles
- Heat sources
- Your eyes
- Your mouth
Use it in a well-ventilated area and follow the instructions on the product label.
If acetone causes significant irritation, stop using it and wash the affected area.
Step 7: Place the Cotton on Your Nail
Put the acetone-soaked cotton directly over the nail.
Make sure it covers the entire gel surface.
Now secure it with a small piece of plastic food wrap or aluminum foil.
The AAD’s dermatologist-recommended method uses plastic food wrap because it can create a tight seal and reduce dripping compared with foil. (AAD)
However, foil is also commonly used for at-home gel removal.


Make the wrap secure, but do not make it painfully tight.
Your finger should feel comfortable and circulation should not be restricted.
Step 8: Wait for the Acetone to Work
This is the part where patience really matters.
Leave the wraps on for approximately 10 minutes.
The AAD’s specific at-home method recommends leaving the plastic wrap in place for 10 minutes, after which most or all of the gel should be gone. (AAD)
Some manicures may need additional time, particularly when:
- The gel has several layers.
- The colour is very thick.
- There is heavy glitter.
- The manicure contains additional strengthening products.
- The gel is particularly stubborn.
Do not start scraping aggressively simply because the first 10 minutes have passed.
Check one nail first.
Step 9: Remove the Wraps One Nail at a Time
Start with one finger.
Remove the wrap and cotton.
Look closely at the gel.
When the acetone has worked properly, the product may look:
- Wrinkled
- Cracked
- Flaky
- Lifted
- Soft
- Uneven
This means the gel has started to break down.
If it still looks completely hard and shiny, it may need more soaking.
Step 10: Gently Remove the Softened Gel
Now use a warm, damp washcloth to gently rub the softened gel from the nail.
The AAD recommends using a warm, wet washcloth to gently remove remaining polish rather than aggressively scraping the nail. (AAD)
This is where many people make a mistake.
They see a small piece that is still attached and immediately reach for a metal tool.
Don’t.
If the gel does not come away easily, soak it again.
Remember this simple rule:
If it does not slide away easily, it probably needs more soaking—not more force.
This one habit can make your gel manicure removal much kinder to your natural nails.
What About an Orange Stick or Cuticle Pusher?
You may have seen tutorials recommending an orange stick or cuticle pusher.
However, the AAD specifically cautions against using an orange stick to remove gel polish because it can injure the nails and contribute to white spots. (AAD)
Therefore, if the gel is still firmly attached, go back to the acetone rather than forcing it.
Step 11: Repeat the Soaking Process if Necessary
Suppose you remove the cotton and notice that half of the gel is still attached.
Don’t panic.
Simply:
- Add fresh acetone to another piece of cotton.
- Place it over the nail.
- Wrap the nail again.
- Wait several more minutes.
- Check the gel.
- Gently wipe away the softened product.
Thick gel can take longer.
The exact timing depends on the type of gel and how many layers were applied.
Step 12: Wash Your Hands
Once the gel is completely removed, wash your hands with mild soap and water.
This helps remove acetone and product residue.
A gentle or fragrance-free soap can be useful if your skin tends to become irritated.
Dry your hands carefully.
At this stage, your nails may look a little dull or dry.
That is why the next step is so important.
Step 13: Give Your Nails Some Moisture
Apply cuticle oil around each nail.
Massage it gently into:
- Cuticles
- Nail edges
- Surrounding skin
Then apply a nourishing hand cream.
You can also use petroleum jelly around your cuticles.
The AAD recommends gently rubbing petroleum jelly into the cuticles and surrounding skin daily for seven days after removal to help reduce irritation caused by acetone. (AAD)


A Real-Life Example: Why Patience Matters
Imagine you have just removed the wraps from your first three nails.
The gel on two nails comes off easily.
The third nail is stubborn.
You try rubbing it.
Nothing happens.
You try scraping it.
Still stuck.
Then you press harder.
This is exactly where damage can happen.
Instead, put fresh acetone-soaked cotton back on that nail and wait a little longer.
When you check it again, the remaining gel may wipe away much more easily.
That extra few minutes is a much better trade-off than aggressively scraping your natural nail.
Can You Remove Gel Nail Polish Without Acetone?
This is one of the most common questions about how to remove gel nail polish at home.
For traditional soak-off gel polish, acetone is the standard effective option recommended by dermatologists.
The AAD describes acetone as an effective way to remove gel polish at home. (AAD)
You may find online methods involving:
- Warm water
- Vinegar
- Lemon juice
- Rubbing alcohol
- Baking soda
- Regular nail-polish remover
However, these methods may not effectively break down a properly cured gel manicure.
Rather than experimenting with several household ingredients, purchasing a properly labelled 100% acetone product is generally a more practical approach when your goal is specifically gel removal.
Can You Use Regular Nail Polish Remover?
It depends on what is inside the remover.
A regular nail-polish remover that is acetone-free may not effectively remove traditional gel polish.
If you are shopping specifically for gel polish remover, check the label instead of choosing a bottle simply because it says “nail polish remover.”
For a standard soak-off gel manicure, 100% acetone is the straightforward option used in the AAD’s recommended home-removal process. (AAD)
Foil vs Plastic Wrap for Gel Removal
Both methods are commonly seen in at-home nail routines.
Aluminum foil
Foil is popular because it is easy to cut into small squares and wrap around the fingertips.
Plastic food wrap
The AAD recommends plastic food wrap because it can create a tighter seal around the nail and help prevent acetone from dripping. (AAD)
If you already have foil at home, you do not necessarily need to purchase a separate removal system.
If you are buying supplies specifically for your nail-care routine, however, having convenient pre-cut foil wraps can save preparation time.
The important thing is that the acetone-soaked cotton remains firmly against the nail.
What If Your Gel Polish Is Very Thick?
Not every gel manicure is the same.
A simple gel manicure might contain:
- Base coat
- One or two colour coats
- Top coat
But some manicures include thicker layers or additional nail products.
If your manicure is particularly thick, expect the removal process to take longer.
Do not respond by filing harder.
Instead, remove the shiny surface gently and give the acetone enough time to soften the remaining product.
If you have builder gel, hard gel, acrylic, extensions, or another enhancement that is not designed to soak off, do not assume the same removal method will work.
When you are unsure what product you have, professional removal is a safer choice.
Mistakes to Avoid When Removing Gel Polish
Don’t Peel the Gel
Peeling may be satisfying, but it can take layers of your natural nail with the product.
The AAD specifically recommends avoiding picking at gel polish. (AAD)
Don’t Aggressively File Your Natural Nail
File the surface of the gel only enough to break its shine.
Once you reach the natural nail, stop.
Don’t Scrape Hard
If the gel does not come away easily, soak again.
Don’t Soak Your Whole Hand
The AAD recommends limiting acetone exposure and soaking only the fingertips rather than the whole hands. (AAD)
Using cotton on individual nails is a convenient way to do this.
Don’t Ignore Dry Cuticles
After using acetone, give your skin some attention.
A good cuticle oil and moisturizer are simple products worth keeping in your nail-care kit.
How to Care for Your Nails After Gel Removal
Removing the gel is only half the job.
The next goal is maintaining healthy-looking natural nails.
Use Cuticle Oil Regularly
Apply cuticle oil once or twice a day if your nails and surrounding skin feel dry.
Massage it gently around the nail.
Moisturize Your Hands
Use a rich hand cream after washing your hands.
This is especially useful if your hands are frequently exposed to water, soap or cleaning products.
Keep Your Nails at a Comfortable Length
If your nails feel weak after removing gel, keeping them slightly shorter can reduce catching and accidental breaks.
Take a Polish Break
The AAD recommends taking a nail-polish holiday of one to two weeks or longer between manicures and moisturizing the nails and cuticles during the break. (AAD)
You don’t have to stop caring for your nails during this time.
In fact, it is a great opportunity to focus on hydration and gentle nail care.
How Often Should You Get Gel Manicures?
There is no single schedule that works perfectly for everyone.
However, repeated gel manicures can contribute to nail brittleness, peeling and cracking. (AAD)
Pay attention to how your nails look and feel.
If you notice persistent:
- Peeling
- Cracking
- Brittleness
- Unusual discoloration
- Nail lifting
- Pain
- Changes around the nail
consider taking a break and seeking professional medical advice.
The AAD recommends seeing a board-certified dermatologist if you notice unusual or persistent nail problems. (AAD)
Is It Worth Buying a Gel Nail Removal Kit?
If you regularly wear gel polish, buying a small gel nail removal kit can be convenient.
Instead of searching for every item whenever you need to remove your manicure, you can keep everything together in one place.
A useful kit might contain:
- Nail files
- Buffers
- Cotton
- Foil wraps
- Cuticle tools
- Storage accessories
However, you do not necessarily need a large kit.
For occasional gel removal, purchasing the basic products separately may be enough.
What should you look for when buying?
Choose products from established beauty suppliers and check:
- Ingredients
- Product instructions
- Intended use
- Customer reviews
- Packaging quality
- Whether the product is designed for soak-off gel
For 100% acetone, make sure the product is clearly labelled.
For files and buffers, choose a product that feels comfortable rather than extremely harsh.
For cuticle oil, look for a formula designed for regular nail and cuticle care.
The best purchase is not necessarily the product with the longest list of features. It is the one that suits your routine and is easy for you to use correctly.
Your Complete At-Home Gel Removal Checklist
Before you begin
- Wash and dry your hands
- Prepare a ventilated workspace
- Protect your table
- Gather your supplies
- Apply petroleum jelly around the nails
During removal
- Gently file the shiny gel surface
- Cut cotton pieces to nail size
- Soak cotton with 100% acetone
- Place cotton over each nail
- Wrap each fingertip
- Wait approximately 10 minutes
- Check one nail
- Gently remove softened gel
- Re-soak stubborn areas
After removal
- Wash your hands
- Dry gently
- Apply cuticle oil
- Apply hand cream
- Moisturize your cuticles regularly
- Consider taking a polish break
Frequently Asked Questions
How long does it take to remove gel nail polish at home?
The AAD recommends leaving the acetone-soaked cotton and plastic wrap in place for around 10 minutes. Some products may require additional soaking time. (AAD)
What is the easiest way to remove gel nail polish?
For a typical soak-off gel manicure, the basic method is to gently break the top coat, use acetone-soaked cotton, wrap each nail, wait for the gel to soften, and gently remove the loosened product.
Can I peel off gel nail polish?
It is better not to. Picking and peeling can damage the natural nail. (AAD)
Can I file gel polish completely off?
You should avoid filing aggressively down to your natural nail. File only enough to break the shiny surface before using acetone.
Why isn’t my gel polish coming off?
It may need more soaking time. Thick layers and certain gel formulas can take longer to soften. Reapply acetone rather than scraping harder.
Is 100% acetone necessary?
For the standard soak-off method described by the AAD, 100% acetone is used. (AAD)
Should I use foil or plastic wrap?
Both can be used to hold acetone-soaked cotton against the nail. The AAD specifically recommends plastic food wrap because it can create a tighter seal and reduce dripping. (AAD)
Can I soak my entire hand in acetone?
It is better to limit acetone exposure. The AAD recommends soaking only the fingertips rather than the entire hands. (AAD)
What should I put on my nails after removing gel polish?
Use cuticle oil, petroleum jelly and a moisturizing hand cream. The AAD recommends moisturizing the nails and cuticles between manicures. (AAD)
Should I take a break after removing gel polish?
The AAD recommends a nail-polish holiday of one to two weeks or longer between manicures, particularly to give nails time to recover and remain moisturized. (AAD)
Final Thoughts
Learning how to remove gel nail polish at home does not have to be difficult.
The secret is not using more force—it is using the right process.
File gently → soak with acetone → wrap → wait → remove gently → moisturize.
If you are building a home nail-care kit, a few good-quality basics are enough: 100% acetone, cotton pads, a gentle nail file, wrapping material, petroleum jelly and cuticle oil.
Buying the right products can make the process easier, but technique matters just as much. A quality product cannot protect your nails if you aggressively peel or scrape the gel away.
Most importantly, listen to your nails. If a product will not come off easily, give it more time. If your nails become unusually thin, painful, discolored or damaged, stop applying new gel and consider getting advice from a dermatologist.
With a little patience, the right supplies and proper aftercare, gel nail polish removal at home can become a simple part of your regular manicure routine.