
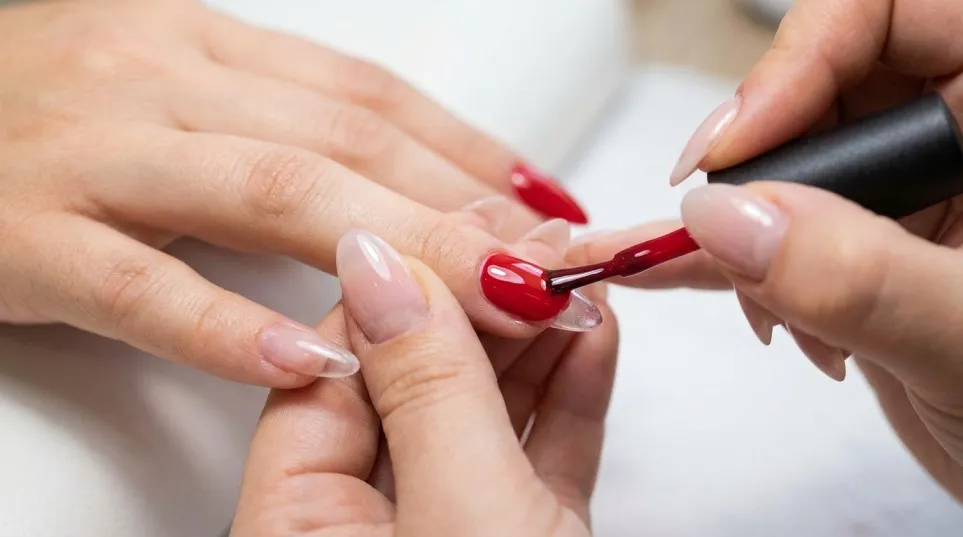
Nail Polish on Gel Nails: Can You Do It? (Tips & How-To)
Can you put regular nail polish on gel nails? Yes. Regular polish sits on top of a cured gel or BIAB manicure without damaging it. Lightly buff the shine, wipe with alcohol, then apply base coat, colour and top coat. Remove it later with acetone-free remover so the gel underneath stays intact.
Have you ever looked at your gel manicure and wished you could change its colour without visiting the nail salon again? Perhaps you have a beautiful nude gel manicure but suddenly want bright red nails for a party. Or maybe your gel nails still look perfect, but you are simply bored with the colour.
The good news is that you can usually apply regular nail polish on gel nails without removing your existing gel manicure. It is an easy and affordable way to refresh your nails, experiment with different colours, and enjoy a new manicure without starting from scratch.
However, there are a few important things you should understand before picking up your favourite nail polish. Using the wrong products, applying thick layers, or removing polish incorrectly can affect the appearance and condition of your gel manicure.
In this detailed guide, we will explain everything about nail polish on gel nails, including how to apply it, which products to choose, how to remove it safely, and how to make your manicure last longer.
Whether you are a beginner or someone who regularly enjoys gel manicures, this guide will help you make the right decisions.
Can You Put Regular Nail Polish on Gel Nails?
Yes! You can apply regular nail polish over gel nails, provided that the gel underneath has been properly cured and is in good condition.
Regular nail polish and gel nail polish are different products. Regular nail polish usually dries through evaporation of its solvents, while gel polish requires a suitable UV or LED lamp to cure and harden.
Because of these differences, regular nail polish can generally be applied over an existing cured gel manicure.
For example, imagine you visited a nail salon last week and got a beautiful pink gel manicure. A few days later, you have a special event and want black nails to match your outfit.
Instead of paying for another salon appointment, you can apply black regular nail polish over your existing pink gel colour.
Once you are finished, you can remove the regular polish and return to your original pink gel manicure.
The biggest advantage is flexibility: you can experiment with different nail colours without constantly changing your underlying gel manicure.
However, remember that the gel layer must be intact. If your gel polish is lifting, cracked, or damaged, adding regular nail polish will not repair it.
Why Should You Apply Regular Nail Polish on Gel Nails?
There are several reasons why people choose to apply regular nail polish over gel manicures.
Let’s explore the main benefits.
1. Change Your Nail Colour Whenever You Want
One of the biggest advantages of regular nail polish on gel nails is the ability to change your nail colour easily.
You do not need to remove your original gel manicure every time you want a different look.
For example:
- Wear nude nails during the working week.
- Change to red nails for a dinner date.
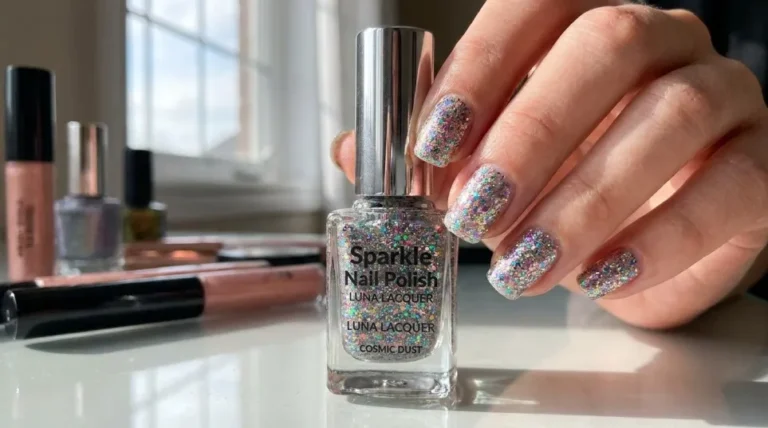
- Try glitter polish for a birthday party.
- Choose pastel colours for a summer holiday.
- Use dark shades for an evening event.
This gives you more freedom to enjoy different nail designs.
2. Save Money on Salon Visits
Gel manicures can be expensive, especially if you visit a nail salon regularly.
Fortunately, regular nail polish is generally more affordable and can be applied at home.
Instead of paying for a complete manicure just to change your colour, you can purchase a few nail polish shades and experiment whenever you like.
Over time, this can help reduce your nail maintenance expenses.
3. Protect Your Existing Gel Manicure From Colour Changes
Applying regular polish can temporarily cover the original gel colour.
This means you can enjoy different nail styles while keeping your existing gel manicure underneath.
However, regular nail polish is not a protective treatment for damaged gel nails. It simply adds another cosmetic layer.
4. Experiment With Different Nail Art Designs
Another exciting benefit is that you can create different nail art designs.
You can try:
- French manicure styles.
- Glitter nail designs.
- Colourful tips.
- Floral nail art.
- Ombre-inspired colour combinations.
- Minimalist nail patterns.
You do not need professional nail art equipment for every design. A few basic nail polish shades and a thin nail art brush can help you create attractive results.
What Is the Difference Between Regular Nail Polish and Gel Nail Polish?
Before applying nail polish on gel nails, it helps to understand how these two products work.
Although they may look similar in a bottle, their formulas and application methods are different.
| Feature | Regular Nail Polish | Gel Nail Polish |
|---|---|---|
| Drying method | Air-dries | Cures under a compatible UV/LED lamp |
| Application | Easy for beginners | Requires more care |
| Finish | Glossy or matte | Usually high-gloss |
| Wear time | Usually several days | Often around 2–3 weeks, depending on the system |
| Removal | Suitable nail polish remover | Product-specific gel removal |
| Equipment | Usually no special equipment | Requires a compatible curing lamp |
Regular polish is a good choice when you want to change your nail colour frequently. On the other hand, gel polish is popular for people who prefer a longer-lasting manicure.
For a more detailed explanation, read this guide to the difference between regular and gel nail polish.
How to Apply Regular Nail Polish on Gel Nails: Step-by-Step Guide
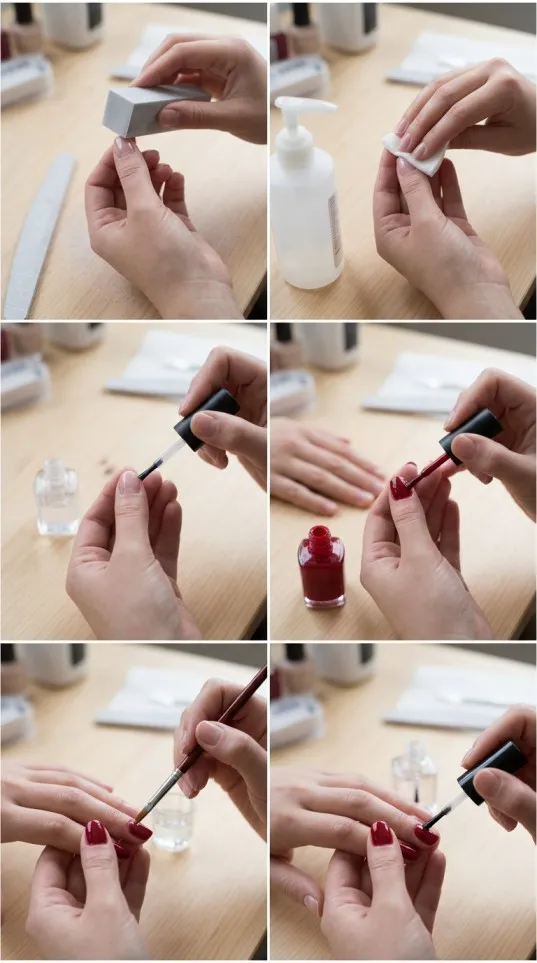
Applying regular nail polish over gel nails is simple when you follow the correct steps.
You do not need to be a professional nail artist to achieve a neat finish. With a little patience and the right products, you can create a beautiful manicure at home.
Step 1: Check Your Existing Gel Manicure
Start by examining your nails carefully.
Make sure your gel manicure is:
- Fully cured.
- Smooth and clean.
- Properly attached to the natural nail.
- Free from cracks and lifting.
- Comfortable, without pain or irritation.
If you notice lifting, green or unusual discolouration, swelling, or damaged areas, do not simply cover them with regular nail polish.
It is better to have the problem assessed and the gel removed or repaired appropriately.
Step 2: Clean Your Nails
Clean nails help regular polish look smoother and more professional.
Wash your hands with mild soap and water. Dry them completely, including the areas around your nails.
Next, remove any visible oil, dust, or leftover skincare products.
Avoid aggressive filing or buffing. You generally do not need to roughen a properly finished gel manicure just to apply temporary regular polish.
Step 3: Apply a Thin Base Coat
A nail polish base coat can help create an even surface for your new colour.
Apply a thin layer and allow it to dry according to the manufacturer’s instructions.
A good base coat can also help reduce staining from strongly pigmented colours.
Step 4: Apply Your Favourite Nail Polish Colour
Now comes the fun part!
Choose a colour that matches your outfit, personality, or occasion.
For example:
- Red for a classic, elegant appearance.
- Nude for an everyday professional look.
- Pink for a soft and feminine manicure.
- Black for a bold, modern style.
- White for a clean and minimal appearance.
Apply a thin coat rather than covering your nails with a large amount of polish.
Allow the first coat to dry before applying the second one.
Professional tip: Two thin coats usually create a smoother result than one thick coat.
Step 5: Allow the Polish to Dry Completely
This is one of the most important steps.
Unlike gel polish, regular nail polish does not become hard simply because you place your hand under a UV or LED lamp.
It needs time to air-dry.
Avoid touching your nails, washing dishes, or putting on tight gloves while the polish is still wet.
A little patience at this stage can prevent smudges and fingerprints.
Step 6: Finish With a Regular Top Coat
Once your colour has dried sufficiently, apply a compatible regular nail polish top coat.
This helps improve shine and gives your manicure a more finished appearance.
It can also help reduce early chipping.
Remember that a regular top coat is different from a UV/LED gel top coat. Do not automatically apply gel top coat over wet or partially dried regular polish.
Step 7: Let Everything Set
Give your manicure enough time to dry.
Once it is completely dry, you can enjoy your refreshed nail colour.
You have now changed the appearance of your gel manicure without removing the original gel underneath!
Can You Use Gel Top Coat Over Regular Nail Polish on Gel Nails?
This is a common question, especially among people who want their manicure to have the glossy appearance of salon-finished gel nails.
The answer is that you should not assume these products are compatible.
A gel top coat is designed to work with a compatible gel system. Regular nail polish dries through evaporation, so placing gel products over it before it has fully dried can cause problems.
For example, the regular polish underneath may remain soft or develop wrinkles.
If you want a simple and reliable result, use a regular top coat over regular polish.
If you want a true gel finish, use products from a compatible gel system and follow the manufacturer’s instructions.
How to Remove Regular Nail Polish From Gel Nails Without Damaging Them
Removing regular polish from gel nails requires some care.
The goal is to remove the temporary colour without unnecessarily affecting the gel underneath.
Imagine that you applied beautiful red nail polish over a nude gel manicure for a weekend party. Now the weekend is over, and you want your original nude colour back.
You can do this by following these steps.
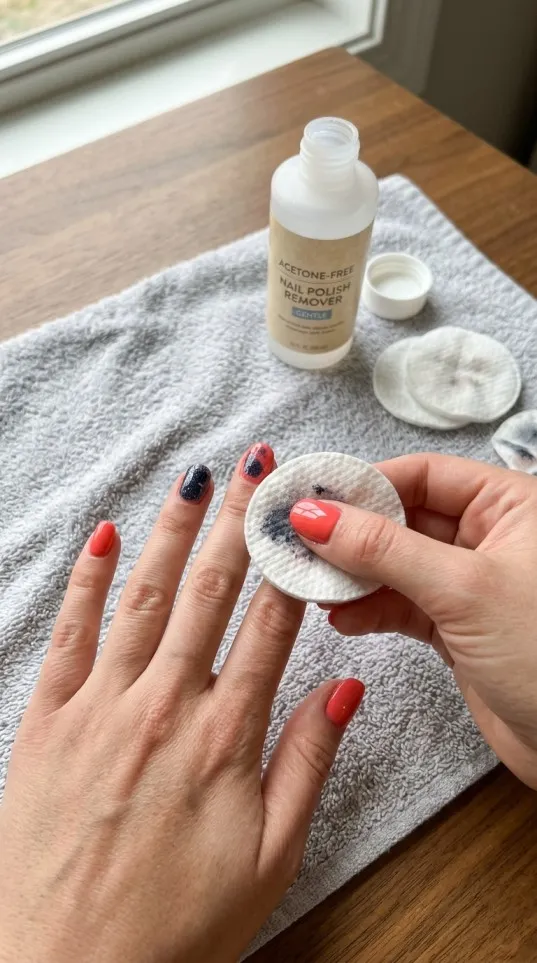
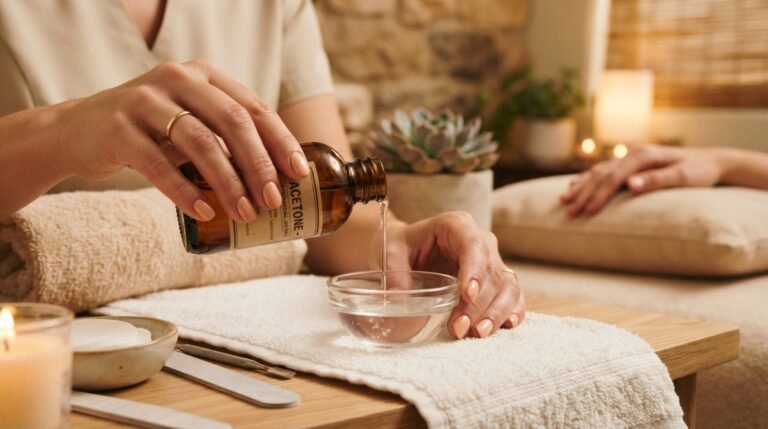
- Choose a suitable remover: An acetone-free nail polish remover is generally the preferred starting point for temporary lacquer over gel.
- Use a soft cotton pad: Apply a small amount of remover to the pad.
- Press gently: Hold the pad against the nail briefly to loosen the regular polish.
- Wipe carefully: Move the pad gently across the nail rather than scrubbing aggressively.
- Check the original gel: Make sure the temporary colour has been removed without disturbing the underlying manicure.
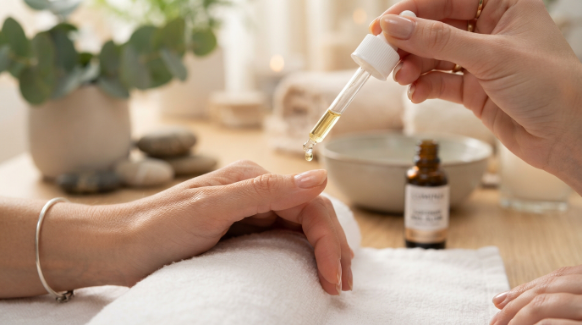
- Moisturise: Apply cuticle oil and hand cream after cleaning your nails.
Ellisons’ professional nail training material specifically advises using acetone-free remover when removing traditional polish applied over gel polish. Read its professional gel nail training guide.
Important: Test your remover on one nail first and check the manufacturer’s guidance for your particular gel system. Do not soak your nails in remover unnecessarily.
Also, remember that acetone-free remover is intended here for removing the regular polish layer. It will not reliably remove the underlying cured gel.
For actual gel removal, follow the gel manufacturer’s removal instructions or consult a qualified nail technician.
Best Nail Polish Colours to Use on Gel Nails
Choosing the right colour can completely change the appearance of your manicure.
Here are some popular colour ideas worth trying.
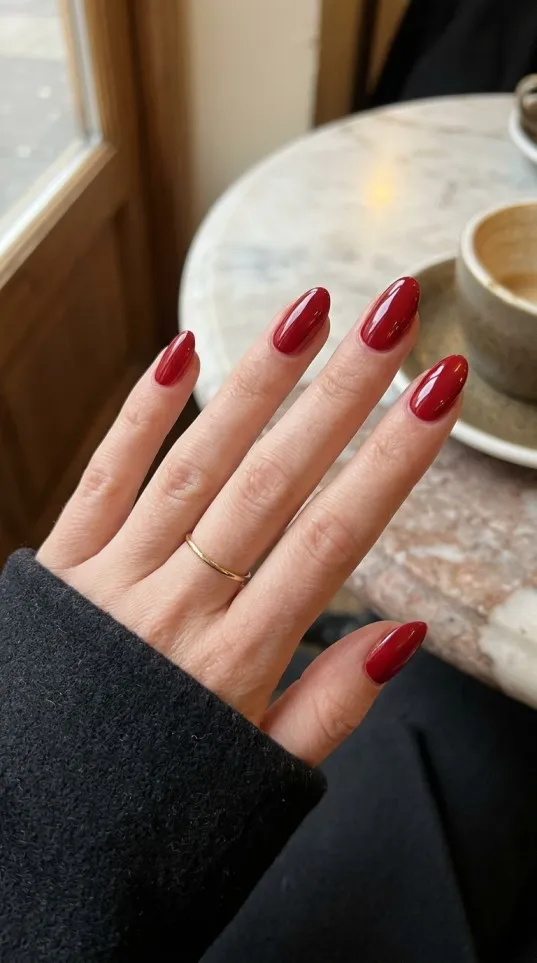
Classic Red
Perfect for parties, dinners, and special occasions.
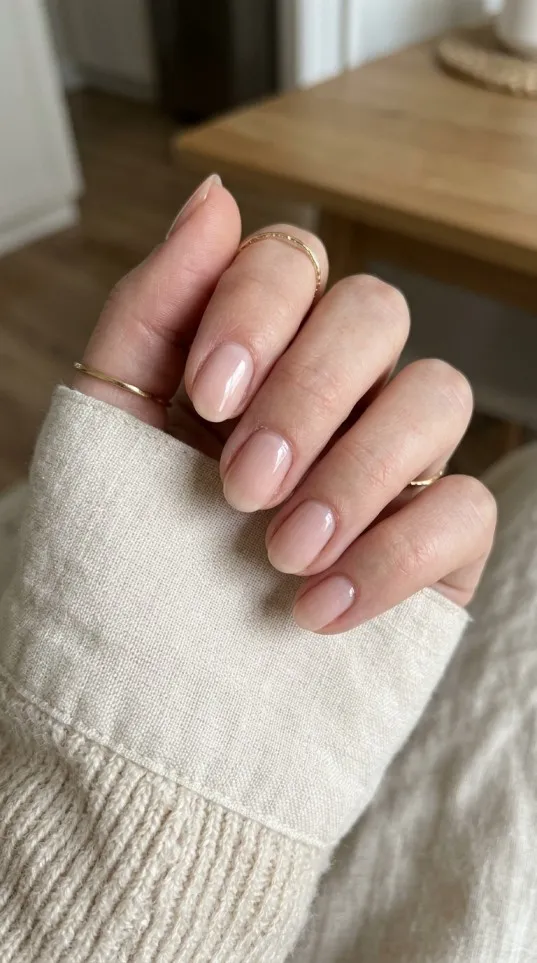
Soft Nude
A clean and professional everyday look.
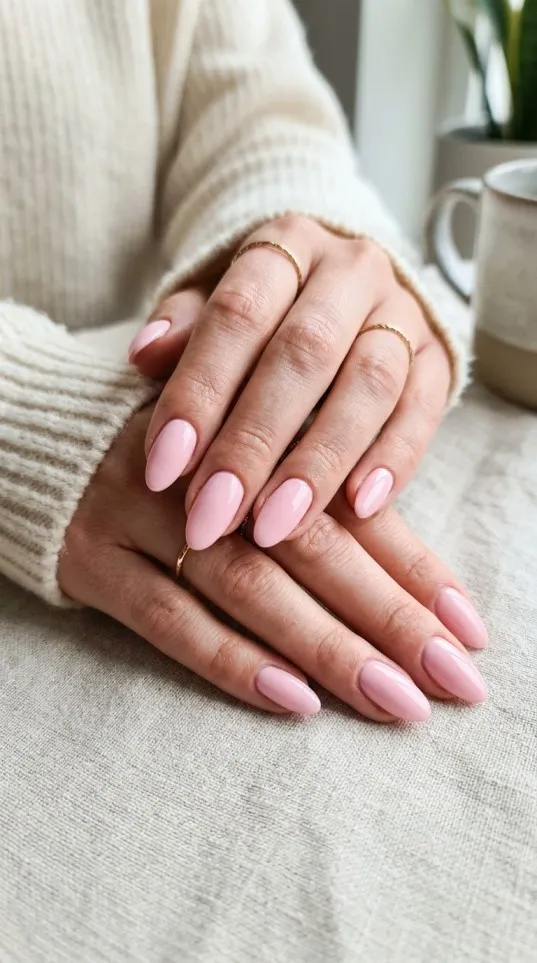
Pastel Pink
A lovely choice for a soft and fresh appearance.
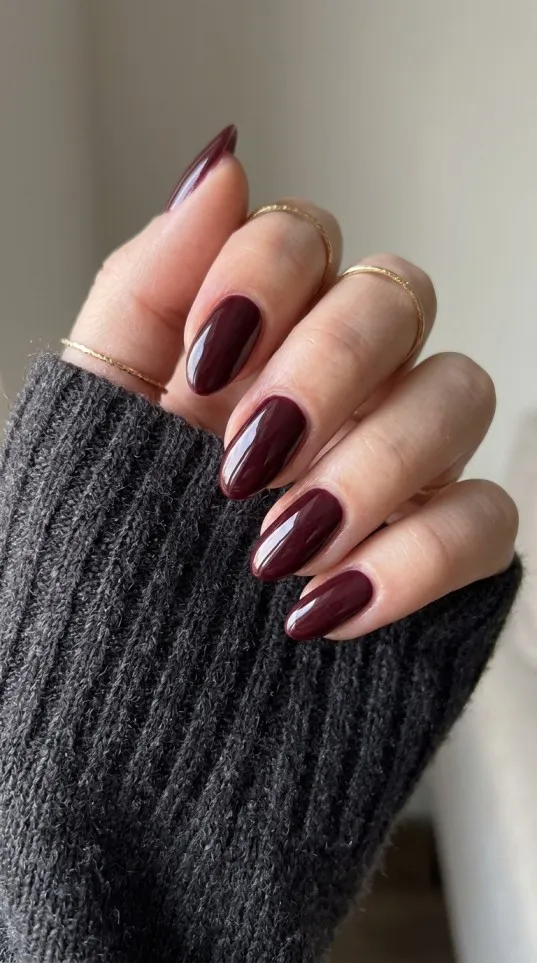
Deep Burgundy
An elegant option for autumn and winter.
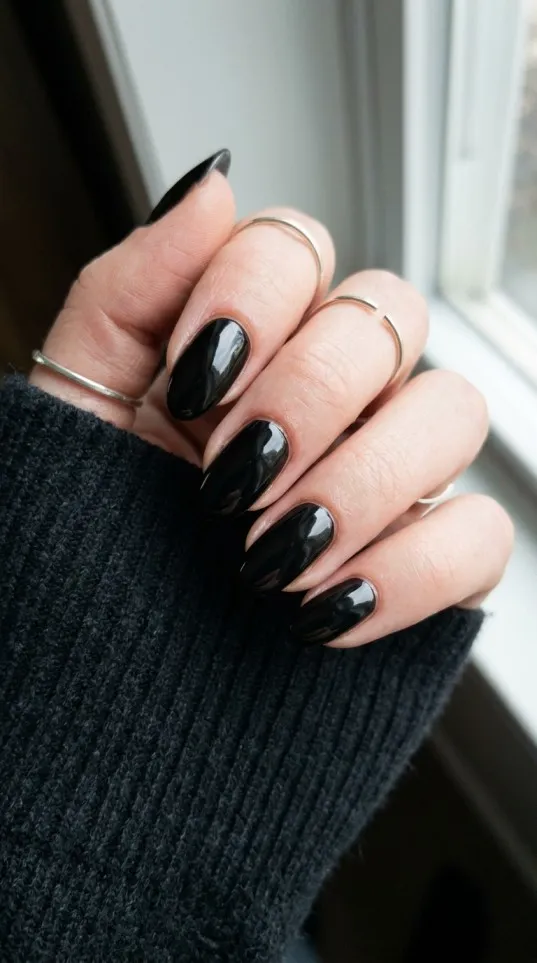
Glossy Black
Ideal for a bold and fashionable style.
Milky White
Beautiful for minimalist nail designs.
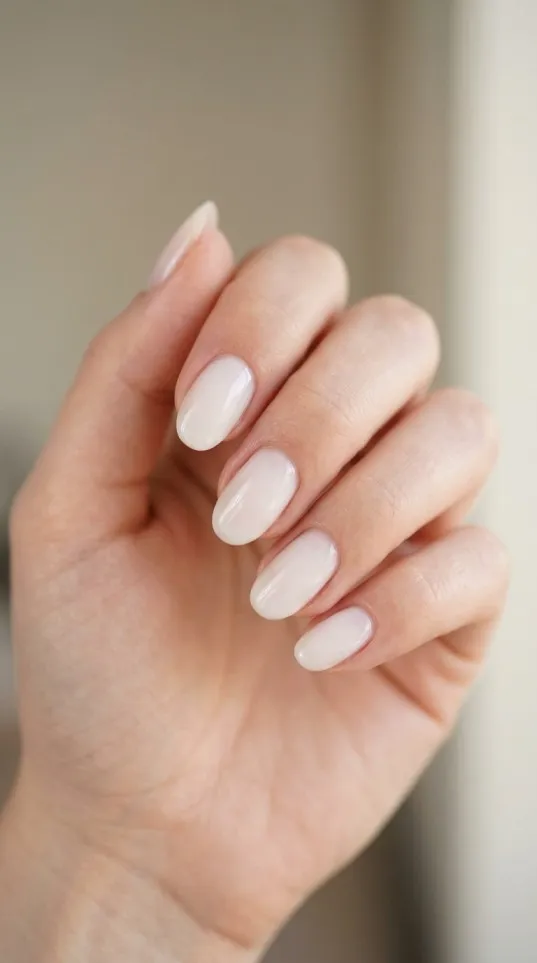
You can also experiment with glitter, metallic-effect regular lacquer, and colourful French tips.
The best part is that you can remove these temporary designs whenever you want, provided you use a remover compatible with your gel manicure.
Common Mistakes to Avoid When Applying Nail Polish on Gel Nails
Even a simple manicure can go wrong if you rush the process.
Here are some mistakes worth avoiding.
1. Painting Over Damaged Gel
Never use regular polish to hide lifting, cracks, or possible nail infections.
Damaged areas should be assessed before adding another coating.
2. Applying Thick Layers
Thick coats take longer to dry and are more likely to smudge.
Always apply thin, even layers.
3. Not Allowing Enough Drying Time
Regular nail polish needs air-drying time.
Using a UV lamp does not turn ordinary nail lacquer into cured gel.
4. Using the Wrong Nail Polish Remover
Some removers can dull or affect certain gel finishes.
Choose a compatible acetone-free remover for the temporary regular polish layer and follow your gel manufacturer’s instructions.
5. Peeling Off the Polish
Do not pick, scratch, or forcefully peel the layers from your nails.
This can disturb the underlying gel and potentially damage the natural nail.
The American Academy of Dermatology’s gel manicure advice also recommends avoiding picking off gel polish.
How to Make Nail Polish Last Longer on Gel Nails
If you want your manicure to remain attractive for several days, follow these simple tips.
- Clean your nails before application.
- Use a suitable base coat.
- Apply thin layers of colour.
- Allow each layer to dry properly.
- Finish with a quality regular top coat.
- Avoid prolonged exposure to hot water immediately after application.
- Wear protective gloves when cleaning or washing dishes.
- Apply cuticle oil regularly.
- Avoid using your fingernails to open packages or scratch hard surfaces.
One important thing to remember is that applying regular nail polish over gel does not give the new colour the same durability as gel polish.
The temporary colour layer behaves like ordinary nail lacquer and may chip within a few days.
That is perfectly normal.
Recommended Nail Polish Products to Buy Online in the UK
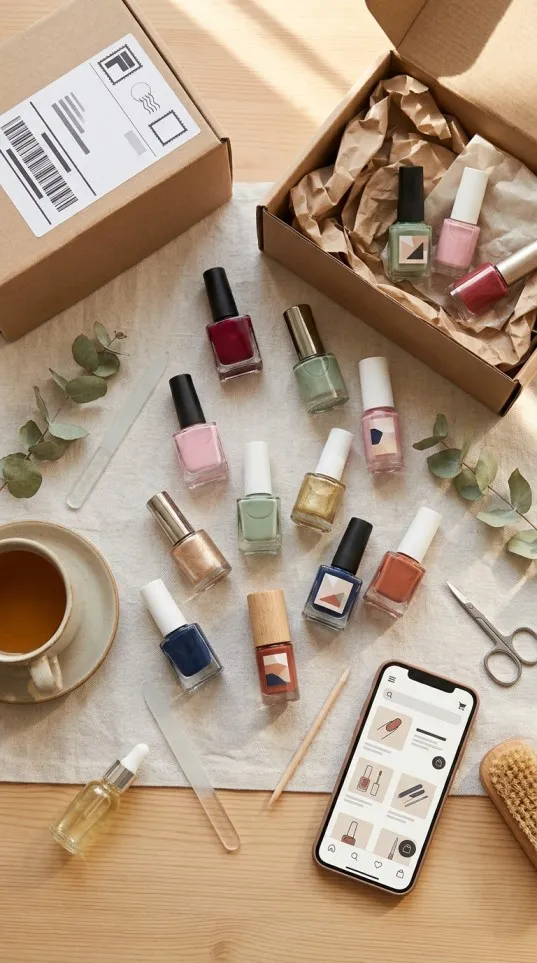
If you are planning to buy nail polish for use over gel nails, look for a product that air-dries, offers smooth coverage, and is easy to remove.
One product worth considering is:
Maybelline New York Superstay 7 Days Nail Polish
Amazon UK listing
- Glossy gel-effect finish.
- Convenient brush application.
- Designed for a long-lasting manicure.
- A practical option for experimenting with nail colours.
The gel-effect description does not mean it is a UV/LED-cured gel product. Check the bottle instructions before purchasing.
My recommendation: If you want to change the colour of your existing gel manicure, choose an ordinary air-drying nail lacquer rather than buying a UV/LED gel polish kit unnecessarily.
Before ordering, check the current price, selected colour, seller, ingredients, and delivery availability. Amazon UK delivery options may differ depending on your location.
Is It Worth Buying Regular Nail Polish for Gel Nails?
Absolutely, if you enjoy changing your nail colour without visiting a salon every time.
A good-quality regular nail polish gives you flexibility, saves time, and allows you to experiment with different looks.
For example, one nude gel manicure can become a red manicure for a party, a pink manicure for a casual outing, or a black manicure for an evening event.
You only need a few essential products:
- Two or three favourite nail polish colours.
- A suitable base coat.
- A regular nail polish top coat.
- Acetone-free nail polish remover.
- Cuticle oil.
These simple products can help you maintain a variety of attractive nail styles without repeatedly replacing your underlying gel manicure.
However, remember that healthy nail care is more important than keeping any manicure looking perfect. Take breaks between manicures when needed, moisturise regularly, and avoid aggressive removal techniques.
For additional advice, explore the American Academy of Dermatology’s nail care recommendations.
Is Nail Polish on Gel Safe for Your Natural Nails?
In general, applying ordinary nail polish over a properly cured and intact gel manicure is a practical way to change your colour temporarily.
The main concern is not simply adding another colour layer. It is making sure the existing gel is healthy and removing the new polish without damaging the manicure.
You should also avoid repeatedly filing, peeling or scraping the gel surface.
If you regularly use gel products, remember that correct curing is essential. Follow the manufacturer’s instructions for the exact product and compatible lamp.
Avoid skin contact with uncured gel products because certain ingredients can cause allergies.
For further information, you can explore professional gel polish application and removal guidance.
Frequently Asked Questions About Nail Polish on Gel Nails
Related BIAB Guides
- White Gel Nail Polish: 10 Beautiful Ideas, Application Tips & Best Products for a Perfect Manicure
- Nail Polish on Gel: Can You Put Regular Nail Polish Over Gel Nails?
- Cat Eye Gel Nail Polish: How It Works, Best Colours and How to Apply It at Home
- How to Remove Gel Nail Polish at Home
Frequently Asked Questions
Yes. You can apply regular nail polish over fully cured gel nails as long as the existing gel manicure is clean, smooth, and free from lifting or damage. Apply thin coats and allow each layer to air-dry.
Yes. Regular nail polish can adhere to a clean, properly finished gel surface. However, its staying power depends on the formula, preparation, and daily activities. It may chip within several days.
Yes. You do not normally need to remove an intact gel manicure before applying regular nail polish. Simply clean the surface and apply your chosen colour.
Usually, one thin base coat, two thin colour coats, and one regular top coat are enough. Allow each layer to dry before applying the next.
Yes. Acetone-free remover is generally a suitable choice for removing temporary regular nail polish over gel. However, check the gel manufacturer’s recommendations and test the remover on one nail first.
It is not recommended to apply gel polish over regular nail polish unless the manufacturer specifically confirms that the products are compatible. Regular polish must air-dry, and trapping it beneath a cured gel layer can cause problems.
Yes. You can apply a regular nail polish top coat over a cured gel manicure. It can add shine and create a smooth surface for your temporary colour.
No. Ordinary nail polish dries through evaporation of its solvents. A UV or LED lamp does not cure regular nail lacquer in the way it cures specially formulated gel products.
Not necessarily. Applying regular polish over an intact gel manicure is generally fine. Problems are more likely to occur through aggressive filing, unsuitable removers, peeling, or applying polish over damaged gel.
Yes. Glitter nail polish can be applied over a fully cured gel manicure. Apply a thin layer and finish with a regular top coat for a smoother appearance.
Final Thoughts: Should You Try Nail Polish on Gel Nails?
Applying regular nail polish on gel nails is a simple and affordable way to enjoy different nail colours without removing your existing manicure.
Whether you love classic red, soft pink, elegant nude, or bold black, regular nail lacquer gives you the freedom to change your appearance whenever you like.
The secret to getting beautiful results is straightforward: start with an intact gel manicure, clean your nails, apply thin layers, allow enough drying time, and use a suitable regular top coat.
Most importantly, remove the temporary polish gently and never pick or peel the underlying gel.
If you want more flexibility with your manicure, investing in a few quality nail polish colours and basic nail care products is a sensible choice.
You do not need a completely new manicure every time you want a new colour. Sometimes, a simple bottle of nail polish is all you need to give your gel nails a fresh look!
. ## 15 Short BIAB Nail Designs for Autumn ### 1. Chocolate Brown Short BIAB Nails Chocolate brown is one of the easiest ways to give your manicure an autumn feel. It looks rich and elegant without needing glitter, patterns, or extra decoration. Choose a deep chocolate shade for a bold look or a lighter milk-chocolate colour for something softer. A glossy top coat makes the colour look smooth and polished. **How to style it:** 1. Keep your nails short with a soft square or rounded shape. 2. Apply your chosen brown BIAB shade according to its instructions. 3. Cure each layer using the recommended lamp and curing time. 4. Finish with a compatible glossy top coat. This design is ideal for everyday wear, office outfits, and weekend plans. ### 2. Short Burgundy BIAB Nails Burgundy is a classic autumn colour because it feels rich without being too bright. It suits short nails particularly well, creating a clean and elegant appearance. You can choose a deep wine red for a dramatic finish or a softer berry shade for a more relaxed look. For extra detail, add one tiny gold-coloured accent using a compatible nail-art product. Alternatively, keep every nail the same colour for a simple, timeless manicure. **Best for:** Dinner dates, autumn weddings, work events, and anyone who loves darker nail colours. ### 3. Nude Short BIAB Nails If you prefer a natural manicure, nude BIAB nails are an excellent choice. Beige, pink nude, and warm milky shades make short nails look tidy without drawing too much attention. This design also works well when you want your nails to match several outfits. Try a sheer pink-beige colour with a glossy finish. If you like a little more coverage, choose a creamy nude shade that complements your skin tone. **Style tip:** A neat cuticle area and evenly shaped nail edges can make a simple nude manicure look professionally finished. ### 4. Short BIAB Nails with Autumn French Tips French tips do not have to be white. For autumn, replace the traditional white tip with chocolate brown, burgundy, terracotta, or olive green. On short nails, thin tips often look more balanced than thick ones. You can use the same colour on every nail or choose a different autumn shade for each fingertip. **How to create the look:** 1. Start with a nude or sheer pink base. 2. Shape the nails evenly. 3. Paint a thin curved tip in your chosen autumn colour. 4. Apply a compatible top coat. The result is a modern version of the French manicure that works with both casual and dressy outfits. Explore more ideas for a [coloured French manicure](https://www.google.com/search?q=autumn+coloured+French+tip+nails). ### 5. Burnt Orange Short BIAB Nails Burnt orange brings warmth to an autumn manicure. It takes inspiration from falling leaves, pumpkins, and the changing colours of the season. For a bold look, paint every nail burnt orange. If you prefer a softer design, combine orange with nude or cream. This colour looks especially lovely on short, rounded nails because the overall effect remains neat rather than overpowering. You can also add a small leaf detail to one nail while leaving the rest plain. ### 6. Olive Green Short BIAB Nails Olive green is a stylish alternative to brown and burgundy. It has an earthy appearance that works well with neutral clothes and autumn layers. Choose a muted olive shade for an understated look or a darker forest green for more contrast. One simple design is to paint four nails olive green and use a creamy nude shade on the remaining nail. You can leave it plain or add a tiny green leaf. **Best for:** Minimalist nail lovers, neutral outfits, and people who want something different from traditional autumn reds. ### 7. Short BIAB Nails with Tiny Autumn Leaves Leaf nail art is a lovely way to celebrate the season without covering your nails in complicated patterns. Start with a nude, beige, or milky base. Add one or two tiny leaves in brown, rust, or burnt orange on an accent nail. Because the nail surface is small, keep the design simple. A few fine lines can be more attractive than a large, detailed picture. **Step-by-step styling:** 1. Choose a neutral base colour. 2. Apply and cure it according to the product instructions. 3. Use a fine nail-art brush to create a small stem. 4. Add two or three tiny leaf shapes. 5. Seal the design with a compatible top coat. If you are new to nail art, practise the pattern on a nail-art practice sheet before working on your nails. ### 8. Caramel Brown Short BIAB Nails Caramel brown offers a softer alternative to dark chocolate. It looks warm, natural, and easy to wear. This colour is ideal if you want an autumn manicure that does not feel too dark. It also pairs beautifully with cream, camel, beige, and denim. For a little variety, use caramel on most nails and add one milky nude accent nail. A glossy finish gives the manicure a fresh look, while a suitable satin-effect top coat can create a softer appearance. ### 9. Short Burgundy and Nude BIAB Nails Combining burgundy with nude creates a balanced manicure that feels both elegant and modern. You could paint three nails burgundy and two nude, or use nude as the base for small burgundy dots or French tips. This combination is especially useful when you want darker autumn colours without making the entire manicure look heavy. Keep the nail shapes consistent so the different colours look intentional. ### 10. Short BIAB Nails with Gold-Coloured Details Gold-coloured accents can make autumn nails feel special without requiring a complicated design. Try a tiny gold line, a small dot, or a delicate accent over a brown, burgundy, or nude base. For short nails, one or two small details are usually enough. Use nail-art products designed for gel systems and follow their curing and compatibility instructions. Avoid applying loose decorative pieces where they may catch on clothing or lift away. **Style tip:** Keep the base colour simple so the small accent remains the main feature. ### 11. Matte Chocolate Short BIAB Nails A matte finish changes the look of chocolate brown without adding any extra nail art. The soft, velvety appearance works particularly well with deep brown, burgundy, olive, and terracotta shades. To achieve the look, use a compatible matte top coat and follow the manufacturer's curing instructions. Not every matte product works with every builder gel system, so check compatibility first. If you are unsure about choosing between glossy and matte, glossy is a versatile everyday option, while matte offers a more understated finish. ### 12. Short BIAB Nails with Tortoiseshell Accents Tortoiseshell nail art combines amber, caramel, dark brown, and black details to create a pattern inspired by tortoiseshell accessories. On short nails, this design works best as an accent rather than a full manicure on every nail. Pair one or two patterned nails with plain chocolate or nude nails. The pattern may require several thin layers and a little practice. If you are doing it yourself, use a nail-art brush and products compatible with your gel system. For a simpler version, use a tortoiseshell-inspired sticker or seek help from a trained nail technician. ### 13. Short Terracotta BIAB Nails Terracotta sits between orange, red, and brown, making it a natural choice for autumn. It offers more colour than nude but is usually softer than bright orange. This makes it a useful option for people who want a warm manicure that still feels easy to wear. You can keep all your nails terracotta or combine the shade with cream and caramel. This design works well for everyday activities because it looks polished without relying on small details that may need frequent touch-ups. ### 14. Short BIAB Nails with Tiny Dots Dot nail art is one of the easiest designs to try on short nails. Start with a nude or cream base and add small brown, burgundy, or burnt-orange dots. You can place one dot near the cuticle, create a neat line of dots, or add a few dots to just one accent nail. A dotting tool can help you achieve more even shapes. If you do not have one, a suitable nail-art tool can also work. Keep the dots small and leave plenty of empty space. This creates a clean design rather than making the nail look crowded. ### 15. Minimalist Mixed Autumn BIAB Nails If you cannot decide on one design, combine several autumn shades in a coordinated manicure. For example: - Chocolate brown on the thumb - Nude on the index finger - Burgundy on the middle finger - Caramel on the ring finger - Olive green on the little finger You can also use the same base colour on every nail and add different tiny details to each one. The key is to choose colours that work together. Warm browns, burgundy, caramel, and burnt orange usually create a harmonious autumn palette. ## Which Nail Shape Looks Best on Short BIAB Nails? The best nail shape depends on your natural nails, finger shape, and personal preference. However, three shapes are especially practical for short autumn manicures. ### Short Square Nails Square nails have straight sides and a relatively flat free edge. They look neat and modern, particularly with chocolate brown, nude, and French-tip designs. If your nail corners catch on clothing, ask your nail technician to soften them slightly. ### Short Squoval Nails Squoval nails combine a square shape with softly rounded corners. They are a versatile choice if you want the neat appearance of square nails without sharp corners. This shape works well with almost every autumn colour, including burgundy, olive, and terracotta. ### Short Round Nails Round nails follow the natural curve of the fingertip. They are a good option for people who prefer a simple, natural-looking manicure. Nude BIAB, caramel brown, and minimalist leaf designs look particularly attractive on this shape. ## How to Do Short Autumn BIAB Nails at Home Creating **short BIAB nail designs for autumn** at home requires the correct products, careful preparation, and attention to safety. ### Step 1: Choose Your BIAB Products Select a builder gel system suitable for your skill level. Check whether the product is intended to be used as a base, an overlay, or a colour product. You may also need a compatible base coat, top coat, nail file, cuticle pusher, cleanser, and a suitable curing lamp. Follow the product manufacturer's instructions rather than assuming that every BIAB product works in the same way. ### Step 2: Prepare Your Natural Nails Remove old polish and gently shape your nails. Clean the nail plate according to the product instructions, taking care not to over-file the natural nail. Avoid cutting or aggressively pushing back living cuticle tissue. Keep the nail surface clean and dry before application. ### Step 3: Apply the Builder Gel Carefully Apply only the layers and thickness recommended by the manufacturer. Keep gel away from the skin and surrounding cuticle area. Skin contact with uncured gel products can contribute to allergic reactions. If gel touches your skin, remove it before curing according to the manufacturer's safety instructions. Never cure gel over skin contact, and do not use a lamp that is incompatible with the product. ### Step 4: Cure Using the Correct Lamp Cure the product for the exact time specified by the manufacturer using the recommended lamp. A gel that feels hard on the surface is not necessarily fully cured. Do not guess the curing time or substitute an unsuitable lamp. If you cannot confirm that your product and lamp are compatible, ask the manufacturer or a trained nail professional for advice. ### Step 5: Add Your Autumn Design Once the builder layer is ready, add your chosen autumn colour or nail art according to the system's instructions. For beginners, a solid chocolate shade, nude French tip, or simple dot design is easier to manage than a detailed tortoiseshell pattern. ### Step 6: Finish and Maintain Your Nails Apply a compatible top coat and cure as directed. If the system requires a final cleansing step, follow the product instructions. Apply cuticle oil to the surrounding skin after the manicure is complete. Avoid picking, peeling, or forcefully removing lifted product. For safe removal, follow the manufacturer's instructions or visit a trained nail technician. Some builder gels require filing, while others are designed for soaking off. For further guidance, consult the [British Association of Dermatologists](https://www.bad.org.uk/) and its resources on contact dermatitis. ## Products You May Need for Autumn BIAB Nail Designs If you plan to create these looks at home, choose products based on the gel system you intend to use. Buying a large kit is not always necessary; a few compatible essentials may be enough. ### BIAB Builder Gel A suitable builder gel provides the structure for your manicure. Check the product's intended use, application instructions, removal method, and compatible lamp before purchasing. ### Autumn Gel Colours Chocolate brown, burgundy, terracotta, nude, and olive are useful shades for creating several different autumn designs. You do not need every colour immediately. Start with two or three shades that you will wear often. ### Nail-Art Brush A fine brush can help create French tips, leaves, and thin lines. A dotting tool is useful for simple dot patterns. ### Compatible Top Coat A glossy or matte top coat changes the final appearance of your manicure. Choose one designed to work with your builder gel system. ### Where to Buy BIAB Nail Products in the UK You can compare available products through [Amazon UK BIAB nail kits](https://www.amazon.co.uk/s?k=BIAB+nail+kit) and [Amazon UK builder gel products](https://www.amazon.co.uk/s?k=builder+gel+nails). Before buying, check the brand, ingredient information, instructions, lamp requirements, customer reviews, and return policy. Avoid choosing a product based on price alone. A complete kit can be convenient, but make sure the included lamp is suitable for the specific gel. If you are a beginner, consider professional application until you understand the preparation, curing, and removal process. ## How to Make Short Autumn BIAB Nails Last Longer A beautiful manicure needs proper care. Although wear time depends on your nails, the product, application, and daily activities, these habits may help maintain your BIAB manicure. - **Keep your nails dry when appropriate:** Avoid prolonged water exposure, particularly immediately after application. - **Use cuticle oil:** Apply it regularly to help condition the surrounding skin. - **Wear gloves for cleaning:** Household cleaning products and prolonged wet work can affect your nails and surrounding skin. - **Do not use your nails as tools:** Opening cans or scraping hard surfaces can cause cracks or lifting. - **Never pick off BIAB:** Pulling product away can remove layers of your natural nail. - **Arrange maintenance when needed:** Have lifting or damage assessed instead of covering it with another layer. BIAB does not guarantee stronger nails or prevent all breakage. If you notice pain, swelling, itching, or a rash around your nails, stop using the product and seek appropriate medical advice. ## Common Mistakes to Avoid with Short BIAB Nails Even a simple design can be difficult to maintain if the application is rushed. Avoid these common mistakes. ### Applying Too Much Product Thick layers may not cure properly. Follow the product's recommended application thickness and curing instructions. ### Letting Gel Touch the Skin Gel on the skin can increase the risk of developing an allergy. Keep the product within the nail boundaries and remove accidental contact before curing. ### Choosing Too Many Colours A short nail offers limited space for detailed designs. Using one main colour with one accent shade often creates a more balanced result. ### Removing BIAB by Peeling Peeling or forcing off builder gel can damage the natural nail plate. Use the removal method specified for the product. ### Ignoring Nail Damage If your nails become painful, unusually thin, or damaged, avoid applying more product until the problem has been assessed. ## Frequently Asked Questions About Short BIAB Nail Designs Autumn ### 1. What are the best short BIAB nail designs for autumn? Chocolate brown, burgundy, nude French tips, burnt orange, olive green, and tiny leaf designs are versatile choices. The best design depends on whether you prefer a natural manicure, a bold colour, or a little nail art. ### 2. Which BIAB colours are best for autumn? Popular autumn BIAB colours include chocolate brown, wine red, burgundy, terracotta, caramel, nude, and olive green. These shades work well alone or in simple colour combinations. ### 3. Can you have BIAB on very short nails? Yes. BIAB can be applied to suitable short natural nails when the product is designed for that use. It can add structure without requiring extensions, although results depend on nail condition and correct application. ### 4. Are short BIAB nails better than long BIAB nails? Neither is automatically better. Short nails can be easier to manage for people who type, work with their hands, or prefer a low-maintenance look. Longer nails provide more room for detailed nail art but may be less practical for some activities. ### 5. How long do short BIAB nails last? Wear time varies according to the product, nail condition, application, and aftercare. Many BIAB manicures are maintained over several weeks, but you should follow the product's recommended maintenance schedule and have lifting or damage addressed promptly. ### 6. Can I do autumn BIAB nail designs at home? Yes, if you have the right products, compatible curing lamp, and sufficient training. Solid colours and simple dots are easier to attempt than detailed nail art. Incorrect curing and skin contact with uncured gel are important safety risks. ### 7. Do short BIAB nails need extensions? No. BIAB is often used as an overlay on natural nails. Extensions are only needed when you specifically want additional length and choose a suitable system. ### 8. What is the easiest autumn BIAB nail design for beginners? A single chocolate-brown, nude, or burgundy manicure is a good starting point. Once you are comfortable with application, you can try thin French tips or tiny dots. ### 9. Can BIAB damage natural nails? BIAB does not automatically damage nails, but over-filing, picking, forceful removal, or incorrect application can cause damage. Some people may also develop allergies to gel ingredients, particularly when uncured product contacts the skin. ### 10. Can I use regular nail polish over BIAB? This depends on the condition of the BIAB surface and the products used. Follow the builder gel manufacturer's instructions and ensure the surface is properly prepared. Do not apply incompatible products or assume that every layer can be cured together. ### 11. Are short autumn BIAB nails suitable for work? Yes. Nude, caramel, chocolate brown, olive, and thin French tips are practical choices for many workplaces. A simple glossy finish can look professional without being too decorative. ### 12. How do I remove BIAB safely? Removal depends on whether the specific builder gel is soak-off or file-off. Follow the manufacturer's instructions or use a trained nail technician. Never peel, bite, or force the product off. ## Final Thoughts on Short BIAB Nail Designs for Autumn The best **short BIAB nail designs autumn** looks do not need to be complicated. A glossy chocolate manicure, a soft nude base, burgundy French tips, or tiny autumn leaves can all make short nails look polished and stylish. If you are new to BIAB, start with one or two autumn colours and a simple design. Choose products that are compatible with each other, follow the curing instructions carefully, and never rush removal. short biab nail designs autumn](https://thebiabnails.co.uk/wp-content/uploads/2026/10/short_biab_nail_designs_autumn_20261014003631-1-768x428.webp)
2 Comments