Gel Nail Strips: The Easy Way to Get a Salon-Looking Manicure at Home


If you love the glossy, polished look of a gel manicure but do not always have the time, money, or patience for a salon appointment, gel nail strips can be an incredibly convenient alternative.
Instead of painting several layers of polish and waiting for each coat to dry, you simply choose a strip that matches your nail, apply it, smooth it down, and—depending on the type you buy—either let it set or cure it under a suitable lamp.
That sounds simple, and it really can be.
The first time someone tries gel nail strips, though, there is usually a small learning curve. Getting the strip close to the cuticle without touching the skin, choosing the correct size, and smoothing out the edges can make the difference between a manicure that looks professionally done and one that starts lifting after a couple of days.
The good news is that once you understand the process, applying gel nail strips at home becomes much easier.
This complete guide explains what gel nail strips are, how they work, how they differ from ordinary nail stickers and gel polish, how to apply them step by step, how to remove them properly, how to choose the right set, and how to get longer-lasting results.
What Are Gel Nail Strips?
Gel nail strips are thin, flexible pieces of nail product designed to fit directly over your natural nails. They come in different colours, finishes, patterns, and shapes.
Depending on the product, you may find:
- Fully cured gel nail strips
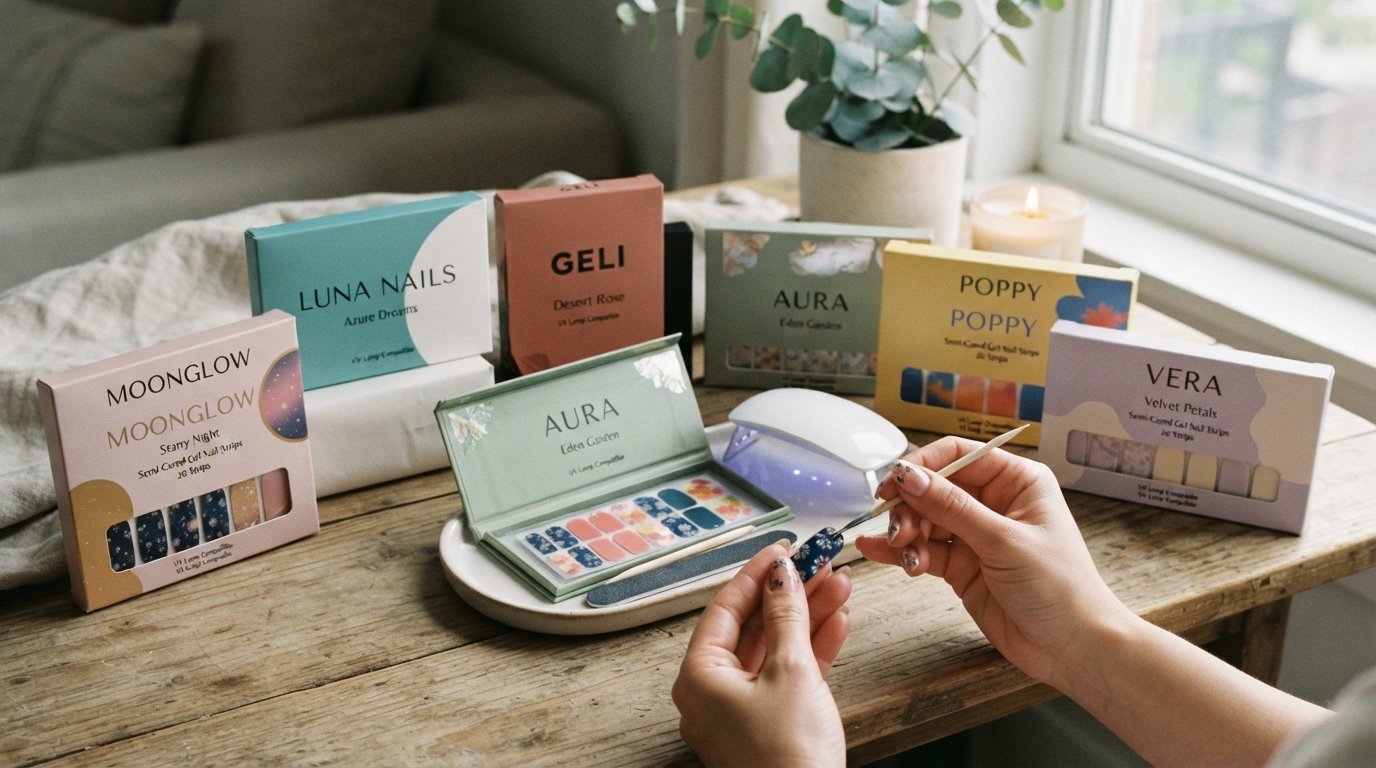
- Semi-cured gel strips
- Gel nail wraps
- Gel polish strips
- Nail polish stickers with a gel-like finish
Some are simply pressed onto the nail and shaped with a file. Others contain partially cured gel that needs to be finished under a UV or LED nail lamp.
The important thing is to read the instructions for the particular product you purchase because application and curing requirements can differ.


Unlike a traditional bottle of nail polish, you are not painting the colour onto the nail yourself. The colour or design is already formed into the strip.
That is one reason they have become popular with people who want an attractive manicure without spending a long time doing detailed nail art.
How Do Gel Nail Strips Work?
The basic idea is straightforward.
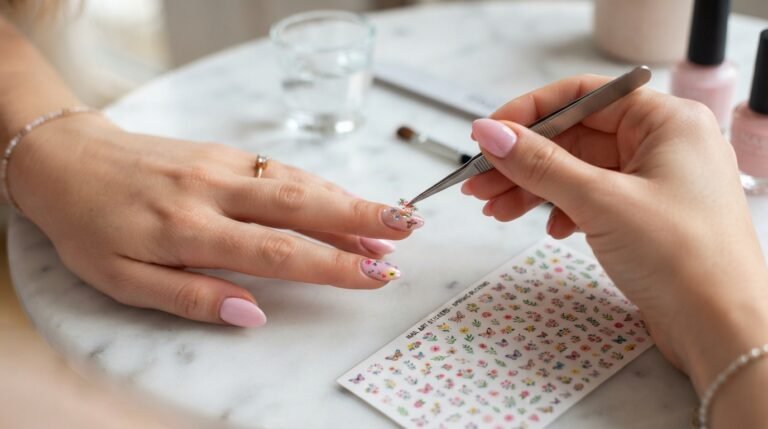
A strip contains the colour, pattern, or gel material that will sit over your natural nail. You peel it from its backing, position it over the nail, press it down, remove or trim the excess, and smooth the edge.
With semi-cured gel nail strips, the product may still need to be cured with the appropriate lamp after application. Some manufacturers recommend curing for a particular number of seconds, so always follow the instructions supplied with your strips and lamp.
For example, application guides for semi-cured strips commonly show a process of cleaning the nail, selecting a suitable size, applying and trimming the strip, then curing and filing the edge.
The result is designed to give you the appearance of a polished, glossy manicure without having to paint the design yourself.
Gel Nail Strips vs Nail Stickers
At first glance, gel nail strips and ordinary nail stickers may look almost identical.
However, they are not necessarily the same thing.
Ordinary nail stickers
Traditional nail stickers are generally decorative products. You apply them to the nail and may add a top coat to improve their appearance or durability.
Gel nail strips
Gel strips are designed to provide more of a manicure-like finish. Depending on the formulation, they may be made from gel material and may require curing.
Some semi-cured gel strips are flexible before curing and become firmer after exposure to the manufacturer’s recommended light.
Therefore, when shopping, don’t assume every product described as a “nail sticker” is a gel strip.
Check the packaging, ingredients, application instructions, and curing requirements.
Why Are Gel Nail Strips So Popular?
There is a reason people keep coming back to them.
1. They are beginner-friendly
You don’t need to be an expert at painting nails.
If you can position a sticker carefully and smooth it down, you already have the basic skills needed.
2. They save time
Traditional manicures can involve:
- Base coat
- Colour coat
- Second colour coat
- Nail art
- Top coat
- Drying time
With gel nail strips, much of the design is already done.
3. You get plenty of designs
You can find strips in:
- French tips
- Nude shades
- Glitter
- Chrome-inspired finishes
- Floral patterns
- Marble effects
- Ombre
- Abstract designs
- Seasonal colours
- Metallic effects
- Minimalist patterns
This makes them especially useful when you want to change your nail look regularly.
4. They are convenient for home use
There is no need to schedule a salon appointment every time you want a fresh design.
You can keep a few favourite sets at home and use them whenever you have an event, holiday, date night, birthday, or simply feel like changing your nails.
What You Need Before Applying Gel Nail Strips
Before beginning, gather everything you need.
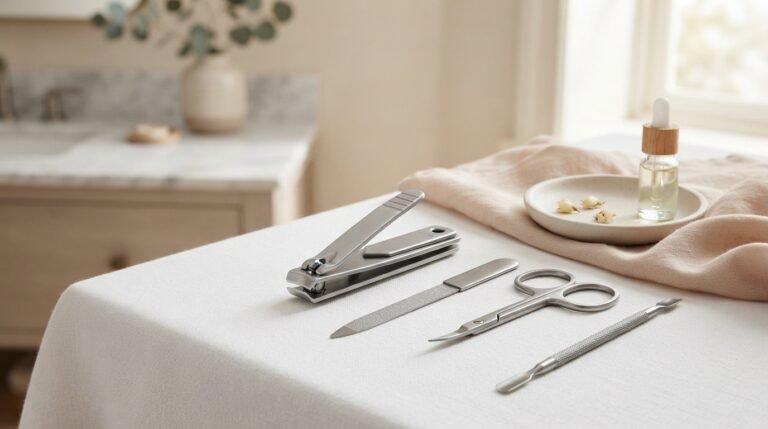
A basic setup may include:
- Gel nail strips
- Nail file
- Nail buffer if recommended
- Cuticle pusher
- Alcohol or nail-prep wipe
- Small nail scissors or clippers, if needed
- UV/LED lamp if your strips require curing
- Cuticle oil for aftercare
Many kits include some of these items.
For example, some semi-cured strip sets include prep pads, files, and manicure sticks along with the strips.
However, don’t assume every kit contains a lamp.
Always check the product description before buying.
Step-by-Step Guide: How to Apply Gel Nail Strips


Now let’s get to the part most people want to know: how to apply gel nail strips properly.
Step 1: Start With Clean, Dry Nails
This step may seem boring, but it is one of the most important.
Wash your hands and make sure your nails are completely dry.
Then remove oil, lotion, dust, and other residue from the nail surface using the preparation method recommended by your product.
Why?
Because excess oil can interfere with adhesion.
Think of it like putting a sticker on a dusty phone screen. It may stick initially, but it is unlikely to stay perfectly attached.
A clean nail gives the strip a better surface to adhere to.
Step 2: Gently Prepare the Cuticles
Push back the cuticles gently if necessary.
Don’t aggressively cut or damage the cuticle.
The American Academy of Dermatology’s guidance on healthy manicures advises avoiding unnecessary cuticle cutting because cuticles help protect the surrounding nail area from infection. (AAD)
The goal is simply to create a clean working area around the nail.
Step 3: Choose the Correct Strip Size
This is where beginners sometimes make a mistake.
Don’t automatically choose the widest strip because you think more coverage is better.
Instead, compare the strip with your natural nail.
Ideally, the strip should cover the nail without extending onto the surrounding skin.
Many application instructions recommend selecting a strip that is slightly narrower than the nail width.
A useful trick
If you are between two sizes, the slightly smaller option is often easier to control than a strip that overlaps onto the skin.
A strip touching the skin can make lifting more likely.
Step 4: Peel the Strip Carefully
Remove the strip from its backing.
Try not to touch the adhesive side excessively with your fingers.
Your fingers contain natural oils, and transferring too much oil onto the adhesive can affect its performance.
Take your time.
There is no prize for applying all ten strips in two minutes.
Step 5: Position It Near the Cuticle
Place the strip over the nail while leaving a small gap between the strip and the cuticle.
Do not press the strip directly onto the cuticle or surrounding skin.
This small detail can make a surprisingly big difference.
If you place the strip too close to the cuticle, it may overlap the skin. As you wash your hands and move your fingers, the edge can start lifting.
Step 6: Press From the Centre Outward
Once the strip is positioned correctly, press it onto the nail.
Start around the middle and work toward the sides.
Smooth it carefully so you do not trap air bubbles underneath.
Pay extra attention to the sidewalls and area near the tip.
Step 7: Remove the Excess
Most strips are longer than your nail because one size needs to accommodate different nail lengths.
Fold or trim the excess according to the instructions for your product.
Some strips can be gently folded over the nail edge and filed away.
Others can be trimmed with nail clippers or scissors.
Application guides for gel strips commonly recommend trimming the excess and then filing the edge smooth.
Step 8: Cure If Required
This step only applies to products that require curing.
If you have semi-cured gel nail strips, follow the manufacturer’s instructions for the recommended UV or LED lamp and curing time.
Do not simply assume that every lamp and every strip combination requires the same time.
Different formulations can have different requirements.
Why curing matters
If a product is designed to be cured and it is not properly cured, the finished manicure may not perform as intended.
More importantly, uncured or improperly cured gel products can increase the risk of skin exposure to reactive ingredients.
The FDA’s nail product safety guidance recommends following product directions and paying attention to warnings because some nail products can cause irritation or allergic reactions. (U.S. Food and Drug Administration)
A Quick Gel Nail Strip Application Checklist
Before you start, remember:
Clean → Size → Position → Press → Trim → Cure if required → File
That simple sequence can become your regular at-home manicure routine.
How Long Do Gel Nail Strips Last?
The answer depends on several things.
These include:
- Product quality
- Nail preparation
- Application technique
- Your natural nail condition
- How often your hands are exposed to water
- Your daily activities
- Whether the strip overlaps the skin
- How carefully the product is removed
Some manufacturers market their strips as long-wearing products, but you should treat any stated wear time as a product-specific claim rather than a guarantee.
A beautifully applied strip on a clean, dry nail may last much longer than one placed over oily nails.
That is why preparation matters so much.
How to Make Gel Nail Strips Last Longer
Want your manicure to look fresh for longer?
Try these simple habits.
Keep the nail dry during application
Don’t apply strips immediately after a shower or while your hands are damp.
Give the nails time to become completely dry.
Don’t apply hand cream beforehand
Cream and oil can interfere with adhesion.
Save your moisturiser and cuticle oil for after the application.
Keep the strip off your skin
The adhesive area should sit on the nail rather than surrounding skin.
Seal the free edge
Smooth and file the tip carefully.
This can help create a cleaner finish.
Don’t pick at lifting edges
If one corner begins lifting, resist the temptation to pull it.
Picking can remove layers of your natural nail along with the product.
How to Remove Gel Nail Strips


Good application matters, but proper removal matters just as much.
One of the worst habits you can develop is peeling off a stubborn manicure aggressively.
Professional nail-care guidance consistently warns against forceful picking and peeling of gel products. OPI’s at-home removal guidance recommends breaking the seal, soaking according to the product instructions, and gently removing softened product rather than scraping aggressively. (opi-us)
Step 1: Don’t Rip the Strip Off
If the strip is firmly attached, don’t simply pull it away.
That can potentially take layers of your natural nail with it.
Step 2: Follow the Product’s Removal Instructions
Different gel nail strips use different adhesive systems.
Some peel away after loosening.
Others may require a remover or soaking process.
Read the instructions that come with your particular product.
Step 3: Work Slowly
If the product does not release easily, stop and give the removal process more time.
The aim is to remove the product—not to win a battle against it.
Step 4: Clean the Nail
Once the strips are removed, gently clean the nail.
Step 5: Moisturise
Finish with cuticle oil or a suitable moisturiser.
Aftercare is especially useful if your nails feel dry after wearing a manicure.
What Happens If You Peel Gel Nail Strips Off?
Imagine you have had your manicure for ten days.
One corner catches on your jumper.
You become impatient.
You pull it.
It comes off.
Great?
Not necessarily.
Aggressive peeling can remove some of the superficial layers of the natural nail along with the product.
Dermatologists have noted that improper removal of gel products can contribute to nail cracking, peeling, white spots, grooves, and weakness. (Cleveland Clinic)
So if you want to enjoy gel nail strips regularly, learn to remove them gently.
Are Gel Nail Strips Safe for Natural Nails?
This depends heavily on the type of product, application, curing, and removal.
Gel products can involve acrylates or methacrylates, ingredients that can cause allergic reactions in some people. The FDA notes that certain nail-product ingredients can cause allergic reactions and recommends reading labels and following directions. (U.S. Food and Drug Administration)
Dermatologists also warn that repeated gel manicures can contribute to nail brittleness, peeling, and cracking, while UV exposure from curing lamps is another consideration. (AAD)
That does not mean you should panic every time you see the word “gel.”
It means you should use the product responsibly.
Good habits include:
- Follow the manufacturer’s instructions.
- Avoid getting uncured gel product on your skin.
- Don’t over-file your natural nail.
- Don’t pick or rip off strips.
- Give damaged nails time to recover.
- Stop using a product if you develop a reaction.
- Read the ingredient information when available.
If you develop redness, swelling, itching, pain, burning, or another unexpected reaction, stop using the product and seek appropriate medical advice. The FDA recommends stopping a cosmetic product when an unexpected reaction occurs and contacting a healthcare professional. (U.S. Food and Drug Administration)
Gel Nail Strips and UV Lamps: What You Should Know
Some gel nail strips require UV or LED curing.
This is an important distinction when shopping.
If you don’t want to use a lamp, look for a product specifically designed to cure without one.
If you are purchasing semi-cured strips, check whether the manufacturer specifies a compatible lamp.
Repeated UV exposure is one reason dermatologists recommend precautions around gel manicures. The AAD suggests considering protection such as broad-spectrum SPF 30+ on the hands before UV curing, or dark opaque gloves with exposed fingertips. (AAD)
The easiest approach is to understand exactly what your product requires before buying it.
How to Choose the Best Gel Nail Strips
With so many options available, shopping can feel overwhelming.
Here are the features worth checking.
1. Nail Size Range
Look for sets with enough different widths to fit your nails.
A good selection can make application much easier.
2. Design
Think about how often you change your style.
If you like minimalist nails, choose nude, sheer, French, or soft pink designs.
If you love nail art, look for glitter, chrome-style effects, flowers, seasonal patterns, or abstract designs.
3. Thickness
Very thin strips may feel lightweight, while thicker products may provide a more substantial appearance.
The right choice is largely personal preference.
4. Flexibility
A flexible strip can be easier to position around the natural curve of your nail.
5. Application Method
Check whether the product:
- Requires no lamp
- Requires LED curing
- Requires UV curing
- Is semi-cured
- Is fully cured
Never guess.
6. Included Accessories
A kit containing a file and prep pads can be convenient, particularly if you are new to nail wraps.
Gel Nail Strips for Different Nail Styles


One of the best things about gel nail strips is the variety.
Nude Gel Nail Strips
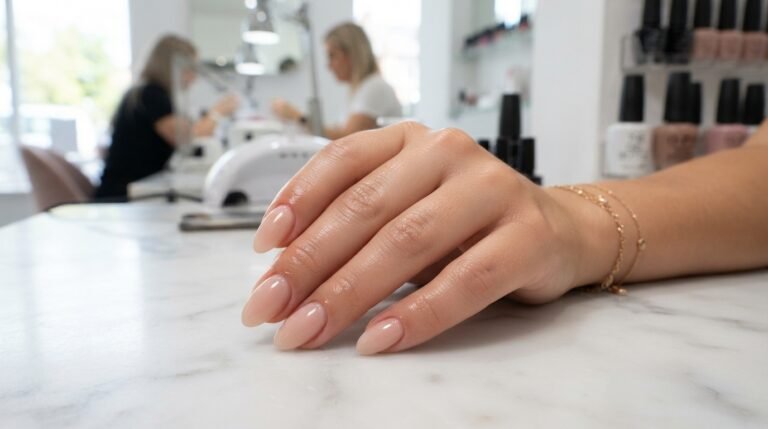
Perfect if you want a clean everyday manicure.
Nude shades work well with casual clothes, office outfits, and special occasions.
French Gel Nail Strips
French tips are timeless.
Instead of carefully painting the white tip yourself, a pre-designed strip gives you the basic shape in seconds.
Glitter Gel Nail Strips
Great for parties, weddings, birthdays, and festive seasons.
You can also use glitter strips on only one or two accent nails.
Floral Gel Nail Strips
Floral designs are particularly popular during spring and summer.
They can give a simple manicure a more playful appearance.
Chrome-Style Gel Nail Strips
If you want a more dramatic finish, metallic and chrome-inspired designs can create a statement look without complicated nail art.
Can You Use Gel Nail Strips on Short Nails?
Absolutely.
In fact, short nails can be very easy to style with wraps.
Choose designs that don’t overwhelm the nail.
Some excellent options include:
- Nude
- French
- Micro-French
- Soft pink
- Milky white
- Minimalist lines
- Small floral patterns
- Subtle glitter
If the strip is too long, simply trim and file the excess according to the product instructions.
Can You Use Gel Nail Strips on Long Nails?
Yes, but you may need to choose a longer strip design or carefully extend the strip over the nail tip according to the manufacturer’s instructions.
Longer nails also experience more leverage and may catch on clothing or objects more easily.
So don’t judge a product solely by how long it lasts on someone else’s nails.
Your lifestyle matters.
Someone who works at a desk may have a very different experience from someone who works with their hands all day.
Gel Nail Strips vs Gel Polish
Which one should you choose?
| Feature | Gel Nail Strips | Gel Polish |
|---|---|---|
| Application | Pre-designed strip | Painted onto nail |
| Nail art | Often already included | Usually done manually |
| Skill level | Beginner-friendly | Requires more technique |
| Drying | Depends on product | Usually requires curing |
| Designs | Wide variety | Unlimited with skill |
| Mess | Usually low | Can be messy |
| Removal | Product-specific | Usually soak/removal process |
| Home use | Very convenient | Requires more equipment |
If you enjoy painting your own nails and experimenting with colour, gel polish may be more satisfying.
But if you want a quick, neat, ready-made design, gel strips are worth considering.
A Beginner’s Mistake That Is Easy to Fix
Let’s say you have chosen a beautiful set of gel nail strips.
You clean your nails.
You pick your sizes.
You start applying them.
But on the third finger, the strip touches the skin around the nail.
You press it down anyway.
Two days later, that corner starts lifting.
This is one of those mistakes that seems small but can make a big difference.
The solution is simple:
Leave a tiny gap between the strip and your cuticle.
It may feel like you are leaving too much space, but the finished manicure can actually look cleaner—and you reduce the chance of the product sitting on your skin.
How to Make Your Home Manicure Look Professional
The difference between an average application and a polished one often comes down to small details.
Take your time with sizing
Don’t rush this step.
Work one nail at a time
This prevents you from mixing up sizes.
Check the sidewalls
Make sure the strip is lying flat.
Smooth before curing
If your product requires curing, make sure it is properly positioned beforehand.
File gently
Use the file to refine the edge rather than aggressively filing the natural nail.
Clean up before finishing
Remove any unwanted residue around the nail.
These small steps can make gel nail strips look far more expensive than they actually are.
Are Gel Nail Strips Worth Buying?
For many people, the appeal is simple: convenience.
You get a ready-made manicure design without needing to master nail painting or nail art.
A good set can also give you the flexibility to experiment with different looks without booking a salon appointment every time.
However, don’t buy based only on attractive photographs.
Before purchasing, check:
- Number of strips included
- Size selection
- Whether a lamp is required
- Curing instructions
- Removal method
- Included accessories
- Ingredient information
- Manufacturer instructions
- Customer reviews where available
The best purchase is one that fits your routine.
If you travel frequently, for example, you may prefer a no-lamp option.
If you already own a suitable lamp and love a gel finish, semi-cured gel nail strips may be more appealing.
If you simply want decorative nails for a weekend, fully cured or adhesive wraps may be enough.
A Smart Shopping Checklist for Gel Nail Strips
Before clicking “buy,” ask yourself:
Do I want a gel strip or an ordinary nail sticker?
Does it require UV/LED curing?
Do I already have the necessary lamp?
Does the kit include nail-prep products?
Are there enough sizes for my nails?
How does the manufacturer recommend removing it?
Can I find the full ingredient information?
Does the product come from a reputable seller?
Taking two minutes to answer these questions can prevent a disappointing purchase.
The FDA recommends reading cosmetic labels, ingredients, warnings, and directions rather than assuming that marketing terms automatically mean a product is safe or suitable for everyone. (U.S. Food and Drug Administration)
Frequently Asked Questions About Gel Nail Strips
Do gel nail strips need a UV lamp?
Some do and some don’t.
Semi-cured gel strips commonly require curing under a UV/LED lamp, while other nail wraps are designed to be used without one.
Always follow the instructions for the specific product.
Are gel nail strips better than gel polish?
Neither is automatically better for everyone.
Gel nail strips are convenient and make nail art easier, while gel polish offers more freedom for people who enjoy painting and creating their own designs.
Your choice depends on your preferred application method, budget, time, and nail routine.
How long do gel nail strips last?
Wear time varies considerably between products and users.
Preparation, application, nail condition, water exposure, and daily activities can all affect how long they remain attractive.
Can I shower with gel nail strips?
Generally, once properly applied according to the product instructions, they are designed to withstand normal daily activities. However, prolonged exposure to water and heat can contribute to lifting for some products.
Can I use gel nail strips on toenails?
Some products are designed for fingernails, while others may be suitable for toenails.
Check the manufacturer’s instructions before using a particular strip on your toes.
Can gel nail strips damage natural nails?
Improper application, aggressive filing, picking, or removal can contribute to nail damage.
Dermatologists note that gel manicures can contribute to brittleness, peeling, and cracking, particularly with repeated use. (AAD)
What should I do if my nail strip starts lifting?
Don’t pull it off.
If the product is still suitable to wear, follow the manufacturer’s guidance. If it has significantly lifted, removing it properly and replacing it may be better than repeatedly catching or picking at the loose edge.
Can I put nail polish over gel nail strips?
It depends on the product.
Some may allow it, while others are designed to be worn as supplied.
Check the manufacturer’s instructions before adding another product on top.
Final Thoughts: Are Gel Nail Strips Right for You?
Gel nail strips offer a simple way to enjoy attractive nails without spending as much time painting, decorating, and correcting mistakes.
For beginners, they can be particularly appealing because the design is already prepared. Instead of trying to paint a perfect French tip or create detailed nail art with a tiny brush, you can choose a ready-made design and apply it directly to the nail.
The key is not to rush.
Prepare your nails properly. Choose the correct size. Leave a small gap around the cuticle. Press the strip firmly and evenly. Trim or file the excess carefully. If your product requires curing, use the recommended lamp and follow its curing instructions.
And perhaps most importantly, remove your gel nail strips gently.
A beautiful manicure should not come at the expense of your natural nails.
If you are shopping for your first set, start with a design you genuinely love and a product with clear instructions. A kit that includes different sizes, preparation supplies, and a nail file can make the first experience much easier.
Once you get comfortable with the process, you can start experimenting with French gel nail strips, glitter wraps, nude gel strips, floral designs, chrome finishes, seasonal nail art, and minimalist styles.
The result can be a polished-looking manicure from the comfort of your own home—without needing to become a professional nail artist.
Just remember: read the instructions, protect your natural nails, and choose a product that fits your lifestyle. That is the best way to get the most from your gel nail strips.