Art Brush for Nails: 9 Types, Uses and Tips for Beautiful Nail Designs
Creating beautiful nail designs at home becomes much easier when you have the right tools. Whether you love simple French tips, delicate flowers, colourful swirls or detailed patterns, a good art brush for nails can make a big difference. It gives you better control over your nail polish or gel and helps you create designs that look neat and professional.
However, choosing the right brush can feel confusing, especially when you see so many different shapes, sizes and styles online. Some brushes are made for drawing thin lines, while others are better for filling colours, painting flowers or creating smooth gradients.
The good news is that you do not need dozens of expensive brushes to get started. A small collection of quality nail art brushes can help you create many different designs, even if you are a complete beginner.
In this guide, we will explain the different types of nail brushes, how to choose the best ones, how to use them step by step and how to keep them in good condition. We will also look at useful buying tips and nail art brush sets available online in the UK.
What Is an Art Brush for Nails?
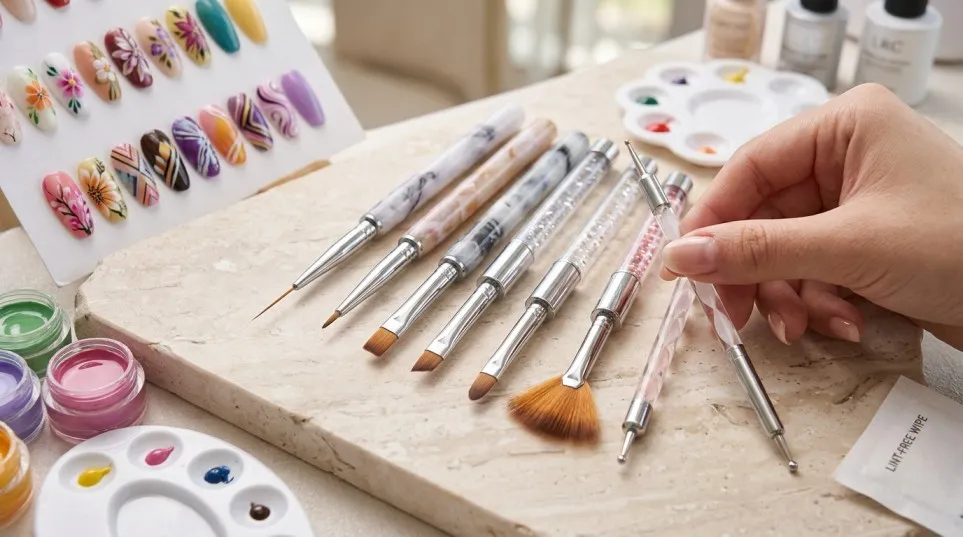
An art brush for nails is a small brush specially designed for creating decorative patterns and detailed artwork on fingernails. Unlike ordinary makeup or painting brushes, these brushes have shapes and bristles designed to work on the small surface of a nail.
They allow you to create different effects, including:
- Fine lines and stripes.
- Flowers and leaves.
- French manicure tips.
- Swirls and curved patterns.
- Geometric shapes.
- Animal prints.
- Small hearts and stars.
- Ombre and blended colour effects.
- Detailed nail illustrations.
You can use nail art brushes with suitable regular nail polish, gel polish, painting gel or other nail art products. However, always check that your brush is compatible with the product you are using.
For example, if you enjoy creating delicate floral designs, a small detail brush will be more useful than a wide flat brush. Similarly, if you love drawing long, thin lines, a liner brush will give you better control.
9 Different Types of Nail Art Brushes and Their Uses
Before buying a brush set, it is helpful to understand what each brush does. Different brush shapes are designed for different techniques, so choosing the right one can save time and improve your results.
1. Liner Brush

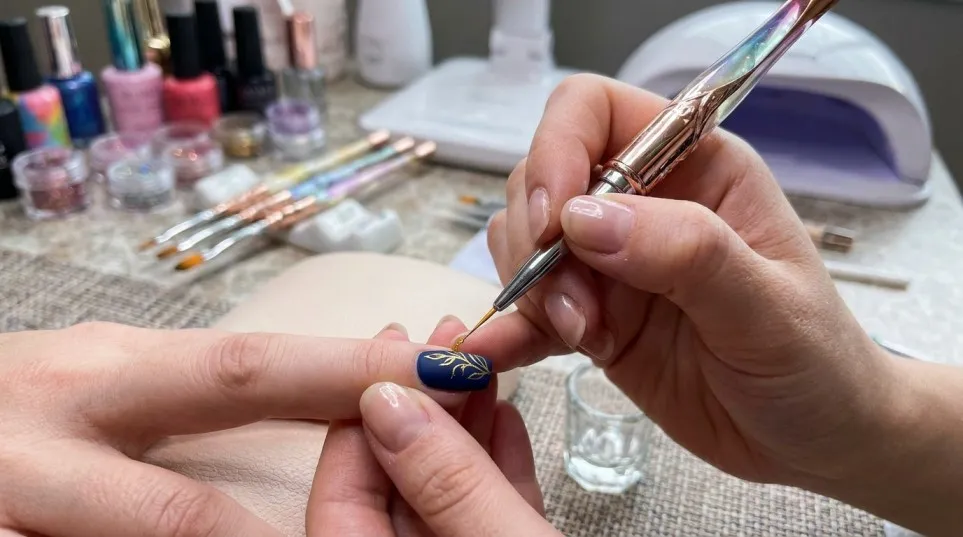
A liner brush is one of the most useful tools for detailed nail designs. It has long, thin bristles that help you draw smooth lines across the nail.
It is particularly useful for:
- French tip designs.
- Thin stripes.
- Curved lines.
- Swirls and abstract patterns.
- Fine outlines.
- Simple lettering.
A shorter liner is generally easier for beginners because it offers more control. Longer liners can help experienced users create flowing lines without repeatedly reloading the brush.
Beginner tip: Start by practising straight lines on a nail practice tip. Once you feel comfortable, move on to curves and swirls.
2. Detail Brush
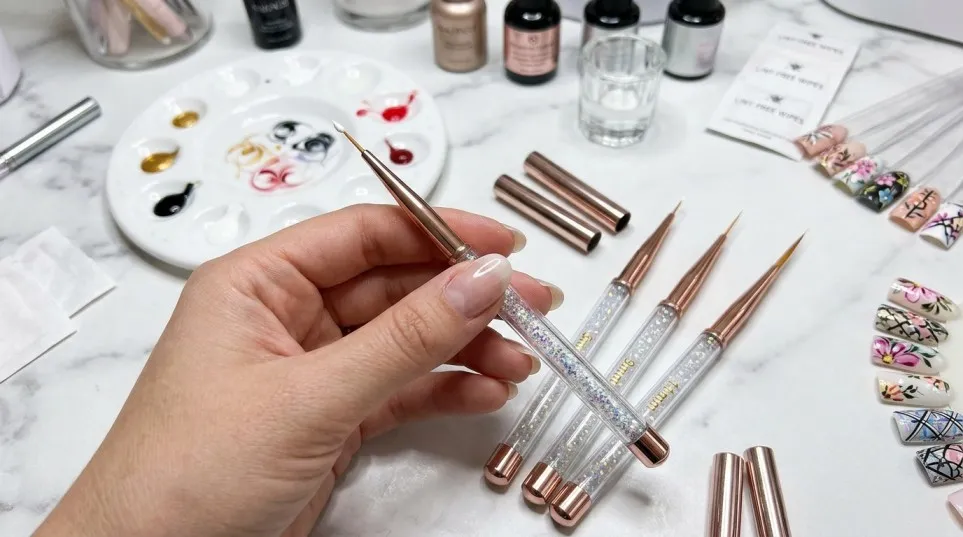
A detail brush is designed for small and precise artwork. It usually has short bristles with a fine pointed end, making it suitable for delicate designs.
You can use it to paint:
- Tiny flowers.
- Small hearts.
- Leaves.
- Animal patterns.
- Small decorative shapes.
- Fine outlines and corrections.
If you enjoy creating detailed nail art, this is one of the first brushes worth adding to your collection.
For example, imagine painting a small white flower on a pink nail. A large brush may spread too much colour, but a fine detail brush makes it easier to control each petal.
3. Flat Nail Art Brush

A flat brush has a straight, square-shaped edge. It is useful when you need to cover a slightly wider area or create designs using broader strokes.
Common uses include:
- Filling larger shapes.
- Painting colour blocks.
- Creating one-stroke flowers.
- Applying certain gel art products.
- Blending colours.
Flat brushes are also useful for some decorative techniques where you want a clean, even stroke.
Choose a brush with soft but firm bristles so that it maintains its shape while you work.
4. Angled Nail Art Brush

An angled brush has bristles cut diagonally rather than in a straight line. This shape makes it easier to create certain curved edges and controlled strokes.
It can be used for:
- French manicure smile lines.
- Leaves and petals.
- Curved patterns.
- Colour blocking.
- Cleaning up selected design edges.
An angled brush can also help create different widths of strokes by changing the pressure and angle of your hand.
If you regularly create French manicures, consider adding one to your nail art collection.
5. Ombre Nail Art Brush
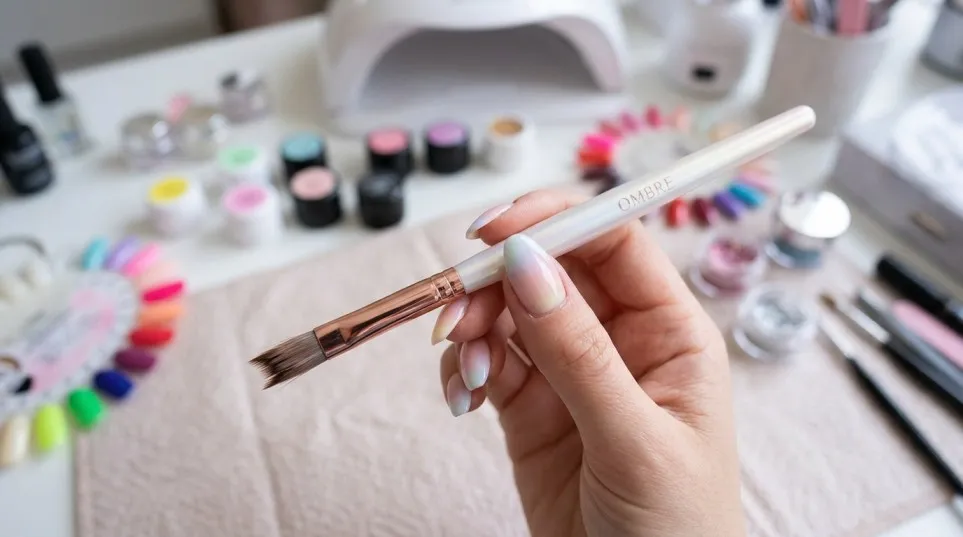
An ombre brush is designed to help blend two or more colours into each other. It usually has soft, flexible bristles that spread colour gently.
It is useful for creating:
- Pink and white ombre nails.
- Baby boomer manicures.
- Sunset-inspired nail designs.
- Soft pastel gradients.
- Blended colour effects.
For the best results, apply a small amount of each colour and blend gently. Avoid pressing too hard because this can create uneven patches.
You may also use a suitable sponge for some gradient techniques, depending on the product and finish you want.
6. Fan Brush
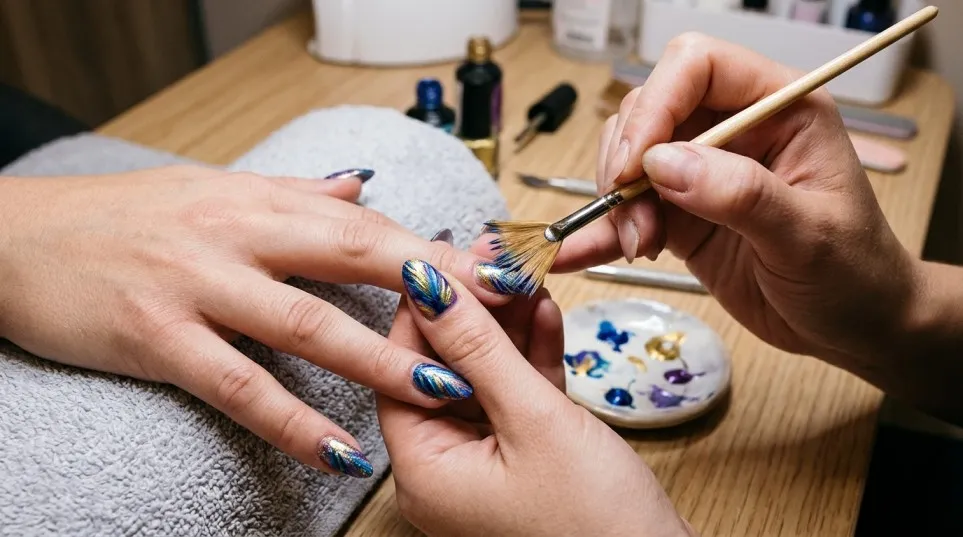
A fan brush has bristles that spread out in a fan-like shape. It creates a different effect from ordinary nail painting brushes.
You can use it for:
- Feathered patterns.
- Soft decorative strokes.
- Glitter effects.
- Light colour blending.
- Abstract nail designs.
It is not an essential purchase for every beginner, but it can be useful if you enjoy experimenting with creative designs.
7. Round Nail Art Brush

A round brush has a rounded or pointed head that can hold a small amount of product. It is useful for painting curved shapes and decorative details.
You can use it for:
- Flower petals.
- Small leaves.
- Curved designs.
- Rounded decorative shapes.
- Filling small areas.
A good round brush should return to its original shape after use. This makes it easier to create consistent strokes.
8. Striping Brush
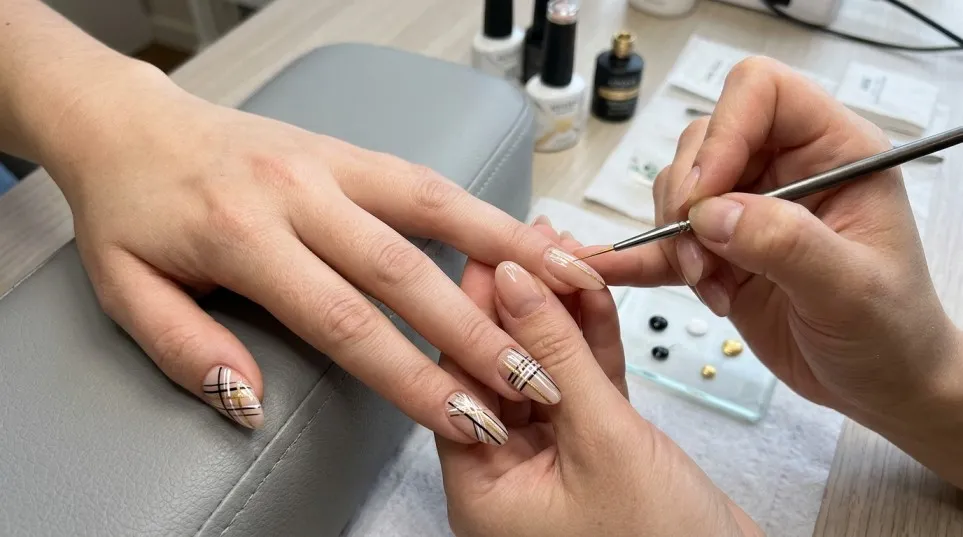
A striping brush is similar to a liner brush but usually has longer, narrow bristles. It is designed to help create long, continuous lines.
It is particularly useful for:
- Straight stripes.
- Geometric nail art.
- Checkered patterns.
- Long swirls.
- Fine decorative lines.
If you want to create elegant minimalist nail designs, a striping brush is a practical addition.
9. Micro Detail Brush
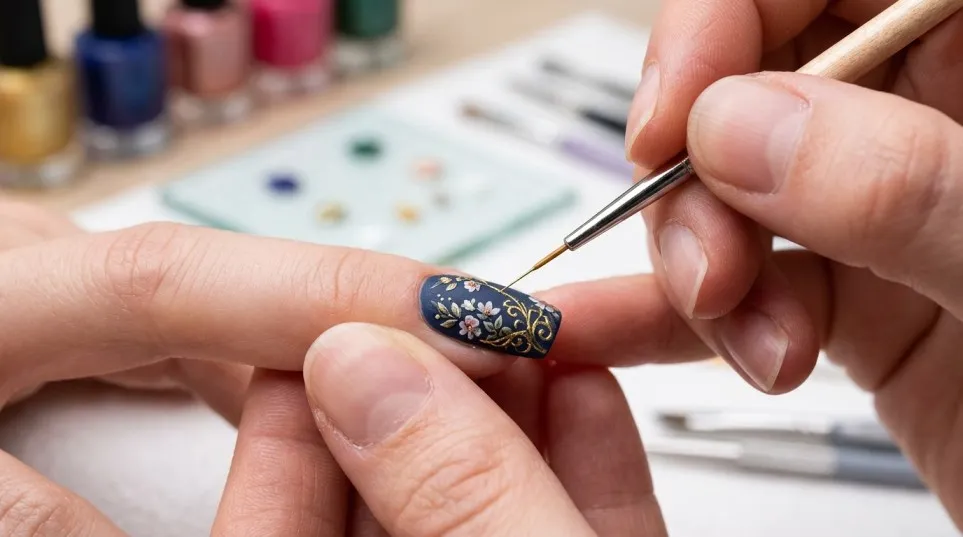
A micro detail brush is designed for extremely small artwork. It has a very fine tip that helps you work on tiny areas.
It is useful for:
- Tiny stars.
- Small dots.
- Fine lettering.
- Miniature flowers.
- Small outlines.
- Intricate decorative patterns.
This brush is especially helpful for advanced nail art. However, beginners can also use it once they become comfortable handling smaller tools.
Which Nail Art Brush Should Beginners Buy?
If you are new to nail art, you might feel tempted to purchase a large 20-piece or 30-piece brush collection. However, buying more brushes does not automatically mean getting better results.
Instead, start with a small set containing the most useful shapes.
| Brush type | Best use | Beginner priority |
|---|---|---|
| Liner brush | Fine lines and swirls | Essential |
| Detail brush | Small artwork | Essential |
| Flat brush | Wider strokes and colour filling | Recommended |
| Angled brush | French tips and curved edges | Recommended |
| Ombre brush | Colour blending | Optional |
| Fan brush | Decorative effects | Optional |
| Round brush | Flowers and curved shapes | Recommended |
A good starter collection should include a liner, a detail brush, a flat brush and a round or angled brush.
You can add specialist brushes later when you want to explore more complicated designs.
How to Choose the Best Art Brush for Nails
Not every brush set offers the same quality. Some have excellent tips and comfortable handles, while others may lose their shape after a few uses.
Here are the most important things to check before buying.
1. Check the Bristle Quality
Bristles are one of the most important parts of a nail art brush.
Look for bristles that:
- Form a neat and even tip.
- Feel flexible but not excessively soft.
- Return to their shape after gentle movement.
- Do not easily fall out.
- Hold a suitable amount of product.
Synthetic bristles are common in nail art brushes and can be suitable for many gel and polish techniques.
2. Choose the Correct Brush Length
Brush length affects how much control you have.
Short bristles are generally easier for tiny details, while longer bristles can hold more product and create longer lines.
If you are a beginner, choose shorter detail brushes and a medium-length liner before experimenting with extra-long brushes.
3. Look for Comfortable Handles
A comfortable handle makes a difference when you spend several minutes painting small designs.
Choose a brush that feels balanced in your fingers and does not slip easily.
A lightweight handle can also help reduce hand fatigue during longer nail art sessions.
4. Check the Brush Shape
Before ordering, look carefully at the product photographs.
A set may advertise ten different brushes, but several could have almost identical shapes.
Make sure the collection includes the brushes you actually need rather than focusing only on the number of pieces.
5. Consider Your Nail Art Products
Different nail products may require different brushes.
For example, gel products, regular nail polish and acrylic systems have different cleaning and handling requirements.
Always follow the manufacturer’s instructions for brush compatibility and cleaning.
How to Use an Art Brush for Nails: Step-by-Step Guide
Using nail art brushes becomes easier with practice. You do not need professional experience to create attractive designs at home.
Follow these simple steps to get started.
Step 1: Prepare Your Nails
Start with clean, dry nails.
Remove any old polish, gently shape your nails with a nail file and prepare the surface according to the product manufacturer’s instructions.
If you are using gel polish, follow the correct preparation and curing instructions.
Step 2: Apply Your Base Colour
Choose your favourite nail colour and apply it evenly.
Popular choices include:
- Nude.
- Baby pink.
- White.
- Milky beige.
- Soft lavender.
- Classic red.
- Chocolate brown.
Allow regular polish to dry properly. If you are using gel polish, cure it according to the manufacturer’s directions.
Step 3: Prepare Your Brush
Select the brush that matches your design.
For example, use a liner brush for thin stripes or a detail brush for small flowers.
Place a small amount of nail art product on a suitable palette. Avoid loading too much product onto the bristles because excess gel or polish can create messy lines.
Step 4: Practise Your First Design
Before painting directly onto your nails, practise on a nail art practice tip or piece of suitable practice material.
Try making:
- Five straight lines.
- Five curved lines.
- A few small dots.
- Simple flower petals.
- Small hearts.
This helps you understand how much pressure to apply and how the brush responds.
Step 5: Create Your Nail Art
Now begin painting your chosen design.
Keep your hand supported on a flat surface. Hold the brush comfortably, similar to a pen, and move slowly.
For fine lines, try to make one controlled movement rather than repeatedly going over the same area.
If you are using gel art products, remember that they do not dry like ordinary nail polish. Follow the appropriate curing instructions before applying additional layers.
Step 6: Finish With a Top Coat
Once your design is complete and properly dry or cured, apply a compatible top coat.
This helps protect the artwork and gives the manicure a smooth finish.
Follow the product instructions for curing or drying.
7 Beautiful Nail Designs You Can Create With Art Brushes
One of the best things about owning a good brush collection is the number of designs you can create.
Here are seven ideas worth trying.
1. Simple French Tip Nails
Use an angled or liner brush to create clean white tips. You can also experiment with pink, red or black French tips for a modern look.
2. Floral Nail Art
A detail brush or round brush can help you create small flowers.
Try white petals with a yellow centre on a nude or pastel background.
3. Swirl Nail Designs
Use a liner brush to paint thin, flowing curves.
Choose two contrasting colours to make the pattern stand out.
4. Minimalist Line Art
Fine lines can create a stylish and simple manicure.
Try black lines over a nude base or white lines over a soft pink background.
5. Ombre Nail Designs
An ombre brush can help blend two colours for a soft gradient.
Pink and white, nude and beige, or lavender and blue are attractive combinations.
6. Heart Nail Art
Use a small detail brush to paint tiny hearts.
This design looks especially beautiful on light pink, red and milky white nails.
7. Abstract Nail Art
Combine different lines, shapes and colours to create a modern look.
There are no strict rules, so you can experiment with your favourite shades.
Best Nail Art Brush Sets to Consider in the UK
If you are planning to buy your first art brush for nails, an affordable multi-piece set can be a convenient starting point.
However, it is worth comparing the available options before making a purchase.
What to Look for in a Nail Art Brush Set
A useful beginner set should ideally include:
- Fine liner brushes in different lengths.
- Short detail brushes.
- Flat or angled brushes.
- Comfortable handles.
- Protective caps.
- Easy-to-clean bristles.
You do not need to spend a lot on a professional collection when you are still learning.
Where to Buy Nail Art Brushes
You can explore different nail art brush sets through Amazon UK.
Recommended shopping links:
- Shop Nail Art Brush Sets on Amazon UK
- Explore Fine Liner Nail Brushes
- Browse Professional Nail Art Brushes
- Find Nail Art Detail Brushes
Before purchasing, compare customer reviews, photographs, brush sizes and the materials used.
Check whether the set includes the brush shapes you need. Also consider delivery costs, seller ratings and return policies.
My buying recommendation: If you are a beginner, choose a small set with a liner, detail, flat and angled brush. This gives you a practical starting collection without paying for tools you may never use.
Common Mistakes to Avoid When Using Nail Art Brushes
Even a good-quality brush may produce poor results if it is not handled correctly.
Here are some common mistakes and how to avoid them.
Using Too Much Product
Too much gel or polish can create thick lines and uneven patterns.
Always remove excess product before beginning your design.
Applying Too Much Pressure
Pressing too hard can spread the bristles and make your design look messy.
Use gentle pressure and allow the brush tip to do the work.
Choosing the Wrong Brush
A large flat brush is not suitable for tiny lettering, just as a micro detail brush is not suitable for covering an entire nail.
Match the brush to the design.
Skipping Practice
If you try complicated designs immediately, you may become frustrated.
Practise simple lines, dots and curves before moving on to detailed artwork.
Ignoring Brush Cleaning
Leaving gel or polish inside the bristles can damage the brush and make future designs harder to create.
Clean your brushes according to the product and brush manufacturer’s instructions.
How to Clean and Maintain Nail Art Brushes
Proper care helps your brushes maintain their shape and remain useful for longer.
Follow these simple habits.
1. Clean Brushes After Every Use
Do not leave gel or polish inside the bristles.
Use a suitable cleaner for the product you have been working with. For example, gel brushes should be cleaned using a compatible gel brush cleanser as directed by the manufacturer.
2. Avoid Using Acetone on Every Brush
Acetone is not a universal brush cleaner.
Repeated exposure can damage some bristles, coatings and brush components. Always check the manufacturer’s cleaning recommendations.
3. Reshape the Bristles
After cleaning, gently bring the bristles back into their original shape.
Do not pull or twist them aggressively.
4. Store Brushes Properly
Keep your brushes in a clean case or holder.
Use protective caps when appropriate and avoid placing pressure on the bristle tips.
5. Keep Brushes Away From UV Light
Uncured gel on a brush can harden if exposed to UV or LED nail lamps.
Keep your brushes away from direct lamp exposure and clean gel residue promptly.
Are Expensive Nail Art Brushes Worth Buying?
Not always.
An expensive brush may offer better construction or a specialised shape, but that does not mean every beginner needs a professional-level collection.
For home nail art, a reasonably priced set with good-quality bristles can be enough.
However, if you regularly create detailed designs or work professionally, investing in specialised brushes may make sense.
The most important thing is to choose brushes that maintain their shape, feel comfortable and work with your chosen nail products.
Final Thoughts
Choosing the right art brush for nails can make nail art easier, more enjoyable and more creative.
You do not need an expensive collection to get started. A few essential tools, including a liner brush, detail brush, flat brush and angled brush, can help you create many beautiful designs.
Take time to practise, choose brushes that suit your favourite techniques and clean them properly after every session.
If you are ready to improve your nail art skills, explore the available nail art brush sets on Amazon UK and choose a collection that matches your needs and budget.
With the right tools and a little patience, you can create attractive nail designs at home and enjoy experimenting with new styles.
Frequently Asked Questions About Art Brushes for Nails
Related BIAB Guides
- Art Nail Gel: Complete Beginner’s Guide to Beautiful, Creative and Long-Lasting Nail Art
- Nail Art Polish: Turn Simple Nails into Stunning Art!
- Christmas Nail Art: 25 Festive Ideas, Easy DIY Designs & Tips for Beautiful Holiday Nails
- Festival Nail Art Designs: 25 Creative, Colourful & Trendy Ideas for Every Celebration
A fine liner brush is one of the most useful choices for nail art. It helps create thin lines, swirls, stripes and French tip designs. Beginners should also consider a small detail brush for flowers and decorative patterns.
A basic nail art collection should include a liner brush, detail brush, flat brush and angled brush. You can add an ombre brush and fan brush when you want to try more advanced techniques.
Yes. Nail art brushes are suitable for beginners as well as professional nail technicians. Start with simple designs such as dots, straight lines, flowers and small hearts before trying complicated patterns.
Clean gel brushes promptly with a compatible gel brush cleanser, following the manufacturer’s instructions. Remove uncured gel before it hardens and keep the brushes away from UV or LED light.
Yes. Good-quality synthetic brushes can work well for many nail art and gel techniques. Look for even bristles, a neat tip and a brush that returns to its original shape after use.
Small detail brushes are generally best for tiny artwork. A fine liner brush is more suitable for longer lines. Brush size labels are not standard across all brands, so check the actual bristle measurements before buying.
You can find nail art brush sets through Amazon UK and specialist nail supply retailers. Compare brush shapes, bristle quality, customer reviews and delivery options before choosing a set.