
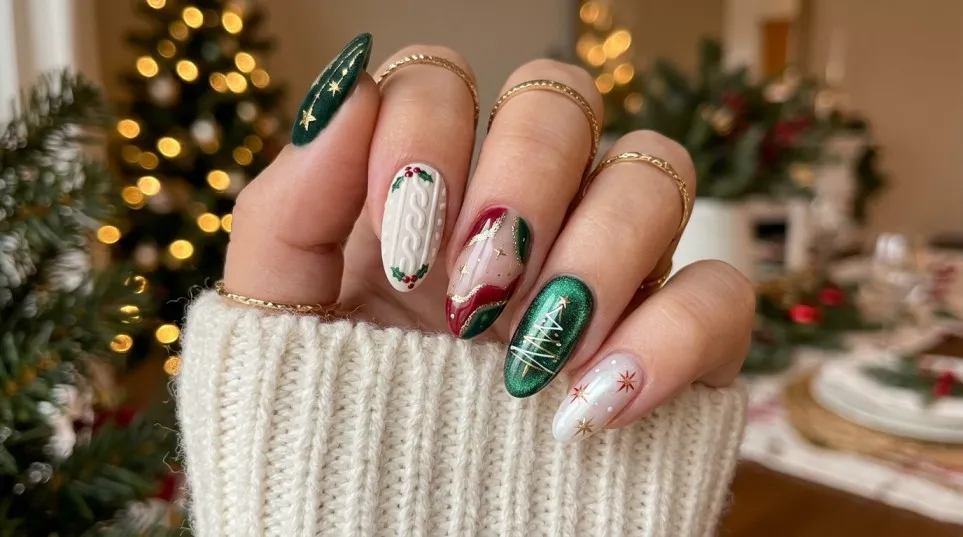
Christmas Nail Inspo: 15 Beautiful Festive Nail Designs to Try This Christmas
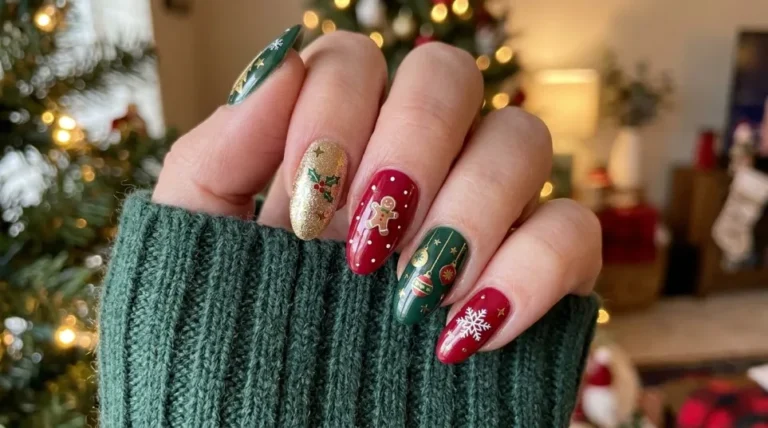
Christmas nail inspo is all about finding beautiful, festive, and creative nail designs that make your hands look special during the holiday season. Whether you love classic red and green nails, cute snowflake patterns, sparkling glitter, or simple winter-inspired manicures, there are plenty of Christmas nail ideas to suit every style. From elegant short nails to glamorous acrylic designs, the right Christmas manicure can add extra excitement to your festive outfits, Christmas parties, family gatherings, and celebrations.
Christmas is the perfect time to experiment with colours, patterns, and nail accessories that you might not wear during the rest of the year. You can choose a simple design for everyday wear or something more eye-catching for a special occasion. The best part is that you do not always need to visit a nail salon. With the right nail polish, stickers, glitter, and a little creativity, you can create beautiful Christmas nails at home.
In this guide, we will explore 15 beautiful Christmas nail designs, popular festive colours, useful products, and simple tips to help your Christmas manicure last longer.
Why Is Christmas Nail Inspo So Popular?
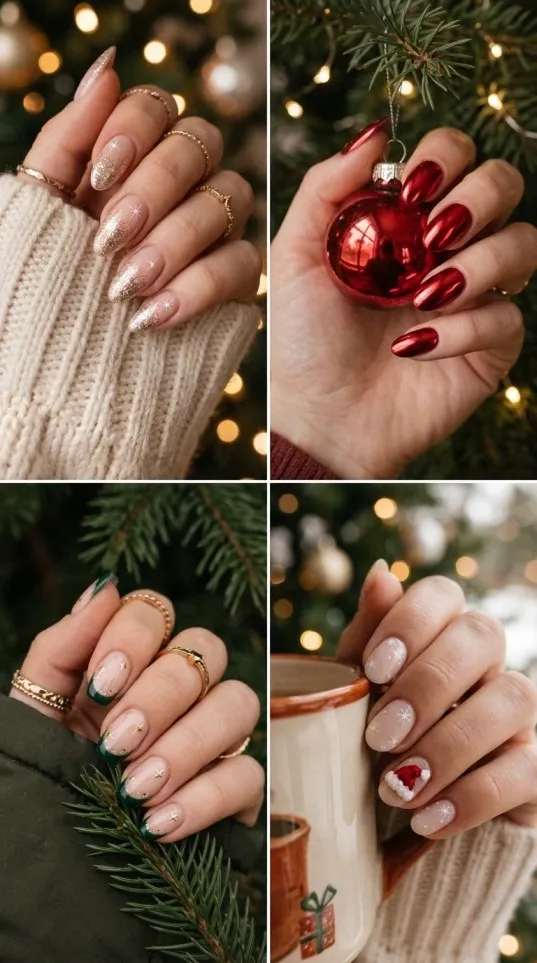
Christmas is one of the most exciting times of the year for beauty and fashion lovers. People decorate their homes, choose festive outfits, exchange gifts, and prepare for special celebrations. Similarly, Christmas nail art has become a fun way to complete a holiday look.
One reason Christmas nail inspo is so popular is that there is something for everyone. If you prefer natural-looking nails, you can try nude polish with tiny snowflakes. On the other hand, if you enjoy glamorous manicures, you can choose red glitter, chrome finishes, or sparkling gold details.
Moreover, social media platforms such as and make it easier to discover fresh nail trends and save designs for your next manicure.
15 Beautiful Christmas Nail Inspo Ideas
Here are 15 festive nail designs that can help you find the perfect look for the holiday season.
1. Classic Red Christmas Nails
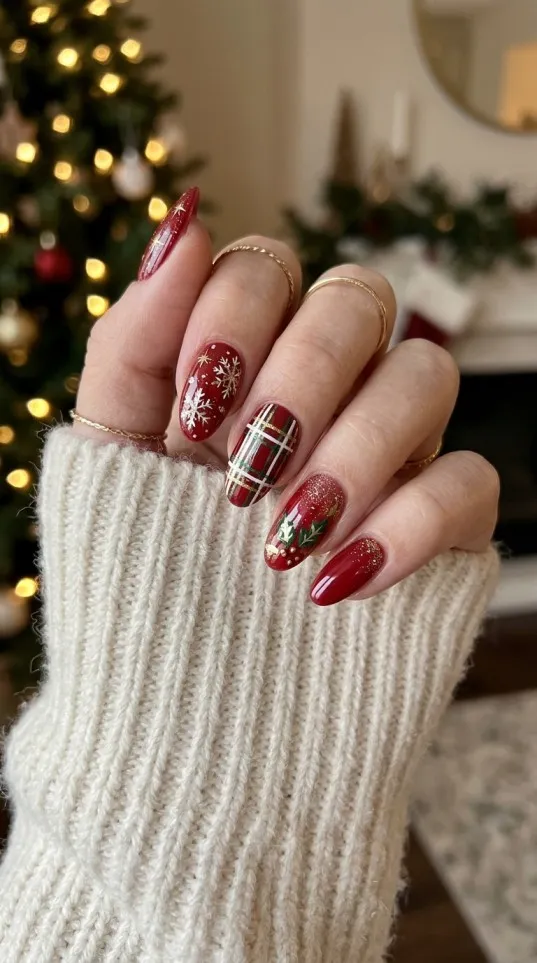
You can never go wrong with classic red nails. Red is one of the most loved Christmas colours because it looks cheerful, elegant, and festive.
Choose a glossy cherry red or deep cranberry shade for a beautiful finish. You can also add a small gold star, glitter accent, or snowflake to one nail.
Best for: Christmas parties, family dinners, and traditional festive outfits.
2. Green Christmas Tree Nails
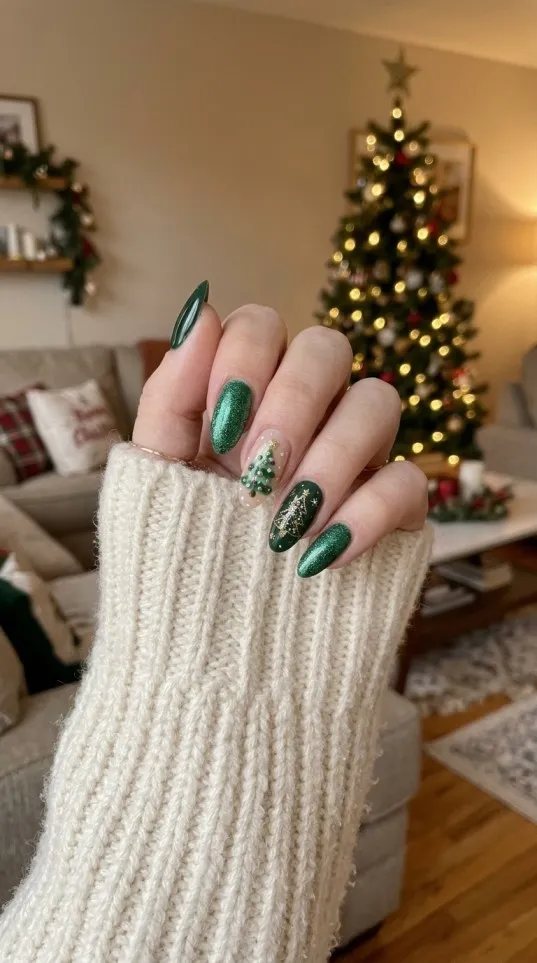
Green Christmas nails are perfect for anyone who loves traditional holiday colours. Use forest green, emerald, or dark pine polish as your base.
For extra detail, paint a small Christmas tree on one accent nail and add tiny gold dots to look like decorations. Even a simple green manicure with a gold accent can look stunning.
Best for: Christmas celebrations and elegant winter manicures.
3. Cute Candy Cane Nails
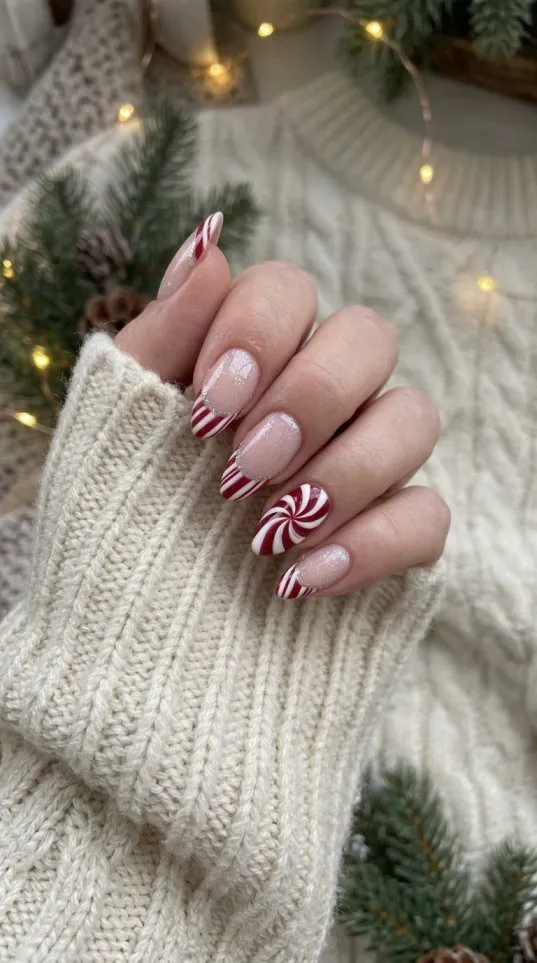
Candy cane nails are playful, sweet, and instantly recognisable. They usually feature red and white stripes inspired by traditional Christmas sweets.
Start with a white or nude base and add thin diagonal red lines. If you find detailed nail art difficult, use Christmas nail stickers to create the pattern more easily.
Best for: Cute nail lovers and festive holiday outfits.
4. Snowflake Christmas Nails
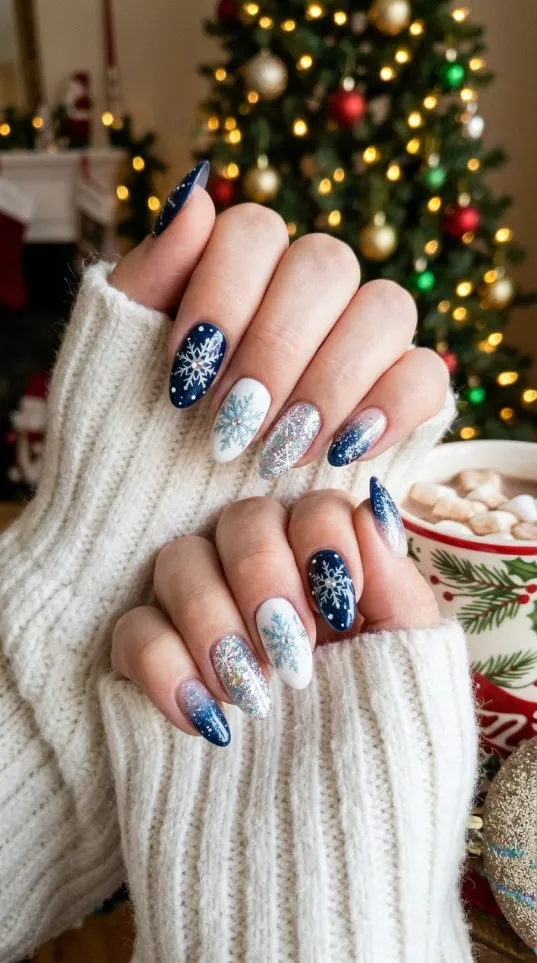
Snowflake nails are a beautiful choice if you want something soft and winter-inspired. A milky white, pale blue, or nude base works perfectly with delicate snowflake patterns.
Add silver glitter around the snowflakes to create a frosty appearance. You do not need to decorate every nail; two snowflake accent nails can be enough.
Best for: Minimalist Christmas looks and winter celebrations.
5. Gold Glitter Christmas Nails
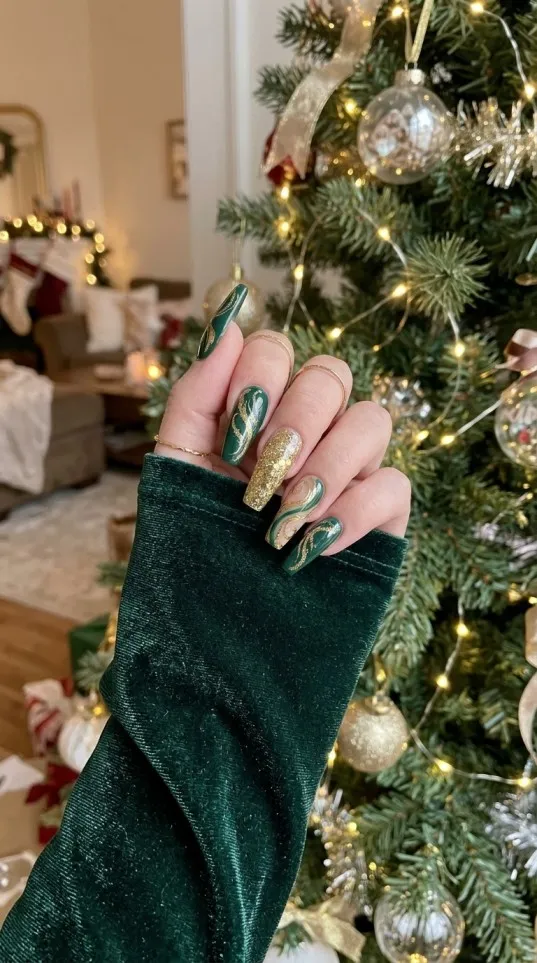
If you love sparkling manicures, gold glitter nails are an excellent choice. Gold looks luxurious and pairs beautifully with red, green, nude, and white.
You can apply glitter to every nail for a glamorous appearance or create a glitter fade at the tips. A champagne-gold shade is particularly lovely for evening events.
Best for: Christmas parties, dinners, and New Year’s celebrations.
6. Cute Santa Claus Nails
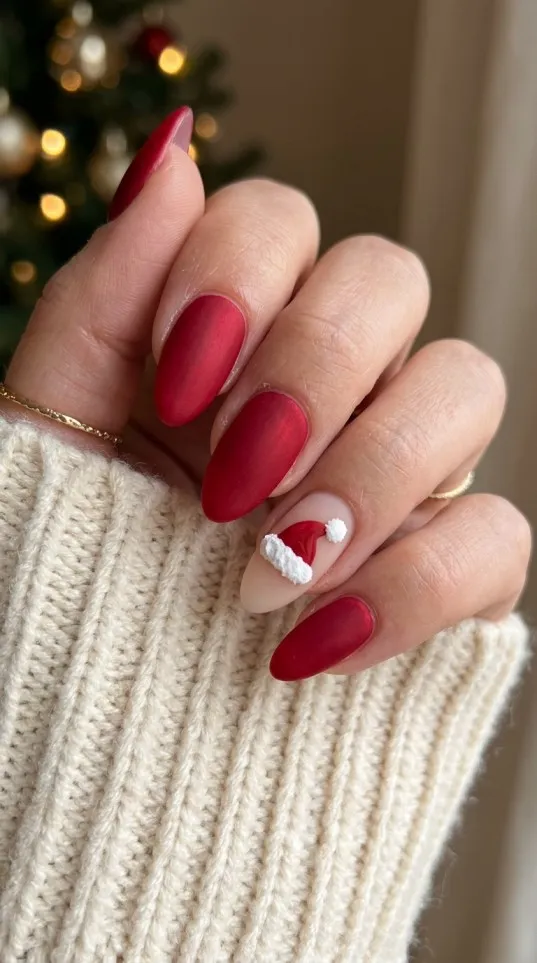
Santa Claus nail art is a fun way to celebrate Christmas. You can paint a little Santa face, a red Santa hat, or a fluffy white beard on one or two nails.
For a simple version, use a red base and add a small white hat design to your ring finger.
Best for: Fun Christmas parties and playful festive manicures.
7. Elegant Nude Christmas Nails
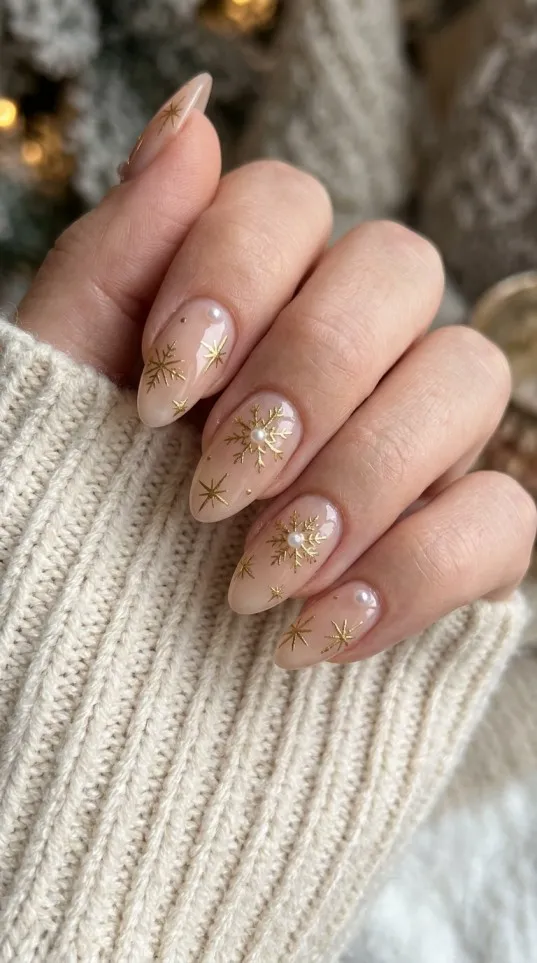
Not everyone wants bright Christmas colours. If you prefer a clean and natural manicure, nude Christmas nails are a lovely alternative.
Choose beige, soft pink, or milky nude polish. Then add tiny gold stars, delicate white snowflakes, or small pearl decorations.
This design is especially useful if you want nails that look beautiful with everyday outfits as well as festive clothes.
Best for: Office parties, everyday wear, and elegant celebrations.
8. Red and White Christmas French Tips
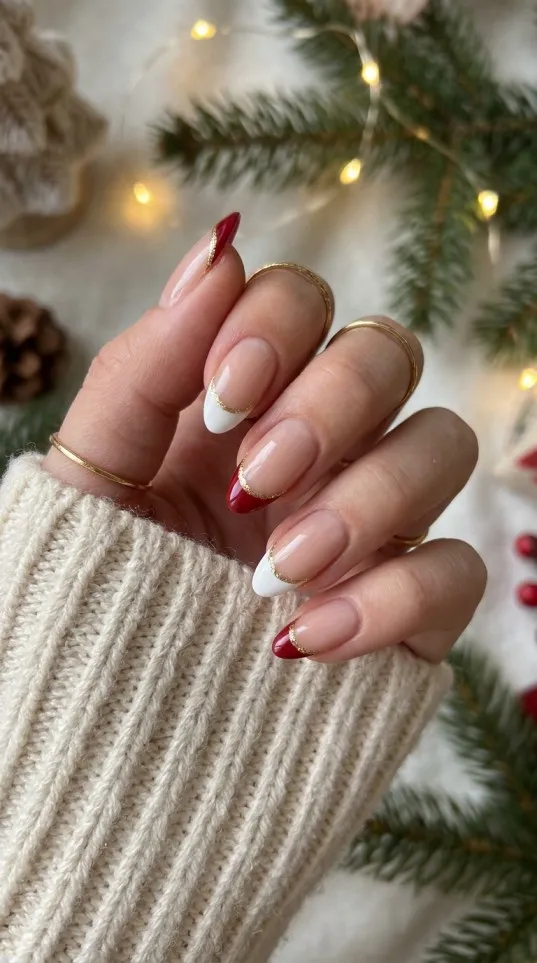
French tips are a timeless manicure style, but you can give them a Christmas makeover by replacing traditional white tips with red and white details.
Try red French tips on a nude base or alternate red and white tips across your nails. Add a tiny snowflake for a more seasonal finish.
Best for: Short nails, medium nails, and people who love simple designs.
9. Christmas Bow Nails
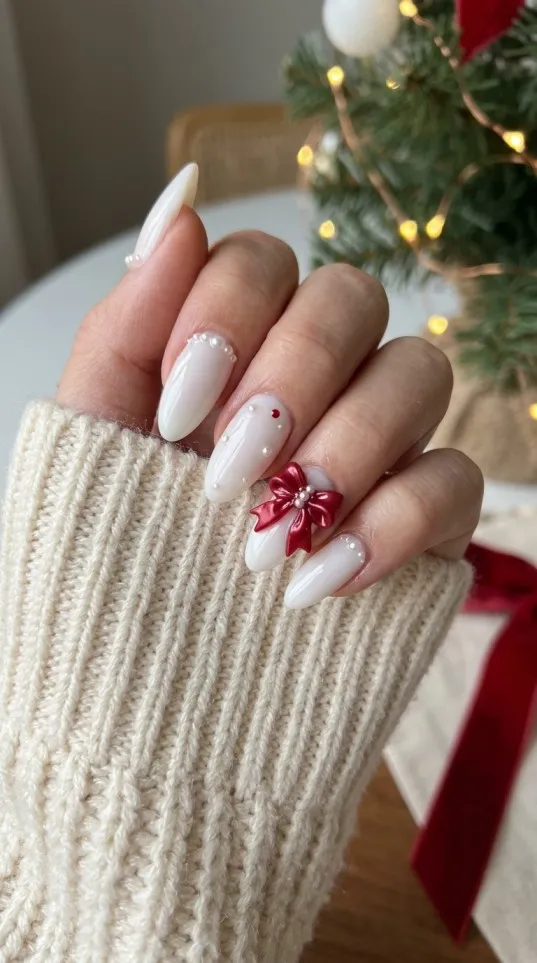
Christmas bows are a beautiful way to create a gift-inspired manicure. Think about the ribbons and bows used to decorate Christmas presents.
Use a soft pink or milky white base and add tiny red bows. You can also choose gold or silver bow details for a more glamorous appearance.
Best for: Feminine, delicate, and fashionable Christmas looks.
10. Gingerbread Christmas Nails
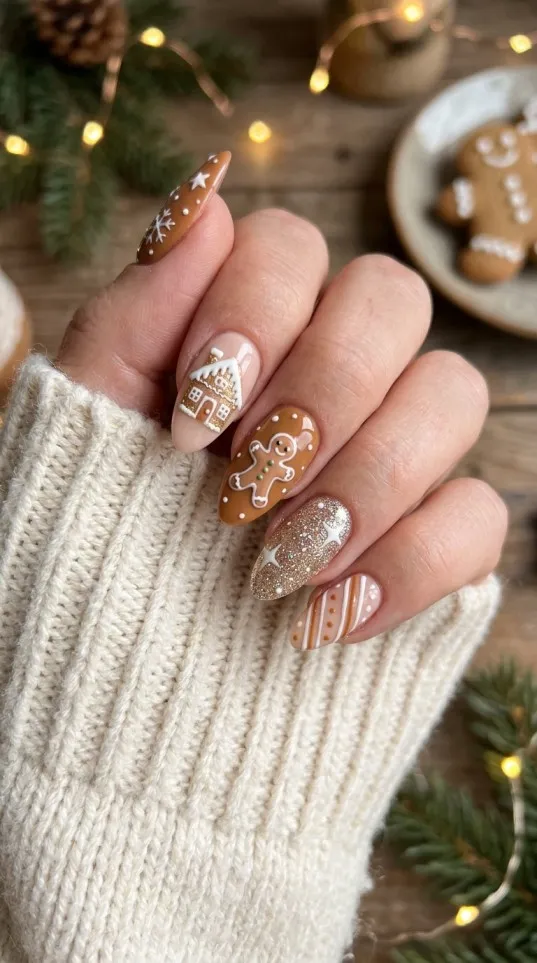
Gingerbread nails bring a cosy and playful feeling to your manicure. Use warm brown, caramel, and cream colours to recreate the appearance of gingerbread cookies.
Add little gingerbread men, white icing lines, or tiny heart details. If you want something easier, use gingerbread-themed nail decals.
Best for: Cute Christmas outfits and fun holiday celebrations.
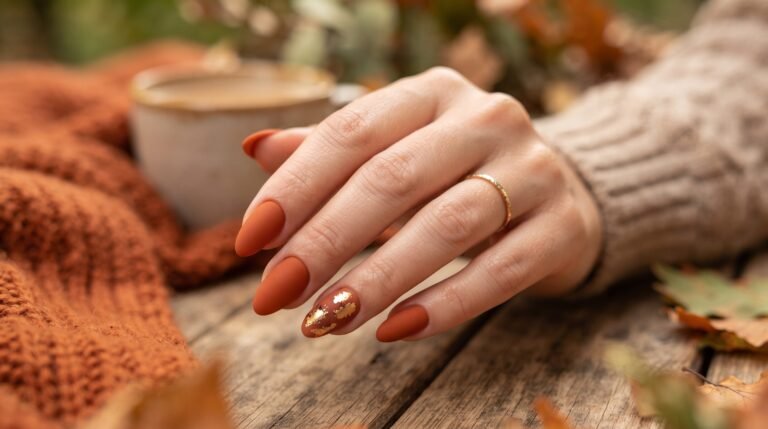
11. Emerald Green and Gold Nails
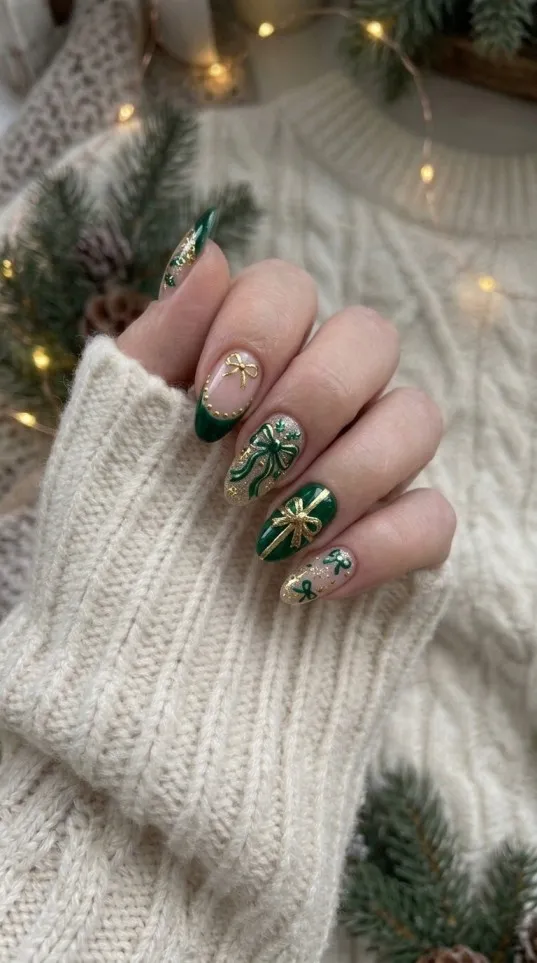
Emerald green and gold make a beautiful combination. The deep green creates a rich background, while gold details add warmth and sparkle.
You can paint most nails emerald green and use gold foil on one accent nail. Alternatively, add thin gold lines or small stars.
Best for: Elegant Christmas dinners and glamorous winter outfits.
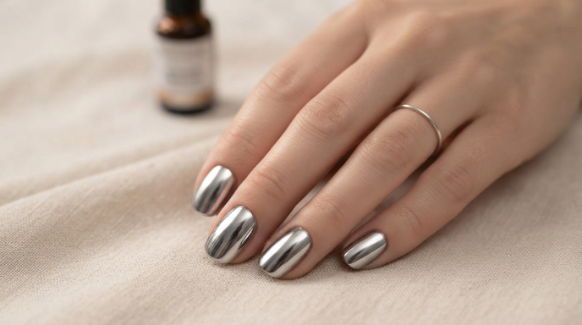
12. Silver Chrome Christmas Nails
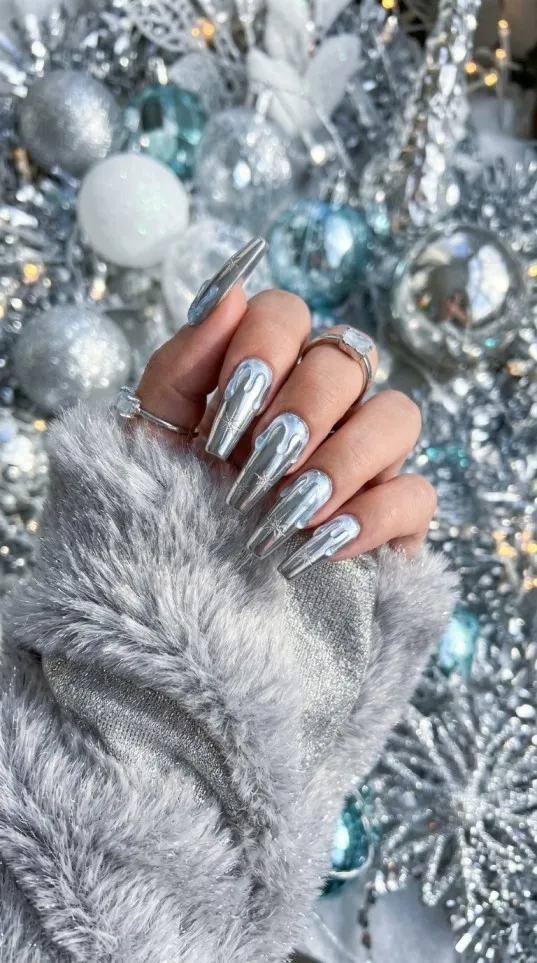
Silver chrome nails are perfect if you prefer a modern and eye-catching manicure. Their reflective finish creates a beautiful metallic appearance.
Try a full silver chrome manicure or combine silver tips with a milky white base. You can also add small snowflakes to make the design more festive.
Best for: Evening parties and modern Christmas nail looks.
13. Pink Christmas Nails
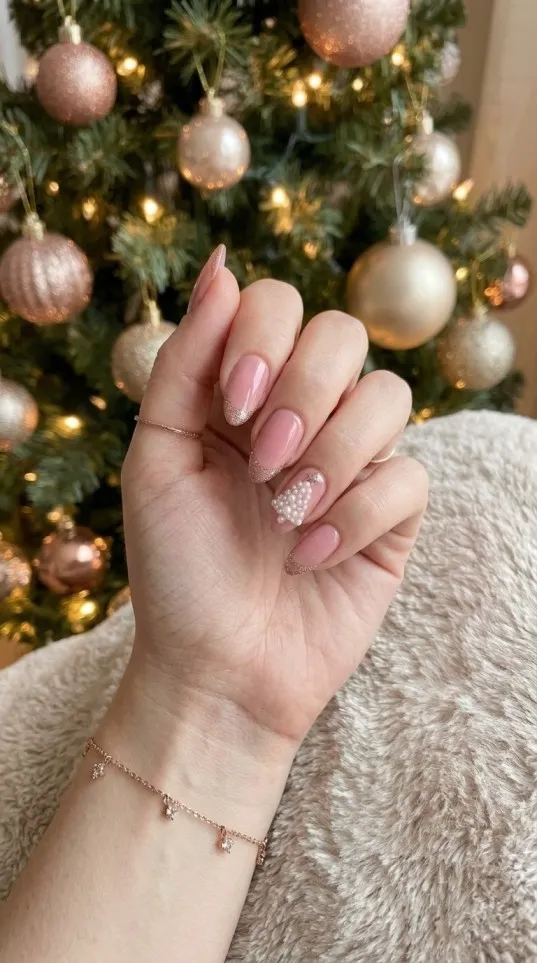
If you love soft and feminine colours, pink Christmas nails are worth trying. Baby pink, blush, and rose shades can look beautiful with white snowflakes and silver glitter.
You can also add little bows, stars, or heart designs for a cute finish.
Best for: Soft-girl styles and delicate festive manicures.
14. Burgundy Christmas Nails
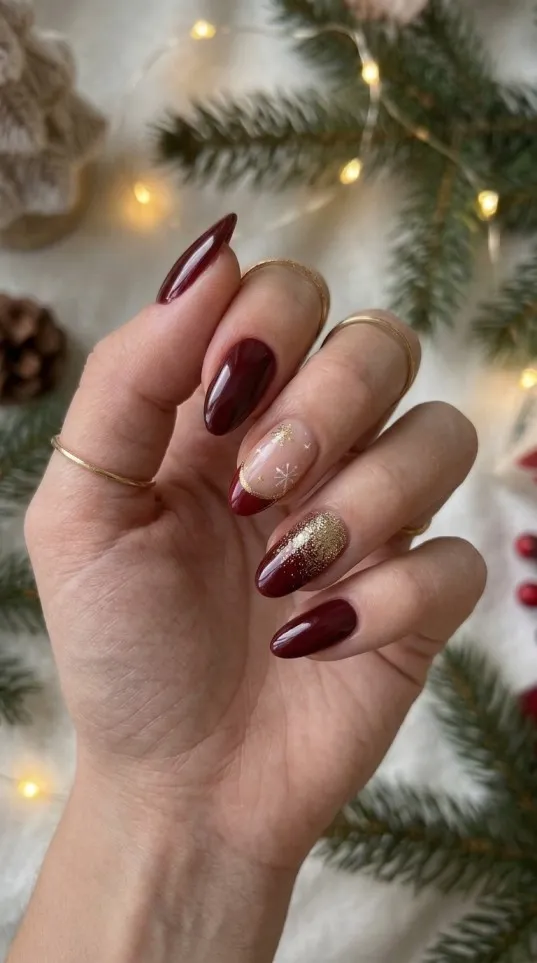
Burgundy is a sophisticated colour that works beautifully during the festive season. It is slightly darker than traditional red and gives your nails a rich appearance.
Add a glossy top coat, gold stars, or a little glitter to make the manicure more festive.
Best for: Elegant outfits, winter evenings, and people who prefer darker colours.
15. Velvet Cat-Eye Christmas Nails
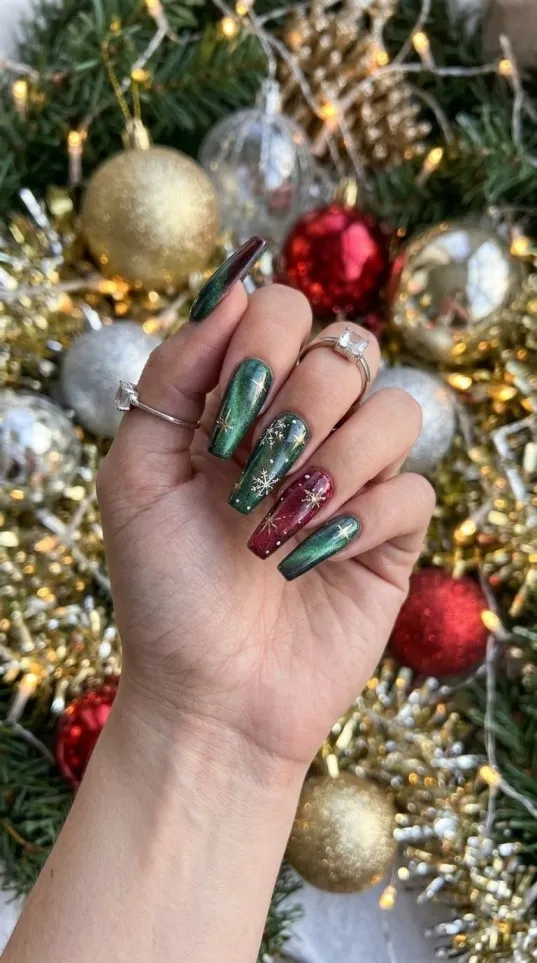
Velvet cat-eye nails are a standout choice for anyone who loves unusual finishes. Magnetic nail polish creates a shifting light effect that resembles soft velvet.
Try deep ruby red, emerald green, or burgundy. These rich colours look beautiful under Christmas lights and evening lighting. The magnetic effect also makes a simple manicure feel more special.
Best for: Trend-focused manicures, Christmas parties, and glamorous winter looks.
Which Christmas Nail Colours Should You Choose?
Choosing the right colour is one of the most important parts of creating a beautiful festive manicure. Here is a quick guide to popular Christmas nail colours.
| Christmas nail colour | Overall look | Best design |
|---|---|---|
| Red | Traditional and bold | Candy cane and chrome |
| Green | Rich and festive | Christmas trees |
| White | Clean and wintry | Snowflakes |
| Gold | Glamorous | Glitter and foil |
| Silver | Modern and icy | Chrome nails |
| Pink | Soft and feminine | Bows and stars |
| Burgundy | Elegant and rich | Velvet nails |
| Blue | Cool and fresh | Snowflake art |
For 2026, deeper reds, emerald greens, icy finishes, velvet effects, and delicate gold details are beautiful directions to explore.
Christmas Nail Inspo for Short Nails
You do not need long acrylic nails to enjoy beautiful Christmas nail art. In fact, short nails can look just as stylish with the right design.
Here are some lovely options:
- Red Christmas nails: A simple glossy red manicure looks beautiful on short, natural nails.
- White snowflake nails: Add one small snowflake to a nude or milky white base.
- Gold glitter tips: A thin glitter French tip adds sparkle without making the nails look busy.
- Green accent nails: Combine forest green polish with one gold accent nail.
- Minimalist Christmas stars: Tiny stars create a festive appearance without taking up too much space.
For short nails, choose small patterns and avoid placing too many decorations close together. This helps your manicure look neat and balanced.
Christmas Nail Inspo for Long Acrylic Nails
Long acrylic nails give you more space to experiment with detailed Christmas nail art. You can combine several festive designs while keeping the overall look coordinated.
Some beautiful options include:
- Christmas acrylic nails with glitter: Use red, gold, and silver glitter for a glamorous appearance.
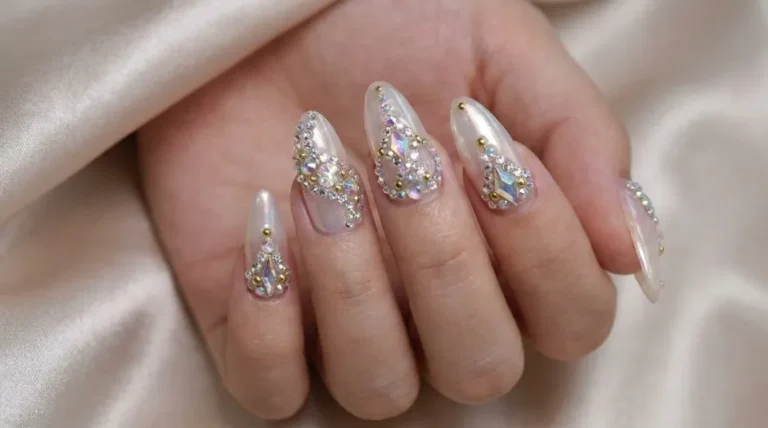
- Almond Christmas nails: Add snowflakes, bows, and French tips to an almond shape.
- Coffin Christmas nails: Try candy cane stripes, Christmas trees, and metallic details.
- Stiletto Christmas nails: Choose bold red chrome or emerald velvet finishes.
If you are choosing acrylic nails for the first time, ask your nail technician to recommend a comfortable length and shape for your everyday activities.
Best Products to Create Christmas Nails at Home
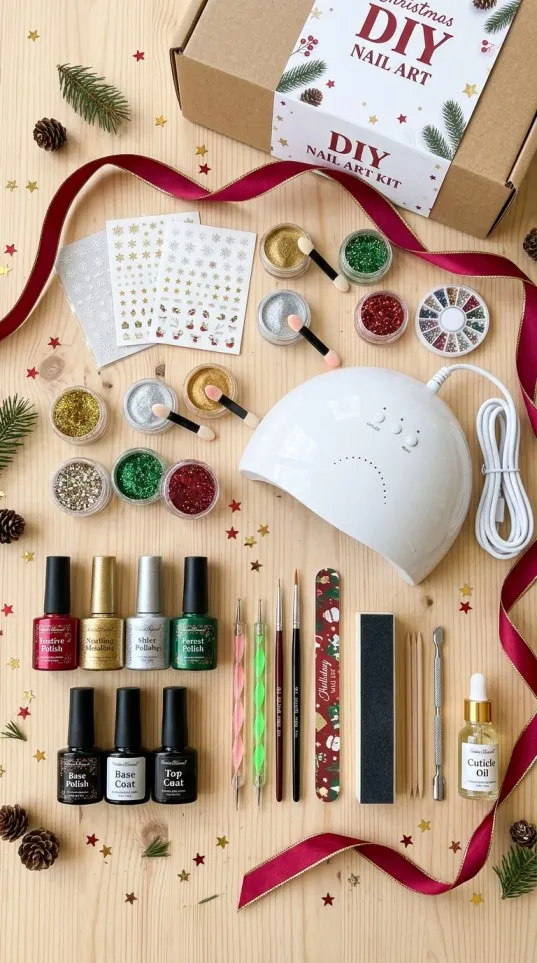
You do not need an expensive salon appointment to create attractive Christmas nail designs. A few useful nail products can help you achieve beautiful results at home.
1. Christmas Nail Stickers
Nail stickers are perfect for beginners who want detailed Christmas designs without painting everything by hand.
2. Festive Nail Polish Set
A Christmas nail polish collection gives you different shades to create seasonal manicures.
3. Nail Glitter Powder
Glitter powder can transform a basic manicure into a sparkling festive design.
4. Nail Art Brush Kit
Thin brushes and dotting tools help you create snowflakes, stripes, stars, and other detailed designs.
5. Christmas Press-On Nails
Press-on nails are a convenient option when you want a ready-made festive manicure without spending hours painting your nails.
6. Clear Nail Top Coat
A quality top coat helps protect your nail colour and gives your manicure a smooth, glossy finish.
Shopping tip: Check customer reviews, product ingredients, sizes, and application instructions before ordering. Prices and availability may change.
How to Create Christmas Nails at Home: Step-by-Step Guide
Creating beautiful Christmas nail designs at home can be easier than you think. Follow these simple steps to get a neat and festive manicure.
Step 1: Prepare Your Nails
Start by removing any old nail polish. Wash your hands and gently shape your nails using a nail file.
Push back your cuticles gently without cutting or damaging the surrounding skin. Make sure your nails are clean and dry before applying polish.
Step 2: Apply a Base Coat
Apply a thin layer of base coat to help your nail polish apply smoothly. Allow it to dry according to the product instructions.
A good base coat can also help reduce staining from darker nail colours.
Step 3: Choose Your Christmas Colours
Select two or three colours that work well together. For example:
- Red, white, and gold.
- Green, silver, and nude.
- Pink, white, and glitter.
- Burgundy, champagne, and gold.
Choosing a coordinated colour combination helps your nail design look more professional.
Step 4: Create Your Nail Art
Now comes the fun part! Use a thin nail art brush, stickers, or dotting tools to create your favourite Christmas patterns.
You can paint snowflakes, candy cane stripes, stars, Christmas trees, or little bows.
If you are a beginner, start with one or two accent nails instead of decorating all ten fingers.
Step 5: Add Glitter and Decorations
Apply glitter or small nail decorations to make your manicure more festive. However, avoid using too many decorations because a balanced design often looks more attractive.
Step 6: Finish with a Top Coat
Once your polish and nail art have dried, apply a suitable top coat. This helps seal the design and adds shine.
Allow your manicure to dry completely before doing activities that could damage it.
Important safety tip: If you use gel polish or UV/LED nail products, follow the manufacturer’s curing instructions and use compatible products. Avoid skin contact with uncured gel, as it can cause allergic reactions. Never peel or forcefully remove gel polish.
How to Make Your Christmas Manicure Last Longer
After spending time creating beautiful nails, you naturally want them to last throughout the holiday season.
Here are some simple tips:
- Use a good base coat: It helps create a smooth surface for nail polish.
- Apply thin layers: Thick polish takes longer to dry and can smudge more easily.
- Seal the edges: Run your top coat gently along the nail tips.
- Wear protective gloves: Use gloves when washing dishes or cleaning.
- Moisturise your hands: Apply hand cream and cuticle oil regularly.
- Avoid using your nails as tools: Opening cans and scratching hard surfaces can damage your manicure.
- Touch up carefully: Add a fresh top coat when appropriate to refresh your manicure.
For additional nail-care information, visit the British Association of Dermatologists and NHS.
How to Choose the Best Christmas Nail Design for Your Style
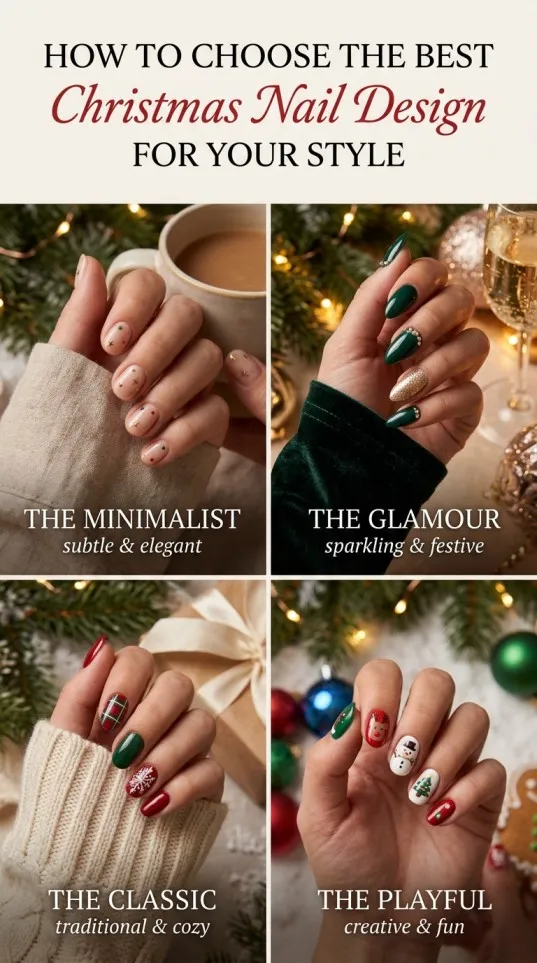
With so many beautiful designs available, choosing just one can be difficult. The easiest way is to think about your personal style, nail length, and the occasions you are attending.
| Your preference | Recommended Christmas design |
|---|---|
| Simple and natural | Nude Christmas nails |
| Traditional festive | Red and green nails |
| Glamorous | Gold glitter and chrome |
| Cute and playful | Santa and gingerbread nails |
| Modern and stylish | Velvet cat-eye nails |
| Minimalist | Snowflakes and tiny stars |
| Short nails | French tips and simple patterns |
| Long acrylics | Detailed Christmas nail art |
You should also consider your Christmas outfit. For example, red and gold nails look beautiful with black dresses, while white and silver designs work wonderfully with winter-inspired outfits.
Final Thoughts
Finding the perfect Christmas nail inspo is a fun way to prepare for the holiday season. Whether you love traditional red and green manicures, cute candy cane patterns, elegant nude nails, or glamorous chrome finishes, there is a festive design for every personality.
The best thing about Christmas nail art is that you can make it as simple or detailed as you like. You can visit a professional nail technician, create your own designs at home, or choose convenient press-on nails when you are short on time.
If you are trying something new this Christmas, consider experimenting with velvet finishes, delicate bows, snowflakes, and sparkling gold details. Choose colours and designs that make you feel confident and comfortable.
Most importantly, enjoy the process and have fun creating a manicure that makes your Christmas celebrations even more special!
Frequently Asked Questions About Christmas Nail Inspo
Related BIAB Guides
- Christmas Nail Varnish Sets: The Perfect Festive Gift for Beautiful Nails This Christmas
- Christmas Nail Polish Sets: Festive Colours & Gift Ideas
- Cute Christmas Nails: 35+ Festive Nail Designs, Easy Ideas, Trends & Tips for a Perfect Holiday Look
- Children Christmas Nails: 10 Cute, Easy & Festive Christmas Nail Ideas for Kids
Some of the most popular Christmas nail designs include classic red nails, green Christmas tree patterns, candy cane stripes, snowflakes, gold glitter, Christmas bows, and velvet cat-eye manicures. These styles offer options for both simple and glamorous festive looks.
Red, green, white, gold, and silver are traditional Christmas nail colours. However, burgundy, emerald, icy blue, champagne, and soft pink are also beautiful choices for modern festive manicures.
Short nails look beautiful with simple red polish, tiny snowflakes, nude French tips, gold glitter accents, and minimalist Christmas stars. Small patterns help keep the manicure neat and balanced.
Short nails look beautiful with simple red polish, tiny snowflakes, nude French tips, gold glitter accents, and minimalist Christmas stars. Small patterns help keep the manicure neat and balanced.
You can create Christmas nails at home using nail polish, a base coat, a top coat, nail art brushes, glitter, and Christmas nail stickers. Prepare your nails, apply your base colour, add festive designs, and finish with a suitable top coat.
Yes, Christmas press-on nails are a convenient option for people who want a festive manicure without visiting a salon. They are available in different lengths, shapes, and designs. Always choose the correct size and follow the manufacturer’s application and removal instructions.
Regular nail polish manicures may last around 5–7 days, depending on application and daily activities. Gel manicures often last around 2–3 weeks when applied and maintained correctly. Press-on nails can last for different lengths of time depending on the adhesive and product instructions.
Choose rich colours such as burgundy, emerald green, and deep red. Add subtle gold details, pearl finishes, or delicate chrome accents. Keep the design balanced and use a glossy top coat for a polished appearance.
2 Comments