How to Remove BIAB Nails Safely at Home: A Complete Step-by-Step Guide
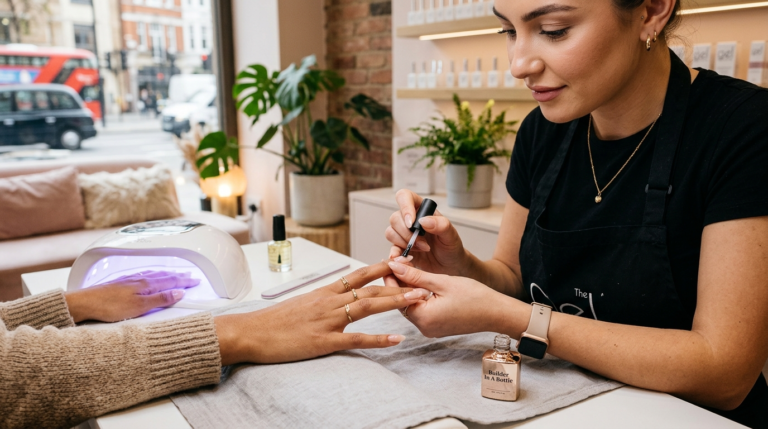
If you love strong, neat, long-lasting manicures, you have probably heard of BIAB nails. BIAB, short for Builder In A Bottle, is a type of builder gel that is used to strengthen natural nails and create overlays or extensions. It can make nails look beautifully smooth and polished, but when it is time for a fresh manicure, knowing how to remove BIAB nails properly is just as important as knowing how to apply them.
The biggest mistake people make is trying to peel, pick, or force BIAB away from the natural nail. It may seem like a quick solution, but improper removal can take layers of the natural nail with it. Professional guidance from The GelBottle recommends breaking down the product gradually and avoiding force during removal. (The GelBottle Inc)
The good news? With the right BIAB removal tools, enough patience, and the correct technique, you can remove many types of BIAB safely.


Important: Not every BIAB formula is removed in exactly the same way. Some formulas are soak-off products, while others are file-off products. Always check the instructions for the specific BIAB product you are wearing before starting. For example, The GelBottle states that some clear, white, and milky BIAB formulas are file-off products, while other BIAB formulas can be soaked off with acetone. (The GelBottle INC)
What Are BIAB Nails?
Before learning how to remove BIAB nails, it helps to understand what you are actually removing.
BIAB stands for Builder In A Bottle. It is a builder gel designed to add structure and strength to the natural nail. Unlike ordinary gel polish, builder gel is generally thicker and is used to create a stronger nail structure.
BIAB can be used for:
- Natural nail overlays
- Nail strengthening
- Short extensions
- Creating an apex
- Supporting weak or flexible nails
- Creating a smooth base for gel colour
The GelBottle describes BIAB as a medium-viscosity builder gel that can be used for natural nail overlays and, depending on the formula, extensions and other applications. (The GelBottle INC)
That extra structure is one reason BIAB can be harder to remove than ordinary gel nail polish.
Why Is Proper BIAB Removal So Important?
Imagine spending weeks growing your natural nails, only to damage them in five minutes because you were impatient with removal.
That is exactly why removal deserves just as much attention as application.
When you pull or peel cured product from the nail, you can accidentally remove part of the natural nail plate with it. According to professional BIAB removal guidance, rushing removal or using excessive force can contribute to peeling, thinning, and unnecessary damage. (The GelBottle Inc)
Proper BIAB nail removal should therefore be:
- Slow
- Controlled
- Gentle
- Appropriate for the specific BIAB formula
- Focused on protecting the natural nail
Think of it this way: the goal is to remove the product, not the nail underneath it.
What You Need to Remove BIAB Nails
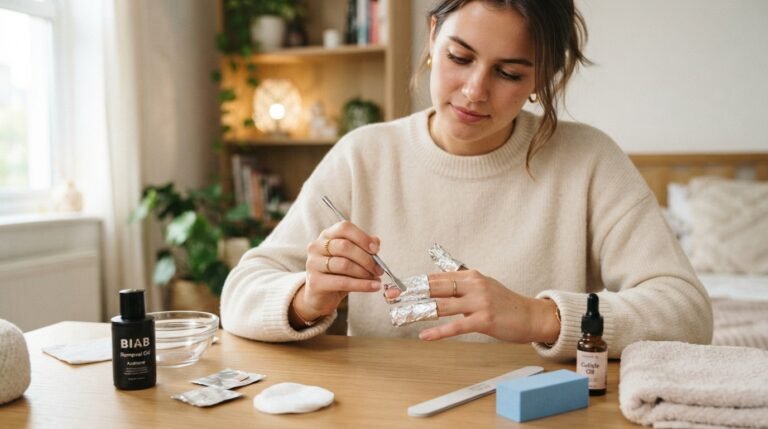
Before starting, gather everything you need. Having your tools ready means you won’t have to stop halfway through the process.
Basic BIAB removal kit
You may need:
- 120/180 grit nail file
- Nail buffer
- Pure acetone, if your BIAB is soak-off
- Cotton pads or lint-free wipes
- Aluminium foil or nail removal clips
- Cuticle pusher
- Cuticle oil
- Hand cream
- Nail clippers, if you need to shorten extensions
- A clean towel or work surface
Professional BIAB removal instructions commonly recommend a 120/180 file for reducing the product before soaking, along with acetone and removal foils for soak-off formulas. (The GelBottle Inc)
If you regularly do your nails at home, investing in a good nail file, quality buffer, removal foils, and nourishing cuticle oil can make the whole process easier and more comfortable.
Step 1: Check Whether Your BIAB Is Soak-Off or File-Off
This is the first step—and one of the most important.
Don’t automatically assume that every builder gel can be dissolved in acetone.
Some BIAB products are designed to soak off, while others are specifically file-off products. The GelBottle, for example, identifies certain clear, white, and milky BIAB products as file-off formulas. (The GelBottle INC)
Other BIAB formulas are designed to soak off with 100% acetone after the surface has been filed.
How can you check?
Look at:
- The product packaging
- The manufacturer’s instructions
- The product website
- The instructions supplied by your nail technician
If you don’t know what product was used, don’t aggressively soak or scrape it and hope for the best.
When in doubt, professional removal is the safer option.
Step 2: Shorten the Nails
If your BIAB manicure includes long nails or extensions, shorten them first.
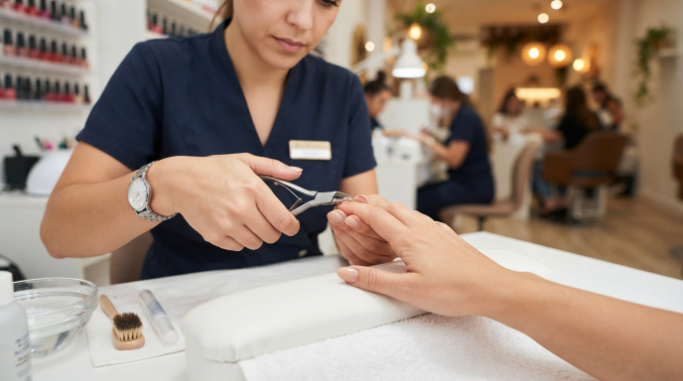
Use a suitable nail clipper or file to carefully reduce the length.
There is no need to keep the full length during removal because shorter nails are easier to manage.
However, don’t clip aggressively. If the extension is very thick, filing down the length gradually can give you more control.
Tip: Work over a towel or disposable surface so nail dust and product pieces are easier to clean up.
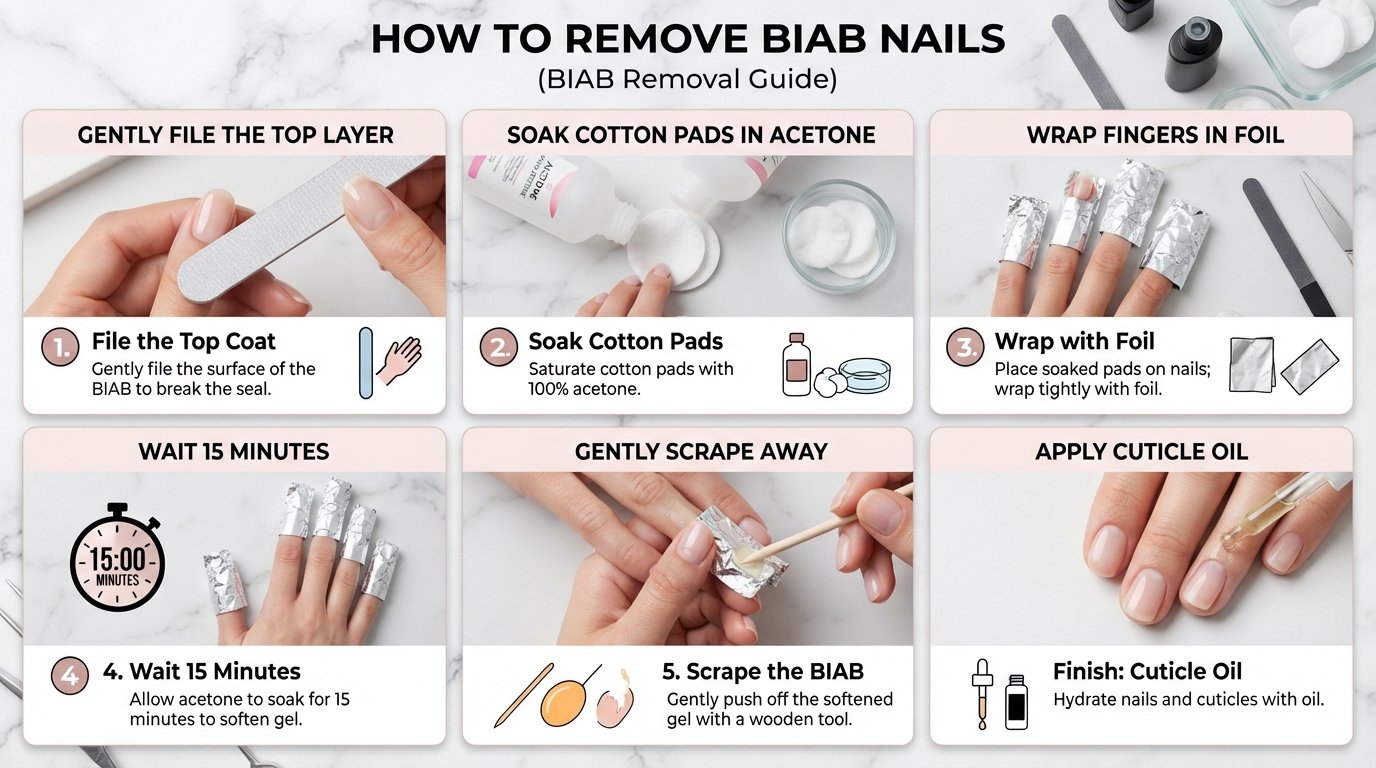
Step 3: File the Top Layer of BIAB
This step is particularly important if you are using the acetone soak-off method.
Start by using a suitable 120/180 grit nail file to remove the shiny top layer and reduce the bulk of the BIAB.
The purpose is not to file all the way down to your natural nail.
Instead, you are trying to:
- Break the surface seal
- Reduce thickness
- Help acetone reach the soak-off product
- Make the soaking process more efficient
Professional instructions recommend filing the top coat before soaking. (The GelBottle Inc)
Keep the file relatively flat and use controlled movements.
Don’t do this:
❌ File aggressively into the natural nail
❌ Keep filing one spot until it becomes hot
❌ Try to remove every last trace with a coarse file
❌ Rush because the process feels slow
A good rule is simple:
File the product, not the natural nail.
Step 4: Protect the Skin Around Your Nails
Acetone can be drying to the surrounding skin, so it is sensible to protect the skin around the nail before soaking.
You can apply a small amount of cuticle oil or another suitable protective product around the surrounding skin, while keeping the nail surface accessible for the acetone.
This is especially helpful if you have naturally dry hands.
However, avoid covering the nail itself heavily with oil before soaking because you want the acetone to contact the remaining product effectively.
Step 5: Soak Cotton in Acetone
If your BIAB is confirmed as a soak-off formula, saturate a small piece of cotton or lint-free wipe with acetone.
Place it directly over the nail.
You want the cotton to be properly saturated so that the product remains in contact with acetone during the soaking period.
For a more controlled process, you can use purpose-made gel removal foils.
These hold the acetone-soaked cotton against the nail and make the process much less messy.
Step 6: Wrap Each Nail
Place the acetone-soaked cotton over the nail and wrap the fingertip securely with aluminium foil or use nail removal clips.
Make sure the cotton stays directly against the BIAB.
Don’t wrap so tightly that your finger becomes uncomfortable.
Now comes the part many people struggle with:
waiting.
According to The GelBottle’s guidance, soak-off BIAB can take around 10–15 minutes, although the exact time depends on the formula and the amount of product left on the nail. (The GelBottle Inc)
Some formulas may need additional time.


Step 7: Check One Nail at a Time
After around 10–15 minutes, remove the foil from one nail first.
Don’t unwrap every finger at once.
Why?
Because if the product is still hard, you can simply rewrap that nail while the others continue soaking.
Look at the BIAB.
A successfully softened product may look:
- Wrinkled
- Flaky
- Lifted
- Soft
- Slightly crumbly
If it still looks hard and firmly attached, don’t start scraping aggressively.
Instead, rewrap it and allow it to soak for longer.
The GelBottle specifically advises rewrapping stubborn areas rather than forcing the product away. (The GelBottle Inc)
Step 8: Gently Push Away the Softened BIAB
Now use a cuticle pusher to gently remove the softened product.
This is where patience really matters.
Place the tool against the softened product and use gentle movements.
The BIAB should come away relatively easily if it has been softened properly.
If it doesn’t come off easily:
Stop.
Don’t scrape harder.
Don’t dig underneath the product.
Don’t use the tool like a chisel.
Simply reapply acetone and soak for another few minutes.
Professional removal instructions recommend additional soaking when stubborn product remains. (The Gel Bottle)
Step 9: Never Peel or Pick BIAB Off
This deserves its own section because peeling is probably the most tempting mistake.
You might see a corner lifting and think:
“I’ll just peel this bit off.”
It can be incredibly tempting.
But if the product is still attached to the natural nail, pulling it away can take natural nail layers with it.
That can leave the nail:
- Thin
- Weak
- Sensitive
- Rough
- Peeling
Instead, soften the product further.
Let acetone and time do the work.
Professional BIAB guidance explicitly says not to pick or peel BIAB from the natural nail. (The GelBottle Inc)
Step 10: Repeat the Process for Every Nail
Continue working one nail at a time.
A simple routine is:
File → Soak → Check → Gently remove → Re-soak if necessary
Don’t worry if one nail takes longer than another.
Nails can have different amounts of product, and some areas may be thicker.
For example, if you have a stronger apex or several layers of builder gel, that nail may require more soaking or more careful product reduction.
What If the BIAB Doesn’t Soak Off?
This is a common question when learning how to remove BIAB nails.
If the product refuses to soften after proper soaking, there are several possibilities.
1. It may be a file-off formula
Some BIAB products are designed to be removed by filing rather than soaking.
2. There may be too much product remaining
If the BIAB was applied thickly, acetone may take longer to reach the lower layers.
3. The top layer wasn’t filed enough
Acetone works more effectively when the surface has been properly reduced.
4. You may be dealing with a different builder-gel system
Not all builder gels behave in exactly the same way.
For example, The GelBottle advises that certain HEMA-free BIAB formulas may require more of the product to be filed away before soaking the remaining layer. (The GelBottle INC)
File-Off BIAB: What You Need to Know
If you have a file-off BIAB, don’t try to force it into an acetone removal routine.
Instead, the bulk of the product is carefully reduced with a nail file or professional e-file.
The important part is knowing when to stop.
If you’re working at home and don’t have professional experience with an e-file, hand filing is generally easier to control.
An e-file can remove product quickly, but improper pressure, speed, or technique can cause heat and over-filing.
Professional e-file guidance emphasizes controlled movement and avoiding excessive pressure. (The GelBottle Inc)
If you’re unsure, this is one situation where visiting a qualified nail technician is worthwhile.
Can You Remove BIAB With an E-File?
Yes, professional nail technicians commonly use an e-file for BIAB removal.
However, it is not necessarily the best choice for beginners.
An e-file removes product much faster than a hand file, which means a small mistake can also happen much faster.
Professional guidance recommends:
- Appropriate e-file bits
- Controlled speed
- Continuous movement
- Light pressure
- Avoiding heat buildup
- Leaving a thin layer where appropriate
If you’ve never used an e-file before, don’t experiment on your natural nail simply because it seems faster.
A good manual nail file may take longer, but it gives you more control.
Step 11: Gently Buff Any Remaining Residue
After the majority of the BIAB has been removed, you may see a very thin layer or small patches remaining.
Use a gentle nail buffer to smooth the surface.
Don’t keep buffing simply because you want the nail to look perfectly bare.
Your natural nail does not need to be aggressively polished.
The goal is a smooth, comfortable nail—not an extremely thin nail plate.
Professional guidance also warns against over-buffing the natural nail. (The GelBottle Inc)
Step 12: Wash Your Hands
Once the removal is finished, wash your hands thoroughly with soap and water.
This removes dust and product residue.
Dry your hands gently with a clean towel.
Now take a moment to look at your natural nails.
They should not feel painfully thin or extremely sensitive.
If you notice significant pain, redness, swelling, lifting, or other unusual changes, stop further nail treatments and consider getting professional advice.
Step 13: Apply Cuticle Oil
This is one of my favourite parts of the entire process.
After removing BIAB, your nails and surrounding skin can feel dry, particularly after acetone use.
Apply a nourishing cuticle oil around each nail.
Massage it gently into:
- Cuticles
- Sidewalls
- Nail surface
- Fingertips
Then follow with a good hand cream.
This simple routine can make your hands feel dramatically more comfortable.
If you are planning another BIAB manicure, don’t immediately pile on another product without following the appropriate nail-preparation instructions.
A Simple BIAB Removal Routine
If you want to save this guide for later, here’s the complete process in short form:
How to Remove BIAB Nails
- Check whether your BIAB is soak-off or file-off.
- Shorten long nails if needed.
- File down the shiny top layer.
- Avoid filing into the natural nail.
- Protect the surrounding skin.
- Saturate cotton with acetone if using a soak-off formula.
- Place cotton over each nail.
- Wrap with foil or removal clips.
- Leave for around 10–15 minutes initially.
- Check one nail.
- Gently push away softened product.
- Re-soak stubborn areas.
- Never peel or force the product.
- Buff remaining residue gently.
- Wash and dry your hands.
- Apply cuticle oil and hand cream.
Common Mistakes When Removing BIAB Nails
Peeling the BIAB
This is probably the biggest mistake.
If it doesn’t come away easily, it isn’t ready.
Solution: Soak again.
Filing Too Deeply
You may think you are simply removing the last little bit of BIAB, but it is easy to accidentally file the natural nail.
Solution: Slow down as you get closer to the natural nail.
Using a Very Rough File
A coarse file can remove product quickly, but aggressive filing can be difficult to control.
Solution: Use an appropriate nail file and controlled movements.
Scraping Too Hard
If softened BIAB doesn’t immediately move, don’t increase the pressure.
Solution: Add more soaking time.
Soaking Without Filing the Top Layer
The acetone may have difficulty getting through an intact top layer.
Solution: Carefully remove the shiny surface first.
Ignoring the Product Instructions
Not every BIAB is identical.
Solution: Check the manufacturer’s removal instructions before starting.
How Long Does BIAB Removal Take?
There isn’t one exact answer.
For a soak-off BIAB system, the soaking stage may take approximately 10–15 minutes, but the total process is longer because you also need to file the surface, remove softened product, and finish the nails. (The GelBottle Inc)
The exact time can change depending on:
- Product formula
- Number of layers
- Thickness
- Extensions
- Top coat
- Nail art
- How thoroughly the product was reduced before soaking
For example, The GelBottle’s help guidance states that some BIAB removal can take around 10–12 minutes after buffing, while longer extensions or a higher apex can increase the time. (The GelBottle INC)
So don’t treat the timer as a strict rule.
The product’s condition matters more than the clock.
How to Keep Your Natural Nails Looking Good After BIAB Removal
After removing BIAB, give your nails some attention.
Use cuticle oil regularly
A small amount of cuticle oil once or twice a day can become a simple part of your nail-care routine.
Keep nails at a manageable length
If your natural nails feel fragile, shorter nails are often easier to manage while they grow.
Avoid picking
If you see a little peeling or roughness, don’t pick at it.
Wear gloves for household chores
Frequent contact with water and cleaning products can be hard on hands and nails.
Don’t over-buff
Your natural nail doesn’t need to be shiny like glass.
Gentle care is enough.
Should You Remove BIAB Completely Every Time?
Not necessarily.
In professional settings, BIAB infills can sometimes be used instead of completely removing the product, depending on the condition of the existing manicure and the product system.
The GelBottle notes that infilling every 2–3 weeks can reduce the need for repeated complete soak-offs while maintaining the structure of the manicure. (The GelBottle Inc)
However, this should be assessed properly. If the product has lifted, cracked, grown out significantly, or the natural nail needs attention, complete removal may be more appropriate.
When Should You Visit a Nail Technician?
Home removal can be convenient, but professional help is a good idea if:
- You don’t know what BIAB product was used.
- The product won’t soften.
- The product is very thick.
- You have long extensions.
- You are uncomfortable using an e-file.
- The natural nail has lifted or cracked.
- You experience pain during removal.
- You have already over-filed the nail.
- You simply don’t feel confident doing it yourself.
A professional nail technician has the training and tools to determine whether a product should be soaked, filed, or partially removed.
The Best Tools to Buy for BIAB Removal
If you regularly wear BIAB, investing in a small BIAB removal kit can make the process much easier.
Look for:
- A quality 120/180 nail file
- A gentle nail buffer
- Lint-free wipes
- Removal foils
- Suitable acetone for soak-off formulas
- A quality cuticle pusher
- Cuticle oil
- Hand cream
You don’t need dozens of products.
In fact, a small collection of good-quality tools is usually more useful than a large kit filled with items you never use.
A good file should feel controlled rather than painfully abrasive. Removal foils should hold the cotton securely against the nail. And a cuticle pusher should allow you to work gently instead of forcing the product away.
For anyone who regularly does their own manicure, these basic tools can be a worthwhile investment because they can be used repeatedly rather than buying disposable removal supplies every time.
Frequently Asked Questions About Removing BIAB Nails
Can I remove BIAB nails at home?
Yes, some soak-off BIAB formulas can be removed at home with the appropriate technique. However, file-off BIAB and unfamiliar builder-gel systems may be better handled professionally.
Can I use regular nail polish remover?
Regular nail polish remover is generally not the same as pure acetone and may not effectively remove builder gel.
If the specific BIAB formula is designed to soak off, follow the manufacturer’s recommended removal method and acetone concentration.
How long should BIAB soak in acetone?
Many soak-off BIAB systems require approximately 10–15 minutes initially, although thicker applications and different formulas may need longer. (The GelBottle Inc)
Why isn’t my BIAB coming off?
It may be a file-off product, or there may still be too much product remaining. It could also need additional soaking.
Don’t force it.
Check the manufacturer’s instructions and continue only with the appropriate removal method.
Can I peel BIAB off?
It’s best not to.
Peeling can remove layers of the natural nail along with the product.
Can I file BIAB completely off?
Some BIAB products are specifically designed to be filed off. However, aggressive filing close to the natural nail can cause damage.
If you aren’t experienced with professional filing techniques, consider having a nail technician remove it.
Can I apply new BIAB immediately?
It depends on the condition of your nails and the product system. If the natural nails are healthy and the manufacturer’s application instructions allow it, another manicure may be possible. However, damaged or very thin nails should not simply be covered with another layer of product.
Final Thoughts: Take Your Time With BIAB Removal
Learning how to remove BIAB nails isn’t really about finding the fastest method. It’s about finding the method that removes the product while respecting your natural nails.
The biggest lesson is simple:
Don’t force it.
If you’re using a soak-off BIAB, file the surface, use the appropriate acetone, allow enough soaking time, and gently remove the softened product. If the product doesn’t soften, stop and check whether it is a file-off formula instead. Professional BIAB guidance supports this approach and emphasizes avoiding aggressive scraping, picking, and over-filing. (The GelBottle Inc)
And if you’re going to do BIAB nail removal at home regularly, don’t underestimate the value of good tools. A quality nail file, proper removal foils, suitable acetone, gentle cuticle pusher, and nourishing cuticle oil can make the whole experience more controlled and comfortable.
Most importantly, remember that beautiful nails aren’t just about the manicure you put on—they’re also about how carefully you take it off.


Helpful Resources
For detailed product-specific instructions, check the manufacturer’s guidance, especially if you are unsure whether your BIAB is soak-off or file-off: